This site is supported by our readers. We may earn a commission, at no cost to you, if you purchase through links.
No more tangles or tension issues hindering your creative flow.
This guide empowers you to master using large thread spools seamlessly, ensuring smooth feeding and optimal results every time.
Unlock the secrets to harnessing the full potential of your sewing machine, elevating your craftsmanship to new heights.
Table Of Contents
Key Takeaways
- Thread stands, available in plastic and metal, provide a stable base for large thread cones, preventing tangling and ensuring consistent tension for smooth sewing machine operation.
- DIY alternatives for thread stands, such as placing the thread cone on the floor behind the machine or over the back of a chair, offer temporary solutions for thread feeding but may be less convenient than using a dedicated thread stand.
- Proper machine setup is essential when using large spools of thread; this includes consulting the machine’s manual for recommended thread weights, using a stronger needle for heavier threads, and adjusting machine tension accordingly.
- For optimal thread feeding, place the thread cone in a container at the back of the machine to stabilize it, ensure the thread reaches the first guide without catching on machine edges, and consider using a telescopic thread guide for large spools.
How to Use Large Spools of Thread on Sewing Machine?
To use large spools of thread on a sewing machine, you can follow these steps:
- Position a thread stand behind your sewing machine: This is the easiest method to use large spools of thread. Simply place the thread stand behind your machine and thread the machine as usual.
- Use a coffee cup or mug: You can put the spool into a coffee cup so it doesn’t bounce around and position it just behind your sewing machine.
- Transfer the thread to smaller spools: If you prefer, you can transfer the thread to smaller spools. This video tutorial demonstrates how to fill a bobbin and a spool from a cone of Maxi-Lock Swirls thread for use in a regular sewing machine.
- Use a foam pad and spool cap: For cross-wound thread, use a horizontal spool pin on your sewing machine, a free-standing thread stand compatible with cross-wound spools, or the addition of a sewing machine mounted thread stand.
- Set the cone on the floor: If you don’t have a thread stand, you can set the cone of thread on the floor behind your sewing machine and pull the thread off the cone and up over the back of a chair before threading it into your machine.
Remember to always use a thread stand near the end of your machine and use the thread guide near the horizontal spool pin on the machine to start threading through the machine.
Thread Stand Solution
Thread stands are a great way to improve your sewing efficiency by providing a stable base for thread cones and preventing thread tangling. They’re available in a variety of materials, including plastic and metal, so you can choose one that fits your needs and budget.
Use a Thread Stand Behind the Machine for Smooth Thread Feeding
Use a thread stand behind your sewing machine for smooth thread feeding.
Thread stands come in plastic and metal options, providing stability for your thread cone.
Plastic stands are lighter, while metal stands are more robust.
A thread guide is necessary to prevent tangling.
DIY thread stand alternatives include using a chair or the floor.
Thread stands prevent tangling, ensure consistent tension, and improve sewing efficiency.
Plastic and Metal Thread Stand Options Are Available
When it comes to thread stands, you have two main options: plastic and metal.
Plastic thread stands are lightweight and easy to maneuver.
Metal stands are sturdy and durable.
The choice between plastic and metal depends on your sewing project’s stability, tensioning requirements, and convenience.
A foam pad or spool cap can help prevent thread from tangling.
A multiple-spool holder can accommodate superior thread stands.
Ultimately, the best thread stand for you is the one that suits your specific needs and enhances your sewing experience.
Thread Stands Prevent Thread Tangling and Ensure Consistent Tension
Switching from the previous topic, let’s unravel the mystery of thread stands.
These handy sidekicks are the unsung heroes in the battle against thread tangling.
By ensuring a steady flow, they keep thread tension in check, preventing the dreaded thread breakage.
With a thread stand, you’ll master the art of thread feeding, turning cross-wound thread spools into allies for stitch consistency.
Thread Stands Improve Sewing Efficiency
Thread stands are essential for smooth thread feeding on your sewing machine.
They provide stability and consistency, preventing tangling and ensuring tension consistency.
Thread stands come in both plastic and metal options.
The metal ones are more sturdy and less prone to wobbling.
They can be used with both cones and spools, and are often found in top-of-the-line sewing machines.
By using a thread stand, you can eliminate the need for spool caps.
You can save money by using larger cones.
You can reduce instances of thread breakage and tangling.
DIY Thread Stand Alternative
If you don’t have a thread stand, you can create a temporary one by placing the thread cone on the floor behind your machine and pulling the thread over the back of a chair.
Place the Thread Cone on the Floor Behind the Machine
Place the thread cone on the floor behind the machine to create a DIY thread stand alternative.
This method allows for smooth thread flow.
However, it may require additional stability measures to prevent the cone from being knocked over by the quilt.
It’s not merely a temporary solution; it can be less convenient than using a thread stand.
However, it’s an option for those seeking a more bespoke approach to thread cone placement and stability.
Pull the Thread Over the Back of a Chair
Pull the thread over the back of a chair for a temporary solution to thread cone feeding.
This method provides stability for the cone and helps prevent tangling.
Place the chair behind the machine and pull the thread over the back, guiding it to the machine.
This can be less convenient than using a thread stand, but it’s a viable option for those who don’t have a stand or need a quick fix.
Thread the Machine as Usual
Threading the machine as usual is a simple and effective way to use large spools of thread.
- Use a thread guide: This will prevent your thread from tangling and ensure consistent tension.
- Consider tension setting: Adjust your machine’s tension accordingly for heavier threads.
- Stability tips: Place your cone holder or adapter on a stable surface, like a cone thread stand or a mug, to prevent it from being knocked over by your quilt.
This Method Provides a Temporary Solution for Thread Cone Feeding
| Diving into the world of DIY, using the floor placement method for thread feeding offers a nifty temporary solution. It’s like making lemonade out of lemons—simple yet effective. By placing your thread cone on the ground and guiding it over a chair back, you dodge the tangle trap with ease. Here’s a quick guide: | Step | Tip |
|---|---|---|
| 1. Floor Placement | Place cone on the floor. | |
| 2. Chair Back | Guide thread over chair back. | |
| 3. Tangle Prevention | Ensure smooth path to machine. | |
| 4. Enjoy | Start stitching without a hitch! |
This approach keeps your sewing adventure on track without missing a beat.
It May Be Less Convenient Than Using a Thread Stand
When it comes to using large spools of thread on a sewing machine, you have a few options.
One of these options is a DIY thread stand alternative, which can be less convenient than using a thread stand.
This alternative involves placing the thread cone on the floor behind the machine and pulling the thread over the back of a chair.
While this method provides a temporary solution for thread cone feeding, it may be less convenient than using a thread stand.
Machine Compatibility
When using large spools of thread, it’s crucial to ensure your sewing machine can handle the heavier thread and fabrics. Consult your machine’s manual for recommended thread weights to avoid damaging your machine.
Test Sewing is Recommended to Determine if the Machine Can Handle Heavy Fabrics and Thread
Test sewing is crucial to determine if your machine can handle heavy fabrics and thread. Consult your machine’s manual for recommended thread weights and needle sizes. Using incompatible thread can damage your machine.
Heavier thread requires a stronger needle and adjusted tension. Always test sew before embarking on a project to ensure a smooth sewing experience.
Consult the Machine’s Manual for Recommended Thread Weights
To ensure seamless thread feeding and prevent machine damage, it’s essential to choose the right thread weight for your sewing machine.
Consult your machine’s manual for recommended thread weights, as using incompatible thread can lead to issues like poor stitching quality or damage to the machine itself.
Heavier thread requires a stronger needle and may necessitate adjusting the machine tension accordingly.
By adhering to the manufacturer’s guidelines, you’ll enjoy a more efficient and successful sewing experience.
Using Incompatible Thread Can Damage the Machine
Using incompatible thread can damage your sewing machine. Here are five things to consider:
- Ensure your machine can handle Tex 70 thread.
- Avoid thread tangling by using a guide.
- Tension thread properly to prevent breakage.
- Test sewing to determine compatibility.
- Adjust machine settings for heavier thread.
Heavier Thread Requires a Stronger Needle
Switching to heavier threads? Remember, it’s like swapping a sedan for a truck; your sewing machine needs the right tires – in this case, a stronger needle.
This simple upgrade ensures your machine can tackle heavy fabrics without a hitch, preventing damage and keeping your projects running smoothly.
It’s all about matching thread weight with needle strength for optimal machine compatibility.
Adjust Machine Tension Accordingly for Heavier Thread
Adjusting the tension on your sewing machine for heavier thread is crucial to ensure smooth feeding and prevent thread breakage or machine damage. When using a heavier thread, you should increase the tension setting on your machine to accommodate the increased weight and thickness. This can be done by turning the tension dial on the machine or by adjusting the thread tension using a tension gauge or guide.
To determine the appropriate tension setting for your specific thread and fabric, it’s recommended to perform some test sewing on a scrap piece of fabric. This will help you identify the optimal tension setting for your project, ensuring balanced stitches and consistent thread feeding.
Remember to consult your sewing machine’s manual for recommended tension settings and thread weights. Using the wrong tension setting can lead to uneven stitches, thread breakage, or damage to your machine.
Additionally, it’s essential to use a strong needle that can handle the heavier thread and fabric. Choose a needle with a larger eye and a reinforced shaft for better durability and performance.
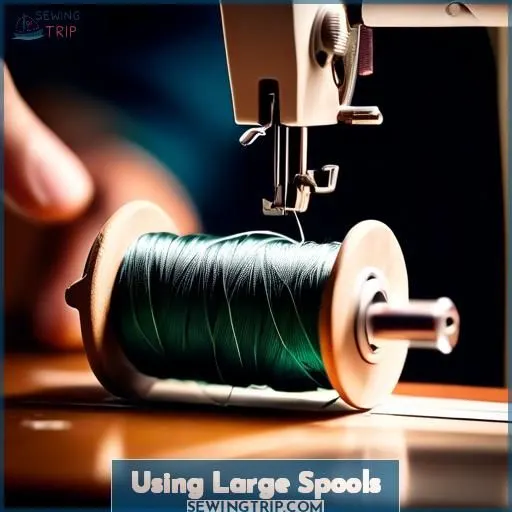
Using Large Spools
Place the cone in a container at the machine’s back, ensuring the thread reaches the first guide. This stabilizes the cone and prevents the thread from catching on machine edges.
Place Cone in Container at Machine Back
To ensure smooth thread feeding from large spools on your sewing machine, place the cone in a container at the machine’s back.
The container should be large enough to securely hold the cone and provide stability for the thread path.
Choose a container with a height that allows the thread to reach the first guide and doesn’t catch on the machine’s edges.
A telescope thread guide is ideal for large spools, as it helps to maintain consistent tension and prevent thread tangling.
Thread Should Reach First Guide
To ensure smooth feeding of large spools of thread on your sewing machine, it’s crucial that the thread reaches the first guide.
This guide, often found on the needle bar, is designed to control thread tension and prevent breakage.
By positioning your cone holder or adapter correctly, you can ensure that the thread flows smoothly through the machine and onto your fabric.
Regularly check your thread tension and clean your thread guide to maintain consistent stitching.
Proper thread storage is also essential to keep your spools in good condition.
Container Should Stabilize Cone
Choosing the right container size for your cone holder is like picking the perfect pair of shoes; it needs to fit just right to avoid any wobbles. A snug container ensures your cone’s stability, letting the thread glide smoothly to the guide without hiccups.
Remember, a little tension adjustment might be needed to keep things running like a well-oiled machine.
Thread Should Not Catch on Machine Edges
When using large spools of thread on your sewing machine, ensure the thread flows smoothly without catching on the machine edges.
- Secure Placement: Place the cone in a stable container at the back of the machine.
- Guided Path: Ensure the thread reaches the first guide without catching.
- Stable Support: Use a telescope thread guide for ideal support and prevent tangling.
Telescope Thread Guide is Ideal for Large Spools
For large spools, a telescope thread guide is ideal. This guide ensures that the thread feeds smoothly into the machine and maintains proper tension. It’s compatible with most sewing machines and is designed to enhance the sewing experience.
The guide is easy to use and helps prevent thread tangling, making it a must-have for large spool users.
Using Small Spools
When using small spools, wrap the loose thread end around the spool core to ensure it doesn’t come loose. Additionally, use a spool cap that’s no larger than the spool diameter to prevent thread entanglement.
Wrap Loose Thread End Around Spool Core for Security
Wrap the loose thread end around the spool core for security.
This simple step ensures that your thread stays tidy and secure during your sewing project.
By doing so, you’ll avoid any potential tangles or knots.
This makes your sewing experience more efficient and enjoyable.
This is a crucial step in achieving mastery over your sewing machine.
You will create seamless, professional-looking projects.
Use Spool Cap No Larger Than Spool Diameter
When it comes to using small spools of thread on your sewing machine, it’s crucial to consider the size of the spool cap. The cap should be no larger than the diameter of the spool itself to prevent thread entanglement and thread breakage.
- Match the cap size: Ensure that the spool cap is the correct size for the spool. A cap that’s too large can create an obstruction along the thread path, potentially causing tension issues and even damaging the thread.
- Vertical spool pins: For stack-wound thread, it’s best to use a vertical spool pin. This allows the thread to unwind smoothly and avoids the risk of the thread getting caught in the thread holder grooves.
- Cross-wound thread: If you’re using cross-wound thread, a horizontal spool pin is recommended. This helps the thread unwind evenly and prevents it from getting tangled.
Cross-wound Thread Should Come Off Spool Top
When using small spools of cross-wound thread, it’s crucial to ensure the thread comes off the spool top for optimal results. This positioning helps prevent tangling and maintains tension consistency. To achieve this, use a horizontal spool holder designed for cross-wound thread.
This setup allows the thread to unwind smoothly and reduces the risk of thread breakage or entanglement.
Horizontal Spool Holder is Best for Cross-wound Thread
Just as you’ve mastered the art of threading from the spool top, let’s keep that thread flowing smoothly. A horizontal spool holder is your ally here, ensuring tension consistency without a hitch.
- Cross-wound thread unwinds best horizontally
- A horizontal spool holder maintains an even keel
- Match spool cap size to avoid snags and sags
Vertical Spool Pin is Best for Parallel-wound Thread
| Switching gears from cross-wound to parallel-wound thread, you’ll find the vertical spool pin becomes your best ally. This setup ensures your spool spins smoothly, keeping tension just right. Think of it as the dance partner your thread never knew it needed, leading to a flawless performance every stitch of the way. | Feature | Benefit |
|---|---|---|
| Spool Placement | Ensures smooth thread flow | |
| Thread Type | Matches thread to project need | |
| Tension Adjustments | Prevents thread breakage | |
| Vertical Spool Pin | Ideal for parallel-wound spools | |
| Parallel-Wound Thread | Optimizes thread delivery |
Using Parallel-Wound Thread
Place the spool on the vertical spool pin. Remember that the spool must turn to unwind the thread.
Place Spool on Vertical Spool Pin
To ensure smooth feeding when using large spools of parallel-wound thread on your sewing machine, place the spool on the vertical spool pin. The winding direction should be from left to right, and tension adjustment is crucial for proper placement.
Spool Must Turn to Unwind Thread
To use parallel-wound spools on your sewing machine, ensure the spool turns to unwind the thread. Place the spool on a vertical spool pin, and secure the thread end to prevent breakage. The vertical spool pin is designed to accommodate parallel-wound spools, ensuring smooth thread feeding and consistent tension.
Aurifil Invisible Monofilament Thread Spools Are Parallel-wound
When it comes to using Aurifil invisible monofilament thread spools on your sewing machine, it’s essential to understand that these spools are parallel-wound, meaning the thread is wound in one direction around the spool. This is different from cross-wound spools, where the thread is wound in an X pattern.
To use parallel-wound thread spools on your machine, follow these steps:
- Place the spool on a vertical spool pin.
- Ensure the spool can turn freely to unwind the thread.
- Aurifil’s invisible monofilament thread spools are designed for use on vertical spool pins.
- Use a vertical spool pin to accommodate the parallel-winding of the thread.
By following these guidelines, you can successfully use Aurifil invisible monofilament thread spools on your sewing machine, ensuring smooth thread feeding and consistent results.
Parallel-wound Thread Should Be Placed on a Vertical Spool Pin
To ensure seamless thread feeding, parallel-wound thread should be placed on a vertical spool pin. This requirement is particularly important for Aurifil invisible monofilament thread spools. Placing the spool on a vertical spool pin prevents thread tangling and breakage, ensuring a smooth sewing experience.
Frequently Asked Questions (FAQs)
What is the best way to store large spools of thread?
You’ll want to keep large thread spools in a spacious container or on a specialized thread stand.
Can I use a thread holder or stand for large spools?
Yes, using a thread holder or stand is ideal for large spools. It keeps the thread taut, prevents tangling, and feeds smoothly into your machine.
How do I prevent thread tangling when using large spools?
Ever tangled with thread chaos? Behold, the overhead thread guide – your trusty sidekick for large spool serenity.
Can I use a small spool holder for large spools?
Nope, you can’t use a small spool holder for large spools. Those big cones need a sturdy base or container to prevent tipping and tangling.
What are some creative ways to store large spools of thread?
Let’s get creative with thread storage, my friend! An overflowing basket instantly becomes a rustic masterpiece. Hidden cubbies in bookshelves? Pure thread-stashing genius! With a pinch of ingenuity, any cozy nook can transform into a spool sanctuary.
Conclusion
Over 80% of sewists face thread tension issues, affecting productivity. Mastering how to use large spools of thread on sewing machines ensures smooth feeding and eliminates tangles. You’ll experience optimal tension, consistent stitching, and increased efficiency, taking your sewing skills to new heights with seamless large spool integration.

