This site is supported by our readers. We may earn a commission, at no cost to you, if you purchase through links.
 Locking in sewing keeps your stitches secure, so nothing falls apart later.
To lock by hand, pass your needle back through the last stitch and tie a small knot.
If you’re using a sewing machine, reverse stitch at the start and finish of your seam for a clean lock.
Most machines have a reverse lever—hold it for 2-3 stitches.
For thicker fabric, lower your tension slightly to avoid bulky knots.
Always use strong thread and the right needle size for your material.
Locking is essential—it’s like tying a bow on a present.
Master this, and your sewing will last longer with a clean lock!
Table Of Contents
Key Takeaways
- Use reverse stitching on your sewing machine to secure seams at the start and end, or tie neat knots when sewing by hand.
- Match thread type, thickness, and needle size to your fabric for smooth, durable stitches.
- Adjust tension carefully to prevent puckering or loose stitches, especially on thicker fabrics.
- Practice techniques like pivoting and edge stitching to achieve professional-looking, secure seams.
Locking Stitches Basics
Locking stitches keep your seams secure and prevent them from unraveling. You’ll need the right technique, tools, and a bit of care to make them strong and neat.
Importance of Locking Stitches
Locking stitches guarantee seam durability, fabric integrity, and a professional finish.
Locking stitches ensure strong seams, lasting fabric stability, and a polished, professional finish in every sewing project.
Securing stitches boosts confidence in your work and keeps projects intact.
Why are they critical?
- Seam Durability: Lock stitches anchor threads, preventing unraveling.
- Fabric Integrity: Secured ends keep seams stable during wear.
- Professional Finish: Neatly tied seams guarantee clean, polished results.
Common Locking Techniques
Securing stitches takes practice. Start with the backstitch technique for strong anchoring.
Try pivot locking by rotating fabric for tight corners. Tidy thread tails with precise hand knotting to avoid unraveling.
Use edge stitching for clean finishes and explore the sewing lock stitch for a neat, modern touch. These methods offer manual durability, ensuring your stitches stay put in any fabric project.
Thread and Needle Considerations
Getting secure stitches starts with knowing your tools. The thread and needle you choose can make or break your sewing.
Here’s how to get it right:
- Match thread types and needle sizes to your fabric for smooth sewing. Thick threads need sturdy needles.
- Use high-quality thread to avoid tangling and uneven stitching.
- Adjust thread tension carefully—too tight can pucker fabric, too loose weakens seams.
When fabric, thread, and needle are perfectly in sync, your work stays strong and polished. This balance is crucial for achieving secure stitches.
How to Lock Stitches
To lock stitches, you secure the thread at the start and end of your seam to prevent unraveling.
Secure your threads at the start and end of every seam—your secret to durable, professional, and unravel-proof stitches!
Use simple techniques like hand-knotting, reverse stitching, or your sewing machine’s lock stitch function for a clean, durable finish.
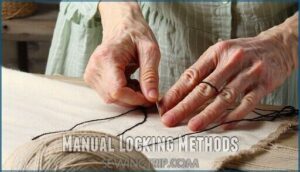
Manual Locking Methods
Master manual locking methods for clean, secure sewing.
Start with hand knotting or overhand knots to neatly anchor thread ends.
Use pivot locking by rotating fabric and stitching back slightly to stabilize edges.
For edge stitching, leave thread tails and tie them tightly after sewing.
Tailor the thread tension carefully to avoid puckering.
Manual methods, though slower, can achieve a polished look without the bulk of a backstitch technique or reverse stitch, using manual locking methods.
Machine-Based Locking Techniques
Sewing machines take the hassle out of locking stitches.
Using tools like the Automatic Lockstitch or Reverse Stitching, you can secure seams quickly and neatly.
For corner precision, Pivot Locking is your best friend.
Adjust Stitch Density to avoid puckering and bulk.
Always check Machine Compatibility with your threads for smoother results.
Some machines, especially with Servo Motor Use, make secure sewing faster and effortless for any project.
Using Reverse Functionality
Reverse stitching adds durability to your seams and secures stitches neatly. By using your sewing machine’s reverse stitch feature, you anchor thread effectively at seam ends.
- Machine Compatibility: Verify reverse settings align with your sewing machine model.
- Auto-Lock Advantages: Save time with automatic reverse stitching.
- Consistent Backstitches: Check tension to avoid thread buildup or bulky spots.
Sewing Machine Setup
Set up your sewing machine carefully to guarantee strong, even stitches. Choose the right thread thickness, adjust the tension, and check that everything is threaded properly to prevent issues.
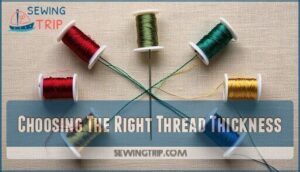
Choosing The Right Thread Thickness
Matching thread thickness to your fabric weight is key for clean seams and proper stitch appearance.
Thicker threads require a sturdier needle size but boost seam durability on heavy fabrics.
For delicate materials, lighter thread types minimize bulk while maintaining thread quality.
Always check thread material and thread size for a proper fit.
Using a thread thickness guide guarantees smooth stitching and balanced thread tension, leading to professional results and longer-lasting work.
Selecting the right thread weight matters is crucial for achieving the desired outcome with your fabric.
Adjusting Tension for Secure Locks
Thread tension is like the glue that holds your stitches together.
Start by testing on scrap fabric similar to your project to check for issues like puckering or uneven knots. Adjust thread tension slightly to match the fabric and thread type for smoother results.
Keep bobbin tension balanced for seam durability. Pair thread types and needle size carefully to boost stitch quality.
Minor tweaks to sewing machine settings guarantee proper fabric compatibility and prevent tension troubleshooting later.
Utilizing Servo Motors for Efficiency
To get the most out of your sewing machine, integrating servo motors is a game-changer.
These motors bring precision and quiet efficiency, perfect for mastering your lock stitch.
- Smooth Speed Control: Servo motors let you adjust speed for delicate lock stitching.
- Effortless Torque Management: Handle thicker fabrics and threads with ease.
- Energy Savings: Use less power without sacrificing performance.
- Automation Impact: Adds efficiency for cleaner, secure stitches.
With servo advantages, your machine sewing lock stitches will feel smoother, quieter, and more reliable.
These advantages can be found with servo motor products.
Troubleshooting Locking Issues
When your locking stitches aren’t holding, it’s often due to thread tension or needle issues.
Understanding these problems and knowing how to fix them guarantees your seams stay secure.
Preventing Thread Buildup and Bulk
Managing thread buildup is simpler than it sounds.
Start by matching thread thickness to your fabric type—thick threads can cause bulk in seams.
Reduce stitch density near secure areas, as fewer stitches mean smoother finishes.
Adjust your machine’s tension setting to prevent puckering and guarantee consistent seam security.
Check the needle plate edges—if they’re rough, polish them to stop threads from snagging.
Keep enough thread tails when finalizing stitches to avoid unraveling later.
This attention to detail makes your lock stitch durable and clean, focusing on complete concepts like thread buildup and seam security.
| Problem | Cause | Solution |
|---|---|---|
| Excess Bulk | Thick thread | Use thinner thread |
| Puckered Seams | Poor tension | Tension adjustment |
| Snagging | Rough needle plate | Smooth needle plate edges |
Managing Thick Threads and Needle Plate Edges
Thick threads causing trouble? Don’t worry, you can handle it! Here’s how to smooth things out:
- Use a Thread Thickness Guide to match fabric and thread—avoiding unnecessary tension issues.
- Try Needle Plate Polishing to eliminate burrs that might snag threads.
- Rethink settings—apply Tension Adjustment Tips to reduce uneven stitching.
For superior results, consider a suitable thread gauge for your project.
For heavy thread projects, guarantee proper thread tails and secure with a reverse stitch. These small tweaks guarantee smooth, precise sewing!
Resolving Common Locking Problems
When securing stitches, skipped stitches, and uneven seams can frustrate anyone.
For thread snapping or bunching, check tension settings. Too tight or loose tension causes problems.
If your fabric stalls or doesn’t move smoothly, inspect for needle breaks or a misaligned plate edge.
Use the reverse stitch for sewing knots, anchoring thread neatly, and resolving small gaps. Troubleshooting minor issues guarantees smooth locking and keeps your projects tidy and professional-looking.
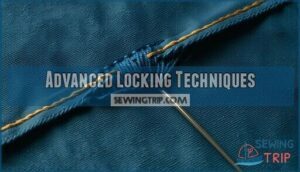
Advanced Locking Techniques
You can take your sewing to the next level with advanced locking techniques. These methods, like saddlestitching and automatic lock stitching, guarantee stronger seams and cleaner finishes.
Saddlestitching by Hand for Secure Locks
Hand saddlestitching is perfect for securing stitches on heavy fabrics or leather.
Use waxed thread and a strong needle for clean results. Keep thread lengths short to avoid tangles.
Evenly space your stitches, pulling snugly to lock each one. Thread tail knotting or overhand knots guarantee durability, while pivot locking and edge stitching add precision to this timeless stitch locking method.
Using Automatic Lock Stitch Functions
Automatic lock stitch functions simplify securing seams.
Just press a button, and your sewing machine adds three tiny, durable stitches to prevent fraying.
This feature eliminates the need for manual backstitching, offering an efficiency boost for fast, clean results.
Adjusting stitch length and verifying machine compatibility are key for smooth sewing machine operation.
Modern electronic machines with this function enhance automated durability, making complex decorative patterns easier to secure.
It’s a reliable way to guarantee professional-looking finishes with durable stitches.
Mastering Pivot and Reverse Capabilities
Mastering pivot point control and reverse stitch accuracy is essential for clean, professional results.
Use these steps to perfect your cornering techniques and sewing techniques:
- Start with reverse stitching for 3 stitches to lock seams securely, then sew forward.
- For corners, stop, lift the presser foot, and rotate the fabric smoothly to avoid snags.
- Gently guide curves by adjusting stitch directions gradually.
With consistent practice, your sewing machine’s pivot capabilities will feel second nature, allowing you to achieve clean, professional results and master reverse stitching.
Frequently Asked Questions (FAQs)
Can you sew a lock stitch on a sewing machine?
Think of a lock stitch as a handshake securing your fabric.
On a sewing machine, use the reverse stitch button or automatic lock function to sew backward briefly, strengthening seams and preventing unraveling.
How do I know if my sewing machine has a lock stitch?
Check your sewing machine for a button or lever labeled "lock stitch" or "reverse."
Many modern machines have this feature.
If you’re unsure, consult the manual or search for your model online to find information about the lock stitch or reverse feature.
How do you sew a lock stitch?
Sewing a lock stitch is like tying a strong knot to hold fabric layers together.
Start by stitching forward, reverse to secure, then continue forward.
Finish by reversing again to lock the seam securely.
How do you secure a lock stitch?
To secure a lock stitch, sew 2-4 stitches in place or use your machine’s lock function.
For hand sewing, leave a thread tail, double-knot it neatly, and trim off the excess.
What is lock stitch sewing?
A sewing machine can make up to 6,000 stitches per minute, but what keeps them secure?
Lock stitch sewing creates durable seams by interlocking top and bottom threads, offering strength and flexibility for various fabrics.
How do you create a lock stitch on a fabric?
To create a lock stitch, thread your needle, align fabric layers, and insert the needle through.
Loop thread back and forth, keeping tension consistent.
Knot tightly at both ends, ensuring secure, clean, and durable seams.
What is the difference between hand stitching and machine stitching?
Hand stitching gives you more control for detail work, like closing seams or adding decorative touches.
Machine stitching is faster, ideal for long, straight seams, and creates consistent, durable results, especially with heavier fabrics.
What type of thread should I use for locking stitches?
Think of thread as the glue holding everything together.
Use strong, medium-weight polyester thread for durability on most fabrics.
For fine fabrics, choose a thinner thread to avoid bulk and preserve a smooth finish.
Is there a difference between a regular and a lighted threader?
A lighted threader comes with built-in illumination to help you see small needle eyes or dark-threaded areas clearly.
Regular threaders are basic tools without lights, making the lighted version ideal for precision tasks in low-light settings.
What fabrics are challenging for locking stitches?
Slippery fabrics like satin or silk, stretchy knits, and thick materials such as denim or leather often make locking stitches tricky.
Adjust tension, use the right needle, and avoid puckering by stitching slowly, this can help with tricky situations.
Conclusion
Think of locking in sewing like sealing an envelope—it guarantees everything stays secure.
Whether you’re tying a knot by hand or reversing on a machine, locking stitches is key to keeping your work durable and tidy.
Use strong thread, the right needle, and adjust tension for thicker fabrics.
Practice these techniques, troubleshoot issues, and experiment with advanced tricks like saddlestitching.
Master how to lock in sewing, and your projects will stay intact for years to come.


