This site is supported by our readers. We may earn a commission, at no cost to you, if you purchase through links.

Your fabric’s grain is your roadmap to success. The lengthwise grain runs parallel to the selvage and has minimal stretch. Test your fabric’s stretch factors by gently pulling crosswise and diagonally. Sharp tools make all the difference—replace rotary blades when they skip or drag.
Double-check grain lines to reduce errors by 62%. Use fabric weights along edges and cutting mats for stability. For slippery materials, pin everything down to prevent shifting.
The secret weapon? Testing small cuts on tricky fabrics first saves heartache down the line. This approach helps in identifying potential issues early on, ensuring a smoother process overall, with proper fabric prep being the foundation of it all, and using fabric weights as a key component in maintaining control during the cutting process.
Table Of Contents
Key Takeaways
- You’ll prevent shrinkage disasters by pre-washing fabric using your garment’s care method – this stabilizes everything and eliminates wrinkles that sabotage cutting accuracy
- Sharp tools are non-negotiable for clean, precise cuts – replace rotary blades when they skip or drag, and maintain fabric scissors regularly to avoid jagged edges
- Following fabric grain like a roadmap reduces cutting errors by 62% – align pattern pieces with lengthwise grain parallel to selvage edges for proper drape and fit
- You’ll save time and materials by stabilizing fabric before cutting – use fabric weights along edges, pin slippery materials, and test cuts on scraps first to catch issues early
Preparing Fabric for Accurate Pattern Cutting
Perfect fabric preparation is the foundation of professional-quality pattern cutting, transforming potential disasters into precise, beautiful results.
You’ll save hours of frustration and create garments that fit exactly as intended when you master these essential preparation techniques.
Preparing Fabric for Accurate Pattern Cutting – Introduction
Perfect fabric preparation is the foundation of professional-quality pattern cutting, transforming potential disasters into precise, beautiful results.
You’ll save hours of frustration and create garments that fit exactly as intended when you master these essential preparation techniques.
Pre-washing and Pressing Techniques
Preparation excellence starts with fabric relaxation through strategic prewashing and pressing techniques.
These foundational steps prevent shrinkage disasters and eliminate wrinkles that sabotage cutting accuracy.
- Prewash using your garment’s care method – machine wash cotton, hand wash delicates
- Overcast raw edges before washing to prevent fraying during the cycle
- Press from the wrong side using appropriate heat settings for fabric type
- Steam iron systematically to achieve complete wrinkle removal and grain alignment
- Allow cooling time after pressing to lock in fabric stabilizing benefits
By following proper fabric preparation techniques, you can guarantee a smooth and accurate pattern cutting process.
Aligning and Squaring Fabric
Once you’ve pressed your fabric smooth, squaring fabric becomes your next critical step.
Start by aligning selvage edges perfectly – these factory-finished sides are your most reliable reference points for grain line accuracy.
Fold your fabric carefully, matching selvages edge to edge, creating a clean foundation for straight cuts.
Use your cutting mat’s grid alignment to verify your fabric’s squareshape, trimming any uneven raw edges with confident, fluid motions.
Managing Fabric Grain and Stretch
Fabric grain runs like invisible highways through your material, guiding how it behaves during cutting and sewing.
Follow your fabric’s grain like a roadmap—it leads to perfect cuts and professional results
Understanding these pathways prevents unwanted fabric distortion and guarantees your patterns maintain their intended shape.
Here’s how to master fabric grain alignment:
- Identify the grainline – Lengthwise grain runs parallel to selvage edges and offers minimal stretch
- Test stretch factors – Gently pull fabric crosswise and diagonally to understand its movement patterns
- Align pattern pieces – Match pattern grainline markings with fabric grain for proper drape and fit
Stretch control becomes your secret weapon when working with knits or bias cuts.
Stabilizing Fabric Before Cutting
Before cutting begins, securing your fabric prevents costly mistakes that’ll haunt your finished garment.
Use fabric weights along edges to maintain grain alignment during cutting.
Cutting mats provide stable surfaces for fabric relaxation.
Pin slippery materials to prevent shifting.
For stretch control, avoid pulling while positioning.
These fabric stabilization steps guarantee fabric cutting accuracy through proper fabric preparation techniques.
Essential Tools for Precision Cutting
You’ll need the right tools to transform your cutting accuracy from good to professional-grade.
Sharp rotary cutters, precise rulers, and quality cutting mats form the foundation of clean, accurate cuts.
That make the difference between a project that looks homemade and one that appears store-bought.
Choosing The Right Cutting Tools
Your cutting arsenal determines project success.
Rotary cutters deliver straighter cuts than scissors, reducing hand fatigue by significant margins.
Fabric scissors with high-carbon steel retain sharpness 30% longer than household alternatives.
Sharp blades prevent fabric damage while cutting mats protect surfaces and provide measurement grids.
Ruler guides guarantee precise alignment.
Match tools to fabric weight—lightweight rotary cutters excel with delicate materials, heavy-duty scissors handle denim effectively.
Using the right rotary cutting tools is vital for achieving professional results in pattern cutting with the right tools and techniques.
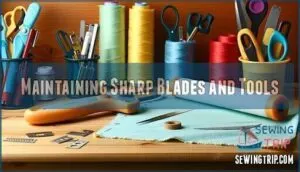
Maintaining Sharp Blades and Tools
Sharp blades prevent fabric damage and guarantee clean cuts; regular blade sharpening is key.
Dull rotary cutter blades create jagged edges and require more pressure, compromising precision blades performance.
Replace blades when they skip or drag. Keep scissor maintenance simple—clean regularly and store properly.
Sharp cutting tools deliver cutting efficiency that transforms your pattern work from frustrating to flawless. Using the right cutter blade types can substantially improve the accuracy of your cuts, ensuring a more flawless result.
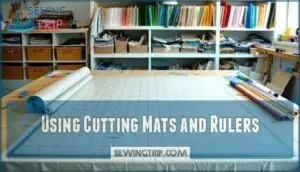
Using Cutting Mats and Rulers
Your cutting mat becomes your command center for precision cutting.
The self-healing surface protects blades while grid alignment keeps your cuts laser-straight.
Position rulers along these gridlines to create rock-solid guides for your rotary cutter.
This combo transforms wobbly cuts into professional straight edges, giving you the fabric cutting accuracy that separates amateur projects from masterpieces.
Mastering accurate fabric cutting methods, including understanding fabric grain importance, is essential for achieving professional results with fabric cutting accuracy.
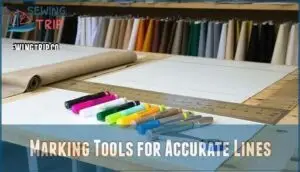
Marking Tools for Accurate Lines
Achieving perfect pattern lines starts with selecting marking tools that won’t betray you mid-project.
Your fabric’s personality dictates which marker becomes your cutting companion.
- Chalk Markers – Brush away easily, perfect for dark fabrics and temporary guidelines
- Fabric Pens – Water-soluble options disappear with steam, ideal for permanent visibility
- Cutting Gauges – Metal guides guarantee consistent seam allowances and parallel lines
- Marking Wheels – Create dotted lines through paper patterns onto fabric beneath
- Ruler Guides – Combine with rotary blades for laser-straight cutting lines
Choosing and Using Pattern Cutting Methods
You’ll need to choose the right pattern method before making your first cut, since this decision affects every step that follows.
Whether you’re working with a commercial pattern, drafting your own, or taking precise body measurements, the accuracy of your cutting depends on selecting the approach that matches your project’s complexity and your skill level.
Commercial Patterns
Most sewists discover that commercial patterns offer pre-designed templates with built-in precision for garment accuracy.
These standardized patterns simplify pattern making while ensuring reliable results through tested measurements and clear instructions.
| Pattern Selection | Size Adjustment | Fabric Matching |
|---|---|---|
| Choose reputable brands | Check ease allowances | Match pattern requirements |
| Read skill level ratings | Blend between sizes | Consider fabric weight |
| Compare body measurements | Grade seam lines | Plan layout efficiently |
| Review included pieces | Test fit with muslin | Account for pattern repeat |
Smart pattern cutting starts with understanding your measurements versus pattern dimensions.
Check grain alignment markings carefully—they’re your roadmap to professional results.
Most commercial patterns include accuracy tips that prevent common mistakes like fabric distortion, ensuring a professional finish with clear instructions and reliable results.
Self-Drafted Patterns
Mastery begins when you create patterns from scratch.
Self-drafted patterns reveal custom fits that commercial options can’t match.
Pattern drafting transforms your vision into precise templates, giving you complete control over garment accuracy and fit.
- Freedom to innovate – Design exactly what you envision without compromise
- Perfect proportions – Tailor every measurement to your unique body shape
- Creative control – Adjust design elements precisely where you need them
- Professional results – Achieve couture-level fit and finish at home
- Cost savings – Create multiple variations from one master pattern
Drafting techniques require geometric precision and attention to fabric grain.
Use heavyweight drafting paper to prevent warping during the creation process.
Mechanical pencils with 0.5mm lead create crisp, accurate markings.
Pattern precision improves dramatically when you measure twice and mark once, ensuring fabric cutting accuracy from the start.
Body Measurements
Perfect body measurements form the foundation of well-fitting garments.
Start with Proportion Analysis using measuring tape around bust, waist, and hips. These Measurement Techniques require precision – measure over undergarments you’ll wear with the finished piece.
Body Scanning technology can supplement traditional Sizing Methods, but manual measurements remain essential for Fit Assessment. Record measurements twice for accuracy.
Measuring Tape Techniques
Measuring tape mastery transforms fabric cutting from guesswork into precision engineering.
Your measuring tools become extensions of your hands when calibrated correctly.
- Check tape calibration against a ruler to confirm measurement precision
- Keep tape taut but not stretched when taking body measurements
- Mark measurements on fabric using flexible rulers for curved lines
- Double-check critical dimensions before making any precision cutting moves
- Use consistent pressure when measuring to maintain accuracy across all fabric marking tasks
Quality measuring tape and proper technique create the foundation for professional results in every project you tackle.
Techniques for Cutting Different Fabrics
Different fabrics demand different cutting approaches to achieve clean, accurate results.
You’ll need to adjust your technique based on each material’s unique properties to prevent fraying, stretching, or damage during the cutting process, using the right approach for each material to ensure accurate results.
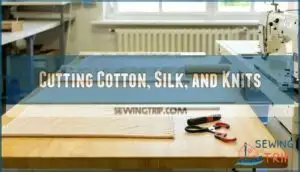
Cutting Cotton, Silk, and Knits
Cotton’s forgiving nature makes it ideal for beginners learning fabric grain alignment. Use sharp cutting tools along the grain to prevent distortion.
Silk handling requires gentle precision—place tissue paper underneath to prevent slipping during cuts.
Knit stretch demands careful attention to the fabric’s natural direction. Cut knits with their stretch orientation to maintain garment shape and guarantee fabric cutting accuracy throughout your project, ensuring a professional finish with sharp cutting tools.
Handling Denim and Leather
Precision becomes your ally when denim cutting and leather tools demand respect.
Heavy fabric and thick materials require sharp blades and deliberate technique for fabric cutting accuracy.
Essential steps for cutting mistakes prevention:
- Pre-wash denim – eliminates shrinkage before pattern layout
- Use heavy-duty scissors – high-carbon steel blades slice cleanly through dense materials
- Cut slowly and deliberately – rushing thick materials creates jagged edges
- Stabilize with weights – prevents leather shifting during precision cutting
- Check fabric grain alignment – guarantees proper drape and prevents garment distortion
To achieve professional results, mastering leather cutting techniques is vital for any serious crafter or designer.
Strategies for Slippery and Delicate Fabrics
Working with silk chiffon or organza feels like wrestling with smoke.
These slippery fabrics demand fabric stabilization through tissue paper sandwiching—place your delicate fabric between tissue sheets before cutting. This precision technique prevents shifting during cuts.
Apply spray starch lightly and press to add temporary stiffness. Use pattern weights instead of pins to avoid snags.
For gentle handling, cut single layers only and smooth fabric over textured surfaces to increase friction and maintain fabric cutting accuracy.
To achieve the best results, for optimal precision, use high-quality silk fabric scissors for precise cuts.
Layer Cutting and Fussy Cutting
Layer cutting streamlines your workflow by stacking 4-6 fabric pieces for simultaneous cuts.
Use sharp rotary blades and cutting mats with gridlines for consistent results.
Fussy cutting showcases bold motifs by strategically positioning pattern pieces over striking designs.
This precision method requires fabric layout planning and careful fabric optimization.
Both techniques demand layer management skills and cutting efficiency to maximize fabric usage while maintaining fabric cutting accuracy through proven precision methods.
To achieve superior results, understanding fabric properties matter is vital for selecting the right cutting tools and techniques.
Avoiding Common Pattern Cutting Mistakes
Even experienced sewers make pattern cutting mistakes that lead to ill-fitting garments and wasted fabric.
You’ll save time and materials by learning to spot these common errors before they happen and knowing how to fix them when they do, which involves understanding complete concepts and being able to identify common errors.
Preventing Pattern Misalignment
Misalignment wreaks havoc on your finished garment, turning hours of careful work into unwearable mistakes.
Start by checking grainlines against your fabric’s weave – they’re your roadmap to success.
Pin pattern pieces with their grain arrows running parallel to the selvage edge.
This Grain Alignment prevents twisted seams and puckered hems that scream "homemade disaster.
Ensuring Accurate Seam Allowances
Accurate seam allowances determine whether your garment fits like a glove or hangs like a potato sack.
Many sewers rush through this step, but seam margin precision directly impacts garment fit and professional appearance.
- Measure twice, cut once – Use measuring tools to verify your seam allowances match pattern specifications before cutting
- Account for fabric shrinkage – Add extra seam margin when working with natural fibers that may shrink during washing
- Mark notches clearly – These alignment points guarantee accurate assembly and prevent cutting errors that compromise measurement precision
Identifying and Correcting Errors
Even careful sewers make cutting mistakes, but you can catch them before they ruin your project.
Visual inspection reveals irregularities in shape, especially across symmetrical garment parts. Cross-reference pattern markings with physical sections to identify mismatched notches. Proper notch marking techniques are essential for achieving accurate seam matching and improving the finished project’s appearance.
| Error Detection Method | Success Rate |
|---|---|
| Double-checking grain lines | 62% reduction |
| Measuring edge distances | Uniform allowances |
| Transparent ruler checks | Subtle shift detection |
Redrawing affected sections corrects 72% of identified errors. Re-align pieces before cutting to prevent permanent fabric distortion.
Tips for Consistent, Clean Cuts
Sharp tools make the difference between professional results and frustration.
Keep rotary cutter blades fresh, replacing them when they skip or drag.
Clean your fabric scissors regularly, removing lint buildup that dulls edges.
Use steady, confident motions when cutting—hesitation creates jagged lines.
Fabric Preparation paired with Precision Tools and proper Cutting Techniques guarantees clean edges every time.
Your cutting accuracy improves dramatically when tools stay sharp and movements stay smooth.
Frequently Asked Questions (FAQs)
How do I ensure pattern tracing is accurate & precise?
Like medieval scribes copying manuscripts by candlelight, you’ll master pattern tracing through careful preparation and steady technique.
Use sharp pencils, secure your pattern with weights, trace slowly along edges, and double-check measurements for precision.
How do you cut a pattern correctly?
Prepare your fabric by pressing it flat and aligning the grain. Pin pattern pieces carefully, matching grainlines and notches. Cut with sharp scissors using smooth, confident strokes along marked lines.
What are the three essential tools for accurate cutting?
You’ll need a sharp rotary cutter for clean cuts, a self-healing cutting mat for stability, and a clear acrylic ruler for accurate measurements and guiding cuts.
What are the best tips for fabric cutting?
Don’t think fabric cutting’s just about sharp scissors.
Use quality rotary cutters with fresh blades, stabilize slippery fabrics with tissue paper, cut confidently in smooth motions.
Always double-check measurements before cutting, and remember to use these tools and techniques to ensure accuracy and quality results.
What is precision in fabric cutting?
Precision in fabric cutting means executing exact, clean cuts that follow measurements perfectly.
You’ll achieve sharp edges, maintain fabric grain alignment, and create pieces that fit together seamlessly for professional results.
How do you cut a fabric on a bias?
Imagine silk cascading like liquid moonlight across your cutting table.
You’ll fold fabric at a 45-degree angle to the grainline, creating that coveted drape that flows and moves with graceful elegance around curves.
How can you ensure accuracy in pattern drafting?
Measure twice, cut once. Use accurate body measurements, double-check pattern dimensions, mark grainlines carefully, and test-fit on muslin first. Sharp tools and proper measuring techniques prevent costly mistakes.
How to get better at pattern cutting?
Like threading a needle in dim light, mastering pattern cutting requires sharp tools, steady hands, and patience. Practice with quality scissors, measure twice, cut once, and maintain proper fabric alignment.
How to sew more accurately?
Sharp tools prevent slipping and ragged edges. Use pins strategically to secure layers without shifting. Check seam allowances twice before cutting. Practice steady hand movements on scraps first.
How do you handle pattern adjustments for different body types?
Pattern adjustments require understanding your unique measurements versus standard sizing.
Start by taking accurate body measurements, then compare them to pattern dimensions.
Add or subtract length at designated adjustment lines, grade between sizes for mixed proportions, and create fitting muslins to test modifications before cutting final fabric, which involves understanding your measurements.
Conclusion
Like a master craftsperson putting the finishing touches on fine furniture, improving accuracy in pattern cutting transforms raw materials into perfectly fitted garments.
You’ve learned that preparation sets your foundation—pre-washing fabric and checking grain lines prevent costly mistakes.
Sharp tools and proper cutting techniques guarantee clean, precise edges every time. Remember to test cuts on scraps first, especially with tricky fabrics.
These methods consistently deliver professional results in your sewing room.
- https://blog.fabrics-store.com/2024/11/03/how-to-pre-wash-fabric-a-simple-guide/
- https://threadsmonthly.com/how-to-prepare-fabric-before-sewing/
- https://icefabrics.com/blogs/news/reasons-to-pre-wash-fabric-before-sewing
- https://thefabricfox.co.uk/blog/preparing-for-sewing-success-the-importance-of-prewashing-and-ironing-your-fabrics/
- https://www.andibedsworth.com/sew-artfully/to-prewash-or-not-to-prewash-your-fabric-in-garment-sewing-that-is-the-question


