This site is supported by our readers. We may earn a commission, at no cost to you, if you purchase through links.

Most breakdowns happen gradually—a belt that’s been slipping for weeks, thread tension that’s drifted out of spec, or oil that’s turned to sludge because nobody checked the reservoir. Regular upkeep prevents these failures before they shut down production.
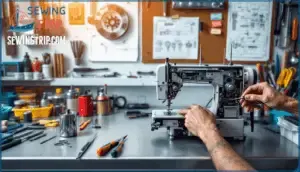
This guide covers the maintenance procedures that keep industrial machines running smoothly, from daily cleaning tasks to deep component servicing that extends equipment life by years.
Table Of Contents
Key Takeaways
- Most breakdowns happen gradually from ignored warning signs—slipping belts, drifting thread tension, or degraded oil—making regular upkeep more effective than reactive repairs at preventing production shutdowns.
- Daily cleaning of lint from needle plates, bobbin cases, and feed dogs cuts thread breakage by 30% and prevents skipped stitches, while proper lubrication every 5–10 hours protects bearings and keeps friction-related failures from stopping your line.
- Needle replacement every 6–8 hours prevents 95% of stitch problems since worn needles damage fabric and break thread, while correct tension adjustment—where both threads lock mid-fabric rather than on the surface—eliminates costly rejects.
- Machines on preventive maintenance schedules run 40% longer than breakdown-only servicing, with documented inspections catching wear patterns early and reducing repair costs by 10–15% annually through predictive monitoring of sounds, vibrations, and component condition.
Key Components of Industrial Sewing Machines
Before you start troubleshooting or planning a maintenance schedule, you need to know what you’re actually working with. Industrial sewing machines aren’t just bigger versions of home units—they’re built from specialized systems that work together under serious stress.
Let’s break down the four key components you’ll be maintaining throughout this guide.
Main Drive and Motor Systems
At the heart of every industrial sewing machine, you’ll find the main drive and motor systems—the powerhouses that control speed, precision, and energy efficiency. Servo motors now dominate the market, offering up to 60% greater efficiency than older clutch motors while cutting energy costs by as much as 75%.
Industrial servo motors deliver 60% better efficiency than clutch motors while slashing energy costs by three-quarters
Key components requiring your attention include:
- Motor brushes: Inspect every 500–1,000 hours; worn brushes affect performance
- Belts and pulleys: Check for glazing or wobble; they generally last 3,000–5,000 hours
- Electrical components: Loose wiring ranks among the top five causes of downtime
- Encoder integrity: Malfunctions trigger irregular stitch quality and speed issues
Regular motor inspection and a solid lubrication schedule prevent overheating and premature failure. Investing in an automated sewing machine improves production capabilities.
When troubleshooting, incorrect belt tension and insufficient power supply are common culprits behind motor problems.
Needle and Feed Mechanisms
While motors provide the force, needle and feed mechanisms control where and how each stitch lands. Change your needle every 8–16 hours—dull or bent needles cause 95% of stitch problems and cut performance by 30%. Using the correct needle also guarantees high-quality stitching.
Feed dogs, needle bar timing, and proper synchronization reduce skipped stitches by 80% and seam skew by 18%. Fabric slippage happens when feed dogs accumulate lint, dropping movement efficiency by 25%, so clean them after every shift.
Bobbin, Hook, and Thread Path
Your bobbin case, rotary hook, and thread path form the heart of stitch formation. Lint buildup in this area happens fast—daily cleaning cuts thread breakage by 30% and prevents skipped stitches from climbing 10–20%.
Clean the bobbin case every 2–3 replacements to prevent thread drag and maintain tension. Correct threading through guides keeps tension stable within ±5%, while hook timing directly controls stitch quality and machine longevity.
Lubrication Systems (manual and Automatic)
Proper lubrication protects bearings, reduces friction, and keeps temperatures stable. Manual systems need oil applied to marked points every 8–10 hours, while automatic lubrication systems use pumps and return lines to deliver lubricant during operation.
Check your oil reservoir every 8 hours, and use only clear mineral or synthetic lubricants—synthetic oils work best with mixed-metal components and reduce over-application risks.
Set your lubrication schedule based on runtime, not calendar days.
Daily and Weekly Maintenance Tasks
Keeping your industrial machine in top shape comes down to a few simple habits you’ll repeat every day and week. These routines prevent the kind of breakdowns that stop production cold and keep your stitches looking sharp.
Let’s walk through the essential tasks that’ll become second nature once you get into the rhythm.
Routine Cleaning Procedures
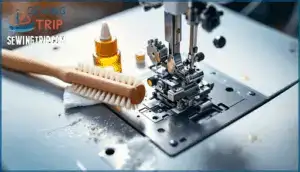
Think of your machine as a high-performance engine—it can’t run clean without regular attention. Daily cleaning involves removing lint and dust from the needle plate, bobbin case, and feed dogs using soft brushes and compressed air. For heavy-use environments, you’ll want to follow scheduled cleaning protocols after every shift.
Component cleaning isn’t just about appearance; it prevents stitching errors and extends lifespan by 10–15%. Always follow safety protocols: power down and unplug before starting any cleaning procedures.
Oiling Moving Parts and Lubrication Points
Without the right lubricant, even a well-built machine grinds to a halt. You need lightweight oils with ISO VG 10 to VG 22 viscosity grades—never WD-40 or general-purpose products that leave residue.
For heavy industrial use, apply oil every 5–10 operating hours to the hook, needle bar, presser bar, and feed mechanism.
Synthetic oil benefits include extended service life exceeding 1,000 hours, while proper lubrication frequency prevents contamination and aids predictive analysis through oil monitoring systems.
Checking and Replacing Needles
A worn needle damages fabric, breaks thread, and costs you time. Replace needles every 6–8 hours of operation, or every 4–6 hours when sewing denim or leather.
To maintain optimal performance, follow these steps:
- Check for needle wear signs by rolling the shank on a flat surface to detect bending, then inspect the tip for burrs or blunting.
- Follow correct replacement procedures by loosening the set screw, inserting the new needle fully upward until it stops, and aligning the scarf toward the hook.
- Track replacement intervals to maintain stitch quality and prevent fabric snags that trigger costly downtime.
Inspecting Thread Tension and Stitch Quality
Thread tension isn’t just a setting—it’s the difference between perfect seams and costly rejects. You need to check tension daily, adjusting the dial in quarter-turn increments until both threads interlock inside the fabric, not on the surface. Manual inspection reveals loops or puckering, while automated monitoring systems detect defects per stitch cycle, reducing faulty output and boosting throughput.
| Tension Issue | Visual Symptom |
|---|---|
| Upper thread too tight | Puckered seams, thread breakage |
| Lower thread too loose | Loops visible on fabric underside |
| Balanced tension | Threads lock mid-fabric, invisible crossing |
Run the diagonal test by pulling sewn fabric—when both threads snap simultaneously, you’ve dialed in proper tension adjustment. Automated systems flag stitch defects before they multiply, but your eyes catch what sensors miss.
Preventative maintenance checklists should include tension verification every shift, because even minor variations compromise output quality and trigger troubleshooting delays you can’t afford.
Deep Cleaning and Lubrication Procedures
Daily maintenance keeps your machine functional, but deeper procedures guarantee long-term reliability and peak performance. Over time, lint compacts in hidden areas, old lubricant breaks down, and internal components need attention you can’t reach with a brush.
This section walks you through the steps to access, clean, and properly lubricate the parts that matter most.
Disassembling for Thorough Cleaning
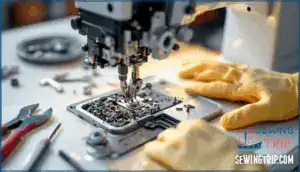
Safety preparations during disassembly aren’t optional—they protect you and your equipment. Industrial machines weigh over 80 kg, so you’ll need a partner when lifting. Before touching any sewing machine components, disconnect power to eliminate shock risks at 110–240 V.
Here’s your systematic disassembly procedure:
- Remove external covers with manufacturer-specific tools to prevent 25% more internal damage
- Label screws and internal components as you go, cutting reassembly time by 40%
- Wear nitrile gloves and dust masks, reducing particulate exposure by 60%
- Use magnetic trays for fasteners—they boost organizational efficiency by 35%
Start with 4–8 cover screws, then work through the needle plate and presser foot to expose the feed dog and hook assembly. The cleaning process requires 1.5–2.5 hours for component removal and thorough access. Follow lubrication guidelines during reassembly, applying oil to 20–40 mapped points. Run performance testing for 3–5 minutes unloaded to verify proper cleaning procedures worked.
Cleaning The Rotary Hook and Bobbin Area
Think of the rotary hook and bobbin area as your machine’s heartbeat—over 70% of malfunctions start here. You’ll want to clean this zone every 4–8 production hours to prevent thread tension problems and skipped stitches.
Power off your machine before starting—that’s your safety baseline. Use a lint brush rather than compressed air to avoid pushing debris deeper into internal circuitry. Once you’ve cleared the bobbin race, apply one drop of high-viscosity oil to the hook bearing surface. Let any solvent evaporate completely before reassembly to maintain proper lubrication films and prevent oil dilution.
| Cleaning Step | Tools Required | Expected Outcome |
|---|---|---|
| Remove needle plate and bobbin case | Offset screwdriver, lint brush | Access to hook assembly for debris removal |
| Clear lint from hook race | Microfiber cloth, cotton swabs | Reduced friction and 15% lower motor load |
| Apply solvent to residue | Isopropyl alcohol | Dissolved adhesive and oil buildup |
| Add oil drop to hook bearing | ISO 22–32 sewing machine oil | Extended hook life by 30% |
Greasing Gears and Internal Components
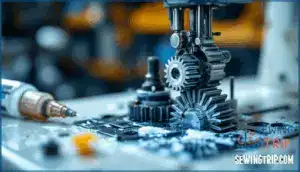
Beyond the hook, your machine’s gears demand attention every three to six months under moderate use. You’ll need manufacturer-specified grease—Type A grease works for most metal assemblies, but nylon gears require different formulations to prevent 40% shorter lifespans.
Clean old lubricant completely before applying new grease to tooth channels using a syringe or brush. Overapplication raises operating temperatures by 15–30°F, so fill only the gear teeth. Rotate the machine manually for 2–3 minutes to distribute lubricant evenly.
Missed lubrication schedules cause 75% of preventable gear failures, making documentation essential for long-term reliability.
Maintaining Oil Reservoirs and Filters
Your machine’s oil reservoir demands inspection every eight hours of operation to catch low levels before friction damage starts. Check oil levels weekly in dusty shops where contaminants enter faster. Replace reservoir oil annually, or every two years in heavy-use settings, draining fully when discoloration appears.
Use only white mineral oils—vegetable types leave residue that clogs channels. Swap filters during oil changes to block particles above 20 microns, since contaminated lubrication causes over 33% of machinery breakdowns.
Preventative Maintenance and Inspection
Preventative maintenance isn’t just about fixing problems—it’s about stopping them before they start. A structured inspection routine catches wear, misalignment, and loose components early, saving you from costly breakdowns and production delays.
Here’s what you need to check regularly to keep your machine running at peak performance.
Developing a Maintenance Schedule
Generally, a preventative maintenance checklist tied to your actual production hours can prevent 25–30% of downtime. You’ll want to set up intervals that match how hard you’re running your machines:
- Daily maintenance: Clean lint, check needles, verify thread paths
- Weekly maintenance: Oil moving parts, tighten fasteners, inspect belts
- Monthly maintenance: Deep clean hook and bobbin areas, check motor belts
- Quarterly maintenance: Calibrate timing, verify tension systems, test alignment
Scheduling frequency matters because it aligns lubrication cycles with usage intensity. Keep maintenance documentation in digital logs—they cut redundant inspections by 30% and help you spot patterns before breakdowns happen.
If you’re running newer equipment, predictive technology using vibration sensors can alert you 15–30 minutes before failure. Don’t skip operator training either—it reduces misuse-related problems by 35% and keeps your cost analysis favorable, since preventative programs lower repair bills by up to 40% compared to fixing things after they break.
Inspecting Belts, Screws, and Fasteners
Once your schedule is in place, inspecting belts, screws, and fasteners becomes straightforward. Weekly, check belt tension—you should feel 3–5 mm of give under moderate finger pressure. Monthly, examine belts for cracks or fraying. Drive belts require replacement after 200 operating hours or every 18–24 months, even if they appear fine.
Fasteners demand daily visual checks for rust or damage, along with weekly torque evaluations using a calibrated turning tool. Maintain torque at 70–80% of thread yield and re-tighten any loose components. OEM parts offer superior longevity and fitment precision. Document every inspection to support your preventative maintenance program and identify fastener corrosion or wear thresholds before breakdowns occur.
| Inspection Item | Frequency | Action Required |
|---|---|---|
| Belt tension | Weekly | Adjust to 3–5 mm depression |
| Fastener torque | Weekly | Maintain 70–80% yield torque |
| Belt wear and tear | Monthly | Replace if cracked or frayed |
| Screw appearance | Daily | Tighten screws, replace if damaged |
Monitoring for Unusual Noises or Vibrations
Your ears are the first line of defense—unusual sounds or vibrations signal trouble before a full breakdown hits. Industrial sewing machines generally run between 80–95 dB(A), so deviations from your baseline reveal misalignment, dry components, or imbalance. Lubrication influence is immediate: skipping oil increases noise by 10 dB and accelerates wear. Preventive monitoring catches these shifts early, slashing repair costs by 10–15% annually.
Watch for:
- Grinding or rattling that spikes when needle speed increases, indicating friction from poor lubrication
- Vibration exceeding 2.8 mm/sec RMS, a threshold where structural fatigue begins according to ISO 10816‑3 standards
- High-frequency whines in the 500–2,000 Hz range, often linked to cam or bearing failure
- Knocking from the crankshaft area, suggesting unbalanced rotors that can worsen by 30–40% without adjustment
Using Checklists for Regular Inspections
When you establish a sewing machine maintenance checklist, you’re building a safety net against unplanned downtime. Standardized preventive action cuts human error by over 40%, while digital integration reduces manual mistakes by up to 60%. Organize inspection frequency across daily, weekly, and annual machine maintenance tasks to maintain 95%+ uptime.
| Interval | Key Tasks |
|---|---|
| Daily | Lint removal, needle condition, oil levels |
| Weekly | Lubrication points, feed mechanism alignment, tension checks |
| Monthly–Annual | Motor calibration, belt inspection, hook cleaning |
Data utilization from digital checklists enables predictive modeling—facilities see 20–25% better schedule adherence. Checklist standardization proves compliance during audits, documents preventative maintenance procedures, and extends machine life by 15–20%.
Your daily machine upkeep tasks become weekly machine maintenance tasks that compound into reliability you can measure.
Troubleshooting and Optimizing Performance
Even the best-maintained machine can hit a snag, and knowing how to respond quickly keeps your production line moving. In this section, you’ll learn how to pinpoint common problems, fine-tune settings for different materials, and create a safer workspace through smart operator habits.
These strategies don’t just solve issues—they help you get the most out of every stitch.
Identifying Common Sewing Machine Issues
When you’re troubleshooting your machine, thread tension issues and needle problems top the list—accounting for roughly 40% of malfunctions. Thread breakage often signals bobbin issues or worn tension disks.
Watch for feed failures causing uneven stitches, or motor malfunctions like irregular speed.
Hook timing problems and skipped stitches usually mean bent needles or hook assembly wear. Catching these before stitch quality tanks saves you serious downtime.
Adjusting Machine Settings for Different Fabrics
Think of settings adjustments like shifting gears—wrong choices cause fabric damage and seam failure. You’ll need tension calibration paired with precise needle selection and pressure adjustments for material compatibility.
- Set tension between 4–5 for woven fabrics; drop below 4 for delicate polyester to prevent puckering
- Match needle size to fabric weight: 80/12 for medium cotton, 90/14 for heavy linen suiting
- Adjust foot pressure from 800 grams for sheers up to 1500+ grams for denim
Test on scrap fabric first—balanced stitches hide the knot between layers. Stitch length optimization matters too: 2.5 mm works for standard seams, while heavy-duty materials need 3.0–4.0 mm for durability.
Ensuring Proper Needle and Thread Selection
Matching needle size to thread weight and material type prevents 60% of thread breakage issues. The metric system runs from 35 to 250—size 100 equals 1 mm shaft diameter. Use 60/8–70/10 for delicate fabrics, 80/12–90/14 for medium cotton, and 100/16–110/18 for heavy denim or upholstery.
| Fabric Type | Needle Size | Thread Weight |
|---|---|---|
| Lightweight (silk, chiffon) | 60/8–70/10 | Tex 35–40 |
| Medium (cotton, linen) | 80/12–90/14 | 40-weight |
| Heavy (denim, canvas) | 100/16–110/18 | Tex 70–92 |
Point types also play a crucial role in sewing efficiency. Ballpoint needles for knits reduce skipped stitches by 30%, while wedge points are ideal for slicing through leather without causing tears. Always verify your machine system code (like 135×17) matches specifications, as mismatches can lead to timing errors and uneven stitching. Proper pairing of needles, threads, and fabrics extends component lifespan by up to 18 months in continuous production.
Implementing Safety Checks and Operator Training
Your machine runs best when operators know what they’re doing and stay safe while doing it. OSHA requires lockout/tagout (LOTO procedures) before any maintenance work, and PPE compliance cuts finger injuries by 25%.
Training programs reduce accident rates by up to 35%, so invest in proper operator safety education covering risk assessment, machine operation, and safety standards.
Weekly inspections of guards and emergency stops build a safety culture that prevents the kind of safety hazards that shut down production lines.
Frequently Asked Questions (FAQs)
How often should industrial machine belts be replaced?
Belt replacement isn’t just a tension-and-hope situation—it’s about reading the signs. Inspect belts weekly for cracks, fraying, or glazing.
Replacement frequency factors include usage intensity and belt material impact. Generally, replace every 12–18 months under normal conditions, sooner if worn parts appear.
Preventative belt checks and proper tension adjustment greatly extend machine lifespan.
What causes thread to bunch underneath the fabric?
Thread bunching underneath usually stems from tension problems or bobbin issues. Check your upper thread tension adjustment first, then inspect the bobbin case maintenance and thread placement.
Needle size mismatches, poor thread quality, or hook timing problems can also cause this.
Can I use household oil on industrial machines?
No, don’t use household oil on industrial machines. Oil viscosity matters—household oils like cooking or motor oil cause component damage, void your machine warranty, and create long-term effects like gumming or part seizure.
Always use clear sewing machine oil designed for industrial equipment.
How do I calibrate timing on industrial machines?
Calibrating timing requires specialized Timing Adjustment Tools and precision. Start by removing the needle plate to access the hook assembly. Align timing marks on the needle bar and hook using Hook Timing Methods, adjusting the needle bar height until the hook catches the loop correctly.
Looper Timing Issues demand careful measurement—calibrate parts incrementally, checking stitch formation after each adjustment. Machine service manuals provide exact specifications for feed dog timing and hook timing synchronization.
Whats the ideal room temperature for machine storage?
Store your machine between 60–75°F with humidity around 40–60%. Ideal temperature prevents rust, material degradation, and moisture buildup that compromise internal components.
Regular preventative maintenance and proper storage guidelines extend your sewing machine’s life considerably.
Conclusion
Studies show that machines on preventive schedules run 40% longer than those serviced only after breakdowns. Your industrial sewing machine maintenance guide doesn’t need to be complicated—clean daily, oil weekly, and inspect monthly.
When you catch a worn belt before it snaps or adjust tension before seams start failing, you’re not just avoiding downtime. You’re protecting your operation’s rhythm, keeping production predictable, and stretching equipment life well past its expected years. Maintenance isn’t overhead—it’s insurance that pays dividends every shift.
- https://www.techsew.com/us/blog/industrial-sewing-machine-maintenance-tips.html
- https://www.sewingtime.co.nz/blogs/news/maintaining-your-machine-how-often
- https://insights.made-in-china.com/Comprehensive-Guide-to-Sewing-Machine-Maintenance-Strategies-Practices-and-Performance-Evaluation_VtiaERfljmHb.html
- https://deltatextilesolutions.com/how-to-define-the-maintenance-schedule-for-textile-machinery/
- https://www.facebook.com/groups/660641024042969/posts/7889844727789193/






![Common Sewing Machine Error Codes: Fix Your Machine in Minutes [2025 Guide] 4 common sewing machine error codes](https://sewingtrip.com/wp-content/uploads/2025/04/common-sewing-machine-error-codes-300x300.jpeg.webp)

