This site is supported by our readers. We may earn a commission, at no cost to you, if you purchase through links.
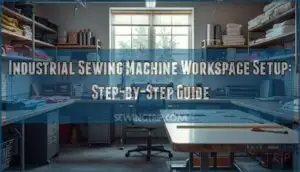
Your industrial sewing machine workspace isn’t just about fitting equipment into a room—it’s about designing a system where every motion counts, every tool lives within arm’s reach, and fatigue doesn’t dictate your output. When you position machines with deliberate intention, install lighting that reveals true fabric colors, and arrange zones that mirror your natural workflow, you’re not just organizing space. You’re building an environment that protects your body, sharpens your precision, and turns hours at the machine into productive momentum rather than exhausting endurance.
Table Of Contents
Key Takeaways
- Misplaced equipment creates hidden inefficiency—47 extra steps daily from a poorly positioned cutting table compounds into miles of unnecessary movement that drains energy and slows production over time.
- Organizing your workspace into three distinct zones (cutting at 10–15% of space, sewing at 35–40%, and pressing within three meters of sewing stations) cuts handling time by 20% and prevents backtracking.
- Ergonomic setup isn’t optional—proper table height at elbow level, adjustable seating, and 750 lux ambient lighting with 1000 lux task lighting reduce operator pain by 35% and boost precision without causing fatigue.
- Regular maintenance prevents most problems—daily cleaning cuts downtime by 20%, preventive schedules reduce machine failures by 25%, and simple upgrades like servo motors slash energy use by 60% without breaking the budget.
Choosing The Ideal Sewing Workspace
Your workspace is the foundation of everything that happens next. Getting the location right means less frustration, better results, and a setup that actually works for the long haul.
Here’s what you need to evaluate before you commit to a spot.
Assessing Room Size and Layout
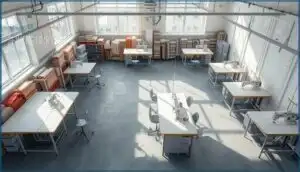
How much room do you actually need? Start by measuring your available floor space, then allocate roughly 4.5 square meters per industrial machine, including aisles and material handling zones. Plan for 3.5 feet of clearance around each unit to guarantee accessibility and safe movement.
Consider future expansion early—your workflow depends on smart space utilization from day one. Position large cutting tables and sewing desks first to maintain clear movement corridors and boost ergonomic considerations throughout your workspace organization.
To improve your workspace, consider the space allocation guidelines for efficient operation.
Selecting a Location for Natural Light
Once you’ve established room size, position your machines where natural light flows freely. North-facing windows deliver the most consistent illumination with minimal glare throughout the day—ideal for color-matching and precision work. Here’s what matters for workspace organization:
- Window Orientation: North-facing placements reduce glare by up to 40% while maintaining over 80% light transmission
- Energy Efficiency: Proper daylighting cuts lighting costs by 40–60% annually in textile facilities
- Worker Productivity: Natural light boosts accuracy by 20% in fabric inspection tasks and reduces eye strain considerably
Use matte white ceilings to reflect 86% of daylight evenly across sewing tables. Fabric buildings can be designed to amplify natural light benefits. Install fabric-lined blinds for glare control without sacrificing the lighting considerations that keep your space efficient and comfortable.
Managing Noise and Ventilation
Good lighting matters, but so does sound. Industrial sewing machines generate 85–95 dB(A)—above safe exposure limits—so you’ll need noise reduction measures from day one. Install soundproofing materials like ply-foam casings to drop noise from 90 dB to 81 dB. Pair acoustic panels with anti-vibration mats to cut reflected sound by 70–90% while improving workspace safety.
Ventilation systems are equally critical. Target 6–10 air changes per hour and position localized exhaust ducts near machines to reduce airborne fiber dust by 40%. Proper air quality control protects against byssinosis and keeps respirable particles below 0.2 mg/m³. Combine acoustic control with flexible ductwork for dual benefits: 30% lower noise exposure and 22% better humidity regulation. Space machines 1.2–1.5 meters apart to support airflow and ergonomic considerations. This integrated approach delivers workspace efficiency, hearing protection, and long-term comfort.
| Control Method | Noise Impact | Air Quality Benefit |
|---|---|---|
| Acoustic panels + exhaust ducts | 8–12 dB reduction | 40% less fiber dust |
| Soundproof curtains (STC 33) | Blocks external noise | Minimal direct impact |
| Anti-vibration mats + HVAC | 28% less acoustic transfer | 10 dB + temp control 22–26°C |
| Machine spacing 1.2–1.5 m | 10 dB diffusion gain | 30% better air circulation |
| Ply-foam casings + localized ducts | 90 dB → 81 dB | 50% lower microbial counts |
Power Source and Electrical Safety Considerations
Sound and air quality handled—now address power. Your industrial machines pull 400–800 watts at 220–240 volts, so electrical safety isn’t optional. Here’s what you need:
- Voltage Requirements: Verify your machines match supply voltage (IEC 60335-2-28:2021 caps single-phase at 250V); mismatches damage electric motors and void warranties.
- Electrical Grounding: Bond metal housings with 8 AWG copper wire per OSHA 29 CFR 1910.304—proper grounding prevents shocks and ensures machine compatibility.
- Circuit Protection: Install breakers and surge protection on dedicated 16–20 amp circuits; load balancing under 80% capacity prevents overheating and fire risk.
Servo motors boost power efficiency by 70% versus clutch motors.
Planning Efficient Workflow Zones
Your workflow setup can make or break your productivity. The key is organizing your space into three main zones that work together smoothly.
Let’s look at how to define each area and keep everything flowing without wasted steps.
Defining Cutting, Sewing, and Pressing Areas
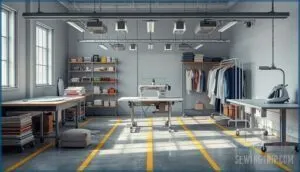
Your workflow runs smoother when you break the floor into three distinct zones: cutting, sewing, and pressing.
Start with the cutting table—you’ll need roughly 10–15% of your space here, positioned where bulky fabric rolls won’t block traffic.
Sewing stations claim the lion’s share at 35–40%, arranged so you’re not backtracking between tasks.
Your pressing zone sits close by, ideally within three meters of the sewing workstation to cut handling time by 20%.
Optimizing Table and Machine Placement
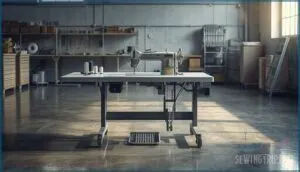
Between proper table height and machine positioning, you’ll see a real shift in daily comfort. Set your industrial sewing table at 30–31 inches and keep the needle 8 inches from the front edge.
Position the machine’s center over the table legs for stability—this cuts wobble and improves operator safety by 9%.
Allow 18 inches to the left of the needle for standard work, expanding to 28 inches for bulkier garments like coats.
Material Handling and Movement Paths
Clear pathways between cutting, sewing, and pressing zones keep fabric transport smooth and reduce wasted motion. One-way fabric flow patterns prevent cross-traffic snags and improve space efficiency. Keep walkways 36–48 inches wide for safe material handling and ergonomic setup that aids workflow optimization across your workspace.
Position material drop zones within arm’s reach of high-frequency machines—overhead conveyor systems can boost output by 15% and cut manual handling fatigue by 25%.
Minimizing Operator Downtime
Every minute an industrial sewing machine sits idle, production capacity slips away. Preventive maintenance schedules cut machine failure incidents by over 25%, while predictive maintenance drops unplanned downtime by 30–50%. Operator training boosts line productivity up to 15% through fewer errors and smoother task flow.
Pair regular maintenance with ergonomic design and downtime analysis to push efficiency optimization past 80%—minimizing downtime becomes second nature when you treat each element as part of one system.
Organizing Tools and Supplies
A well-organized workspace keeps your tools accessible and your workflow smooth. The key is matching your storage approach to how you actually work—not just how you think you should work.
Let’s look at practical ways to organize your supplies so everything has a place and you’re not hunting for scissors mid-project.
Smart Storage Solutions for Tools and Notions
You can’t fix chaos with containers alone—you need a system. Start with modular storage units like clear bins or shallow drawers to group sewing notions by function: threads, bobbins, needles, fasteners.
Labeling systems cut retrieval time substantially, and transparent containers let you spot what you need instantly.
Smart storage solutions turn clutter into control, keeping your sewing tools accessible and your workspace organized without wasting motion.
Vertical Storage: Shelves, Pegboards, and Racks
When floor space is tight, vertical integration becomes your best ally. Wall-mounted pegboard design and industrial rack systems can boost storage density by 40% or more, reclaiming precious square footage.
Install adjustable shelving near your sewing station for quick access to spools and bobbins, and use modular organization systems to keep storage bins visible. These sewing room storage solutions cut tool retrieval time while improving shelf optimization—giving you both control and efficiency in one move.
Fabric and Pattern Organization Systems
Once you’ve optimized vertical storage, turn your attention to fabric and material control. Fabric Labeling with color-coded tags can speed sorting by 31%, while Digital Cataloging slashes pattern retrieval time by 37%. Here’s what works:
- Fabric storage: Label by fiber type and weight—categorized systems cut retrieval time by 28%.
- Pattern storage: Roll large formats in tubes to prevent creasing, or use binders with sheet protectors to extend lifespan by 45%.
- Inventory Tracking: Combine manual logs with software—hybrid systems reduce miscounts to 2.8% annually.
Cloud backups and barcode systems further tighten control over your sewing room organization.
Displaying Vs. Concealing Supplies
After organizing your fabric and patterns, consider how you’ll balance Visual Clutter with quick access. Clear containers cut retrieval time from 43 to 12 seconds, but too many visible items spike distraction by 37%.
A hybrid approach—open thread racks paired with concealed fabric drawers—delivers 25% faster tool access while dropping dust contamination by 60%. Aim for 50/50: display active supplies on pegboards, hide reserve stock in closed cabinets.
This Concealment Strategy sharpens focus by 19% and maintains Workspace Aesthetics without sacrificing efficiency in your ergonomic sewing space.
Ensuring Ergonomics and Safety
You can’t sew comfortably—or safely—if your workspace works against you. Long hours hunched over a machine or poor lighting will wear you down faster than any deadline.
Here’s how to set up your space so it aids your body and keeps you out of harm’s way.
Selecting an Ergonomic Sewing Table
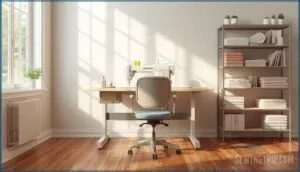
Your industrial sewing table should match your elbow height—OSHA recommends positioning the surface right at that level to keep your shoulders and back neutral. Look for adjustable legs that let you fine-tune between 29 and 31 inches, accommodating your specific build.
A wider surface area cuts down repositioning time by 25%, so don’t skimp on tabletop space. Proper table height and workspace ergonomics reduce neck and back pain by up to 35% while boosting precision.
Choosing Comfortable Seating and Proper Posture
Your ergonomic chair should let you adjust seat height between 38 and 50 centimeters—this range keeps your knees slightly above 90 degrees and thighs horizontal, cutting down on the lower back pain that hits 82% of operators. Look for lumbar support, padded backrests, and tilt controls.
Active movement matters too—change stances regularly and take breaks to avoid one-sided strain. Proper seating boosts your focus, reduces errors, and keeps you stitching longer without discomfort.
Lighting: Ambient and Task Illumination
Good workspace lighting combines ambient illumination and task lighting to support precision and comfort. Aim for 750 lux overall brightness across your floor, with ceiling-mounted fixtures ensuring even distribution.
Add focused task lighting—LED needle lights delivering around 1000 lux—directly over stitch points for color-accurate detail work. Choose daylight color temperature near 5000K for true fabric matching.
LED systems cut energy costs by 35% and reduce eye strain, boosting both safety and productivity.
Machine Guards and Emergency Procedures
Protecting operators starts with proper machine guarding and clear emergency protocols. OSHA regulation 29 CFR 1910.212 requires guards at needle points, pulleys, and rotating shafts to prevent contact injuries—preventing up to 70% of incidents when installed correctly.
Facilities with monthly guard inspections report 45% fewer mechanical accidents, proving that consistent safety measures in sewing environments protect your team and guarantee OSHA compliance.
Follow these safety protocols:
- Install transparent polycarbonate guards at feed ends and needle zones per OSHA 1910.262
- Place red emergency stop buttons within 10 feet of every workstation for single-action shutoff
- Conduct daily visual guard inspections and monthly maintenance reviews to catch worn barriers
- Train operators in emergency stop use and hazard recognition in their primary language
- Anchor machines securely to prevent guard misalignment during operation
Maintaining and Upgrading The Workspace
Your workspace won’t stay perfect on its own—it needs regular care and the occasional smart upgrade. Over time, dust builds up, equipment wears down, and your workflow changes as you take on new projects.
Here’s how to keep your setup running smoothly and adapt it when your needs shift.
Cleaning and Maintenance Routines
You can’t afford to let maintenance slide. Clean your machine after every use—dust and lint in the bobbin area cause up to 30% of stitch problems. Oil machine ports every 7-8 hours of continuous use following manufacturer specs.
Check needles weekly and replace when dull. Daily cleaning cuts downtime by 20%, and professional servicing once or twice yearly prevents 22-25% of major breakdowns.
DIY and Budget-Friendly Upgrades
You don’t need deep pockets to improve your sewing space. Swap clutch motors for brushless servo units at $100–$200—you’ll cut energy use by 60% and gain precision control. Add magnetic LED fixtures for under $30 to boost lighting by 45%.
Build a sturdy workstation from dual filing cabinets and countertop for under $75. Mount pegboards to reclaim desktop space, or retrofit adjustable heights using gas-lift mechanisms.
These DIY upgrades deliver professional results without the premium price tag.
Regular Equipment Inspection
Think of your industrial sewing machine like a car—it runs smoother with regular checkups. Daily visual inspections catch worn needles and misaligned presser feet before they trigger downtime. Weekly checks on gears, rotary hooks, and feed dogs keep machine components healthy.
Monthly reviews of belts and screws prevent safety issues, while annual documented inspections meet compliance standards and cut repair costs by 27%. This routine troubleshooting approach boosts your equipment maintenance game and slashes unexpected downtime.
Adapting The Setup as Needs Change
Your workspace should evolve with your work. Modular integration lets 87% of manufacturers reconfigure within three months—swap table adjustability or add mobile carts as projects shift.
Regular iterative improvements through workspace reconfiguration boost efficiency by catching bottlenecks early.
Future-proofing with adjustable tables and evolving ergonomics keeps productivity high while improving material handling as your operation grows.
Frequently Asked Questions (FAQs)
How to choose a sewing machine workspace?
You need to take into account three main factors: available floor space, lighting conditions, and noise control.
A standard industrial machine requires roughly 25 square feet per station, including table and walking room.
How do you set up a sewing machine?
Start by threading the needle and bobbin correctly—following your machine’s manual ensures proper tension adjustment and stitch quality. Choose the right needle for your fabric, wind the bobbin, and test accessories before sewing.
How do you design a sewing machine layout?
Picture a garment factory floor where operators walk hundreds of extra steps daily—that’s wasted time you can reclaim. Layout design starts with workflow optimization: position your industrial sewing machine for ergonomic machine placement, then map material flow from cutting through pressing.
Setting up an industrial sewing table means considering automation integration and space utilization to optimize workspace efficiency and safety.
How do I create a small sewing space?
You can set up a functional sewing space in even the smallest room by using multifunctional furniture like foldable tables, maximizing small sewing spaces with vertical storage solutions, and choosing portable setups that adapt to shared spaces through creative workspace design.
How do you sew clothes in a small space?
Think of it like threading a needle—you’ve got to make every inch count. Space-saving techniques like multi-functional furniture, portable machines, and clutter reduction transform tight quarters into functional sewing space.
Prioritize projects, use vertical storage, and position your workspace near outlets for an ergonomic industrial sewing table setup.
Is a small space too small for a sewing machine?
A small space isn’t necessarily too small for a sewing machine, but you need to verify the machine footprint and clearance standards first.
Most lockstitch machines require just 20-22 inches of workspace, while proper ergonomic layout demands 4-6 inches around each side for safe operation and material handling.
What industrial sewing machines work best for beginners?
A lock and key symbolize your entry point: beginner-friendly industrial sewing machines feature adjustable sewing speed controls, automatic thread control systems, and simplified fabric handling.
Look for beginner models with servo motors, knee lifts, and easy-to-use threading to master machine selection confidently.
How much space is required for dual-machine setups?
You’ll need roughly 10 feet of width and at least two feet of workspace depth for a dual machine setup. Position machines 24 inches apart for operator safety and comfortable reach.
This ergonomic layout ensures smooth material handling between your industrial sewing machines.
Which flooring types reduce vibration and operator fatigue?
Rubber flooring and anti-fatigue mats excel at vibration reduction and operator comfort. Epoxy coatings with rubber underlays provide durability while cushioning.
These materials decrease workplace injuries by 70% and reduce musculoskeletal discomfort by 25-50%, enhancing ergonomics and workplace safety.
How do humidity levels affect fabric and equipment?
Humidity control matters because moisture affects fabric shrinkage, static reduction, and corrosion prevention. Cotton shrinks up to 4% above 60% humidity, while high moisture corrodes metal parts and degrades lubricants.
Keep your workspace between 45-60% relative humidity for ideal fabric stability and sewing equipment longevity.
Conclusion
Think of your workspace as a garden—what you plant at the start determines the harvest later. A thoughtfully arranged industrial sewing machine workspace setup doesn’t just hold equipment; it grows efficiency, safeguards your body, and nurtures consistent quality.
Review your zones quarterly, adjust what strains you, and maintain what flows. When scissors land exactly where your hand expects them, when light reveals every stitch without squinting, you’re no longer fighting your environment—you’re working in harmony with it. That’s when productivity becomes sustainable.
- https://www.academia.edu/97916738/Guidelines_to_sewing_machine_workstation_design_for_improving_working_posture_of_sewing_operator
- https://apparelresources.com/business-news/manufacturing/the-sewing-machine-as-a-workplace/
- https://www.clinicalcasereportsint.com/open-access/ergonomic-evaluation-of-workstation-for-sewing-machine-operators-in-ethiopia-9501.pdf
- https://evo.support-en.dial.de/support/solutions/articles/9000080858-standard-values-for-the-textile-industry
- https://www.ppsthane.com/blog/lux-level-standards-industry

