This site is supported by our readers. We may earn a commission, at no cost to you, if you purchase through links.
Look for features like auto-digitizing, which turns images into embroidery-ready designs effortlessly, and powerful editing tools for tweaking stitch density or design specifics.
Check compatibility with your embroidery machine and prioritize a user-friendly interface.
Your budget matters too; beginner-friendly software costs less, while advanced options suit professionals.
Think of it like picking tools for a craft—go for what fits your skillset, but don’t shy away from a challenge, and a well-chosen program can feel like the stitch-perfect partner for your creative journey, with the right balance of features and ease of use.
Table Of Contents
Key Takeaways
- Focus on software that matches your skill level and budget, whether you’re a beginner or a pro.
- Look for features like auto-digitizing, stitch control, and format compatibility to simplify your workflow.
- Always check machine compatibility and read user reviews to avoid compatibility or functionality issues.
- Use free trials and tutorials to explore options, learn tools, and ensure the software meets your needs.
Choosing Embroidery Software
You’ll need to match your embroidery software to both your skill level and the specific features your projects require, much like finding the right needle for your fabric.
The right choice balances powerful digitizing tools with your budget constraints, ensuring you’re not paying for fancy bells and whistles you’ll never use.
While still getting the essential functions that’ll make your embroidery dreams come true.
Key Features to Look for in 2025
In 2025, embroidery digitizing software is all about smarter, faster, and more flexible features.
The key is AI Integration—AI tools effortlessly handle auto-digitizing, reducing manual effort. Expect Cloud Capabilities to keep designs secure and accessible, whether you’re at home or on the go.
Format Evolution guarantees compatibility with a wide range of embroidery machines, keeping your workflow smooth. Plus, simplified workflows offer a better User Experience, helping beginners and pros alike.
- AI-driven auto-digitizing simplifies intricate designs.
- Cloud storage safeguards projects anywhere.
- Format compatibility avoids file headaches.
- User-friendly tools keep learning curves low.
Factors to Consider When Choosing Software
Building on those cutting-edge features, let’s examine what actually matters when selecting your software.
When choosing embroidery digitizing software, six factors should guide your decision: machine compatibility, support reliability, feature alignment with your projects, user reviews, trial availability, and scalability needs.
Don’t overlook a thorough budget analysis and honest skill assessment. The perfect software balances powerful tools with your specific requirements—making your stitching journey smoother and more creative.
Budget and Skill Level Considerations
After traversing the selection factors for embroidery software, your wallet and expertise now come into focus.
Your budget and skill level are like two sides of the same stitch – both influence which embroidery digitizing software fits best. Beginners might start with SewArt or Ink/Stitch, keeping software cost low while you learn the basics.
Budget and skill must align, like thread and needle, to ensure your embroidery software helps your creativity flourish effortlessly.
As your skill growth progresses, consider how project complexity increases. That $99 program might save money now, but could limit business scalability later. Many users find that digitizing offers flexibility when creating unique designs.
Don’t bite off more than you can thread! Match the learning curve to your experience – beginner-friendly options offer tutorials, while advanced programs grant precision for professionals committed to mastering their craft. This approach ensures that you can grow with your software, making it a valuable investment.
Embroidery Digitizing Basics
You’ll transform your artwork into machine-ready patterns with embroidery digitizing software, which converts your designs into precise stitch instructions your machine can follow.
The right software acts like your personal translator between creative vision and technical execution, turning what used to take hours of manual coding into a streamlined process that even beginners can master with a bit of practice, allowing for technical execution.
What is Embroidery Digitizing Software
After exploring software options, let’s understand what you’re actually choosing.
What is embroidery digitizing software? It’s the bridge between your creative ideas and your embroidery machine.
This specialized tool converts artwork into stitch-ready files your machine can understand.
- Design Conversion: Transforms images into precise stitch patterns
- Stitch Control: Manages density, angles, and underlay stitches
- File Format Support: Handles formats like DST, PES, and JEF
- Machine Communication: Creates code your embroidery machine reads
- Design Manipulation: Lets you resize, edit, and combine designs
Think of it as your embroidery translator—turning artistic vision into stitch reality.
How It Works and Its Benefits
Think of embroidery digitizing software as your stitching navigator. It transforms artwork into machine-ready files while boosting the digitizing process with precision and efficiency gains.
With control over stitch types and design scalability, you’ll love the creative freedom it offers. Plus, tools like stitch simulation guarantee perfect outcomes every time.
| Feature | Benefit | Example |
|---|---|---|
| Stitch Simulation | Avoid costly mistakes | Preview designs before stitching |
| Workflow Tools | Efficiency gains | Faster project completion |
| Stitch Control | Precision adjustments | Modify stitch density and angles |
| Scalability | Versatile designs | Resize without losing quality |
| File Formats | Machine compatibility | Convert files to DST, PES, and EMB |
The software offers various benefits, including efficiency gains and precision adjustments, making it an essential tool for embroidery digitizing.
Essential Software Features
When diving into embroidery digitizing software, focus on key features that boost both creativity and efficiency.
Here’s what to look for:
- Stitch Control: Adjust density, angles, and layering for flawless results.
- File Conversion: Confirm compatibility across machines like.PES, .DST, and.JEF.
- Vector Support: Create smooth, scalable designs, avoiding pixelation at all sizes.
- Design Libraries & Cloud Integration: Access pre-made designs and store projects anywhere for seamless workflows.
Choosing software with these essentials will keep every project on point, whether you’re a hobbyist or a pro!
Evaluating Software Options
Choosing software? Start with a feature comparison—focus on tools like auto-digitizing, file compatibility, and scalability needs.
Check trial limitations to confirm they include the features you need. User reviews can reveal real-world pros and cons.
Prioritize support availability if you’re new to embroidery digitizing software.
| Feature | Why It Matters | Questions to Ask |
|---|---|---|
| Auto-Digitizing | Speeds up designs | Is it accurate enough? |
| File Compatibility | Avoids conversion issues | What formats are supported? |
| Scalability | Grows with your skills | Will it meet future needs? |
| Support Options | Eases troubleshooting | Is help timely/reliable? |
Software Types and Considerations
Choosing embroidery software might seem tricky, but it’s all about matching your needs with the right tools.
Whether you’re a beginner, a pro, or somewhere in between, the right software makes all the difference.
Beginner-Friendly Options
Starting your embroidery digitizing journey? Go for beginner-friendly software like Embrilliance Essentials or Brother PE-Design Lite.
These programs shine with a simple interface, basic features, and affordable pricing. You’ll find auto-digitizing, resizing tools, and built-in designs right at your fingertips.
Need guidance? Easy tutorials and step-by-step guides make these the easiest software options for quick results.
If you’re looking for options, consider exploring suitable software products for your needs.
Want to test the waters? Many brands offer free trials so you can explore digitizing software before committing. It’s as smooth as stitching your first pattern!
Professional-Grade Software
Professional-grade embroidery software helps you achieve precision and creativity effortlessly. With options like Wilcom Embroidery Studio, Hatch Embroidery, and Floriani Total Control U, you’ll have all the tools needed for complex designs and high-quality output.
These platforms are designed for professionals tackling bulk orders or intricate customizations. Here’s why they’re worth considering:
- Advanced Stitching: Gain full control with stitch-by-stitch editing.
- Vector Graphics Support: Guarantee crisp, scalable designs every time.
- Scalability Tools: Handle growing workloads without a hitch.
- Cloud Access: Easily share and collaborate on designs globally.
While these solutions cost more, their efficiency and ability to produce professional-grade results make them a worthwhile investment. Many users find that Embrilliance offers flexibility with its modular system.
Machine-Specific Software
Machine-specific embroidery software guarantees optimized performance by tailoring features to each brand’s quirks.
For example, Brother PE-Design enhances workflow, while Bernina ArtLink 9 offers exclusive features perfectly suited to its machines.
Sticking to brand loyalty simplifies software bundling and guarantees format compatibility.
Brand Software Key Feature
Remember—limited compatibility may require you to tweak designs or update machine settings!
Mastering Embroidery Digitizing
Mastering embroidery digitizing takes patience and practice, but it’s simpler than you might think with the right tools.
You’ll learn to turn images into detailed stitch patterns, avoiding common pitfalls along the way.
Learning Embroidery Digitizing Step by Step
Learning embroidery digitizing takes patience and practice.
Start with easy designs, using beginner-friendly embroidery digitizing software. Watch an embroidery digitizing tutorial to master basics like stitch types and workflow details.
Here’s a simple plan:
- Pick your tools: Choose proper software, fabric, and stabilization techniques.
- Follow steps: Import a basic design, adjust settings, and explore embroidery digitizing techniques like Color Selection.
- Experiment: Test stitches and save frequently, even if mistakes happen.
Embroidery digitizing is a hands-on learning process—embrace it!
Tips for Improving Digitizing Skills
Sharpening your embroidery digitizing skills is like perfecting a recipe—patience, practice, and curiosity are key.
Experiment with digitizing software to refine your stitch consistency and explore embroidery digitizing techniques like fabric compensation or underlay stitching. One option is free embroidery software for design creation.
Analyze designs like a designer sleuth. Pay attention to key details:
- Stitch refinement: Adjust density to avoid clumping or gaps.
- Lettering mastery: Test fonts for clean, crisp results.
- Underlay techniques: Build a solid stitch foundation for stability.
Routine practice matters. Recreate simple designs to polish skills, and study tutorials for stitch editing tricks. Progress happens when you’re hands-on and open to learning.
Common Mistakes to Avoid
Skipping test stitches is like heading into a storm without an umbrella—it’s risky.
Ignoring fabric types? That leads to puckers or thread breaks. Poor density or skipped stitch direction checks? Surefire headaches. Neglecting underlay results in saggy disasters, while skipping push compensation messes up alignment.
| Mistake | Result | Prevention Tip |
|---|---|---|
| Poor Density | Thread breaks | Adjust density settings |
| Underlay Neglect | Uneven designs | Use proper stabilizers |
| Wrong Fabric Choice | Puckering, distortion | Match fabric to design |
Tools like stitch editing in embroidery digitizing software fix many embroidery mistakes. Good troubleshooting spells success!
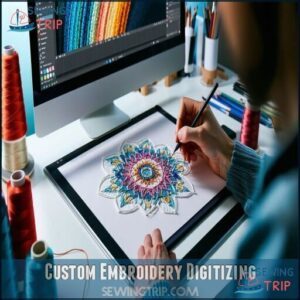
Custom Embroidery Digitizing
Custom embroidery digitizing lets you turn unique ideas into precise, machine-readable designs customized to your needs.
It’s all about having full control over every stitch, making it perfect for creating one-of-a-kind projects with professional results.
Factors That Make Custom Digitizing Important
Custom embroidery gives your designs individuality and flair. With embroidery digitizing software or custom embroidery services, you can craft embroidery that reflects your brand identity and meets specific needs.
Custom digitizing guarantees your project pops with intricate details while staying suited to the fabric. Quality control is another huge perk.
Professionals fine-tune embroidery design files to avoid puckering or distortion, so your stitches are crisp and consistent.
- Consistency matters: Logos and designs stay uniform across hats, bags, and shirts.
- Complexity simplified: Even the most intricate details shine with professional digitizing.
Whether it’s a business logo or unique art, custom digitizing elevates every stitch.
How to Create Custom Embroidery Designs
Think of creating custom embroidery designs as blending art and engineering.
Start with embroidery digitizing software to plan stitch types based on your design complexity.
Pick color palettes that complement the fabric choice, and adjust stitch density to avoid puckering.
Use stabilization techniques to keep your embroidery design precise during stitching.
Edit patterns for texture and layering, focusing on intricate details.
Great design creation thrives on patience, creativity, and a touch of experimentation to perfect.
Benefits of Custom Embroidery Digitizing
When you embrace custom embroidery digitizing, your creative ideas transform into stitch-perfect realities.
It’s a game-changer for achieving design uniqueness and intricate details, all while building your brand identity.
- Save money by reducing outsourcing costs.
- Boost stitch quality with detailed control over every design.
- Scale designs effortlessly, handling both small and large orders.
- Bring complex designs to life, showcasing precision and craftsmanship.
Many users find digitizing designs simple with the right software.
Get the edge using embroidery digitizing software today!
Embroidery Software Features
You’ll find that great embroidery software isn’t just about creating designs, it’s about having the tools to edit, customize, and perfect every detail.
With features like auto-digitizing, built-in design libraries, and powerful editing tools, you can bring your ideas to life without breaking a sweat, utilizing great embroidery software to achieve your goals.
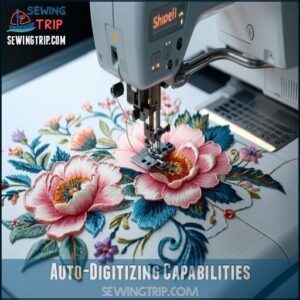
Auto-Digitizing Capabilities
Auto-digitizing in embroidery design software is like having a skilled assistant by your side.
These features make embroidery faster and easier, especially when tackling complex designs. Here’s how embroidery digitizing software simplifies the process:
- AI Conversion: Quickly transforms images, preserving image quality in vector-like precision.
- Stitch Optimization: Automatically adjusts tension for flawless, smooth curves.
- Automation Accuracy: Guarantees consistent, high-quality results.
- Real-Time Previews: Instantly shows likely stitch issues.
- Batch Processing: Speeds up handling multiple designs.
Autodigitizing confirms you’re ready to edit with confidence!
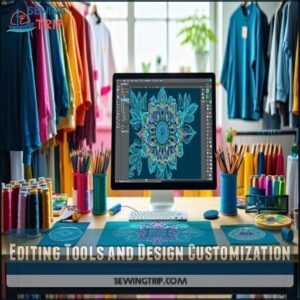
Editing Tools and Design Customization
It’s exciting when editing tools allow you to mold embroidery designs like an artist at work.
Using stitch editing, you can fine-tune angles, textures, or even densities for a flawless finish. Node editing puts you in control, letting you shape paths with surgeon-like precision.
Got bold ideas? Experiment with design tweaks—from reshaping to enhancing details—while real-time previews keep surprises at bay.
Resizing designs is effortless, thanks to auto-density that keeps stitches smooth. Add depth with custom layering, or explore color palettes to make designs pop.
Whether it’s monogramming options or appliqué creation, these tools offer flexibility for true design customization.
Built-in Design Libraries and Pre-made Designs
Built-in design libraries in embroidery software offer incredible design variety, saving you time with pre-made designs like florals and motifs.
These embroidery design collections support customization options, letting you tweak and stitch with ease.
Many users find inspiration from extensive online resources.
Check for licensing rights to avoid commercial hassles.
Mind storage limitations, ensuring access to high-quality designs that fit your machine’s capabilities and project needs.
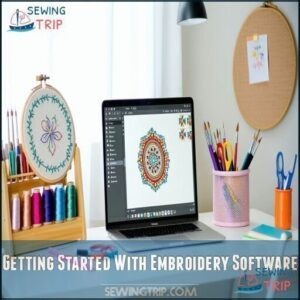
Getting Started With Embroidery Software
Getting started with embroidery software doesn’t have to feel overwhelming if you break it down into manageable steps.
From installing the program to understanding the interface, you’ll be stitching like a pro in no time.
Setting Up and Installing The Software
Getting your embroidery digitizing software up and running can feel like setting up a new gadget—simple, if done right. Start by checking the system requirements to confirm your computer can handle the software’s load.
Once ready, the installation process is straightforward:
- Download from the official site to avoid malware.
- Temporarily pause antivirus software—it can flag the setup file incorrectly.
- Keep your software activation key handy for licensing.
To easily manage your licenses, consider purchasing a valid software key.
Don’t forget machine-specific driver installation if needed. If something goes wrong, don’t sweat it. Many brands offer troubleshooting errors guides or live chat support to fix issues and get you stitching in no time.
Understanding The User Interface and Navigation
Once your embroidery software is installed, the user interface becomes your creative playground.
You’ll notice menu organization designed to boost workflow efficiency, with toolbar customization and intuitive layouts.
Hover over icons for visual feedback—a quick way to learn functions while exploring.
Keep shortcut keys handy; they’re time savers!
Adjust panels to fit your style and make certain icon clarity so navigation feels smooth, letting your creativity flow effortlessly.
Importing and Editing Designs
Bringing your artwork into embroidery digitizing software sets the stage for creativity. Start by importing designs in formats like JPG, PNG, or vector SVG, ensuring compatibility. Use the editing tools for precise Design Resizing, Object Manipulation, or Color Adjustments.
- Resize or rotate your design to fit your project.
- Apply Stitch Modifications—adjust direction, density, and layering.
- Perform Format Conversion for embroidery-ready files.
Simple tweaks create flawless results!
Customizing and Optimizing Embroidery Settings
Fine-tuning embroidery settings boosts your design game. Start by adjusting stitch density based on your fabric—tight for silk, looser for terry cloth. Solid underlay stitching acts as a sturdy base, like a brick foundation.
Use pull compensation to make up for fabric stretch, and control thread tension to avoid messy backsides. Experiment confidently!
- Stitch density: Tailor it to fabric type.
- Underlay settings: Confirm a stable stitch foundation.
- Pull compensation: Prevent distorted designs.
- Color blending: Add depth with thread shades.
- Fabric stabilization: Prevent puckering with proper backing.
Frequently Asked Questions (FAQs)
What is digitizing in embroidery?
Imagine turning drawings into thread-art symphonies—digitizing in embroidery does exactly that.
It’s converting designs into machine-readable files, instructing stitch paths, types, and densities, bringing your creative visions straight onto fabric with precision.
Which software is easiest to use for embroidery digitizing?
For ease of use, Hatch Embroidery is a top pick.
Its simple and intuitive interface, paired with excellent tutorials, makes it beginner-friendly.
You’ll quickly master essentials without feeling overwhelmed by complex features.
Is SewArt a good embroidery digitizing software?
You might think SewArt is too basic, but it’s actually fantastic for beginners.
It offers easy auto-digitizing and basic editing tools, making it perfect for simple designs.
Just note, advanced features are pretty limited, and SewArt is not ideal for complex projects.
What are some add-ons for Perfect Embroidery Professional?
Perfect Embroidery Professional offers add-ons like My Quilt Planner for custom quilting designs.
Word Art in Stitches is available for creative text layouts, and ColorPlay for experimenting with thread color combinations, adding versatility to your embroidery projects, with My Quilt Planner offering custom quilting designs.
Is embroidery software necessary?
Embroidery software acts like a skilled conductor guiding an orchestra.
It’s essential for precise design creation, stitch control, and file conversion.
Without it, your machine may hit the wrong notes, wasting fabrics and time, which underscores the importance of embroidery software.
Is there a free trial for embroidery digitizing?
Most embroidery digitizing software, like Hatch and Wilcom, offers free trials.
You’ll get a chance to test features, learn the interface, and see if it matches your needs before committing.
Give it a try!
What is the best program to digitize embroidery?
In the area of digitizing embroidery, Hatch Embroidery is a slam dunk for beginners and hobbyists.
Wilcom Embroidery Studio shines for pros needing precision and advanced tools.
Pick based on your skill and budget!
How to learn digitization?
Start by exploring free tutorials on YouTube or platforms like Udemy.
Practice with beginner-friendly software like Hatch. Experiment with images to see how stitch paths work.
Join online forums for tips and constructive feedback on your stitch paths and overall design to improve your skills, focusing on constructive feedback.
What is the best file format for embroidery digitizing?
For flawless finishes, formats like DST or PES are your best bet.
They’re universally accepted, machine-friendly, and preserve design details.
Think of them as the gold standard for seamless stitching and sharp results.
How much does it cost to get a design digitized for embroidery?
Digitizing a design for embroidery typically costs $10–$50, depending on its complexity and size.
You’ll often pay the higher end for intricate details, but simple logos or text typically fall on the cheaper side.
Conclusion
Choosing the right embroidery digitizing software doesn’t have to feel overwhelming.
Start by sorting software by skill level, features, and your budget. A user-friendly interface paired with functions like auto-digitizing makes a massive difference, especially for beginners.
Professionals will value advanced editing tools for intricate designs. Prioritize machine compatibility and experiment with different options.
Remember, investing time in learning the software is key. With determination and a great tool, your projects will have stitch-perfect precision every time!

