This site is supported by our readers. We may earn a commission, at no cost to you, if you purchase through links.
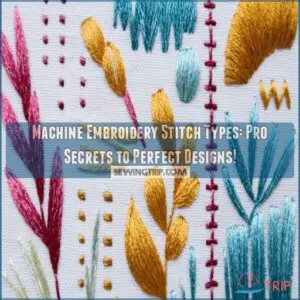
Machine embroidery stitch types are your secret weapon for stunning designs.
Running stitches will help you create razor-sharp lines, while satin stitches deliver those crisp, clean edges that make projects pop.
Fill stitches are your go-to for adding rich texture and depth – think tatami for smooth coverage or zigzag for dynamic backgrounds.
Pro tip: keep your satin stitch length under 10mm and density tight at 0.3mm to prevent fabric snags.
Mastering these machine embroidery stitch types means you’ll transform ordinary fabric into extraordinary art that’ll have everyone asking, "Where’d you learn that?
Table Of Contents
Key Takeaways
- Master running stitches for sharp lines and fine details; control stitch length between 1.25-7mm for precision.
- Use satin stitches for smooth, shiny edges and keep stitch length under 10mm with density at 0.3mm to avoid snags.
- Apply fill stitches like tatami for medium texture and zigzag for dynamic backgrounds to add depth to your designs.
- Match stitch types to your fabric, adjust density, and use stabilizers to prevent puckering and ensure professional results.
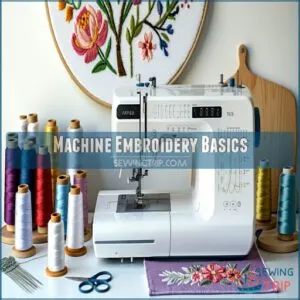
Machine Embroidery Basics
Ready to transform your machine embroidery from bland to brilliant? Mastering stitch types is your secret weapon for creating jaw-dropping designs that’ll make even professional crafters do a double-take.
Running Stitch Uses
Often, running stitches are your secret weapon for breathtaking embroidery detail.
You’ll love how these nimble stitches create razor-sharp lines without overwhelming delicate fabrics.
Mastering stitch length control between 1.25-7mm lets you nail fine detail work, whether you’re quilting intricate patterns or adding whisper-thin edging to your project.
Pro tip: choose your thread wisely! Understanding the running stitch basics is essential for achieving professional-looking embroidery results.
Satin Stitch Characteristics
After nailing your running stitch basics, you’re ready to master satin stitches – the rockstars of embroidery.
Here’s your cheat sheet for satin stitch success:
- Aim for smooth, shiny lines that pop
- Keep stitch density tight (around 0.3mm)
- Limit length to 10mm to prevent fabric snags
- Choose threads that complement your fabric’s texture
Satin stitches transform ordinary designs into eye-catching masterpieces with their crisp, clean edges, making them a key element in achieving embroidery perfection.
Fill Stitch Applications
Mastering fill stitch techniques transforms your embroidery from flat to fabulous.
Here’s a quick guide to discover those background design secrets:
| Stitch Type | Primary Use | Texture Level |
|---|---|---|
| Tatami Fill | Large Areas | Medium |
| Zigzag Fill | Textured Backgrounds | High |
| Mosaic Fill | Complex Patterns | Varied |
| Standard Fill | Basic Coverage | Low |
Experiment with different densities and directions to create stunning, professional-looking embroidery textures that’ll make your designs pop!
Embroidery Stitch Types
Building on the machine embroidery basics, let’s explore the sphere of embroidery stitch types that’ll transform your designs from basic to brilliant.
Your creative toolkit includes a variety of stitches, each with its own superpowers:
- Running stitch for delicate details
- Satin stitch for crisp borders
- Fill stitch for textured backgrounds
- Zigzag stitch for dynamic edges
- Bean stitch for dimensional effects.
Understanding these embroidery stitch types means you’ll discover endless design possibilities and take your machine embroidery skills to the next level.
Mastering machine embroidery stitches is key to creating professional-looking designs with various stitch types.
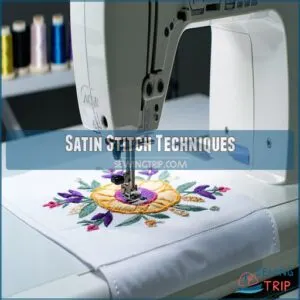
Satin Stitch Techniques
Master the art of satin stitch in machine embroidery and you’ll transform your designs from basic to brilliant.
Whether you’re creating crisp letters or smooth, shiny surfaces, understanding satin stitch techniques will give you the pro-level edge you’ve been craving.
Satin Stitch Density
Every detail matters when you’re fine-tuning satin stitch density in machine embroidery.
Your stitch density can make or break a design’s professional look.
Understanding the normal density settings is vital for achieving superior results.
Check out this quick reference guide:
| Density Factor | Impact on Embroidery |
|---|---|
| Low Density | Loose, transparent appearance |
| High Density | Stiff, potentially damaged fabric |
| Ideal Density | .4 to.45 mm spacing |
| Fabric Consideration | Adjusts density based on material type |
Satin Stitch Length
With precision in machine embroidery, satin stitch length makes or breaks your design’s impact.
Getting it right requires careful consideration:
- Keep lengths between 3-10mm for ideal visual appeal
- Adjust based on fabric weight and design complexity
- Test different lengths to find your sweet spot
Experiment boldly – your thread tension and fabric selection will guide you toward stitch optimization that truly shines.
Satin Stitch Uses
After nailing your satin stitch length, you’ll want to explore its versatile uses. Satin stitches shine in creating crisp letter borders, smooth fills, and eye-catching patch edges.
| Stitch Use | Best For | Pro Tips |
|---|---|---|
| Letter Outlines | Small Lettering | Keep under 10mm |
| Color Blending | Texture Effects | Vary stitch density |
| Border Accents | Patch Edges | Maintain smooth flow |
Master these techniques to elevate your embroidery game with killer satin stitch designs.
Fill Stitch and Specialty Stitches
When you’re ready to level up your machine embroidery skills, mastering fill stitches and specialty stitches is your secret weapon.
You’ll transform ordinary designs into textured, eye-catching masterpieces by understanding how these versatile stitches can add depth, dimension, and professional flair to your embroidery projects.
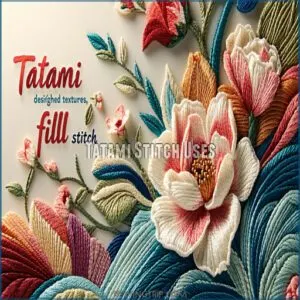
Tatami Stitch Uses
In the realm of machine embroidery, the tatami fill stitch becomes your secret weapon for creating rich, textured designs.
By manipulating stitch density and direction, you’ll transform ordinary fabric into a canvas of intricate embroidery textures.
Master this technique to optimize your design, giving your embroidery projects a professional edge that stands out from the crowd.
Understanding various types of sewing stitches is essential to achieve the desired embroidery effects and textures in your projects.
Zigzag Stitch Applications
On the cutting edge of machine embroidery, zigzag stitches transform your designs with their dynamic flair.
They’re perfect for edge finishing and handling fabric stretch, creating organic borders that dance along curved lines.
Whether you’re crafting appliqué patches or adding decorative touches, these versatile machine embroidery stitches bring life to your creative vision.
Mastering the use of a zigzag stitch machine is essential for achieving professional-looking results in various embroidery projects.
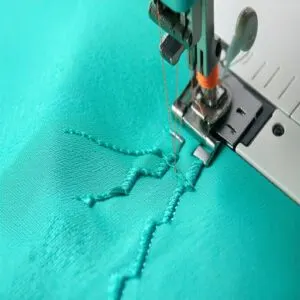
Bean Stitch Characteristics
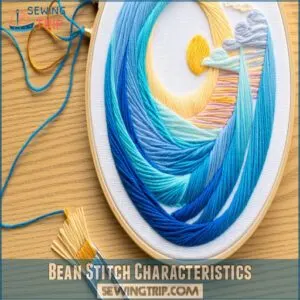
After exploring zigzag stitches, let’s zoom in on bean stitches – your secret weapon for bold, dynamic embroidery designs.
These powerhouse stitches bring serious punch to your work:
- Create defined edges with less thread density
- Handle curved outlines like a pro
- Build bolder, more pronounced design elements
- Provide exceptional outline control without fabric distortion
Master bean stitch techniques, and watch your embroidery designs transform from good to jaw-dropping.
Digitizing Considerations
When you’re ready to transform your embroidery designs from good to extraordinary, understanding digitizing considerations becomes your secret weapon.
Master the art of selecting the right stitch types, adjusting density, and matching techniques to your fabric, and you’ll achieve professional-grade results that’ll make your designs pop.
Stitch Type Combinations
Mastering embroidery stitch combinations is like being a design DJ—mix and match your favorite tracks to create killer artwork.
Blend running, satin, and fill stitches strategically to add depth and texture.
Experiment with thread choices and lengths to discover creative stitch patterns that’ll make your machine embroidery pop with personality and precision.
To achieve professional results, understanding embroidery digitizing software is vital for optimizing stitch combinations and design customization.
Fabric Compatibility
Great tip from your stitch combo exploration: your fabric choice can make or break an embroidery project.
Different fabric types demand unique thread selection strategies, weave patterns, stretch factors, and fiber content impact your design’s success.
Whether you’re working with sturdy cotton or tricky knits, understanding fabric characteristics helps you choose the right embroidery stitches for beginners.
Stitch Quality Factors
Since stitch quality can make or break your embroidery project, understanding key factors is vital.
Your embroidery success hinges on these critical elements:
- Thread tension affects overall stitch appearance
- Needle selection impacts fabric penetration
- Fabric choice determines stitch stability
- Embroidery speed influences stitch precision
Mastering these stitch quality factors guarantees professional-looking machine embroidery every time.
Machine Maintenance Tips
Every few months, give your embroidery machine some TLC through regular maintenance.
Keep your machine running smoothly with routine oil changes, checking thread tension, and replacing needles before they wear out.
Clean the bobbin area, remove lint, and inspect moving parts.
Using the right embroidery machine oil is vital for maintaining superior machine performance.
These simple steps prevent costly breakdowns and guarantee high-quality stitch quality in your machine embroidery projects, ensuring your machine continues to operate with routine oil changes.
Frequently Asked Questions (FAQs)
What type of stitch do embroidery machines use?
You might think embroidery machines only use one stitch, but nope—they handle various types like satin, fill, and running stitches.
Each adds unique detail, from smooth borders to textured fills, depending on your design.
What is the difference between a run stitch and a satin stitch?
A run stitch is a simple, thin line perfect for outlines and fine details,
while a satin stitch is thicker, shiny, and smooth, ideal for bold designs like lettering or small decorative elements.
What is the difference between satin and tatami stitch?
Think of satin stitch as smooth silk and tatami stitch as woven fabric.
Satin gives shiny, crisp finishes for small areas, while tatami efficiently fills larger spaces with a flatter, textured look perfect for backgrounds.
What types of embroidery stitches are there?
You’ve got running stitches for outlines, satin for smooth borders, fill for large areas, bean for bold edges, zigzag for textured lines, and even manual stitches for total creative control.
This single sentence encompasses all the stitch types and their uses, making it a complete concept that does not require further separation for clarity.
What embroidery machine is best for beginners?
Did you know 80% of beginners prefer user-friendly embroidery machines?
Start with a Brother SE600—it’s affordable, reliable, and offers built-in designs.
Plus, it’s simple enough to avoid turning your first project into chaos with a Brother SE600.
How much does professional embroidery digitizing cost?
Professional embroidery digitizing costs vary, typically ranging from $10 to $50 per design, depending on complexity and size.
Simple logos are cheaper, while intricate designs or custom work might push the price higher.
Can I embroider on stretchy knit fabrics?
Imagine this scenario: you’re embroidering a stretchy T-shirt, and it puckers.
To avoid this, use a stabilizer, reduce stitch density, and choose stretchy-friendly stitches like zigzag.
Test first—your fabric will thank you!
What thread types work best for embroidery?
Polyester thread works best for durability and colorfastness, while rayon adds a shiny, smooth finish.
Cotton threads offer a matte look for vintage vibes.
Match thread weight to your design—too thick or thin can ruin stitches, consider colorfastness for the best results.
How do I prevent fabric puckering during embroidery?
It’s funny how fabric puckers right when you’re nailing the design, right?
Use stabilizers, adjust thread tension, and lower density in tight areas.
Test on scrap fabric first—it’ll save you frustration later.
Conclusion
Think of mastering machine embroidery stitch types like learning a new recipe – the right ingredients (stitches) make all the difference.
Running stitches outline your design with precision, satin stitches add that polished flair, and fill stitches bring depth and texture.
Mix and match these techniques while keeping fabric compatibility in mind, and you’ll create designs that truly stand out.
With practice and a little patience, your embroidery projects will go from ordinary to extraordinary in no time, using the right combination of stitches like fill stitches.
- https://www.digitizingmadeeasy.com/machine-embroidery-stitch-types/
- https://www.mrxstitch.com/the-only-stitch/
- https://forum.embroideres.com/blogs/entry/180-machine-embroidery-stitch-types-and-limitations/
- https://zdigitizing.com/machine-embroidery-stitch-types/
- https://inkstitch.org/docs/stitch-library/

