This site is supported by our readers. We may earn a commission, at no cost to you, if you purchase through links.
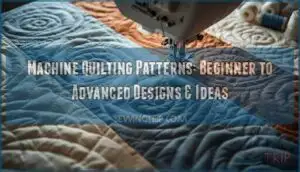
Your first quilt sandwich sits under the machine needle, and suddenly that beautiful pieced top feels vulnerable. One wrong move with the quilting pattern and months of work could bunch, pucker, or worse—look amateurish.
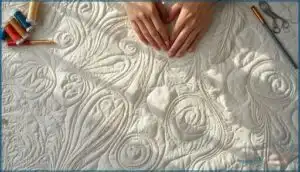
But here’s what experienced quilters know: machine quilting patterns aren’t just decoration. They’re the architecture that holds your quilt together, adds dimension, and transforms flat fabric into something you’ll want to touch. The pattern you choose determines whether your quilt hangs stiff as cardboard or drapes like a dream.
Whether you’re running straight lines with a walking foot or diving into free motion swirls, matching the right pattern to your project makes the difference between “I made this” and “I’m never showing anyone this.
Table Of Contents
Key Takeaways
- Quilting patterns serve as structural architecture that determines both the durability and drapeability of your finished quilt, not just decoration.
- Beginners should master foundational techniques like stitch in the ditch, straight line quilting, and simple meanders before advancing to complex free motion designs like feathers or intricate pantographs.
- Choosing the right pattern requires matching your quilting style to your quilt’s design (traditional blocks pair with feathers and loops, while modern quilts shine with geometric grids), considering texture density for your desired drape, and honestly assessing your skill level.
- Thread weight, batting type, and quilting density work together to control pattern visibility and fabric texture—with 40-weight thread and thoughtful spacing creating the most versatile results for everyday quilts.
Essential Machine Quilting Patterns for Beginners
Starting your machine quilting journey doesn’t mean you need to tackle complex patterns right out of the gate. The best way to build your skills and confidence is to master a handful of foundational techniques that work beautifully on nearly any quilt.
Let’s look at four essential patterns that’ll give you a solid starting point and set you up for success as you grow.
Stitch in The Ditch
Stitch in the Ditch is your foundation for quilt stability and seam reinforcement. This Machine Quilting for Beginners technique creates invisible stitches right in the seamlines, holding your layers together without changing your design. Here’s what makes it work:
- Use a ditch foot to boost stitch accuracy by 70%
- Press seams to one side for stronger, more durable joins
- Perfect for stabilizing before adding Free Motion Quilting or other Machine Quilting Designs
Understanding quilting techniques is essential for mastering Stitch in the Ditch.
Straight Line Quilting
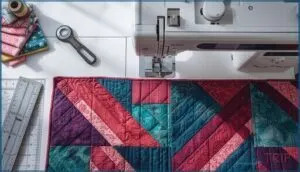
Once you’ve mastered Stitch in the Ditch, straight line quilting opens up a world of creative possibilities. Your walking foot keeps fabric tension even while you experiment with grids, diagonal runs, or radiating designs.
Set your stitch length between 2.5-3mm and your quilting speed at three-fourths max—this combo prevents puckering and gives you confident control. These machine quilting designs work beautifully for both backgrounds and bold accents.
For a successful quilting process, understanding quilting design basics is essential.
Simple Meander Designs
Now you’re ready to free your hands and create something that flows. Simple meander designs teach curve control and rhythm—just guide your fabric under the needle while moving in random, looping paths that never cross. Set your stitch length around 2.5–3 mm and let your hands do the steering.
Here’s what makes meander basics work for you:
- Curve Control: Keep your curves gentle (about 1.5–3 inches wide) so your hands move smoothly without jerking.
- Quilt Texture: Meandering adds soft dimension and reduces quilting time by 30% compared to complex machine quilting designs.
- Free Motion Practice: Over 60% of beginners start here because it builds confidence fast—you’ll see improvement after just three sessions.
This free motion quilting technique creates beautiful texture while you master essential quilting techniques for future machine quilting patterns.
Echo Quilting Basics
Once you’ve practiced those looping curves, echo quilting gives you a new way to highlight your piecing. You’ll stitch parallel lines about 1/4 inch from seams or appliqué edges—your presser foot becomes your guide. This quilting technique works beautifully with a walking foot for straight shapes or free motion quilting for curves, and it’s one of the top three beginner-friendly machine quilting patterns.
| Aspect | Walking Foot | Free Motion Approach |
|---|---|---|
| Best For | Straight blocks, borders | Curved appliqués, organic shapes |
| Stitch Speed | 500–1500 spm | 500–800 spm for detail |
| Thread Types | Cotton or silk topstitching | Finer bobbin, cotton top |
| Quilt Density | Uniform texture, 1/8–1/2″ spacing | Variable density for emphasis |
Your fabric choices matter—71% of echo-quilted projects use 100% cotton for stable stitch tension. Mark your guidelines with water-soluble pens, or trust your foot’s edge as a spacer. You’ll add soft dimension while mastering essential quilting techniques that prepare you for complex quilting designs and patterns ahead.
Popular Free Motion Quilting Patterns
Free motion quilting opens up a whole new world of creative possibilities once you’ve mastered the basics. These patterns let you move your quilt in any direction, creating flowing designs that add personality and texture to your work.
Let’s explore four popular free motion patterns that will take your quilting from functional to fabulous.
Pebbles and Stippling
If you’re craving texture that pops, pebbles and stippling are your free motion quilting powerhouses. Pebbles create raised, bumpy relief—perfect when you want that dimensional wow factor. Stippling, on the other hand, recedes beautifully, making your main quilting designs shine.
Both patterns demand smart thread choices and adjusted machine settings. Pay attention to quilting density: tighter fills need finer thread, while looser spacing keeps your digital quilting designs soft and inviting.
Loopy Meander
Want speed without sacrificing style? Loopy meander delivers both, finishing quilts up to ten times faster than straight lines. This foundational free motion quilting design builds your coordination while creating whimsical texture across any fabric.
Master these essentials:
- Loop density between 0.5 to 1.5 inches controls flatness
- Scale variation impacts completion time dramatically
- Machine speed aligned with hand movement prevents skipped stitches
- Thread choice like darker neutrals ensures consistent appearance
Swirls and Spirals
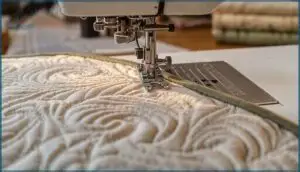
By adding swirls and spirals to your free motion quilting toolkit, you’ll bring movement and texture to any project. These expressive swirls work beautifully as filler stitches or allover quilting designs.
Template usage helps maintain consistent spiral density—aim for 8–12 swirls per square foot. Practice swirl direction clockwise to reduce bulk, and remember: elongated curves create more elegant results than tight circles.
Feathers and Plumes
Feathers and plumes stand as one of the most celebrated free motion quilting motifs, though they’ll test your skills. These intermediate-to-advanced quilting patterns feature a central spine with radiating plumes—perfect for showcasing your machine quilting techniques.
- Design Variations: Choose traditional symmetrical feathers or modern organic plumes for different effects
- Skill Development: Practice drawing feathers repeatedly before moving to your machine
- Motif Placement: Adapt feather quilting to fill squares, triangles, or curved spaces
- Troubleshooting Tips: Maintain slow, controlled speed to avoid wobbly spines and uneven spacing
Walking Foot Quilting Pattern Ideas
Walking foot quilting gives you control and precision that’s perfect when you want clean, structured designs. It’s your best friend for creating straight or gently curved lines without wrestling with your quilt sandwich.
Let’s explore four adaptable patterns that’ll help you build confidence while creating beautiful texture on your projects.
Wavy Line Patterns
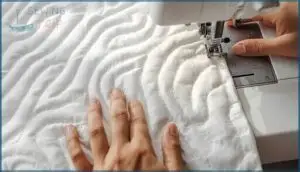
Wavy line patterns bring instant texture enhancement to your quilts with organic movement that softens rigid piecing. This beginner-friendliness makes them perfect for new quilters—you’ll finish a lap quilt in just 2–3 hours.
The time efficiency and design adaptability work across all quilt styles, from modern minimalist to traditional patchwork. These machine quilting techniques offer visual softening while hiding minor piecing mistakes.
| Wavy Line Variant | Best For |
|---|---|
| Non-crossing lines | Clean, modern quilting designs |
| Intentionally crossing | Dense texture, free motion quilting designs |
| Parallel spaced lines | Even coverage, controlled machine quilting patterns |
| Loose spacing (1–2″) | Quick projects, functional quilts |
| Dense spacing (1/2″) | Show quilts, machine quilting techniques showcase |
Grid and Crosshatch Designs
Think of grid patterns and crosshatch techniques as the backbone of geometric designs—they give your quilt structure while adding satisfying quilting textures. Set your stitch optimization at 2.5–3 mm, then use a walking foot to maintain precision.
These machine quilting patterns work brilliantly alone or paired with free motion quilting accents. Digital quilting files and longarm quilting systems nail consistent spacing every time.
Curved Line Quilting
Curved seams introduce flowing, organic movement that softens straight-line grids. Medium to large curves work best, and you’ll master this walking foot technique by pivoting gently and managing your quilting pace control.
Mark your quilt path planning with a ½-inch grid, then practice smooth fabric management at intersections. Thread tension stays consistent when you stop with the needle down, building confidence as you create those signature pod-like shapes.
Channel Quilting Variations
Channel lines branch beyond simple parallels—you can angle them diagonally, group them in clusters, or vary spacing from ½ inch to 1½ inches to control channel density and texture. Quilting software helps plan these stitch variations before you commit, preventing fabric distortion.
Spacing at 1 to 1.5 inches balances durability with softness, perfect for everyday quilts that need regular washing.
Decorative Allover Quilting Patterns
Allover patterns are where you can really let your creativity shine and transform your quilt into something remarkable.
These designs cover the entire quilt surface with repeating motifs that add texture, movement, and visual interest to any project.
Whether you’re drawn to flowing curves or structured geometry, you’ll find options that match your style and skill level.
Orange Peel Design
The Orange Peel design brings a rich piece of quilting history to your modern projects. Dating back to the 1800s, this pattern features interlocking curved piecing that creates stunning visual movement.
You’ll find it works beautifully with free motion quilting or digital longarm patterns. Use quilting templates to master those signature curves, and explore peel variations to make the design uniquely yours.
Clamshells and Waves
Clamshell variations and wave density create quilting rhythm that flows across your entire project. These combined patterns blend tradition with modern aesthetics—semicircles stacked in rows paired with undulating lines that soften rigid edges.
You’ll find clamshells work beautifully at roughly 4.5 by 6 inches, while waves forgive minor imperfections.
Perfect for quilting for beginners exploring machine quilting or expert quilting techniques using digital pantographs.
Geometric Repeating Patterns
Squares, triangles, and diamonds transform into bold repeating motifs when your machine quilting approaches geometric shapes with pattern precision. Modern quilting designs thrive on design symmetry—computerized machines guide digital stitching through grids, crosshatch, and tessellations at speeds reaching 600 stitches per minute.
You’ll master quilting algorithms that create fluid concatenations, connecting the quilting community to both minimalist and avant-garde quilting patterns through shared resources and innovation.
Pantograph Pattern Options
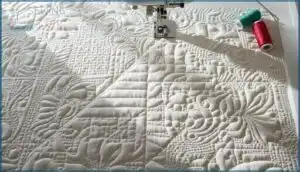
Pantograph designs give you edge-to-edge quilting magic through continuous patterns repeated across your quilt. You’ll find over 700 digital patterns available—from swirls to feathers—compatible with home machines and longarm quilting techniques.
Quilting software lets you scale patterns to match your machine’s throat space, while digital pantographs eliminate backtracking for smooth, efficient stitching. It’s the most economical route to professional-looking allover machine quilting patterns.
Choosing The Right Pattern for Your Quilt
Picking the right quilting pattern can feel like standing at a crossroads with a dozen signs pointing in different directions. The good news? You don’t need to guess.
Let’s walk through three key factors that’ll help you choose a pattern that works for your quilt, your skill level, and the look you’re going for.
Matching Patterns to Quilt Style
Your quilt style analysis starts with understanding what you’ve created. Matching quilting patterns to your quilt top design isn’t guesswork—it’s about making smart choices that refine your work.
Here’s how to approach it:
- Traditional blocks shine with feathers, loops, or echo quilting for that hand-quilted feel
- Modern quilts pop with straight lines, grids, or geometric patterns emphasizing structure
- Bold prints need subtle stippling so fabric choice stays visible
- Art quilts demand dense, custom motifs that refine imagery
- Pattern scaling matters—small blocks need compact designs; large blocks handle bigger quilting designs
Longarm quilting techniques and thoughtful quilt making create texture balance that transforms patchwork into showstoppers.
Texture and Density Considerations
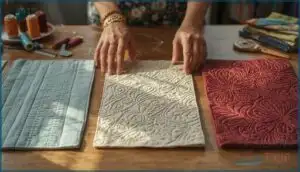
Think of quilting density as your creative dial—closer stitches create stiff, textured art while open spacing keeps quilts soft and drapey. You’ll control fabric texture through batting options (high-loft puffs beautifully), thread choices that vanish or pop, and stitch visibility on solid versus busy prints.
Free motion quilting and machine quilting patterns transform flat layers into dimensional masterpieces when density matches your vision.
Skill Level Assessment
Your sewing ability—whether you nail straight seams or wrestle with uneven blocks—determines which quilting patterns you’ll actually finish. Beginners thrive with large-piece designs and simple meander quilting, while intermediate progression unlocks smaller blocks and free-motion skills. Expert quilting techniques demand precision with intricate feathers and complex pantographs.
Your sewing ability determines which quilting patterns you’ll actually finish—beginners need simple designs while experts tackle intricate feathers and complex pantographs
Honest skill indicators like your seam accuracy guide smarter pattern complexity choices than wishful thinking ever could.
Frequently Asked Questions (FAQs)
What thread weight works best for different patterns?
Threading the needle of choice starts here: 40-weight thread suits most quilting patterns, balancing visibility and strength. For delicate free motion quilting, try 50-weight. Bolder designs? Reach for 30-weight thread.
How do you prevent puckering during machine quilting?
Master basting techniques with a 3-inch pin grid and adjust tension settings to 2–5 for delicate fabrics.
Choose proper needle selection, use stabilizer support, and practice careful handling of fabric to achieve professional results.
Can you combine multiple patterns in one quilt?
Over 64% of quilters mix patterns in a single project. Try pairing straight-line walking foot quilting with free-motion motifs—it balances structure and creativity beautifully while letting your unique vision shine through.
What batting type affects quilting pattern visibility most?
Batting loft and fiber content have the biggest impact on quilting pattern visibility. High-loft polyester batting makes designs pop by up to 40%, while wool’s natural springiness creates sharper definition than flat cotton options.
How do you mark complex patterns on fabric?
Tool precision matters more than you’d think—fine-tipped pens, stencils, and soap slivers all transfer quilting designs differently.
Your fabric’s color and texture guide which marking techniques stick, remove cleanly, and prevent alignment challenges later.
Conclusion
The irony? Those machine quilting patterns you worried would ruin your quilt are actually what make it indestructible. They’re not just holding layers together—they’re building resilience into every stitch.
Start with the simplest pattern that matches your skill level, then watch your confidence grow with each finished project. Your quilting machine isn’t waiting to sabotage your work. It’s ready to help you create something that lasts generations.
- https://www.precisionbusinessinsights.com/market-reports/quilt-market
- https://craftindustryalliance.org/the-size-of-the-quilting-market-quilting-trends-survey-results-2025/
- https://dataintelo.com/report/industrial-quilting-machine-market
- https://www.cognitivemarketresearch.com/computerized-quilting-machines-market-report
- https://www.linkedin.com/pulse/united-states-automatic-computer-quilting-machine-market-osyqf

