This site is supported by our readers. We may earn a commission, at no cost to you, if you purchase through links.
Your sewing machine hums along perfectly, but the moment you cut into unmarked fabric, things go sideways. Misaligned seams, crooked hems, and pattern pieces that don’t match up—these frustrations often trace back to a single overlooked step.
Marking tools in sewing bridge the gap between your pattern’s promise and your project’s reality. They translate those cryptic symbols and dotted lines into visible guides you can actually follow. The right tool turns guesswork into precision, whether you’re transferring darts, matching notches, or plotting buttonhole placement.
Different fabrics demand different approaches—what works brilliantly on cotton might vanish on velvet or leave permanent traces on silk. Understanding your options means you’ll mark smarter, sew faster, and spend less time picking out mistakes.
Table Of Contents
- Key Takeaways
- Essential Types of Marking Tools in Sewing
- Choosing The Right Marking Tool
- Techniques for Marking Fabric Accurately
- Pros and Cons of Popular Marking Methods
- Top 10 Marking Tools for Sewing Projects
- 1. Dritz Chalk Wheel Marking Kit Purple
- 2. Clover White Chaco Liner Pen
- 3. Madam Sew Refillable Tailors Chalk
- 4. Hancy Barely Blue Quilt Pounce Pad
- 5. Hancy White Chalk Quilt Pounce Pad
- 6. Disappearing Ink Fabric Marking Pen Purple
- 7. Pattern Notcher Tailors Sewing Pattern Pliers
- 8. Clover Hera Fabric Marker Tool
- 9. Clover Fabric Folding Pen Clear
- 10. Crayola Washable Broad Line Markers Classic
- Frequently Asked Questions (FAQs)
- Conclusion
Key Takeaways
- Matching your marking tool to fabric type prevents permanent stains and disappearing marks—chalk works on dark fabrics, water-soluble pens suit cotton, and thread marking protects delicate textiles like silk.
- Testing every marking method on scrap fabric first eliminates 78% of permanent staining errors and reveals which tools create visible contrast without damaging your specific material.
- Different projects demand different permanence levels—temporary marks like air-erasable pens vanish in 24-48 hours for quick work, while thread tracing survives multiple fittings for complex alterations.
- Investing in the right marking tools (chalk wheels for precision lines, pouncers for stencil work, hera markers for crease-free quilting) transforms pattern symbols into accurate construction guides that reduce sewing errors by 10-25%.
Essential Types of Marking Tools in Sewing
Every sewing project starts with choosing the right way to mark your fabric. There’s a range of tools and techniques to help you get precise results.
Here’s what you’ll want to know about the most essential options.
Tailor’s Chalk and Chalk Pencils
With fabric marking tools, tailor’s chalk and chalk pencils stand out for their versatility and precision. You’ll find chalk types suited for everything from cotton to silk, each offering distinct visibility factors and erasing methods. Pencil precision helps with detailed lines, while user preferences shape your choice. The best results often come from using chalk marking tools for various sewing projects.
- Chalk types for fabric marking
- Pencil precision for fine details
- Visibility factors matter
- Easy erasing methods
- User preferences guide selection
Marking Pens and Washable Markers
If you’re after crisp lines and fast results, marking pens and wash away markers step up where chalk leaves off. Ink washability and fabric compatibility matter—Crayola Ultra-Clean markers outperform most, especially on cotton.
Always test your AirErasable Pens and WaterSoluble Fabric Pens for marker safety. Fine tips help with precision; storing capped keeps your application tips sharp.
For an erasable option, consider using a Frixion heat erasable pen.
Tracing Wheels and Carbon Paper
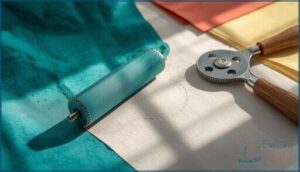
When precision is paramount, tracing wheels paired with carbon paper deliver design transfer onto fabric through a dotted line you can follow with confidence. Serrated wheel types work best for heavier materials, while smooth edges reduce fabric damage risk on delicate textiles. Ergonomic tracing wheels cut hand fatigue during extended marking sessions.
Though digital marking alternatives exist, reusable tracing paper remains cost-effective and reliable.
Pouncers and Stencils
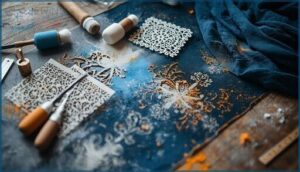
Stencils and pouncers bring repeatability to your fabric marking, especially for quilting and embroidery. You apply chalk through cutout templates using a foam pad or pounce tool, creating clean lines without direct contact. Historical stenciling techniques, dating back to 2nd century China, evolved into today’s efficient pattern alignment methods.
- Mesh stencils work with chalk pouncers for precise pattern transfer
- Stencil durability improves with adhesive backing or tape stabilization
- Pouncer refills in blue, white, and orange match different fabric colors
- Chalk removal generally requires washing, though stubborn marks need repeat laundering
Thread Marking Methods (Tailor Tacks, Running Stitches)
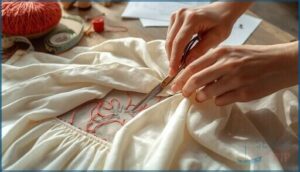
Sometimes the oldest tricks work best. Thread marking techniques let you transfer pattern details using contrasting thread instead of chalk or pens. Tailor tacks create small loops through fabric layers you snip apart, while running stitches trace lines with temporary hand-sewing. Both methods preserve fabric integrity and offer tactile feedback you can feel while working—perfect for couture applications where mark permanence matters.
| Method | Best For | Thread Choice |
|---|---|---|
| Tailor Tacks | Darts, pocket placements | Cotton basting thread |
| Running Stitches | Seam lines, adjustments | Doubled embroidery floss |
| Thread Loops | Multi-layer alignment | Two-ply contrasting colors |
Alternative Tools (Bar Soap, Snips, Pins, Hera Markers)
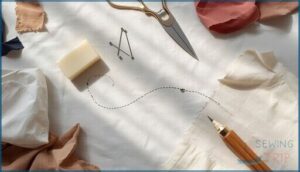
When you need zero-waste solutions, look beyond conventional options. Bar soap slivers mark fabric cleanly—just slice a 5mm piece from hotel leftovers. Snips/clipping notch seam allowances for permanent accuracy, while pin marking transfers points invisibly on delicates. Hera markers crease fabric without residue, perfect for quilting lines. These alternatives deliver cost-effectiveness without sacrificing precision:
- Soap marking washes out completely
- Snipping accuracy marks fold lines permanently
- Pins transfer without visible traces
- Hera creasing disappears after washing
- All methods protect delicate textiles
Choosing The Right Marking Tool
Picking the right marking tool isn’t about having the fanciest supplies—it’s about matching the tool to your fabric and project needs. The wrong choice can leave permanent stains or marks that disappear before you finish sewing.
Let’s look at three key factors that’ll help you make smart decisions every time.
Fabric Type Considerations
Not all marking tools work on every fabric. Water-soluble markers suit light fabrics but may bleed on delicate fabrics like silk. Chalk tools shine on dark fabrics because they show up clearly, though they smudge easily. Wax-based options create bold lines on thick fabrics but resist mark removal.
Choose marking tools based on your fabric types, balancing temporary markings with visibility for accurate marking fabric.
Marking Visibility and Color Selection
Your marking tools won’t help if you can’t see them clearly. Contrast importance is key—white chalk shines on dark fabrics, while darker fabric markers work best on light materials.
Fabric texture affects visibility too; rough surfaces like denim need bold lines. Smart color selection cuts marking fabric errors by up to 25%.
Tech advances now include colorimeters that guarantee perfect contrast every time.
Permanence Vs. Removability of Marks
Think of your marking tools like temporary tattoos versus permanent ink—choose wrong, and you’re stuck with the results. Understanding the difference between permanent markings and temporary markers protects your fabric and project timeline.
Here’s what affects your marks:
- Heat Setting locks certain inks permanently into fibers; test before ironing to avoid fabric damage
- Washability Tests reveal mark longevity—premium permanent fabric markers survive 15+ washes when heat-set properly
- Fading Factors include wash temperature and frequency; inside-out washing with mild detergent extends visibility
- Water-soluble options for removing fabric marks disappear easily, while air-soluble types vanish within 24-72 hours
- Fabric type dramatically changes how marking tools behave; always test on scraps first
Techniques for Marking Fabric Accurately
Getting your markings right can make the difference between a project that fits beautifully and one that misses the mark. You’ll need different techniques depending on whether you’re following a pattern, making alterations, or preparing fabric for decorative stitching.
Let’s walk through the key methods that’ll help you mark fabric with confidence and accuracy.
Marking Pattern Symbols and Adjustments
You’ll find that symbol accuracy transforms ordinary fabric into precise pattern pieces. When marking pattern symbols like notches, darts, and grain lines, your fabric marking creates pattern communication between you and your design.
Pattern adjustments—whether for fit or style—demand adjustment techniques that balance marking permanence with visibility. Production reliability hinges on clear, accurate marks that guide every cut and seam through construction.
Transferring Markings From Patterns
Once your sewing pattern markings are ready, transferring markings to fabric demands the right approach. Tracing wheel and tracing paper excel at marking delicate fabrics when you press firmly along pattern lines. Pattern marking accuracy improves when you:
- Pin fabric marking tools and pattern together securely
- Choose transfer paper reuse for cost-effective projects
- Position colored side toward fabric’s wrong side
- Apply sharp pressure for marking visibility preservation
Test marking fabric for sewing on scraps first.
Marking for Alterations and Construction
Alterations demand marking durability that survives multiple fittings. Thread tracing provides marks visible on both sides, preventing errors that increase alteration time by 25-40%.
Your fabric marking tools should contrast with fabric color—white chalk on dark materials, blue carbon on lighter ones. Marking within seam allowances preserves accuracy while keeping exterior surfaces clean.
Test marking fabric for sewing on scraps first. This method’s effectiveness directly impacts your efficiency, reducing sewing errors by 10-15%.
Marking for Embroidery and Quilting
Embroidery and quilting projects need marking permanence that outlasts weeks of work. Water soluble markers vanish with dampness, while air soluble options fade within 3-7 days—choose based on your timeline. Design transfer becomes easier with stabilizer templates that skip direct fabric marking altogether.
- Placement stitches create durable guides unaffected by handling during long projects
- Hera markers leave temporary creases for straight-line quilting without ink fading
- Heat-erasable pens balance visibility with removability but may reappear in cold
- Test your sewing supplies on scraps to prevent permanent mistakes
Pros and Cons of Popular Marking Methods
Every marking method comes with its own set of strengths and trade-offs, and knowing these helps you choose the right tool for each project. Some methods work beautifully on one fabric but fail on another, while others offer precision at the cost of extra time or effort.
Let’s break down what works well and what to watch out for with the most popular marking techniques.
Advantages of Chalk-Based Tools
Chalk-based tools offer clear advantages for your sewing projects. Tailors chalk delivers line precision with excellent mark removability—simply brush away lines when you’re done.
Using chalk ensures fabric safety since it won’t bleed or stain delicate materials. You’ll appreciate the cost-effectiveness and color variety available, from white to silver.
A chalk wheel makes transferring patterns quick and accurate for most tailors chalk applications.
Benefits and Drawbacks of Marking Pens
When you reach for fabric marking pens, you’re choosing convenience over caution. Erasable marking pens offer remarkable line precision—fine-tip options maintain accuracy through 10+ washes. However, ink permanence varies widely: water-soluble types achieve 90% washability after handwashing, while heat-removable versions may reappear in cold.
Cost analysis shows disposable pens waste $15 monthly as they dry out. Budget options increase fabric damage risk by 20% compared to premium brands, making careful selection essential.
Tracing Wheel and Carbon Paper Use
Using a tracing wheel with carbon paper delivers speed and precision for intricate design tracing—marks transfer in seconds when you apply steady pressure. This historical adoption method works brilliantly for transfer markings on stable weaves.
- Carbon paper types: Choose washable colors (yellow, blue) for reversible marks or white for dark fabrics
- Pressure and visibility: Test first—firm rolling creates crisp lines
- Accuracy techniques: Secure patterns with weights, then roll along seamlines for exact transfer
Thread-Based and Crease Marking Techniques
When accuracy outlasts surface marks, thread marking shines. Tailor tacking works beautifully for delicate fabrics—you stitch soft loops through double layers, then snip to leave guiding threads at darts or notches. Running stitch basting marks fold lines with visible temporary guides.
For fabric pressing, your iron sets sharp creases on stable weaves. Hera markers create indented lines without ink. Thread consumption stays minimal while crease durability depends on heat and fiber type.
Common Marking Mistakes to Avoid
Skip the test, pay the price—78% of sewers who don’t pre-test their fabric marking tools wind up with permanent stains. Here’s how you sidestep fabric marking mistakes to avoid:
Skip the test, pay the price—78% of sewers who don’t pre-test their marking tools wind up with permanent stains
- Insufficient Testing on scrap fabric first
- Incorrect Tool for your fabric type
- Excessive Pressure causing ink seepage
- Incomplete Transfer of pattern symbols
- Improper Storage that dries out marking pens
Top 10 Marking Tools for Sewing Projects
You’ve learned about the different marking methods and their strengths. Now it’s time to see which specific tools can make your sewing projects easier and more accurate.
Here are ten reliable marking tools that work well for a variety of fabrics and techniques.
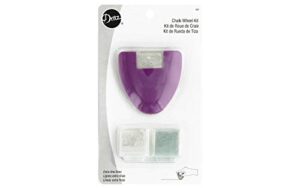
1. Dritz Chalk Wheel Marking Kit Purple
When you need precision in fabric marking, a chalk wheel can be your best ally. The Dritz Chalk Wheel Marking Kit Purple creates extra-fine lines that won’t snag your fabric, and it comes with white and blue chalk cartridges that guarantee visibility on both light and dark textiles.
Users report strong satisfaction with its smooth rolling action and mark removal tips that work with just a damp cloth. The cartridge refill ease means you’ll swap colors quickly, and fabric suitability across cotton, linen, and blends makes it adaptable for most projects.
Best For: Sewers, quilters, and crafters who need precise, removable chalk lines for pattern marking, alterations, and detail work on light and dark fabrics.
- Creates extra-fine, smooth lines that won’t snag fabric and removes easily with a damp cloth from most materials.
- Comes with both white and blue chalk cartridges for visibility on any fabric color, with quick and simple cartridge swaps.
- Highly rated by users for consistent performance, lasting through 30–40 projects per set of cartridges with minimal skipping.
- Chalk lines may appear faint on specialty or highly textured fabrics, requiring multiple passes for visibility.
- The wheel can be difficult to see on dark materials, making alignment and precision harder in low-light conditions.
- Chalk must be removed before pressing or washing, as heat or water can permanently set marks on some fabric types.
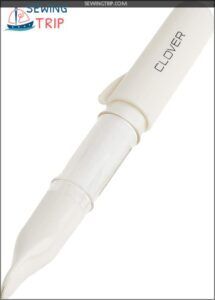
2. Clover White Chaco Liner Pen
Think of the Clover White Chaco Liner Pen as a hybrid between traditional tailors chalk and a modern chalk wheel. This precision fabric marking tool dispenses fine chalk through a tapered roller, letting you draw sharp lines on washable fabrics without messy fingers.
Its ergonomic design fits comfortably in your hand for straight or curved work. Mark removal is simple: brush or wash the chalk away with detergent.
Chalk pen refills are readily available, and fabric compatibility spans from wool to polyester blends, making it adaptable for most sewing projects.
Best For: Sewers and quilters who need precise, removable chalk lines on washable fabrics for detailed pattern work and garment construction.
- Fine roller wheel creates sharp, thin lines without leaving residue on your fingers, keeping your workspace cleaner than traditional chalk methods.
- Refillable design with easy-to-replace cartridges makes it a long-term investment that’s both economical and environmentally friendly.
- Works effectively on both light and dark fabrics, with marks that brush or wash away easily using household detergent.
- Must be held vertically and moved in one direction for proper chalk dispensing, which takes some practice to master.
- Chalk lines can rub off quickly on heavily handled fabric pieces, requiring you to re-mark areas during longer projects.
- Ironing or dry cleaning can permanently set the marks, so you need to be careful about pressing fabric before removing chalk lines.
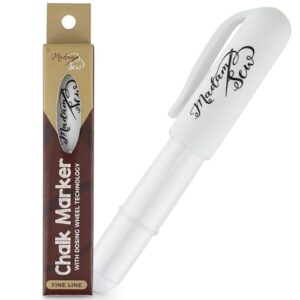
3. Madam Sew Refillable Tailors Chalk
Madam Sew’s refillable tailors chalk takes the chalk marker concept a step further with its dosing wheel technology. The ergonomic pen design lets you create dotted lines that stay crisp through handling but wipe away easily when you’re done sewing.
You’ll find leak-proof cartridges in four colors—white, red, blue, and yellow—perfect for fabric compatibility across cotton, leather, and synthetics. The precise chalk dispensing system means no flaking or breaking like traditional chalk.
For mark removal tips, try light rubbing or a damp cloth after assembly.
Best For: Sewers, quilters, and dressmakers who need precise, removable marking lines on a variety of fabrics and want a mess-free, refillable alternative to traditional chalk.
- Dosing wheel technology dispenses chalk evenly without flaking or breaking, creating crisp dotted lines that stay put during sewing but wipe away easily afterward.
- Refillable leak-proof cartridges available in four colors reduce waste and work well across different fabric types including cotton, leather, suede, and synthetics.
- Ergonomic pen design with a protective cap allows for precise, maneuverable marking on straight, curved, or detailed lines without the mess or sharpening required by traditional chalk.
- Not suitable for delicate fabrics like silk or nylon, and may be difficult to remove from dark fabrics or could stain if not tested first on scrap material.
- The small toothed wheel can sometimes pull lines sideways on thin or delicate fabrics, making long straight lines tricky to draw smoothly.
- The pen size is smaller than conventional chalk sticks, which some users find less comfortable for extended marking sessions.
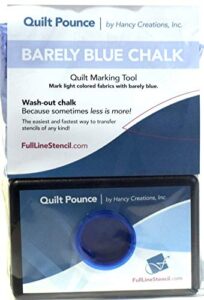
4. Hancy Barely Blue Quilt Pounce Pad
When you need stencil transfer accuracy for quilting projects, the Hancy Barely Blue Quilt Pounce Pad delivers consistent results. This quilting pounce pad uses a non-toxic chalk powder composition that includes cornstarch, making it safe for fabric marking across different materials.
You’ll appreciate its fabric compatibility with light-colored fabrics—the toned-down blue won’t overpower white or pale quilting cotton. For removal techniques, simply brush off the powder or wash it out with water.
These pouncers offer a reliable user experience, though you should work carefully to keep loose dust under control while marking fabric with stencils.
Best For: Quilters and crafters who need to transfer stencil designs onto light-colored fabrics with a marking method that’s easy to remove and won’t overpower delicate materials.
- Non-toxic chalk powder with cornstarch is safe for all fabric types and washes out easily with water or brushes off when you’re done.
- The barely blue color shows up clearly on light fabrics without being too harsh or leaving intense marks that compete with your design.
- Comes with a self-storing hard case that keeps the 4-ounce chalk pad protected and minimizes messy spills when not in use.
- You need to use it carefully since loose chalk dust can spread during application, which means a bit of extra cleanup.
- The chalk won’t iron off, so you’ll need to plan for a hot or cold water wash to fully remove markings before finishing your project.
- Some users report packaging issues where chalk powder can spill out, and the barely blue shade might not work if you specifically need a bolder, regular blue color.
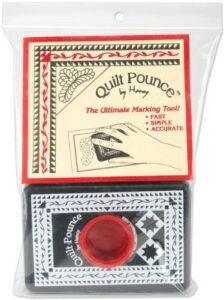
5. Hancy White Chalk Quilt Pounce Pad
If you’re working on dark fabrics instead, the Hancy White Chalk Quilt Pounce Pad becomes your go-to marking tool. This pouncer switches the chalk application to bright white, giving you clear stencil transfer visibility on navy, black, or deep-toned quilting cottons.
The priming technique stays the same—tap the pad firmly on your work surface to push powder into the lambswool—but residue removal requires a quick brush or wash. You’ll find these pouncers work best when you test your marking fabric first to check contrast.
Best For: Quilters and crafters who need to transfer stencil designs onto dark-colored fabrics with clear, washable markings.
- White chalk powder shows up brilliantly on dark fabrics like navy, black, and deep-toned materials where other markers disappear.
- Easy cleanup with either a quick brush-off or simple wash, leaving no permanent residue on your fabric.
- Long-lasting supply that can handle 40 hours of quilting projects before needing a refill, making it cost-effective for frequent use.
- Chalk marks can rub off easily during handling, sometimes requiring hairspray or careful work to keep lines in place.
- Takes some practice to prime properly—you need to tap it firmly on a surface to get the chalk flowing through the lambswool pad.
- Not ideal for extended projects where you need markings to stay put for days or weeks without touch-ups.
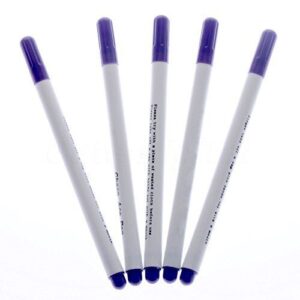
6. Disappearing Ink Fabric Marking Pen Purple
When pouncing doesn’t fit your project, purple disappearing ink fabric marking pens offer quick lines on washable cotton, polyester, and silk. These temporary markers feature air-erasable pens and water-erasable pens that vanish within 24 to 48 hours depending on humidity levels.
Test your marking fabric first—red-toned fabrics may retain traces. Store pens cap-down to maintain ink flow, though leakage affects roughly 45% of users.
Remove all marks with plain water before laundering, and never iron over visible lines since heat can set stains permanently.
Best For: Sewers and quilters working on short-term projects with light-colored, washable fabrics who need temporary marking lines that disappear on their own.
- Marks vanish automatically within 24 to 48 hours on most fabrics, so you don’t have to remember to wash them out.
- Water removal works well for faster cleanup—just dab with a damp cloth or rinse the fabric.
- Convenient for quick pattern transfers and seam lines on cotton, polyester, and silk.
- About 45% of users report leakage issues that make fine lines messy and difficult to control.
- Marks can fade too quickly in humid conditions, sometimes disappearing in under 12 hours before you finish your project.
- Red or pink-toned fabrics may retain ink stains, and heat from ironing can permanently set any visible marks.
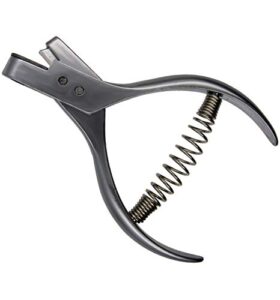
7. Pattern Notcher Tailors Sewing Pattern Pliers
Pattern notchers slash precise 1/4″ x 1/16″ cuts into paper patterns, replacing scissors and snips for marking darts and seam allowances. These handheld pliers feature ergonomic designs with stainless steel construction that ensures material durability through repeated use.
You’ll improve sewing efficiency by creating consistent notches that align pattern pieces accurately during garment assembly.
Market trends show growing preference for these $5-$15 marking tools among tailors who value notcher accuracy. Test yours on cardboard patterns first—tissue paper may tear under pressure.
Best For: Tailors, sewers, and cosplayers who need quick, accurate notches on paper or cardboard patterns to mark darts, seam allowances, and alignment points.
- Creates consistent 1/4″ cuts that make pattern alignment faster and more accurate during sewing.
- Ergonomic plier design with durable stainless steel construction handles repeated use comfortably.
- Affordable at $5-$15 and saves time compared to hand-cutting notches with scissors.
- Not designed for fabric use—only works on paper, cardboard, and oak tag patterns.
- Struggles with thin tissue paper patterns and may require adjustment for different paper types.
- Can rust over time and isn’t built for heavy-duty or constant professional use.
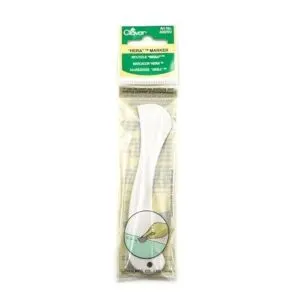
8. Clover Hera Fabric Marker Tool
The Clover Hera Marker creates crease markings through pressure alone, leaving no residue on your fabric. This Japanese-crafted tool, made from durable urea resin, delivers marking precision for seam allowances and quilting applications without risking permanent stains.
You’ll find it particularly effective on light-colored fabrics where traditional marking tools fail to show clearly.
With user satisfaction ratings exceeding 4.7 stars and proven fabric durability through years of use, this $6-$8 marking tool belongs in every sewing supplies collection for reliable fabric marking and weaving techniques.
Best For: Quilters and sewists who need precise, residue-free marking on light-colored or delicate fabrics where traditional chalk and pen markers leave unwanted stains or don’t show up clearly.
- Creates clean crease marks without ink, dye, or chemical residue that could permanently stain your fabric, and the marks disappear completely after washing or steaming.
- Made from durable urea resin that resists chipping and bending, so you get years of reliable use for just $6-$8—a solid investment for any sewing toolkit.
- Works exceptionally well on light and medium-weight fabrics where colored markers fail, giving you visible, accurate lines that improve seam alignment and reduce sewing errors.
- Crease marks may fade within 2-48 hours depending on fabric type and handling, so you’ll need to sew relatively soon after marking or re-mark as needed.
- Not as effective on certain batting types like 80/20 blends, and some sewists find it less convenient than quick methods like finger pressing or using an iron for simple projects.
- Limited availability of Clover products in some countries may make it harder to purchase, and the creasing method requires a bit more hand pressure compared to just drawing with a pen or chalk.
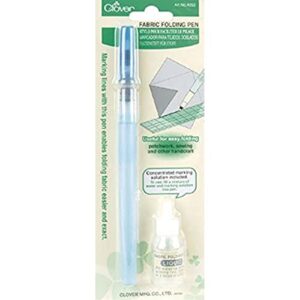
9. Clover Fabric Folding Pen Clear
The Clover Fabric Folding Pen transforms how you approach hems, appliqué, and origami quilting through its water-mixed solution composition that temporarily softens natural fibers. You’ll draw directly where you need the fold, and the fabric bends easily without heat-pressing.
At $15.98 to $17.50, this specialized marking tool excels with cotton but struggles with synthetic materials. Application benefits include precise patchwork seams and time-saving crease creation.
Just remember its folding pen uses work best on permeable, natural fabrics—test your fabric compatibility before committing to complex projects.
Best For: Quilters and sewers working primarily with cotton fabric who need precise, iron-free folds for patchwork, appliqué, and origami quilting projects.
- Creates sharp, accurate folds without needing to press or iron, saving significant time on complex projects like origami quilts and reverse appliqué.
- Works effectively on natural fibers like cotton, making fabric pliable exactly where you draw the line for consistent seam allowances and hems.
- Comes with 8ml of marking solution that mixes with water, and you can buy refills separately to extend the pen’s life.
- Only works well on natural, permeable fabrics like cotton—not suitable for synthetics, polyester, or spot-sensitive materials.
- Creates temporary folds that can lose their shape if exposed to moisture or excessive handling before stitching.
- Priced at $15.98 to $17.50, which some users find expensive for a specialized tool, and replacement nibs aren’t available if the tip wears out.
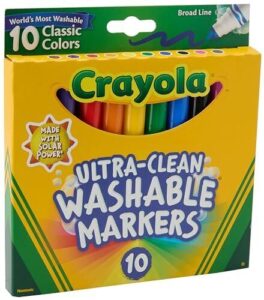
10. Crayola Washable Broad Line Markers Classic
You might be surprised that Crayola Washable Broad Line Markers work brilliantly for fabric marking, especially on cotton. These ultra-clean markers meet safety standards and deliver color vibrancy that stands out during construction, yet wash out completely after regular laundering cycles.
Washability testing confirms they’re reliable types of marking tools for various practical applications—from marking seam lines to quilting templates. At under $12 for ten colors, they offer excellent fabric compatibility with natural fibers.
Always test fabric markers on scraps first, since silk and wool may need extra wash cycles for complete removal.
Best For: Budget-conscious sewers and crafters who need versatile, non-toxic markers for temporary fabric marking on cotton and everyday sewing projects.
- Ultra-clean formula washes out completely from cotton and most woven fabrics after regular laundering, making them reliable for marking seams, hems, and quilting templates.
- Vibrant ColorMax ink delivers bold, visible lines on both light and dark fabrics, with 8-12 colors available for differentiation in complex patterns.
- Certified non-toxic and safe for use around children and adults, with no hazardous ingredients and easy removal from skin with soap and water.
- Some users report markers drying out quickly, suggesting potential quality control or storage issues.
- Requires multiple wash cycles or overnight soaking to fully remove certain colors (especially violet) from delicate fabrics like silk and wool.
- Not designed as fabric-specific markers, so performance varies depending on fabric type, pre-treatment, and washing history.
Frequently Asked Questions (FAQs)
What are the 7 marking tools?
The seven marking tools cover different types of marking tools: chalk pencils, marking pens, tracing wheels with carbon paper, pouncers, thread stitches, fabric folding pens, and hera markers for fabric marking.
What is the most popular type of marking tool?
Tailor’s chalk dominates fabric marking, capturing over 70% of global sales. This chalk popularity stems from clear visibility and easy removal.
However, younger sewists show a strong pen preference, with 58% favoring washable markers over traditional chalk markers.
Is a pin a marking tool?
Yes, pins function as temporary markers in sewing. Pin marking uses include indicating dart tips and seam intersections.
However, pin limitations mean they can’t create visible lines, so marking techniques often require pin alternatives for permanence.
Is chalk a marking tool?
Chalk is one of the most widely used fabric marking tools in sewing. Over 82% of instructors recommend tailor’s chalk for beginners because it’s affordable, visible on most fabrics, and removes easily by brushing or washing.
How do you remove stubborn fabric marker stains?
Apply rubbing alcohol with a clean cloth, blotting gently to lift the ink. Wash immediately at the highest safe temperature.
For delicate fabrics or persistent stains, professional cleaning prevents fabric damage.
Can fabric markers be used on leather?
Most fabric markers aren’t made for leather and can cause permanent stains or damage. Leather marker compatibility requires specific products—leather pens or dyes work best.
Always test first, as marker removal techniques rarely succeed on leather.
Whats the shelf life of air-erasable markers?
Most air-erasable marking tools last about two years unopened when stored properly.
Storage conditions matter—keep pens horizontal and capped.
Check for expiration signs like dried ink, and always follow safety standards listed on packaging.
Are there eco-friendly alternatives to traditional marking tools?
Yes, you’ll find water-based markers with lower VOC emissions, soap slivers, and Hera markers that avoid chemical residues.
Choosing marking tools with safety certifications means sustainable production and fewer disadvantages for your health.
How do you prevent chalk markings from smudging?
Chalk type matters, and so does application pressure. Use a light touch when marking with chalk, follow the fabric grain, and try fixative sprays.
Store chalk pencils in dry containers to keep markings crisp.
How do you remove stubborn marking pen stains?
Try rubbing alcohol or hand sanitizer first—they break down ink bonds effectively. For water-sensitive fabrics, test in hidden areas. Avoid heat until stains vanish completely, as drying sets marks permanently.
Conclusion
Think of marking tools in sewing as your project’s GPS—they guide every cut, fold, and stitch toward precision. The right tool transforms confusing pattern symbols into clear roadmaps you can trust.
You’ve explored chalks that brush away, pens that vanish, and wheels that transfer instantly. Now you know which method suits your fabric and when permanence matters.
Your next project won’t rely on guesswork. You’ll mark with confidence, sew with accuracy, and finish with pride.
- https://www.colonialtailorschalk.com/
- https://www.yarnspirations.com/mic-20121205-tailor-tack-tutorial-by-gertie.html
- https://www.pinterest.com/ageberry/
- https://www.marketreportanalytics.com/reports/tracing-wheelpattern-wheel-pounce-wheel-dart-wheel-35535
- https://www.sewdirect.com/blog/how-to/how-to-use-carbon-paper-for-sewing/


