This site is supported by our readers. We may earn a commission, at no cost to you, if you purchase through links.
This essential safety device creates a protective barrier between your hands and the lightning-quick needle, letting you focus on creativity instead of worrying about injuries.
Whether you choose a durable metal guard or a budget-friendly plastic version, you’ll find options specifically designed for popular brands like Brother, Singer, and Janome, or universal models that fit multiple machines.
Installation is usually as simple as snapping it onto your presser foot bar – just make sure it’s secure before you start stitching away.
There’s a whole world of clever features that make these guards even more useful than you might expect.
Table Of Contents
- Key Takeaways
- Why Needle Guards Are Essential for Safety
- Different Types of Sewing Machine Needle Guards
- How to Install a Needle Guard
- Best Needle Guards for Popular Machine Brands
- Signs Your Needle Guard Needs Replacement
- Teaching Kids to Sew With Needle Guards
- Common Problems With Needle Guards
- Professional Sewers’ Tips for Guard Usage
- Where to Buy Quality Needle Guards
- Alternative Safety Devices for Sewing Machines
- Frequently Asked Questions (FAQs)
- Conclusion
Key Takeaways
- You’ll find needle guards essential for protecting your fingers from accidental pricks while sewing, allowing you to focus on your creativity rather than safety concerns.
- You can choose between metal and plastic guards, with options available for specific brands like Brother, Singer, and Janome, or universal models that fit multiple machines.
- You’ll need to regularly check your needle guard for wear and tear, replacing it if you notice cracks, loose attachments, or performance issues to maintain optimal safety.
- You can enhance your sewing safety beyond traditional needle guards with alternatives like finger shields, presser foot guards, and LED guide systems, which offer additional protection without sacrificing visibility or precision.
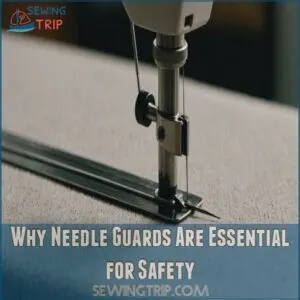
Why Needle Guards Are Essential for Safety
You’ll find that a needle guard isn’t just another sewing accessory – it’s your first line of defense against painful finger pricks and unexpected fabric slips while you’re working on your projects.
Whether you’re a beginner getting comfortable with your machine or an experienced sewer who knows that accidents can happen in a split second, this simple attachment will help you maintain steady control and focus on creating beautiful pieces.
Protection Against Needle Injuries
Behind every successful sewing project lies a key safety companion – your needle guard.
You wouldn’t believe how many sewists learn this lesson the hard way!
Here’s why you can’t ignore this important protective shield:
- Prevents painful needle strikes to your fingers during high-speed sewing
- Creates a safe barrier between moving parts and your hands
- Offers peace of mind, letting you focus on creativity instead of safety concerns
Preventing Fabric Slips
Slippery fabric can turn your peaceful sewing session into a frustrating game of chase.
Your needle guard acts like a trusty sidekick, keeping those tricky materials in check while you work.
It teams up with proper feed dog pressure and fabric tension to prevent unwanted shifts, especially when you’re working with silks or synthetics.
You’ll love how it holds everything steady, letting you focus on creating perfect stitches.
Maintaining Focus While Sewing
A needle guard’s protective shield isn’t just for your fingers – it’s your mindful sewing companion against fatigue-induced mistakes.
When you’re deep in concentration, those late-night texts or Netflix binges can throw off your rhythm.
Your guard acts like a safety net, catching potential slip-ups when distractions creep in.
It’s your reliable partner in maintaining focus, especially during those marathon sewing sessions when concentration naturally wanes.
Building Confidence for Beginners
When you’re just starting your first sewing project, a needle guard acts like your trusty sidekick, giving you that extra peace of mind to focus on mastering stitch types.
You’ll feel more confident threading your machine and guiding fabric, knowing there’s a safety barrier between your fingers and that speedy needle.
It’s like having training wheels while you build your sewing skills – soon you’ll be stitching like a pro!
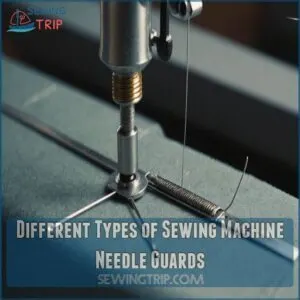
Different Types of Sewing Machine Needle Guards
When changing a sewing machine needle, it’s crucial to access the needle area safely, and you’ll find several types of needle guards available for your sewing machine, from sturdy metal ones that wrap around the presser foot to lightweight plastic models that snap right into place.
Whether you’re using a simple home machine or an industrial powerhouse, you’ll need to choose between brand-specific guards designed for perfect compatibility or universal options that work with multiple machine models.
Metal Vs Plastic Guards
Metal guards pack the punch you’re looking for in durability and stability, but they’ll cost you a bit more than their plastic counterparts.
When shopping for the right metal or plastic guard, consider needle guard sewing products.
You’ll notice plastic guards feel lighter and won’t scratch your machine, plus they’re easier on your wallet.
Here’s the real deal: metal guards last longer and can take a beating, while plastic ones offer more flexibility for detailed work.
Brand-Specific Models
Many sewing machine brands offer their own needle guards, designed to fit like a glove.
Brother’s guards often attach with a simple screw, while Janome provides front, rear, and top-loading options.
Singer’s designs might throw you a curveball, so double-check compatibility.
Prices dance between $2 and $10, depending on brand and style.
Remember, finding the perfect fit for your machine is like dating – it might take a few tries!
Universal Guards
Universal guards are your sewing machine’s trusty sidekick, fitting multiple brands and models.
They’re a budget-friendly safety solution, typically costing between $5 and $15.
Installation’s a breeze – just snap them onto your presser bar.
These versatile guards work well for home sewers and professionals alike, offering protection without breaking the bank.
- Feel the peace of mind as your fingers stay safe from needle pricks
- Experience the satisfaction of mastering your craft without fear
- Enjoy the freedom to focus on your creativity, not potential injuries
Industrial Machine Guards
While universal guards work for many machines, industrial setups need something beefier.
Heavy-duty guard options for these powerhouses are built to last, offering excellent sewing machine protection.
They’re like the bodyguards of the sewing world!
Custom guard designs fit perfectly, ensuring your projects stay on track.
Remember, though, even the toughest guards need TLC.
Regular guard maintenance tips will keep your industrial setup humming along safely, saving you headaches (and maybe a finger or two) down the line.
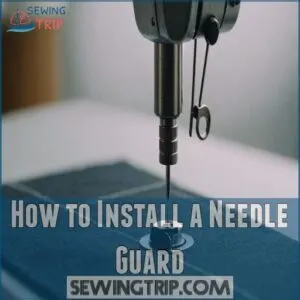
How to Install a Needle Guard
Installing a needle guard on your sewing machine isn’t rocket science, but to ensure overall safety and efficiency, it’s crucial to know when to change the sewing machine needle, as a dull needle can cause damage and malfunctions. Installing a needle guard on your sewing machine isn’t rocket science, but it’s a vital step in safeguarding your fingers from unexpected jabs.
You’ll be threading with confidence in no time once you’ve got the right tools and know-how to properly attach this tiny but mighty safety device.
Step-by-Step Installation Process
Now that you’ve chosen your needle guard, let’s get it installed!
First, unplug your machine – safety first, folks!
Next, locate the presser foot bar.
Most guards snap or screw onto this part.
If you’re using a screw-on type, grab a small screwdriver.
Align the guard with the bar, then either snap it in place or secure it with the screw.
Give it a gentle tug to make sure it’s snug.
You’re all set to sew safely!
Common Installation Mistakes
Properly securing your sewing machine’s needle clamp screw with the right type of screw is crucial to prevent issues like a falling needle, which is often caused by loose needle clamp screw. Don’t let common mistakes needle you when installing your sewing machine guard!
Incorrect alignment can leave you exposed, while over-tightening might damage your machine.
For a snug and secure fit, consider consulting a guide on finger guards for sewing machines.
Choosing the wrong guard type is like using a fish as a bicycle – it just won’t work.
Missing screws? That’s a recipe for a wobbly guard.
And remember, improper pressure can make your guard as useful as a chocolate teapot.
Stay safe and sew smart!
Required Tools
Your sewing-safety toolkit is essential for installing a needle guard.
You’ll need a few key items to get the job done right.
Here’s what you should have on hand:
- A small screwdriver for precise adjustments
- A ruler to make sure proper alignment
- Needle-nose pliers for handling tiny parts
- The instruction manual for your specific sewing machine
With these tools, you’ll be ready to tackle the installation like a pro, whether you’re quilting, embroidering, or working with leather.
Remember, safety first!
Compatibility Checks
Before diving in, check if the needle guard fits your machine like a glove.
Not all guards play nicely with every model.
Match the guard to your machine’s brand and type – whether it’s for clothing, denim, or quilting.
Universal fits can be a lifesaver, but double-check the specs.
Remember, a mismatched guard is like a square peg in a round hole – it just won’t work!
Best Needle Guards for Popular Machine Brands
To prevent common issues like a needle breaking, ensure you’re using the right needle size for your fabric, as explained in the guide on why sewing machine needles break. You’ll find the perfect needle guard for your sewing machine, whether you’re stitching with a Brother, Singer, Janome, or another popular brand.
Let’s explore the best options to keep your fingers safe and your sewing smooth, because nobody wants their masterpiece to end with a trip to the ER!
Brother Compatible Guards
Several reliable Brother-compatible needle guards make sewing safer and more enjoyable.
The DREAMSTITCH metal guard, a fan favorite, snaps right onto most Brother models – it’s like giving your machine a safety helmet!
For those looking for more options, you can find a variety of sewing machine needle guards online, such as this Everysimply Needle Guard.
For budget-conscious crafters, try the universal WellieSTR guard; it’s wallet-friendly and works just as well.
Remember, a well-fitted guard lets you focus on creating without worrying about accidental pricks.
Singer Compatible Guards
While Brother machines keep things simple, Singer owners have their own guard game to play.
The classic Singer guard clicks right onto the presser bar – it’s like putting a helmet on your nimble needle!
Modern Singer models often come with built-in guards, but if you’re working with a vintage beauty, don’t worry.
Compatible guards are easy to find and install, letting you focus on creating masterpieces without playing finger roulette!
Janome Compatible Guards
A shield of confidence, Janome compatible guards fit like a glove on your trusty machine.
You’ll find front-loading, rear-loading, and top-loading options to match your specific model.
Most guards snap right on – no tools needed!
They’re reasonably priced at $5-8 and won’t slow you down, even when you’re tackling heavy upholstery projects.
User reviews rave about their durability and how they don’t obstruct your view while sewing.
Universal Options
Versatility meets safety with universal needle guards – your trusty sidekicks for any sewing machine brand.
You’ll love how these one-size-fits-most options snap right onto popular models like Brother, Singer, and Janome.
Just double-check the measurements before you buy!
Most universal guards feature adjustable brackets, letting you fine-tune the fit for your specific machine.
Think of them as the Swiss Army knife of sewing safety – adaptable, reliable, and always there when you need them.
Signs Your Needle Guard Needs Replacement
You’ll know your needle guard needs replacing when you spot visible cracks, warping, or loose attachments that make it wobble during sewing.
Regular checks can help you catch these warning signs early, ensuring you’re always stitching safely and avoiding any needle-related mishaps that could turn your crafting session into an unexpected trip to the first aid kit.
Wear and Tear Indicators
Just like your favorite comfy jeans start to show their age, your needle guard has telltale signs when it’s time for a replacement. Even the best guards don’t last forever, and keeping an eye out for wear can save you from safety surprises down the road. When choosing a new guard, consider opting for a needle guard for sewing machine to make sure you’re getting the right protection for your specific machine. * Visible cracks or chips in the guard’s surface
- Loose attachment points that wiggle more than usual
- Discoloration or material breakdown from cleaning solutions
- Bent or misshapen areas that affect coverage
- Scratches or grooves where the needle makes contact
Performance Issues
Your sewing machine’s acting up? It might be your needle guard sending out an SOS.
Those pesky performance issues can sneak up on you – watch out for fabric that’s feeding unevenly or getting caught.
If you’re noticing irregular stitch patterns or the needle’s jamming more than usual, your guard might be misaligned or ready for retirement.
Don’t let a worn-out guard turn your sewing session into a wrestling match!
Safety Concerns
Time-worn needle guards can spell trouble for your safety game.
Watch out for cracks, chips, or bent edges – they’re red flags that your guard isn’t up to snuff anymore.
If you notice wobbly movements or the guard doesn’t sit flush against the presser foot, it’s time for a swap.
Don’t gamble with proper needle handling; a compromised guard puts beginner sewists at risk.
Maintenance Tips
Through regular checks, you’ll spot when a needle guard needs replacing.
Keep an eye out for loose attachments, visible cracks, or bent metal – these are red flags.
If you notice the guard wobbling during use or interfering with fabric feed, it’s time for an upgrade.
Don’t wait until it’s hanging by a thread!
A well-maintained guard guarantees your safety and keeps your sewing projects running smoothly.
Teaching Kids to Sew With Needle Guards
You’ll find that needle guards are your best friend when teaching kids the art of sewing, keeping their curious fingers safe from accidental pricks while they learn.
Starting with a properly installed guard on your sewing machine won’t just boost their confidence—it’ll help you breathe easier as they discover the joy of creating their first projects.
Age-Appropriate Guards
Little fingers need extra protection when learning to sew!
Choose child-friendly needle guards made from durable plastic or rounded metal edges.
Start with wider guards for beginners, graduating to slimmer designs as skills improve.
Most kid-friendly sewing machines come with built-in guards, but you can easily add universal ones to standard machines.
Remember, different ages need different guards – what works for a teen won’t suit a 7-year-old’s exploratory hands.
Safety Training
A needle guard’s your young sewist’s best friend, but proper training makes all the difference!
Start by showing kids how to attach and check their guard before each session.
Let them practice threading with the machine off first.
Emphasize the "slow and steady wins the race" approach – there’s no rush when safety’s on the line.
You’ll know they’re ready when they can explain the safety rules back to you!
Supervision Guidelines
Sharp-eyed supervision is your secret weapon when teaching kids to sew safely.
You’ll want to be their sewing buddy until they’re confident with the needle guard.
Keep the mood light but stay alert – remember, you’re not just teaching a skill, you’re instilling confidence and safety habits that’ll last a lifetime.
- Stay within arm’s reach to guide their hands when needed
- Use positive reinforcement for following safety guidelines
- Take regular breaks to prevent fatigue and maintain focus
- Make it fun – turn safety checks into a game or rhyme
Building Good Habits
Anyone can help kids develop rock-solid sewing habits!
Start by making safety first your mantra – always check the needle guard’s in place before hitting the pedal.
Practice consistency by creating a pre-sewing checklist they’ll actually want to follow.
Be patient as they build their mindful sewing skills – it’s like learning to ride a bike with training wheels.
Soon, they’ll be threading needles and respecting the machine like pros!
Common Problems With Needle Guards
You’ll find that needle guards can sometimes be more trouble than they’re worth, causing issues like blocked views of your stitching or getting in the way as you feed fabric through your machine.
While these safety devices are meant to protect you, it’s important to know the common challenges you might face and how to work around them effectively.
Visibility Issues
Needle guards can sometimes feel like you’re sewing with blinders on, causing vision impact that makes precision work tricky.
You’ll notice this challenge most when working on detailed seams.
To tackle these visibility issues head-on:
- Adjust your guard placement slightly higher for better seam visibility
- Invest in enhanced lighting solutions to reduce eye strain
- Try clear plastic guards instead of metal ones for improved view
Don’t let guard problems cloud your vision – with these tweaks, you’ll be stitching like a pro in no time!
Fabric Feed Interference
While you’ve got your eye on the prize, don’t let those pesky fabric feed issues throw you off track!
Sometimes, a needle guard can get in the way of smooth feeding, especially with thicker fabrics.
You’ll want to adjust your feed dogs and check if your guard’s placement is causing any snags.
Different fabric types might need tweaks – silk glides differently than denim.
Try lifting your presser foot a smidge higher for bulkier materials.
Attachment Problems
Let’s get real about those pesky attachment problems.
You’ve got your fabric moving smoothly, but now the guard won’t stay put.
It’s like trying to wrangle a slippery fish – compatibility issues pop up when your guard doesn’t match your machine model, and a loose screw, similar to the issue of a sewing machine foot falling off, can also cause a guard to detach.
Installation mistakes happen to the best of us, leading to loose fittings or even guard breakage.
You’ll know something’s off when you hear rattling or see the guard wobbling during use.
Quick Solutions
Struggling with a finicky needle guard? You’re not alone!
Once you’ve got the attachment sorted, it’s time to tackle common hiccups head-on.
Here are four quick fixes that’ll have you back to smooth sewing in no time:
- Visibility blues? Try adjusting your task lighting for a clearer view
- Fabric getting caught? A dab of machine oil can reduce friction
- Guard feeling loose? Double-check and gently retighten all screws
- Getting skipped stitches? Realign your guard to the perfect height
Professional Sewers’ Tips for Guard Usage
You’ll find that pro sewers have mastered the art of using needle guards without slowing down their work.
Whether you’re quilting king-size blankets or stitching delicate silk, their tested techniques will help you stay both safe and efficient at your machine.
Speed Control
Once you’ve got your guard properly attached, speed becomes your secret weapon.
Pro tip: start slow – think tortoise, not hare!
Gradually increase your pace as you get comfy with the guard’s presence.
Remember, your sewing speed should match your project’s complexity.
For intricate work, dial it back.
When you’re cruising on straight lines, you can rev it up a bit.
You’ll find your sweet spot in no time!
Fabric Handling
Now that you’ve got your speed under control, mastering fabric handling with your needle guard is your next challenge.
The right fabric tension can make or break your project!
Here are three pro tips for seamless sewing:
- Keep your fabric flat and taut as it approaches the needle
- Adjust your feed dogs based on fabric thickness
- Guide layers gently – don’t push or pull against the guard
Remember, you’re the boss of your fabric, not the other way around!
Project-Specific Adjustments
Different fabrics call for different needle guard approaches.
Let’s match your guard setup perfectly for each project, keeping you safe and your sewing spot-on.
Consider investing in a durable Machine Needle Guard for best protection.
Here’s a handy guide to nail those adjustments:
| Fabric Type | Guard Position | Needle Size |
|---|---|---|
| Lightweight | Lower height | 60/8 – 70/10 |
| Medium | Middle setting | 80/12 – 90/14 |
| Heavy-duty | Higher position | 100/16 – up |
Just like a chef adjusts their knife grip, you’ll want to fine-tune your guard for the best control and visibility.
Efficiency Techniques
How can you sew like a pro without sacrificing safety?
By mastering fabric handling with your needle guard!
Start with slower speeds, gradually picking up the pace as you get comfortable.
Always keep your work area well-lit to avoid eye strain and improve accuracy.
You’ll find your sweet spot where the guard feels like a natural extension of your hands.
For bulkier projects, adjust your guard’s position slightly – it’s like finding the perfect dance partner for different tempos and moves.
Where to Buy Quality Needle Guards
You’ll find reliable needle guards at most craft stores and through trusted online retailers like Amazon, with prices typically ranging from $2 to $10 depending on your machine’s brand.
When you’re shopping, make sure to check the compatibility with your specific sewing machine model to guarantee a perfect fit and the best protection for your fingers.
Manufacturer Recommendations
Ready to level up your sewing safety game?
Let’s talk about where the pros get their needle guards.
Your machine’s manufacturer is your best bet for finding top-quality, perfectly compatible guards.
Head to their official website or authorized dealers – they’ll hook you up with guards that fit like a glove.
Brother, Singer, and Janome all offer model-specific options with solid warranty coverage and detailed installation guides.
Trust me, your fingers will thank you!
Price Comparisons
On your quest for the perfect needle guard, don’t let price be your only guide. High-quality brands like DREAMSTITCH and Kunpeng typically range from $5-15, while generic options cost around $2-5.
When choosing a needle guard, consider investing in a sewing machine with built-in safety stitch function for added protection.
When comparing prices, watch out for suspiciously cheap deals that might compromise your safety
- Overpriced "premium" guards that don’t offer extra protection
- Hidden shipping costs that can double your total investment
Look for bulk quantity discounts if you’re stocking up!
Reliable Retailers
Savvy sewists know that trusted retailers make all the difference when shopping for needle guards.
You’ll find quality options at local fabric shops like JOANN and Hobby Lobby, where you can get hands-on advice.
For convenience, check out authorized brand websites or popular online stores like SewingPartsOnline and AllBrands.
Don’t forget to browse customer reviews to make sure you’re getting a reliable product.
Warranty Information
Smart shoppers know that a good warranty can be worth its weight in gold regarding needle guards. You’ll want to check the fine print on coverage details and return policies before making your purchase. Most manufacturers offer 30-day to one-year warranties, depending on the model and price point.
- Premium guards often come with extended warranties and free replacement parts
- Look for sellers who offer hassle-free returns within 90 days
- Choose manufacturers that provide clear repair options and responsive customer service
Alternative Safety Devices for Sewing Machines
You’ll find many reliable alternatives to traditional needle guards that can boost your sewing safety, including finger shields and LED guide systems that’ll keep your fingers far from harm’s way.
These smart safety devices work alongside your machine’s existing features to give you extra peace of mind while you’re creating your masterpieces.
Finger Shields
Beyond traditional needle guards, finger shields offer an extra layer of protection for your busy hands.
These nifty devices come in magnetic, clip-on, and adjustable varieties.
You’ll love how they’re designed to keep your fingers safe without getting in your way.
For DIY enthusiasts, you can fashion temporary shields from clear plastic sheets, but we’d recommend investing in professional-grade options for long-term safety and comfort.
Presser Foot Guards
While finger shields offer protection from above, presser foot guards give you an extra layer of security right where the action happens.
They’re like mini bodyguards for your fingers, keeping them safely away from the needle’s path.
Here are three game-changing benefits of presser foot guards:
- Creates a protective barrier between fingers and feed dogs
- Helps maintain consistent seam allowances
- Prevents fabric from bunching or shifting unexpectedly
Safety Plates
You’ll love how safety plates act as your trusty shield against needle mishaps.
These sturdy metal or acrylic guards install directly onto your machine’s throat plate, creating a protective barrier between your fingers and the needle area.
They’re especially handy for quilting and free-motion work.
Don’t forget to clean your safety plate regularly – a buildup of lint can affect its performance and your sewing precision.
LED Guide Systems
Modern LED guide systems are like having a personal spotlight for your sewing projects.
These bright helpers cast a clear line on your fabric, making it easier to track your stitching path.
You’ll love how they boost your sewing accuracy, especially during detailed work or low-light conditions.
Just check your machine’s compatibility before investing – not every model plays nice with add-on LED systems.
Frequently Asked Questions (FAQs)
What is the use of needle guard in sewing machine?
A needle guard acts as your fingertip’s bodyguard, shielding it from accidental pricks.
It’s like having a tiny safety net that lets you focus on your stitching without worrying about becoming a human pincushion.
Pretty nifty, right?
How do you put a needle guard on a sewing machine?
Fear not, installing a needle guard is a breeze!
Snap it onto your presser bar or foot, depending on the model.
It’s like giving your machine a tiny shield.
Adjust it to hover just above the needle for maximum protection.
What is a finger guard on a sewing machine?
A finger guard on a sewing machine is your trusty sidekick, protecting your digits from needle pricks.
It’s like a mini shield that attaches near the presser foot, keeping your fingers safe while you guide fabric through the machine.
What is the function of the needle bar on a sewing machine?
The needle bar is the sewing machine’s workhorse.
It holds and moves the needle up and down, creating stitches as you sew.
Think of it as the rhythm section in your sewing symphony, keeping everything in sync.
Can needle guards affect stitch quality?
Like a watchful guardian, needle guards can affect your stitching.
They might obstruct your view or interfere with fabric feeding.
You’ll need to balance safety and precision.
Experiment to find what works best for your sewing style and machine.
Are needle guards compatible with all fabric types?
Most needle guards work well with various fabrics, but you’ll want to think about thickness.
Thicker materials might need adjustments.
Test different settings to find what works best.
Remember, safety’s your top priority, so don’t skip the guard!
Do needle guards work with specialty presser feet?
Threading the needle of compatibility, specialty presser feet can be a tight fit with needle guards.
You’ll need to check if they play nice together.
Some guards might need adjusting or replacing to accommodate your fancy feet.
How often should needle guards be cleaned?
Clean your needle guards regularly, ideally after each sewing session.
You’ll want to wipe them down with a soft, lint-free cloth to remove dust and thread debris.
This keeps your sewing smooth and prevents jams.
Don’t forget those hard-to-reach spots!
Can needle guards be used during embroidery work?
Ironically, you’d think needle guards would be a no-brainer for embroidery.
They can be used, but they might cramp your style.
You’ll need to weigh safety against visibility and maneuverability.
Try it out and see what works best for you.
Conclusion
Just like a knight’s shield protects them in battle, your needle guard for a sewing machine is your trusty armor against unexpected jabs.
Don’t let safety be an afterthought – it’s the foundation of your sewing success.
Remember, a well-chosen guard also keeps your fingers safe but boosts your confidence and creativity.
So, whether you’re a seasoned pro or just starting out, make that needle guard your sewing sidekick.
With it in place, you’re all set to stitch your way to greatness!

