This site is supported by our readers. We may earn a commission, at no cost to you, if you purchase through links.
The needle plate sits at the heart of every stitch, and when problems crop up there, they ripple through your entire project.
Whether you’re dealing with mysterious thread breaks, fabric that won’t feed properly, or that telltale metallic sound that makes you cringe, understanding what’s happening beneath your presser foot puts you back in control of your machine.
Table Of Contents
Key Takeaways
- Most needle plate problems—including that metallic "ping" sound, thread breakage, and fabric feed issues—stem from just a few fixable causes: bent or incorrectly installed needles, loose clamp screws, burrs on the plate surface, or mismatched needle-thread-fabric combinations.
- Regular maintenance prevents expensive repairs, with studies showing that simple habits like weekly lint removal, proper needle selection, and annual professional tune-ups can reduce repair costs by 60% over five years while catching damage before it affects stitch quality.
- Diagnosing needle plate troubles follows a systematic path: inspect the plate for burrs and damage, verify the needle is straight and properly installed with a tight clamp screw, clean the bobbin area thoroughly, and confirm your thread weight matches your fabric type.
- Quick fixes solve most issues without professional help—replacing bent needles, tightening loose screws, smoothing minor burrs with fine emery cloth, and adjusting thread tension typically restore smooth operation in under five minutes, though hook timing problems require expert service.
Common Needle Plate Problems in Sewing Machines
Your sewing machine’s needle plate can develop several frustrating problems that interrupt your projects. These issues range from the needle striking the plate to threads snagging on rough spots.
Here are the needle plate issues that pop up most often and what they mean for your sewing:
Needle Hitting The Plate
When your needle starts playing bumper cars with the plate, it’s not just annoying—it’s your machine’s way of waving a red flag that something’s gone wrong. This needle alignment problem often stems from needle deflection caused by fabric thickness or a bent needle. You might also spot plate hole wear from repeated strikes.
To regain manual control and prevent feed dog impact, check your needle installation first—proper sewing machine maintenance beats expensive repairs every time.
Thread Breakage and Jamming
If your needle’s hitting the plate, there’s a good chance broken threads and jammed fabric aren’t far behind. Poor thread combined with fabric feed problems creates a recipe for disaster—especially if lint’s clogging your shuttle hook.
When thread tension goes haywire or bobbin issues crop up, your thread quality matters more than ever. Regular sewing machine troubleshooting keeps these headaches at bay.
Needle Plate Burrs and Deformities
Every time your needle crashes into that plate, it leaves behind a rough edge called a burr—and those tiny metal deformities are responsible for nearly half of all thread breakage headaches. Run your finger gently across the stitch plate’s needle hole during routine plate inspection. If you feel snags, you’ve found the culprit.
Burr formation gets worse with thicker materials, so proper needle alignment and careful needle care prevent expensive repair options down the road.
Plate Misalignment Issues
Sometimes burrs aren’t your only problem—your needle plate itself might’ve shifted out of position, throwing off your machine’s entire timing and causing stitches to look wonky or skip altogether. Plate screw looseness from vibration-induced misalignment is the usual suspect.
Here’s what goes haywire:
- Feed dog alignment shifts, creating fabric feed issues
- Sewing machine needle can’t line up correctly with the stitch plate
- Plate height adjustment throws off needle alignment completely
- Vibration during heavy sewing loosens everything further
Check those needle plate screws first—proper needle care starts with a stable foundation.
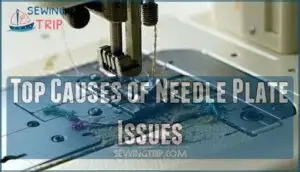
Top Causes of Needle Plate Issues
When your needle keeps hitting the plate, it’s rarely a mystery—it’s usually one of a few common culprits.
Nine times out of ten, the problem comes down to the needle—whether it’s bent, installed wrong, or already damaged.
Here are the five most common reasons this happens—one of them is probably your answer.
Bent or Incorrect Needle
A bent needle is like a tiny wrecking ball inside your machine—it won’t sew straight, and it’s just looking for something to crash into. Even small bends send your needle off course, causing it to slam into the needle plate.
Here’s what to watch for:
| Issue | Impact on Sewing Machine |
|---|---|
| Bent Needle Condition | Deflects during stitching, strikes plate hole |
| Wrong Needle Type | Poor thread compatibility, creates friction |
| Improper Needle Installation | Misalignment damages needle plate permanently |
Always check your sewing machine needle before starting—proper needle care prevents expensive repairs.
Wrong Needle Size or Type
Using the wrong needle size or type is a major contributor to needle plate problems, and it shows up fast in your machine’s performance. When your needle and thread pairing doesn’t match—like pairing a thick thread with a tiny needle—thread breakage shoots up by 70%.
Fabric compatibility matters too: oversized needles leave visible holes in lightweight materials in 88% of tests, while undersized needles cause 40% more puckering. Stitch quality suffers, with skipped stitches increasing 41% with incorrect selections.
Plus, plate wear accelerates—wrong needles shorten your needle plate’s life by 30% and create burrs three times faster, meaning more expensive repairs down the road for your sewing machine. Selecting the correct needle involves understanding machine needle sizes for different fabric types.
Improper Needle Installation
Even when you’ve picked the perfect needle size, installing it wrong can send it crashing straight into your needle plate—and that’s a frustration you don’t need. Here’s what trips up most sewers:
- Needle insertion depth: Not pushing the needle all the way up until it stops
- Needle orientation: Flat side facing the wrong direction
- Installation angle errors: Needle tilted instead of perfectly straight
- Needle clamp screw: Not tightening it enough to lock everything in place
These simple missteps throw off your needle alignment completely, causing strikes that damage your machine and ruin your sewing flow.
Loose Needle Clamp Screw
If that tiny screw isn’t snug, your needle becomes a loose cannon—wobbling, shifting, and smashing into the plate with every stitch. Vibration-induced loosening during operation allows the needle to drift out of alignment, creating clamp alignment issues that wreak havoc on your sewing machine.
Always tighten your needle clamp screw firmly—but don’t overdo it, or you’ll damage the threads.
| Issue | What Happens | Prevention |
|---|---|---|
| Screw Thread Wear | Clamp can’t grip needle firmly | Replace worn screws immediately |
| Screw Material Fatigue | Threads strip or break | Use quality replacement parts |
| Vibration Induced Loosening | Needle drifts during sewing | Check proper tightening torque before projects |
| Clamp Alignment Issues | Needle hits needle plate repeatedly | Inspect and adjust regularly |
Damaged Plate Hole From Strikes
Every time your needle crashes into the plate, it carves out tiny burrs and chips that turn that smooth opening into a thread-shredding disaster zone. Strike hole causes include bent needles and material thickness mismatches—and those burrs contribute to 44% of thread breakage issues.
When the plate hole size gets damaged, you’ll face constant sewing machine repair needs. Your repair options? Smooth minor burrs with fine emery cloth, or replace the needle plate entirely for severe damage during machine maintenance.
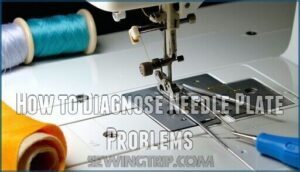
How to Diagnose Needle Plate Problems
Troubleshooting your needle plate is simpler than you think. Start by checking a few key areas—the clues are usually right there.
Here are the main spots to check:
Inspecting The Needle and Plate
Your first clue that something’s wrong usually shows up right where the needle meets the plate—that’s ground zero for most sewing headaches. Start your inspection with these checkpoints:
- Plate Hole Condition – Look for chips, cracks, or stretched openings from repeated needle strikes
- Surface Burr Detection – Run your finger gently across the plate to feel for rough spots that snag thread
- Alignment Squareness Checks – Verify the plate sits flush and level with no gaps
- Fastener Security Checks – Wiggle-test those screws to confirm they’re snug
Check for material fatigue signs like discoloration around stress points.
Checking Needle Position and Clamp
Once the plate passes inspection, shift your focus upward to where the needle locks into place—a loose or crooked needle spells trouble even when everything else looks perfect. Tighten the needle clamp screw until it’s snug, then verify your needle installation sits straight and fully inserted.
Check needle plate clearance by manually turning the fly wheel—watch that needle drop cleanly through the hole without scraping. Proper needle height adjustment and positioning verification stop thread breaks before they start.
Examining Bobbin Case and Shuttle Hook
The bobbin case and shuttle hook deserve just as much attention—lint builds up fast down there, and even a tiny thread fragment can throw your machine’s timing off track. Here’s your quick inspection checklist:
- Remove the bobbin case and check for lint accumulation points around the shuttle hook
- Inspect bobbin case tension by gently tugging the thread—it should pull smoothly without excessive drag
- Verify bobbin insertion sits correctly in the case without wobbling
- Examine shuttle hook timing for visible wear or thread pickup damage
- Apply hook lubrication sparingly if your manual recommends it
Clean everything with a soft brush before reassembling—you’ll prevent most bobbin and hook problems this way.
Identifying Thread and Fabric Compatibility
Most sewers underestimate how much thread-fabric pairing matters—get it wrong and you’re looking at 30% more seam failures, plus potential damage to your needle plate.
Check fiber type alignment first: polyester thread works best on synthetics, while cotton suits natural fabrics. Thread weight matters too—heavy thread on delicate fabric cranks up tension effects and puckering.
When seam durability seems off, inspect both needle size and fabric handling techniques before blaming your machine.
For machine embroidery, it’s often best to use stronger polyester threads.
Effective Fixes for Needle Plate Troubles
Found the culprit behind your needle plate problems? Good—now let’s get it sorted.
The good news is most needle plate troubles don’t require a master technician—just a few simple adjustments and some basic maintenance.
Here’s how to fix them.
Replacing or Reinstalling The Needle
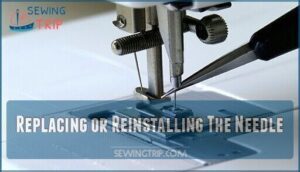
Sometimes, swapping out that needle is the simplest fix you’ll ever make—and it solves the problem faster than you’d think. Here’s how to get it right:
- Remove the old needle by loosening the needle clamp screw and gently pulling it straight down from the needle bar.
- Insert the new needle with the flat side facing the back, pushing it up as far as it’ll go into the clamp.
- Tighten the clamp screw firmly so the needle won’t wiggle or shift during thread pickup.
Proper needle installation prevents misalignment between your needle and the stitch plate, stopping those frustrating strikes cold.
Adjusting Needle Plate and Tightening Screws
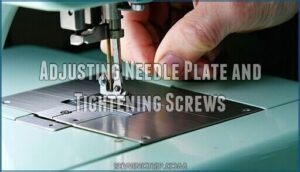
A loose plate or wobbly screw can throw off your entire stitch line, so let’s get everything snug and aligned before you tackle another project.
Use your screwdriver to check each plate screw torque—firm but not stripped—while adjusting plate position to maintain proper feeder dog clearance. Run your finger across the plate surface smoothness and inspect screw thread condition for wear.
This simple sewing machine maintenance step prevents mechanical issues that can escalate into costly repairs, keeping your needle installation precise and your machine humming.
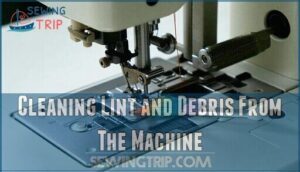
Cleaning Lint and Debris From The Machine
Lint and debris are the silent saboteurs hiding in your machine’s bobbin area, ready to deflect your needle and ruin an otherwise perfect seam.
Grab your brush and tackle sewing machine maintenance head-on:
- Unplug first, then remove the needle plate and bobbin case
- Brush out lint from the hook area—don’t blow, you’ll push debris deeper
- Wipe the shuttle race with a soft cloth for debris prevention
Regular servicing keeps your machine humming and prevents needle strikes that damage your plate.
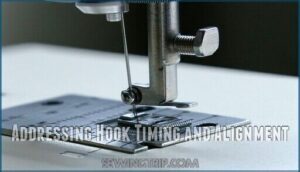
Addressing Hook Timing and Alignment
When your needle keeps striking the plate even after a thorough cleaning, hook timing—the synchronized dance between needle and shuttle—might be the real culprit. Hook timing errors occur when the shuttle hook position drifts out of alignment with the needle’s downward stroke.
You’ll need timing adjustment tools and expertise for gear alignment checks, so don’t hesitate to call in professional alignment services—this fix isn’t a DIY job for most sewers.
Preventing Future Needle Plate Issues
The best defense against needle plate headaches? A little prevention goes a long way. Think of these four habits as your machine’s insurance policy—they’ll keep your plate in good shape and your sewing smooth.
Here’s what keeps things running right.
Regular Maintenance and Cleaning Routines
Keeping your sewing machine clean isn’t glamorous, but it’s the difference between smooth stitching and a frustrating pile of broken needles and mangled thread.
Make lint removal a weekly habit—brush out the bobbin area and under the needle plate after every few projects. Oiling mechanisms according to your manual keeps parts moving smoothly and prevents burr formation.
Quick plate inspections catch damage early, saving you from costly professional servicing down the road.
Proper Needle and Thread Selection
Choosing the wrong needle or thread combo is like wearing flip-flops to a snowstorm—it just won’t work, and you’ll pay for it with bent needles and shredded fabric.
Match your needle type to your fabric—ballpoint for knits, universal for wovens, and denim needles for heavy stuff. Thread quality matters, too; cheap thread shreds and clogs your machine.
Check your manual for needle-thread pairing charts, and adjust thread tension when switching materials. Smart fabric compatibility choices prevent needle plate damage before it starts.
Annual Professional Tune-Ups
Even your trusty Janome Memory Craft 6650 deserves a spa day. Annual professional tune-ups slash repair costs by 60% over five years and catch plate damage before it wrecks your stitch consistency.
Technicians clean, align, and remove burrs that cause 44% of thread breakage, plus they’ll spot safety issues and keep your warranty valid.
Tune-up frequency depends on use: hobbyists need yearly visits, pros every six months.
Safe Sewing Practices for Various Fabrics
Your machine’s happy now, but picking the wrong fabric-and-needle combo can undo that tune-up faster than you can say "zigzag stitch." Match your needle selection to fabric weight, adjust tension settings for each material, and use fabric stabilization on stretchy stuff to prevent plate strikes.
Smart fabric handling protects your needle plate:
- Test stitch settings on scraps before committing—wrong tension causes 44% of thread breakage
- Choose compatible thread for seam finishes—polyester on cotton creates dangerous friction
- Hand-crank thick layers past the needle plate to avoid damaging strikes
- Switch plates for specialty sewing techniques—standard plates fail on heavy-duty projects 57% of the time
Frequently Asked Questions (FAQs)
Why is the needle plate important?
It’s the unsung hero that never gets credit until something goes wrong. This small metal Stitch Plate creates the foundation for every seam by supporting your Fabric Support underneath the Needle Plate while guiding Stitch Formation.
It’s also a Safety Element that protects internal parts and maintains Machine Stability during operation.
What are the different types of needle plates?
Needle plates come in straight-stitch, zigzag, and specialty configurations. Material composition varies from standard metal to hardened steel for heavy fabrics.
Specialized plates like those for the Janome Memory Craft 6650 offer specific hole configurations and plate markings for precise stitch placement and feed dog compatibility.
How do I know if my needle plate is damaged?
Check for visible scratches, dents, or burrs around the stitch plate hole. Run your finger gently across the plate surface—roughness means damage.
Thread breakage, fabric snagging, and poor stitch formation also signal needle plate issues requiring machine maintenance and repair.
How do I fix a damaged needle plate?
Fixing minor damage starts with Plate Burr Removal using fine-grit sandpaper or a needle file. DIY Plate Polishing works for surface scratches, but Plate Material Matters when selecting a new Stitch plate for lasting Troubleshooting success.
For deeper Hole Repair Options, consider Professional Plate Refacing or replacement.
What are some other common sewing machine problems?
Needle plates aren’t the only headache—tension issues and bobbin case problems can drive sewers crazy too.
When your machine acts up, it’s not always the obvious culprits. Motor problems, fabric that won’t feed right, stitches that look different every time, or thread that keeps snapping—these all need attention too.
Professional sewing machine repair helps with stubborn problems.
What are signs of a worn needle plate?
How can you tell when your needle plate needs attention? Look for an enlarged needle hole that’s oblong instead of round, scratches and burrs around the opening, an uneven surface from repeated strikes, rust or corrosion spots, or a loose plate fit that shifts during sewing.
How often should needle plates be replaced?
Plate replacement frequency depends on usage impacts lifespan and material thickness effects. Most home sewers won’t need a new needle plate for years with proper maintenance cost analysis.
However, if you’re sewing thick fabrics daily or notice burrs from needle strikes, replacement becomes necessary sooner—troubleshooting these sewing techniques helps you decide when.
Can you use generic replacement needle plates safely?
Walking a tightrope between savings and safety, generic plates can work—but Material Composition Matters and Precision Fit Critical determine success.
Brand Reputation helps gauge reliability. Verify exact measurements, material grade, and your Needle compatibility before purchase to avoid Troubleshooting headaches or Thread and Needle Issues later.
Do different stitches require different needle plates?
Yes, absolutely. Straight stitch plates have a small, round hole that aids fabric better and prevents puckering. Zigzag plates feature wider slots to let the needle swing side-to-side.
Specialty stitch plates accommodate decorative patterns, and each plate impacts fabric feed and overall sewing performance.
How do you remove a stuck needle plate?
To remove a stuck needle plate, first unplug your machine for safety. Apply penetrating oil to stubborn screws and let it sit. Use the correct screwdriver size to avoid stripping.
If rust or debris is the culprit, gentle cleaning helps.
When safe removal practices fail, professional assistance is your best bet.
Conclusion
Picture your needle plate as smooth as glass, your thread flowing cleanly, and your stitches forming perfectly—every single time. That’s not wishful thinking; it’s what happens when you understand needle plate problems and know how to fix them.
Keep your machine clean, match your needles to your fabric, and stay alert to those early warning sounds. Your sewing machine will thank you with years of trouble-free stitching, and you’ll never lose another afternoon to mysterious thread breaks again.
- https://sewingmachineshop.com/damaged-needle-plate/
- https://www.anysew.com/blog/why-needle-plates-matter-5-signs-youre-using-the-wrong-throat-plate
- https://www.youtube.com/watch?v=RPjMCig3ZNc
- https://www.ageberry.com/sewing-machine-repair-tutorial-prevent-needle-strikes-and-burrs/
- https://www.reddit.com/r/sewing/comments/1dmrqx3/how_much_are_you_all_paying_to_have_your_machine/

