This site is supported by our readers. We may earn a commission, at no cost to you, if you purchase through links.

For stretchy knits, reduce ease allowances by 1-2 inches, while woven fabrics require more room.
Adjust darts and seams for fabrics with drape, and add extra seam allowance for fraying fabrics like linen.
Heavy materials need simplified designs with fewer seams, while delicate fabrics work better with faced edges.
Remember that pattern alteration advice for different fabrics isn’t one-size-fits-all—cotton behaves differently than silk or wool.
Your pattern might look perfect on paper, but fabric behavior is where the real magic (or mayhem) happens.
Table Of Contents
Key Takeaways
- You’ll need to adjust ease allowances differently for each fabric type—reducing by 1-2 inches for stretchy knits while adding more room for woven fabrics to achieve the right fit.
- Your pattern alterations should account for fabric properties like drape, weight, and stretch percentage, as these characteristics significantly impact how the final garment will hang and fit.
- You should preserve grainlines during all alterations, as even a 5-degree variation can dramatically change your fabric’s drape and ruin the garment’s professional appearance.
- You’ll need specialized techniques for different body types—whether you’re adjusting for plus sizes (focusing on bust and torso length) or petite/tall frames (requiring proportional changes throughout the pattern, not just hemlines).
Fabric Selection Tips
Picking the right fabric can make or break your sewing project, especially when altering patterns.
Pay attention to fabric type, weight, and stretch so your garment fits beautifully and hangs just right.
The right fabric choice transforms your sewing project, ensuring perfect fit, flawless drape, and a garment that truly shines.
Choosing Fabric Type
Start with fabric guide basics to match your project and design.
Focus on these steps:
- Fiber Content: Natural fibers breathe; synthetics last.
- Weave Structure: Tight weaves for durability; loose weaves for movement.
- Fabric Drape: Flowing or structured? Match fabric type to your pattern.
- Pattern Matching: Prints should align, so budget extra fabric.
Smart fabric selection guarantees smooth results!
Considering Fabric Weight
Fabric weight impacts how a garment drapes and feels.
Lightweight fabrics, like chiffon, require delicate handling and adjustments for stability, while heavyweight fabrics, such as denim, need precise seams to avoid bulk.
Consider fabric properties and seasonal fabrics when selecting weight. A fabric guide is invaluable for ensuring alignment between the pattern and fabric type during fabric selection.
Understanding grams per square meter helps determine the fabric’s suitability for a project.
Understanding Fabric Stretch
Stretch percentage and fabric recovery matter big time when choosing the right material. Some knit types stretch differently than woven fabrics. Bias stretch impacts how a fabric drapes. Test stretch by pulling it gently—you’ll thank yourself later.
Understanding fabric properties helps match sewing techniques to your project and guarantees pattern alterations create the perfect fit. Always check fabric stretch guides to ensure you’re working with the right material for your needs.
- Measure stretch percentage with a ruler.
- Test fabric recovery after stretching.
- Know how bias stretch changes fabric behavior.
- Match stretch direction to pattern requirements to achieve the desired outcome, considering the perfect fit.
Pattern Alteration Basics
Pattern alterations can seem tricky, but mastering key terms like ease, darts, and seam allowance makes it simpler.
Sewing techniques rely on these basics to preserve a pattern’s integrity. Pay attention to grainline impact—align fabric properly to avoid awkward fits.
Before diving into sewing alterations, always test adjustments with muslin mock-ups. They let you spot flaws early without risking your final fabric.
When working on pattern adjustments, remember to slash, spread, or fold carefully to maintain balance and flow. Alteration techniques, such as lengthening or reshaping seams, work best when precise.
A key aspect involves employing easy pattern alteration techniques for a perfect fit. Finally, consider fabric properties like stretch or weight, which can change how alterations behave. Small tweaks in patterns lead to big wins in fit and comfort!
Grading Patterns Correctly
Grading patterns correctly guarantees your garment fits perfectly without losing its original design.
You’ll adjust specific areas, like the bust or waist, to match your measurements while keeping everything balanced.
Measuring Body Proportions
Now that you understand pattern basics, let’s measure your body proportions accurately. Taking precise measurements forms the foundation of successful pattern grading.
Here’s your five-step measurement process:
- Wear appropriate undergarments for honest measurements
- Use a soft measuring tape for flexibility around curves
- Stand relaxed with feet together for consistent results
- Record measurements digitally for future reference
- Measure twice at each reference point for seamline precision.
For reliable results, consider purchasing flexible measuring tools.
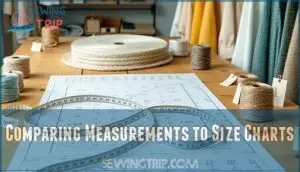
Comparing Measurements to Size Charts
Now that you’ve got your measurements, it’s time to decode those pattern size charts.
Remember, your body measurement accuracy matters more than the number on your clothing tags.
Compare your bust, waist, and hip measurements to the chart, noting that pattern sizes often run larger than ready-to-wear.
When in doubt, select based on your largest measurement—you can always adjust down.
Don’t forget to account for ease allowance based on fabric properties.
You can find various pattern sizing products online.
Adjusting for Different Body Types
Now that you’ve aligned your measurements with size charts, let’s tackle your unique silhouette.
Different body types need specific pattern alterations.
For hourglass figures, balance bust and hip adjustments while cinching the waist.
Ruler body shapes benefit from added curves through strategic darts.
Apple modifications focus on roomier midsections while maintaining shoulder fit.
Pear resizing requires generous hip allowances with narrower upper adjustments.
Remember, your body proportions guide all pattern alterations—one shape doesn’t fit all, and making the right pattern alterations is key to a good fit, considering your overall silhouette.
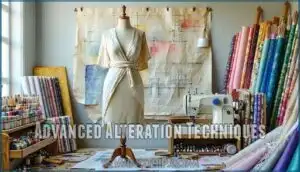
Advanced Alteration Techniques
You’ll need specialized techniques to modify patterns for different fabric types, as knits, wovens, and specialty materials all respond uniquely to alterations.
Once you’ve mastered these advanced methods, you’ll transform ill-fitting commercial patterns into custom creations that look like they were made just for you.
Working With Knits and Wovens
Now that you’ve mastered pattern grading, let’s talk about the unique challenges when switching between knits and wovens.
Knit fabric stretch requires different pattern adjustments than woven fabric drape. You’ll typically need to size down for knits due to their negative ease.
When combining both fabric types in one garment, mark seams carefully and stretch the knit slightly as you sew to prevent bunching in the woven sections. Using the correct needle selection is essential for sewing with knit fabrics.
Making Adjustments for Plus Sizes
While knits offer more forgiveness with fit, plus-size patterns need specific attention.
Your body proportions matter more than the number on the size chart. Focus on Bust Adjustments first, adding 1-2 inches where needed.
Don’t forget Torso Length—plus-size figures often need extra room vertically. For Hip Adjustments and Upper Arm areas, use the slash-and-spread technique.
When fitting the Abdomen, make certain you’ve added enough ease for comfortable movement.
Altering for Petite and Tall Sizes
Petite and tall frames require precise pattern alterations beyond simple shortening or lengthening.
When modifying patterns for your height, remember:
- Petite proportions need consistent adjustments throughout (not just hemlines)
- Tall torso adjustments should maintain design elements and proportions
- Sleeve length must coordinate with armscye modifications
- Rise adjustments should be equal in front and back pattern pieces
- Inseam lengthening requires checking finished measurements against your actual inseam
Compare your measurements to pattern specifications and adjust accordingly, using a muslin test for verification to ensure a proper fit, considering precise alterations and actual measurements.
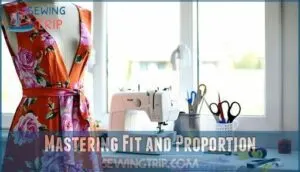
Mastering Fit and Proportion
You’ll transform your sewing projects from homemade to handcrafted when you master the art of fit and proportion.
By learning to balance pattern pieces, preserve grain lines, and troubleshoot common issues, you’ll create garments that look and feel custom-made for your body, with a focus on achieving a perfect proportion.
Balancing Pattern Pieces
Balance becomes the unsung hero of successful pattern alterations. When modifying patterns, you’ll need to make certain all corresponding pieces receive consistent alterations.
| Alteration Type | What to Balance |
|---|---|
| Sleeve Cap | Armhole circumference |
| Bust Adjustment | Side seam length |
| Waistline | Front and back pieces |
| Hemline | Consistent length all around |
| Neckline | Collar or facing pieces |
Make symmetrical adjustments across pattern pieces to maintain matching seams and proportional changes while preserving the grainline alignment throughout your fabric. To achieve a perfect fit, it’s vital to compare body measurements with the pattern size chart.
Preserving Grain Lines and Ease
Every successful pattern alteration hinges on preserving grainlines and ease.
When adjusting patterns, always mark grainlines clearly and maintain them parallel to the fabric’s selvage.
Your ease allowance should accommodate movement while preserving the design integrity.
Remember, fabric drape changes dramatically when grainlines shift—even a 5-degree variation can ruin your garment’s hang.
After alterations, double-check that your pattern balance remains intact for professional results, ensuring that the overall design and ease allowance work in harmony to achieve the desired professional results.
Troubleshooting Common Fit Issues
Now that your grain lines and ease are properly aligned, let’s tackle those annoying fitting issues. When pants twist sideways or hems aren’t parallel to the ground, they’re telling you something.
Drag lines often indicate where fabric needs more room, while excess fabric creates unwanted gaping. For flat buttocks, look for vertical wrinkles under darts. Square shoulders? Watch for diagonal wrinkles from shoulder to biceps.
Always test alterations with muslin mockups before cutting your fashion fabric. Accurate fitting relies on using the correct sewing implements.
Frequently Asked Questions (FAQs)
How do I know what fabric to use for a pattern?
Check pattern requirements first, then consider drape, stretch, and weight. Match your fabric’s properties with the pattern’s intended look. Beginners should stick with recommended fabrics until they gain more experience.
How do you match different fabric patterns?
Birds of a feather flock together when matching fabric patterns.
Align dominant elements, match scales appropriately, and make certain colors complement each other.
You’ll need pins and patience for precise pattern matching at seams.
How do directional prints affect pattern alterations?
Directional prints require you to cut all pattern pieces facing the same way. You’ll need extra fabric and careful alignment since you can’t flip pieces to save material during alterations.
How to adjust patterns for sheer fabrics?
Like delicate veils, sheer fabrics reveal all secrets beneath.
Double your seam allowances for French seams, add lining pieces, and choose faced edges instead of hems.
You’ll need extra width for modesty panels too.
When to alter interfacing pieces differently?
You’ll need to alter interfacing pieces differently when working with stretch fabrics, lightweight materials requiring stabilization, or when creating structured elements like collars and cuffs.
Always adjust interfacing to match your pattern changes.
Adjusting for napped fabrics like velvet?
When cutting velvet, make certain all pattern pieces face the same direction.
You’ll need more fabric since you can’t flip pieces.
Mark nap direction with arrows on your pattern for consistent light reflection.
How to handle pattern alterations for sequined fabrics?
Mark, cut, and separate sequined fabric before altering patterns.
You’ll need to remove sequins from seam allowances and add extra width for comfort.
Always test on scraps first to prevent needle damage.
Conclusion
According to recent surveys, 87% of sewists report better project outcomes when matching pattern alterations to fabric properties.
Remember, your pattern alteration advice for different fabrics should evolve as you gain experience.
You’ll soon develop an intuitive sense for how materials behave under the needle, and by embracing these fabric-specific adjustments, you’re not just following directions—you’re developing a personal relationship with your materials that’ll transform your sewing journey from frustrating to fulfilling.
Happy sewing!


