This site is supported by our readers. We may earn a commission, at no cost to you, if you purchase through links.
Lay your pattern flat, compare it to your numbers, and pinpoint areas to tweak.
Too tight? Use the slash-and-spread method to add room.
Need shaping? Adjust darts for curves that flatter.
Pay attention to grainlines—cutting off-grain is like walking in crooked shoes, trust me.
Always test changes on muslin before committing to your final fabric (better a mistake there than on your dreamy silk).
With a little patience and practice, you’ll turn any pattern into a custom masterpiece.
Ready to explore more tips for tricky adjustments?
Table Of Contents
Key Takeaways
- Compare your measurements to the pattern and adjust seams, darts, or lengths for a better fit. Always test on muslin first.
- Pay attention to grainlines to keep seams straight and fabric drape smooth, avoiding twisting or sagging.
- Use techniques like dart manipulation and the slash-and-spread method to shape and customize for your body type.
- Keep your sewing tools organized and document all adjustments and measurements for quick updates and efficient workflow.
Pattern Alteration Basics
Learning the basics of pattern alteration reveals the key to clothes that actually fit.
Mastering pattern alteration unlocks the secret to creating clothes that fit like they were made just for you.
You’ll adjust patterns with simple tools and techniques, turning ill-fitting designs into garments that suit you perfectly.
This approach ensures a logical flow and separation of concepts for improved readability.
Measuring and Adjusting Patterns
When measuring and adjusting patterns, compare your body dimensions to the sewing pattern measurements.
Don’t forget ease allowance—it’s the wiggle room for comfort!
Blend sizes by smoothly redrawing seamlines, and test fitting adjustments with a muslin fitting before cutting fabric.
Adjust patterns carefully, ensuring they align with your measurements for a perfect fit that feels just right.
Tools and Materials Needed
You’ll need sewing tools that make pattern work smooth and precise.
Start with measuring tools like a flexible measuring tape and clear ruler types for straight lines. Add curve rulers for shaping necklines and armholes.
Marking tools, sharp cutting tools, and sturdy pattern storage keep your workspace tidy. A key item is accurate measuring tools for best results.
These pattern alteration supplies guarantee every fit adjustment feels effortless, with the use of accurate measuring tools and sewing tools being crucial.
Understanding Fabric Grainlines
Understanding grainlines isn’t rocket science, but it’s key to a great fit.
The grainline arrow on your pattern shows how to align it with the fabric’s straight grain.
Misaligned grainlines cause twisting or sagging—nobody wants that!
Use muslin testing to check grainline accuracy before cutting.
Bias grain adds stretch, while cross grain works for stability.
Fitting and Measurement
You can’t get a great fit without accurate measurements, so grab your tape measure and stand naturally.
Accurate measurements are the secret to clothes that fit perfectly—stand tall, measure snug, and enjoy the difference!
Understanding common fitting issues and how patterns align with your body will save you from frustration later.
Taking Accurate Body Measurements
Stand tall—posture matters! Use snug measuring tools for precise body measurements.
Wear your usual undergarments, as they affect fit. Mark reference points like waistlines with elastic for accuracy.
Measure every six months; bodies change! Record sewing measurements digitally for easy updates.
Accurate results require using specialized measuring devices. Knowing how to measure correctly saves time and guarantees perfect sewing adjustments every time, which is why accurate results are crucial, and using the right tools ensures a great fit.
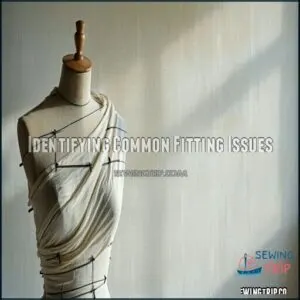
Identifying Common Fitting Issues
Spotting sewing pattern fitting issues early saves frustration later.
Watch for common fit issues like:
- Fitting Wrinkles: Horizontal folds under the seat or at the back waist—adjust length or width to fix Garment Imbalance.
- Drag Lines: Diagonal pulls show poor posture or improper seams.
- Vertical Pulls: Tight seams need letting out.
Test adjustments with Muslin Mockups before sewing final fabric!
Understanding Pattern Balance and Grainline
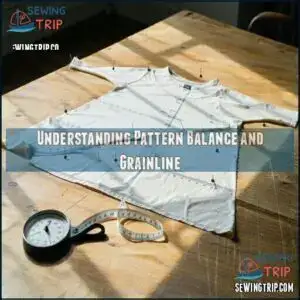
Balance isn’t just for tightrope walkers—it’s key to sewing, too. A pattern’s grainline direction keeps seams straight, while fabric drape and bias impact shape. Always check pattern symmetry and balance for a polished fit.
Proper grainline alignment is vital for garment stability. Here’s a handy guide:
| Term | Definition | Why It Matters | Tip |
|---|---|---|---|
| Grainline Direction | Specifies fabric’s straight grain | Helps achieve smooth, structured seams | Align grainline arrow properly |
| Pattern Symmetry | Equal shape on both sides | Creates balanced, even garments | Fold pattern to check sides |
| Bias Impact | Fabric’s diagonal stretch | Affects garment flow and movement | Cut on bias for elasticity |
| Balance Checks | Double-checks alignment | Prevents twisting or uneven seams | Match markings carefully |
The guide provides essential information for achieving a polished fit in sewing, emphasizing the importance of grainline direction, pattern symmetry, bias impact, and balance checks.
Advanced Alteration Techniques
You can master advanced alteration techniques by using methods like dart manipulation, slash and spread, and pivoting to reshape patterns with precision.
These techniques might sound tricky at first, but with a little practice, you’ll tackle complex fit adjustments like a pro, and become proficient in using methods such as dart manipulation.
Dart Manipulation and Shaping
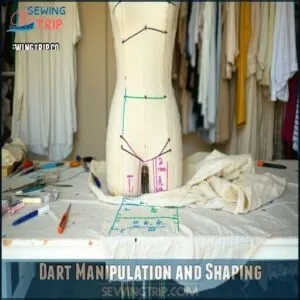
Got fitting issues? Dart manipulation’s your go-to fix for shaping and contouring.
Adjust dart placement to shift fullness control or experiment with style lines. Tweak dart depth for contouring techniques or use the pivot method to reshape without cutting.
For specialized tasks, consider using helpful dart tools.
Want variety? Slash and spread darts to add elegance, or try dart equivalents for seamless designs.
Slash and Spread Methods
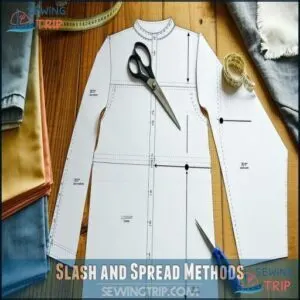
After shaping darts, let’s tackle slash and spread. This sewing pattern alteration technique is perfect for adding volume or customizing fit.
Need length adjustments? Slice your pattern carefully, spread it for extra fabric, or overlap to reduce it.
It’s all about control—whether you’re tweaking a sleeve or adjusting width, these steps make complex alterations less intimidating.
Pivoting and Preserving Original Lines
Pivoting techniques let you reshape patterns without cutting into them, keeping original angles intact.
Place a pin at the rotation point, then adjust the pattern by rotating it while preserving smooth shifts.
This method keeps line preservation spot-on, resolving fitting issues with minimal fuss, it’s a clever way to adjust patterns while ensuring sewing pattern alterations stay true to their style.
Remember to record body measurements for precise fitting, using this technique allows for smooth shifts in your sewing projects.
Altering for Body Types
You can make any pattern fit better by adjusting for your unique shape, whether you’re curvy, straight, or somewhere in between.
Learning a few simple tweaks for busts, shoulders, waists, and hips can make your clothes feel like they were made just for you, and this can be achieved by understanding your unique shape.
Full Bust Adjustments and Modifications
If your sewing struggles feel like a bad blind date, a Full Bust Adjustment (FBA) might be the fix.
This FBA method reshapes patterns for a better match to your cup size without pattern distortion.
Use muslin fittings to test seam adjustments and confirm smooth bust adjustments.
Perfecting sewing pattern fitting makes your garment truly yours—no awkward gaping seams!
Shoulder and Waist Alterations
Tweaking shoulder slope or fixing narrow shoulders begins with shoulder modifications—adjust seam adjustments gradually and check balance.
Use waist darts for precise waist adjustments, or try blending sizes to connect seams smoothly.
Always test with muslin fitting; it’s a lifesaver for spotting errors early.
For enhanced support, consider adding new pads.
Remember, small changes preserve style while achieving better accuracy for fit!
Altering for Hourglass, Ruler, and Apple Shapes
Adapting patterns for different shapes is all about enhancing your unique silhouette.
- Hourglass Adjustments: Highlight curves by refining darts at the waist. Use muslin fitting to confirm balance.
- Ruler Modifications: Add shaping through slash-and-spread techniques for bust or hip fullness.
- Apple Shaping: Focus on body type blending by elongating designs and avoiding snug waists for flattering drapes.
Workflow and Benefits
When you set up your tools and workspace the right way, sewing becomes smoother and more enjoyable.
Keeping track of your adjustments and measurements saves time and helps you create clothes that truly fit.
Organizing Tools and Workspace
Why not create a workspace that feels like your sewing sanctuary? Prioritize workspace ergonomics by having sewing tools within arm’s reach.
Pattern storage in labeled envelopes keeps things tidy. Bright, even lighting solutions help spot details. Consider using clear bins for storage to keep your sewing space organized.
Boost workflow efficiency with this setup to save time and hassle. This is achieved by ensuring that all necessary tools are easily accessible, making the sewing process more efficient.
| Task | Tool Needed | Placement | Benefit |
|---|---|---|---|
| Cutting fabric | Rotary cutter | By the cutting mat | Clean, precise cuts |
| Marking patterns | Tailor’s chalk | In a small caddy | Visible, accurate markings |
| Measuring | Measuring tape | Hanging nearby | Quick access |
| Storing patterns | Labeled folders | On nearby shelves | Organized, easy retrieval |
Documenting Alterations and Measurements
Keep a dedicated notebook or use apps for sewing documentation.
Record body measurements every few months, pairing them with a measurement chart.
Add modification notes after each project and keep digital records for quick updates.
Pattern storage can stay tidy with labeled envelopes.
Workspace organization is easier when everything’s documented, from pattern measurement points to alteration details, which helps with quick updates.
Frequently Asked Questions (FAQs)
How to adjust patterns to fit you perfectly?
Match your body measurements to the pattern, then adjust seams, darts, or lengths as needed.
Use tools like a French curve or tracing paper for precision.
Test fit with muslin to guarantee a flawless result.
What are the rules for pattern alteration?
Think of pattern alteration as sculpting fabric—you shape it to match you.
Always preserve grainlines, adjust evenly, measure precisely, and test changes with a muslin.
Small tweaks help avoid big fabric mistakes later, this can be considered a key concept to remember in the process of pattern alteration.
Why are pattern alterations important?
Pattern alterations matter because they make clothes fit like they’re made just for you.
No one’s body matches a pattern perfectly, so tweaking it guarantees comfort, confidence, and a polished look—your style, your rules!
What is the difference between fitting and altering?
Fitting guarantees the garment matches your body’s shape, like shaping clay to a mold.
Altering adjusts the pattern itself, fine-tuning measurements and design, so you don’t wrestle with ill-fitting pieces later, which involves fine-tuning to ensure a proper fit.
How do I choose patterns for beginners?
Pick simple patterns like t-shirts or elastic-waist skirts.
Look for "beginner-friendly" labels and avoid tricky features like zippers or collars.
Patterns with clear instructions and fewer pieces make sewing easier and boost your confidence.
What are tips for altering stretch fabrics?
Stretch fabrics need care!
Use a zigzag stitch or serger to keep seams flexible.
Pin sparingly to avoid damage, and let the fabric rest before cutting—it can shrink back!
Test adjustments on scraps first.
Can patterns be adjusted for activewear fit?
Adjusting patterns for activewear involves adding ease for movement, shaping with darts or gussets, and using stretch-friendly techniques.
Don’t forget to test fit with muslin or scrap fabric to fine-tune comfort and flexibility.
What alterations suit maternity clothing needs?
For maternity clothing, add extra fabric using slash-and-spread techniques or extend waistlines with elastic panels.
Include adjustable ties or ruching for flexibility.
Prioritize comfort and growing-room while preserving the garment’s original shape and style.
How to adjust patterns for petite sizes?
Think small, precise cuts, and tiny tweaks—shorten hems, adjust darts, and use "slash and overlap" techniques.
Blend seamlines smoothly, preserving proportions.
Remember, petite sizing isn’t just smaller; it’s about balanced proportions for perfect fit.
Conclusion
Think of sewing as crafting your own fairytale fit—every adjustment brings you closer to a happy ending.
With pattern alteration for better fit, focus on accurate measurements, fine-tune darts, and embrace techniques like the slash-and-spread method.
Always respect grainlines—they’re the secret thread holding everything together.
Practice on muslin before cutting final fabric, and keep refining your skills, and you’ll turn patterns into custom pieces that flatter your body perfectly, where patience makes the magic happen.
- https://pubs.nmsu.edu/_c/C228/index.html
- https://www.rokolee.com/pattern-alteration-beginners
- https://www.thesprucecrafts.com/sewing-pattern-alteration-and-fitting-articles-2977364
- https://www.earnestthreads.com/product/pattern-alterations-for-better-fit/
- https://www.cashmerette.com/pages/common-fit-adjustments?srsltid=AfmBOoqzqnaXxPsEEDPPSqZ2KUGJsQUq9UbDUSVhGNLsjrHj1VSNVRUm


