This site is supported by our readers. We may earn a commission, at no cost to you, if you purchase through links.
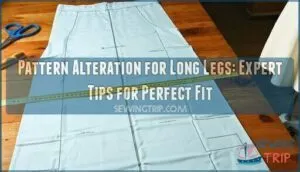
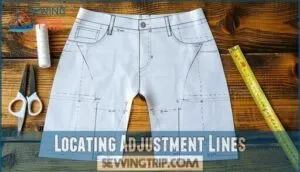
Start by measuring your inseam and comparing it to the pattern’s finished length. Look for the adjustment lines printed on most commercial patterns – they’re usually located between the knee and hip areas.
Cut along these lines and add your needed length, spreading it evenly to maintain the garment’s proportions. Don’t forget to adjust the rise if needed, as longer legs often require additional room through the crotch area.
The secret lies in understanding which specific measurements matter most for your unique build, and making alterations accordingly to achieve a proper fit, which is the ultimate goal of pattern alteration.
Table Of Contents
Key Takeaways
- You’ll need to measure your inseam and compare it to the pattern’s finished length, then cut along the printed adjustment lines between the knee and hip areas to add length strategically rather than just extending the hem.
- You should distribute added length evenly across multiple adjustment lines – add half the needed length at both the upper and lower adjustment points to maintain the garment’s original proportions and avoid fitting problems.
- You can’t rely on your usual clothing size when selecting patterns since they run differently – choose your pattern size based on your largest measurement (typically hips for pants) and don’t forget to adjust the rise if your longer legs require additional room through the crotch area.
- You must test your alterations with a muslin fitting before cutting your final fabric, checking that grainlines run straight, measurements match on both legs, and the overall fit feels comfortable without tugging or pulling.
Measuring Body Length
You’ll need to measure your body’s key length points with a flexible tape measure to determine exactly where your pants pattern needs adjustments.
Start by measuring from your natural waistline to your knee, then from knee to ankle, since these measurements will show you precisely how much extra length you’ll need to add compared to the pattern’s standard proportions.
Measure waist to knee, then knee to ankle—these numbers reveal exactly how much length your pattern needs.
These measurements will help you understand how much extra length you need to add to your pants pattern.
Taking Accurate Measurements
When measuring for pattern alterations, your flexible tape becomes your best friend for capturing accurate measurements.
Focus on these key body landmarks to guarantee success:
- Natural waistline (where you bend sideways)
- Fullest hip point (usually 7-9 inches below waist)
- Inseam length (from crotch to desired hem)
- Thigh circumference (at fullest point)
- Knee measurement (center of kneecap)
Always double check measurements using consistent tension and follow your measurement guide religiously.
Comparing Measurements to Pattern Chart
Once you’ve got your measurements down, it’s time to play detective with the pattern chart.
Compare your inseam length to the pattern’s finished measurements, not just the size, and look for pattern ease – that extra room built into garments.
Your body proportions might need a different size than your measurements suggest, and this fit analysis reveals whether you’ll need pattern alteration for those long legs, which can be crucial for a proper fit, considering the finished measurements.
Identifying Length Alteration Needs
Once you’ve compared your measurements to the pattern chart, spotting length alteration needs becomes crystal clear. Look for inseam discrepancies of more than an inch—that’s your green light for pattern alteration.
Consider your style preferences too; some folks with long legs prefer cropped looks while others want full coverage. Proportion analysis through muslin evaluation reveals exactly where lengthening adjustments will create the perfect fit for your unique frame.
Accurate pattern adjustments begin with precise body measurements, which is a crucial step in achieving a flattering silhouette that matches your personal style, and ultimately leads to a successful alteration.
Choosing Pattern Size
You’ll need to measure your hip and waist carefully, then compare these numbers to the pattern’s size chart rather than relying on your usual clothing size.
Pattern sizes often run differently than ready-to-wear garments, so don’t be surprised if you need a size larger or smaller than what hangs in your closet, and this is because pattern sizes can be quite different.
Measuring Hip and Waist
Finding your true waist definition starts with locating your natural waistline—bend sideways and note where you crease.
For hip placement, measure at your fullest point, typically eight inches below your waist.
Measurement accuracy matters more than vanity sizing, so embrace your real body measurements, and your waist-to-hip ratio guides proper pattern selection for achieving that perfect muslin fitting later, which is crucial for a perfect muslin fitting.
Comparing Measurements to Size Chart
Numbers don’t lie, but they can surprise you. Your body measurements mightn’t match standard sizing expectations due to unique body proportions and pattern ease allowances.
Your tape measure tells the truth your closet size won’t—embrace those real numbers for pattern success.
Here’s your systematic approach to measurement accuracy:
- Cross-reference your inseam length against the pattern chart’s finished garment dimensions
- Calculate size discrepancies between your actual leg length and pattern specifications
- Assess pattern ease built into each size for proper fit analysis
- Document differences to guide your alteration strategy.
To guarantee accuracy, it’s important to gather measuring tools before you begin.
Selecting Correct Pattern Size
After comparing your measurements, choose your pattern size based on your largest measurement—typically hips for pants. Don’t chase your usual clothing size; patterns run differently. Consider body proportions and fitting ease when selecting.
Size blending works well for tall women’s clothing when measurements span multiple sizes. Pattern styles and fabric choice affect fit, so factor these into your decision.
| Measurement Area | Pattern Selection Priority | Alteration Strategy |
|---|---|---|
| Hip Largest | Choose hip size | Adjust waist/length |
| Waist Largest | Choose waist size | Grade hip area |
| Between Sizes | Blend or size up | Custom fitting ease |
For pattern alteration projects, especially those involving long legs, focus on inseam length and body length adjustments after selecting your base size. This approach makes fitting long legs manageable rather than overwhelming.
Lengthening Pants Patterns
When your measurements show you need extra length in your pants, you’ll work with specific adjustment lines on the pattern to add inches where they’re needed most.
You’ll cut along these marked lines and spread the pattern pieces apart evenly, ensuring the added length distributes properly from waist to hem for a balanced fit, and this process will help you achieve the desired length by working with the pattern.
Locating Adjustment Lines
After selecting your pattern size, you’ll need precise Pattern Adjustment Points for lengthening pants pattern success.
The knee level sits at half your inseam measurement plus two inches from the hem upward.
Mark this Crotch Point Location carefully on your pattern pieces.
Your Inseam Adjustment Guide starts here, where proper Grainline Impact guarantees professional results.
For help with this process, consider a dedicated inseam adjustment tool.
Hemline Placement depends on these foundational marks for pattern alteration long legs.
Cutting and Adding Length
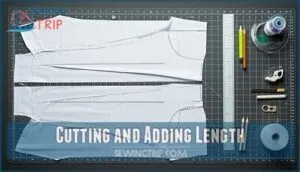
Now you’re ready to make the cut! Slice along your adjustment lines with sharp scissors, keeping cuts perfectly perpendicular to the grainline alignment.
Open the pattern pieces and add your calculated length – half at each adjustment line for proper length distribution.
Consider using specialized pattern alteration tools for more precise results.
Tape paper strips behind the gaps, maintaining straight edges. This pattern alteration long legs technique guarantees your lengthening pants project stays true to the original design proportions.
Ensuring Even Distribution
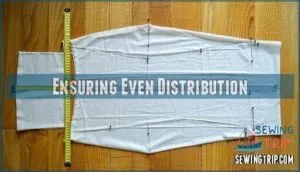
After cutting your pattern pieces, you’ll want to create symmetrical adjustments across both front and back pieces.
Keep your folds consistent and maintain parallel grainlines throughout your long legs alteration.
This balanced length approach guarantees uniform alterations that’ll give you professional results.
Your inseam lengthening techniques should match perfectly on both sides for that polished, custom look you’re after.
Shortening Pants Patterns
When your pants pattern is too long for your proportions, you’ll need to remove excess length at specific adjustment lines to achieve the perfect fit.
By folding and cutting at designated points, you can maintain the pattern’s original shape while creating pants that won’t require endless hemming or alterations later, ensuring a complete adjustment to your needs.
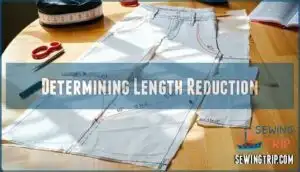
Determining Length Reduction
Before you start snipping away at your pattern pieces, measure the difference between your actual leg length and the pattern’s intended length.
Check your hemline styles against your shoe choice—flats need different lengths than heels.
Mark adjustment lines clearly on both front and back pattern pieces.
This careful planning prevents over-shortening and guarantees your leg length adjustment creates the perfect fit you’re after, ensuring a complete concept is applied to your pattern pieces.
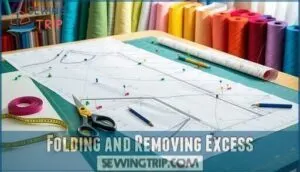
Folding and Removing Excess
Once you’ve determined how much length to remove, it’s time to fold and remove the excess fabric from your pattern. This step requires precision to maintain the pant’s proportional balance.
Here’s your folding checklist for pattern alteration success:
- Fold along both adjustment lines simultaneously for consistent folds
- Remove half the needed length at each designated line
- Keep your ruler handy to measure fold depths accurately
- Press folds firmly before securing with tape
- Double-check measurements against your muslin testing notes
Even distribution prevents awkward proportions in your finished inseam. By following these steps, you can ensure a well-balanced and properly fitted pant, which is crucial for pattern alteration success and achieving the desired proportional balance.
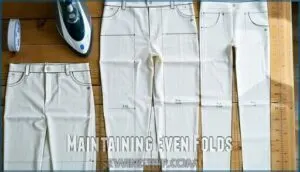
Maintaining Even Folds
Your pattern alteration tutorial‘s success hinges on consistent folding techniques. When shortening pants patterns, maintain uniform folds across both front and back pieces.
Press each fold with proper ironing technique before cutting. Test your adjustments with muslin testing first—this prevents costly fabric mistakes when sewing for long legs.
| Measurement Check | Front Pattern | Back Pattern |
|---|---|---|
| Fold Width | 2 inches even | 2 inches even |
| Fabric Thickness | Single layer | Single layer |
| Precise Marking | Clear lines | Clear lines |
| Ironing Technique | Medium heat | Medium heat |
| Final Measurement | Double-check | Double-check |
To ensure accuracy, it’s crucial to follow these guidelines with precise marking and attention to detail, using medium heat for ironing, and always double-checking your final measurement.
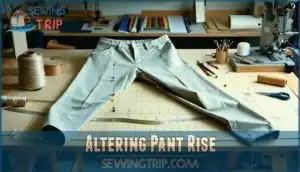
Altering Pant Rise
Pant rise affects how your pants sit on your waist and how comfortable they feel when you sit, bend, or walk.
You’ll need to adjust the crotch seam length and modify the waistband position to create the perfect rise that matches your torso length and personal comfort preferences.
Adjusting Crotch Seam
When your crotch depth feels off, you’re not stuck with baggy or tight fit issues.
Start by finding the lengthen/shorten line across the fly area on your pattern piece. Cut from center front to side seam, leaving the side seam uncut as your hinge.
This adjusting rise length technique maintains proper seam shape while improving your overall comfort level during pants fitting.
Addressing issues such as soft horizontal folds can further refine the fit.
Modifying Waistband
After tweaking your crotch seam, you’ll need to reshape your waistband to match.
Waistband fitting becomes tricky when adjusting rise length – that extra fabric doesn’t magically disappear! Try contouring methods like gentle curves rather than sharp angles.
Consider facing options or elastic insertion for comfort. Don’t forget button placement – it affects how your pants sit naturally.
Ensuring Proper Fit
Perfect fit means freedom from tugging and pulling.
After adjusting inseam length for tall womens clothing, check your muslin fitting for comfort level and grain alignment.
Your body proportions should feel natural, not constrained, and maintain alteration symmetry between front and back pieces when altering patterns tall.
If you’re still pinching fabric or feeling restricted, you’re not quite there yet—keep tweaking until sewing pattern alterations feel invisible on your body, ensuring a perfect fit.
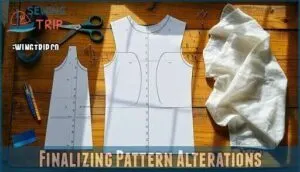
Finalizing Pattern Alterations
After you’ve made all the necessary length and rise adjustments to your pattern pieces, it’s time to transfer these changes from your test muslin back to your original pattern for a perfect final version.
Think of this step as creating your personal blueprint – you’ll carefully mark each adjustment, double-check your measurements, and verify that both front and back pieces match perfectly before cutting into your final fabric.
Transferring Adjustments
Once you’ve nailed your muslin fitting, it’s time to make those adjustments permanent on your actual pattern. Pattern tracing becomes your best friend here, preserving your original while creating a perfectly customized version.
Here’s your roadmap for transferring those hard-won adjustments:
- Mark every adjustment from your muslin onto tissue paper
- Measure twice before cutting your final pattern pieces
- Check symmetry between left and right pattern pieces
- Label alterations clearly for future reference
- Test measurements against your body one final time
This careful marking adjustments process guarantees your extending garment length modifications translate perfectly from muslin to final pattern, giving you consistent results every time you sew. Using specialized transfer supplies can make this process easier.
Making Final Adjustments
After transferring your adjustments, you’re ready for the home stretch. Create a muslin fitting to test your lengthened pattern before cutting your final fabric.
Check that your grainline runs straight and your inseam measurements match both legs. Look for symmetry balance and proportionality review across all pieces.
Understanding pattern balance and grainline is vital for a polished fit. This final hemline perfection guarantees your sewing pattern adjustments deliver the perfect fit you’ve worked toward.
Frequently Asked Questions (FAQs)
How do I adjust knee placement for longer legs?
Like shifting puzzle pieces to find their perfect home, you’ll move the knee line down on your pattern.
Measure your actual knee-to-waist length, then relocate the pattern’s knee line to match your longer proportions exactly.
Should I lengthen front and back pieces equally?
You don’t need to lengthen front and back pieces equally.
Your body’s proportions determine the adjustment amounts.
Measure your front and back rise separately, then add the specific length each piece needs for proper fit.
Whats the maximum length I can safely add?
Here’s the thing about pushing boundaries: you can safely add up to 4 inches total length using adjustment lines.
Beyond that, you’ll throw off proportions and create fitting nightmares that’ll haunt your wardrobe forever.
How do I maintain proper pant proportions when lengthening?
Distribute length additions evenly across adjustment lines to preserve proportions.
Add half the needed length at both the top and lower adjustment lines, maintaining the original relationship between thigh, knee, and calf segments.
This ensures that the adjustments do not alter the overall proportions of the segments.
Can I lengthen pants without affecting pocket placement?
You can lengthen pants while preserving pocket placement by making adjustments below the pockets. Add length at the knee or hem areas instead of the waist-to-hip zone where pockets sit.
Conclusion
Mastering pattern alteration for long legs transforms your entire wardrobe from ill-fitting disasters to perfectly customized pieces.
You’ve learned to measure accurately, locate adjustment lines, and distribute length evenly while maintaining proper proportions.
Don’t forget to adjust the rise when needed—your comfort depends on it.
With these techniques, you’ll never struggle with pants that are too short again, and practice makes perfect, so grab your scissors and start creating garments that actually fit your unique body shape, allowing you to master the art of customization and enjoy perfectly customized pieces.

