This site is supported by our readers. We may earn a commission, at no cost to you, if you purchase through links.
Start by comparing your body measurements to the pattern’s size chart, focusing on bust, waist, and hip measurements. Common fit issues like tight sleeves or gaping necklines stem from measurement mismatches.
Use slash-and-spread techniques for width adjustments and fold-and-overlap methods for reducing size. Multi-size patterns offer flexibility for blending between sizes.
Always pre-wash fabric before cutting to prevent shrinkage surprises. The secret lies in mastering five overlooked measurement points that transform amateur alterations into professional-looking garments.
Table Of Contents
Key Takeaways
- You’ll need sharp scissors, rulers, tracing paper, and measuring tape as your essential tools – these make the difference between frustrating struggles and smooth alterations
- Start by comparing your bust, waist, and hip measurements to the pattern’s size chart, then use slash-and-spread techniques for adding width and fold-and-overlap methods for reducing size
- Always make a muslin test garment before cutting expensive fabric, especially when you’re trying complex alterations or working with unfamiliar patterns
- Document every change you make with clear labels and dates on your pattern pieces – your alteration records become invaluable time-savers for future projects
Essential Tools and Materials for Pattern Alteration
You’ll need the right tools to make pattern alterations work smoothly and look professional.
Having sharp scissors, rulers, tracing paper, and marking tools on hand makes the difference between frustrating struggles and successful sewing projects.
Must-Have Pattern Alteration Tools
With the right tools, you’ll transform tricky alterations into smooth sailing.
Start with tracing paper for copying patterns and rulers for precise measurements. A measuring tape helps compare your body to sewing patterns.
Add a cutting mat for clean cuts, plus a sewing gauge for marking small adjustments. These essentials make garment alteration and pattern making techniques much easier to master.
Understanding pattern alteration techniques is vital for achieving a perfect fit.
Selecting and Preparing Patterns
Now that you’ve got your tools ready, choosing the right sewing patterns sets you up for success.
Pick patterns that match your skill level and body shape. Check the size chart carefully, then measure yourself twice to confirm fit.
Pre-wash your fabric before cutting to prevent shrinkage surprises. Proper pattern preparation and fabric choice make measurement tips and garment alteration much smoother later.
Understanding various sewing patterns is essential for achieving professional-looking results with the right fabric choice.
Understanding Pattern Types and Fit Adjustments
Before you start adjusting patterns, you need to understand how different pattern types work with your unique measurements.
Each pattern type has specific fit requirements, and knowing these differences helps you choose the right alteration approach for your sewing project.
Understanding these differences is crucial for a successful sewing project.
Types of Sewing Patterns Explained
Now that you’ve gathered the right tools, understanding different pattern types helps you choose the best starting point for your alterations.
Commercial patterns come in various formats, each designed for specific skill levels and garment construction methods.
- Multi-size patterns feature overlapping cutting lines that let you blend between sizes seamlessly
- Individual size patterns provide cleaner lines but require more precise size selection upfront
- Block patterns serve as foundation templates for creating multiple garment variations through pattern drafting
Sewing guides typically classify patterns by complexity. Beginner-friendly options focus on simple shapes with minimal fitting requirements, while advanced patterns incorporate detailed seaming and construction techniques.
Pattern making companies design these templates using standard body measurements, but your unique proportions will determine which alterations you’ll need. Fabric selection also influences pattern choice, since different textiles behave differently during garment construction.
Understanding sewing patterns for clothing is essential for achieving a professional finish and proper fit in your sewing projects.
How Patterns Relate to Body Measurements
Understanding how patterns connect to your body is the key to successful sewing projects.
Most commercial patterns use three core measurements to determine size selection and fit analysis.
| Body Area | Pattern Connection |
|---|---|
| Bust/Chest | Controls upper garment width and dart placement |
| Waist | Determines fit at narrowest torso point |
| Hips | Sets lower garment circumference and ease |
| Length Points | Affects overall garment proportions |
| Shoulders | Influences neckline and armhole positioning |
Your personal silhouette differs from standard sizing charts, making measurement techniques essential for garment construction.
Pattern drafting relies on body proportions, but finished measurements include ease for movement.
When your measurements fall between sizes, choose the larger option.
Garment sizing isn’t just numbers—it’s about translating your unique shape into fabric that fits beautifully through careful sewing alterations and sewing guides.
To achieve a perfect fit, taking accurate body measurements is essential for successful sewing projects.
Common Fit Issues and Their Solutions
Most sewers encounter predictable fit challenges that stem from body proportions differing from standard pattern measurements.
Measurement errors and incorrect garment ease often create sewing mistakes that affect comfort and appearance.
- Tight sleeves that restrict arm movement and create pulling across shoulders
- Gaping necklines that reveal more than intended and look unprofessional
- Bunching fabric at the waist that adds unwanted bulk and ruins silhouette
- Short hemlines that constantly need tugging down throughout the day
- Loose bodices that gap open and require constant readjustment while wearing
These garment construction issues require specific sewing alterations.
Pattern sewing tutorials help identify where clothing alteration becomes necessary for proper fit.
Step-by-Step Guide to Pattern Alteration Techniques
Now you’ll learn the core techniques that transform any pattern into a perfect fit for your body.
These four methods work together to create professional-quality alterations that save both time and fabric.
Measuring and Comparing Body to Pattern
Take your Body Measurements using a flexible measuring tape, then compare these numbers to the pattern’s Sizing Charts.
Accurate measurements are your foundation—without them, even perfect alterations won’t fit right
Most patterns include finished garment measurements, so subtract ease amounts to find the base pattern size.
Perform Fit Analysis by checking key areas like bust, waist, and hip measurements.
This Pattern Comparison reveals where clothing alteration is needed, helping you choose appropriate Measurement Techniques for successful pattern sewing.
Accurate sewing requires using a sewing measuring tool to guarantee the best fit.
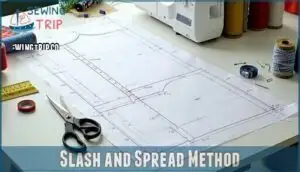
Slash and Spread Method
After comparing your measurements to the pattern, you’ll often need to add width or length. The slash and spread method works like magic for these adjustments.
Cut strategic lines on your pattern, then spread the pieces apart to create extra room.
- Cut vertical lines parallel to grainlines for width adjustments
- Make horizontal cuts perpendicular to grainlines for length changes
- Distribute changes evenly across multiple cut lines for smooth results
This spread technique transforms basic patterns into custom fits. Place tissue paper underneath before cutting to catch loose pieces.
When spreading, maintain grain control by keeping your alteration lines straight. Fashion sewing becomes much easier when you master these pattern drafting skills.
The method offers significant fabric savings since you’re working with precise measurements rather than guessing sizes. Understanding pattern grading basics is essential for achieving a perfect fit.
Folding and Overlapping Adjustments
While adding fabric through slash and spread expands patterns, you can also reduce excess by using fold techniques and overlap methods.
These seam adjustments work perfectly when patterns run too large for your measurements.
| Adjustment Type | Best Used For |
|---|---|
| Simple Fold | Reducing width across bust or hip |
| Overlap Method | Shortening pattern pieces quickly |
| Dart Modifications | Fine-tuning waist and bust areas |
| Parallel Folds | Maintaining grainline alignment |
| Graduated Overlap | Tapering adjustments smoothly |
You’ll fold out excess fabric along adjustment lines, then overlap the edges to create a smaller pattern piece.
This fabric fitting approach maintains the original pattern design while improving your sewing skills through hands-on pattern design work.
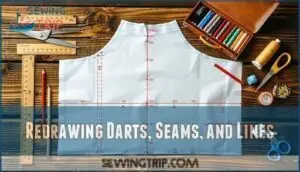
Redrawing Darts, Seams, and Lines
After slashing and spreading your pattern, smooth out those jagged edges like polishing a rough diamond.
Pattern truing transforms choppy alterations into professional results. Understanding proper pattern alteration techniques is essential for achieving a perfect fit.
- Dart Manipulation – Redraw dart lines to maintain proper fit and shape
- Seam Revision – Blend cut edges into smooth, continuous curves
- Line Smoothing – Connect adjustment points with flowing lines
- Edge Refining – True all pattern pieces for accurate sewing instructions
How to Lengthen or Shorten a Sewing Pattern
You’ll need to adjust pattern length when your measurements don’t match the standard sizing.
This process involves finding the right adjustment lines and making precise changes to achieve a perfect fit.
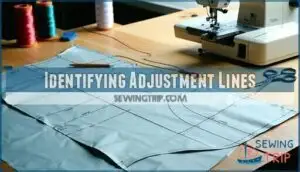
Identifying Adjustment Lines
Look for double lines printed across your pattern pieces – these are your roadmap for safe alterations.
Commercial patterns include these adjustment marks specifically where you can lengthen or shorten without ruining the design’s proportions or fit.
| Pattern Type | Common Locations | Visual Markers |
|---|---|---|
| Bodice patterns | Above/below bust, waistline | Parallel dashed lines |
| Pants/skirts | Hip area, above knee | Double solid lines |
| Sleeves | Upper arm, forearm | Marked adjustment zones |
| Children’s wear | Multiple locations | Extra adjustment marks |
These pattern lines maintain proper seam allowance spacing and preserve grain lines.
Most sewing instructions label them clearly as "lengthen or shorten here."
Following these fold lines prevents distortion of darts and design elements that make your garment fit properly.
Understanding pattern adjustments is essential for achieving a perfect fit in your sewing projects.
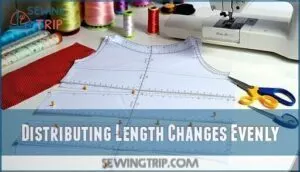
Distributing Length Changes Evenly
When you need length adjustments across multiple sections, split the change between several alteration lines.
Instead of adding two inches at one spot, add half an inch at four different places. This approach maintains the garment’s proportions and prevents distortion.
Pattern truing becomes easier when changes are distributed evenly. Your measurement accuracy improves, and the fabric grain stays consistent throughout your sewing project, which is crucial for the overall quality and appearance.
Truing and Smoothing Altered Patterns
After distributing your length changes, you’ll need to true up those altered seam lines.
Perfect seam lines make all the difference between homemade and professional-looking garments
Pattern Truing guarantees your pieces align perfectly when sewn together.
Edge Finishing keeps your project looking professional, not like a patchwork quilt gone wrong.
- Redraw curved seams using a French curve or flexible ruler for smooth lines
- Check that all connecting seam lines match in length and shape
- Maintain proper Fabric Grain by keeping grainlines perpendicular to fold lines
- Test fit with muslin before cutting your final fabric pieces to ensure a perfect fit and professional look
Advanced Alterations and Customization Tips
Once you’ve mastered basic pattern alterations, you can tackle more complex modifications that truly customize patterns to your unique needs.
These advanced techniques include eliminating design elements, adjusting for unusual body proportions, and creating a system to track your changes for future projects.
Eliminating Back Yokes and Shirt Pleats
Back yokes and pleats can bulk up shirts unnecessarily.
Yoke Removal starts with tracing the yoke outline onto the back pattern piece, then Seam Shifting the shoulder line down.
Pleat Folding out creates Fabric Savings while maintaining fit.
Dart Redesign replaces pleats with shaped seams.
These advanced techniques, taught in sewing courses and pattern creation classes, transform basic textile pattern designs into streamlined decorative design elements.
Adjusting for Unique Body Shapes
Custom Fittings work like magic once you understand your Body Proportions. Different body shapes need specific Sewing Modifications to address common Fit Issues.
Professional sewing courses teach these Measurement Techniques for perfect results. They help in creating a flawless garment by understanding how different body shapes require unique adjustments.
- Triangle shapes need wider hips with fitted waists using slash-and-spread methods
- Square figures benefit from curved seams that create waist definition through dart adjustments
- Curvy body types require extra ease in bust and hip areas for comfortable movement
Pattern creation becomes easier when you match textile pattern choices to your unique measurements. Decorative design elements can enhance or minimize certain areas. Sewing classes often focus on these custom adjustments for professional results. Understanding proper custom fittings is essential for achieving a flawless garment.
Documenting and Labeling Changes for Future Use
Tracking alterations transforms chaos into clarity.
Document every change with clear labels, version numbers, and dates on pattern pieces.
Your Alteration Records become invaluable Future References, especially in sewing classes where pattern recognition skills develop.
| Documentation Element | Why It Matters |
|---|---|
| Change Tracking logs | Prevents repeating mistakes |
| Labeling Systems | Finds patterns quickly |
| Revision History | Shows pattern evolution |
| Decorative design notes | Recalls aesthetic choices |
Smart sewists know that today’s pattern definition meaning becomes tomorrow’s time-saver through organized records.
Frequently Asked Questions (FAQs)
Can patterns be altered after cutting fabric pieces?
Yes, you can alter fabric pieces after cutting, but it’s trickier than adjusting paper patterns.
You’ll need to add fabric through seaming, use bias binding, or carefully trim excess material while preserving seam allowances.
How do fabric properties affect pattern alterations?
Fabric weight, stretch, and drape directly impact how you’ll adjust patterns. Heavy fabrics need less ease, while stretchy materials require smaller alterations since they conform naturally to your body’s curves.
When should you make a muslin test garment?
Make a muslin when you’re unsure about fit, trying complex alterations, using expensive fabric, or working with unfamiliar patterns. It’s your safety net before cutting into good material.
Whats the difference between design ease and wearing ease?
Wearing ease provides comfort for movement and breathing, while design ease creates the garment’s intended silhouette. You’ll find wearing ease adds functional room, but design ease shapes style.
How do you alter patterns for maternity wear?
Gradually add fabric panels at the bust and belly areas using slash-and-spread techniques. Extend side seams outward, lengthen hem, and create adjustable waistbands for comfort throughout pregnancy.
Conclusion
Like a well-fitted garment that moves with you, mastering pattern alteration guide sewing projects transforms your handmade wardrobe.
You’ve learned essential tools, measurement techniques, and adjustment methods that turn ill-fitting patterns into custom pieces. Remember to document your changes for future projects.
Practice these techniques on muslin first, then apply them to your favorite fabrics. With patience and these skills, you’ll create professional-looking garments that fit perfectly every time.
- https://textilelearner.net/pattern-alteration-techniques/
- https://happyoff.com/blogs/news/how-to-alter-sewing-patterns-a-beginners-guide-to-perfect-fit
- https://sewingworkshop.com/new-blog/how-to-fit-a-pattern
- https://pubs.nmsu.edu/_c/C228/index.html
- https://ttu-ir.tdl.org/server/api/core/bitstreams/c75eac0c-a07d-46c6-9f13-e5f1c46c721e/content

