This site is supported by our readers. We may earn a commission, at no cost to you, if you purchase through links.
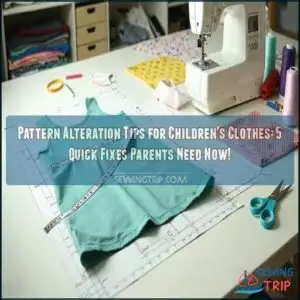 Altering kids’ clothing patterns isn’t as tricky as it sounds. Start by measuring your child’s chest, waist, and hips accurately—kids grow fast, so add a little extra ease for comfort.
Compare these to the pattern’s size chart to pick the closest size, even if you need to blend sizes. Adjust shoulders and armholes for better mobility or add darts for shaping.
Don’t forget to test adjustments on muslin first—it saves fabric and frustration! Always follow grainlines to keep the garment’s balance intact.
The result? A perfect fit that’s comfy and stylish! Now, let’s explore tools that make alterations even easier.
Table Of Contents
Key Takeaways
- Measure your child accurately, focusing on chest, waist, hips, and height, and always add 1-2 inches for growth.
- Use muslin to test adjustments before cutting fabric to save time and ensure a proper fit.
- Blend sizes and adjust shoulders, armholes, and sleeve lengths to match your child’s proportions comfortably.
- Align fabric with grainlines and use fusible interfacing for structure to maintain durability and fit.
Measuring Children Correctly
You’ll save hours of frustration by measuring your child correctly before altering patterns, focusing on chest, waist, hip, and height measurements with a flexible tape measure while they stand naturally.
Measure your child’s chest, waist, hips, and height accurately to ensure a perfect fit and fewer alterations every time.
Take measurements over lightweight clothes and add a growth allowance of 1-2 inches in key areas to extend the garment’s wearable life.
Taking Accurate Body Measurements
For accurate pattern alterations, always measure your child while they’re standing naturally.
Use a flexible tape to record their torso length, arm span, and body proportions.
Locate their waist at the narrowest point between ribs and hip bones.
Measure their chest at the fullest point and hips at the widest area.
Using accurate measuring tools is vital for successful kids clothing modifications and guarantees proper fit.
Taking precise measurements is the foundation of successful kids clothing modifications and guarantees proper fit, which relies on accurate measuring tools.
Understanding Pattern Ease
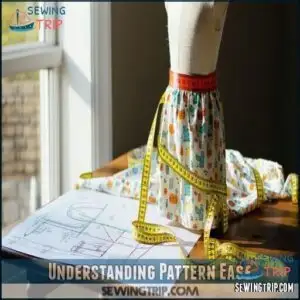
Now that you’ve got your child’s measurements, you need to understand pattern ease.
Ease is the difference between body measurements and the final garment size.
Children need adequate movement allowance for play and growth.
Design ease adds style, while layering ease provides room for clothes underneath.
Some stretchy fabrics require negative ease for a snug fit.
Consider your child’s comfort preference when selecting pattern size to guarantee proper clothing fit.
Locating Natural Waistline
While pattern ease gives room to move, finding your child’s natural waistline is the next key step.
The waistline isn’t always where kids wear their pants! To locate it properly, have your child bend sideways—the crease that forms shows their true waist.
This spot, typically the narrowest part between ribs and hip bones, is essential for accurate torso length measurements and proper fitting of kids garments, ensuring a good fit.
Measuring Hip and Chest Circumference
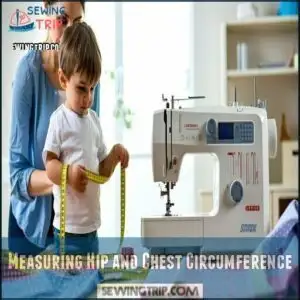
For proper fit, measure your child’s chest at the fullest point, keeping the tape measure parallel to the floor.
Take hip measurements around the widest part, typically 7-9 inches below the waist. Maintain measurement consistency by having your child stand naturally.
Use a flexible tape measure for accuracy, and add 1-2 inches for growth considerations when altering children’s patterns or resizing kids’ garments.
It’s best to have someone help, as accurate body measurements are essential for the right fit, ensuring you get the best results.
Choosing Pattern Size
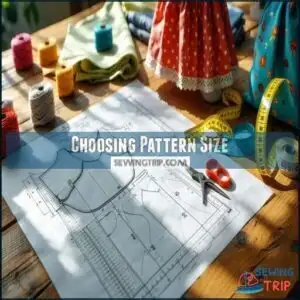
You’ll need to compare your child’s measurements directly to the pattern size chart, not their clothing size, to select the right starting point for your project.
Select a slightly larger size when measurements fall between sizes, as you can always take in excess fabric but can’t add what isn’t there, which is a key consideration for a successful project.
Selecting Correct Pattern Type
Now that you have your child’s measurements in hand, it’s time to choose the right pattern type.
Consider pattern complexity, design features, and your skill level when browsing sewing patterns for kids.
Look for styles suitable for your child’s age and activity level. Match fabric compatibility with the pattern requirements—some designs work better with stretchy fabrics, while others need structured materials for proper draping and fit.
Comparing Measurements to Size Charts
Always prioritize measurements over clothing sizes when choosing a pattern size for children’s clothes.
Refer to the size chart for accuracy and compare it to your child’s measurements. Account for body variations and consider size blending if measurements fall between sizes.
Don’t forget ease allowance—this guarantees comfortable movement even after pattern alteration. Accuracy here avoids extra-fitting guesswork later.
Considering Growth and Adjustments
Growth spurts are unpredictable, so plan for them by adding hem reserves or expandable seams.
Plan for growth spurts with hem reserves and expandable seams to ensure kids’ clothes last longer and fit comfortably.
These techniques extend a pattern’s lifespan, letting you resize kids’ garments easily.
Adjustable features, like elastic in waistbands, make childrens clothing adjustment simple.
Taking extra steps guarantees altered clothes fit longer, minimizing future alterations.
Adjust kids’ garments with care, keeping child growth in mind, and ensure that the clothes are made to last by using techniques such as expandable seams and elastic in waistbands.
Understanding Pattern Markings and Grainline
Pattern symbols and grainline markings keep your sewing patterns on track.
Think of the grainline as a compass—it guarantees fabric alignment for comfort and durability in children’s clothes.
Matching notches avoids warped seams, essential for pattern grading or alteration impact.
Misaligned grainlines can ruin fit and flow.
Straight grain provides stability to the garment.
Always study each pattern piece carefully before cutting to ensure proper alignment and a good fit.
Altering Garment Patterns
You can transform any pattern to fit your child perfectly by focusing on key adjustment areas like shoulders, armholes, and sleeve lengths.
Simple changes, such as adding darts or modifying seams, guarantee a comfortable and polished fit every time.
Adjusting Shoulder and Armhole Fit
Shoulder adjustments and armhole depth tweaks can completely shift a garment’s fit.
Start by:
- Checking shoulder slope and adjusting pattern lines for smooth flow.
- Ensuring the armhole matches the bodice fit.
- Using muslin testing to fine-tune fit without cutting fabric.
- Measuring sleeve adjustments for easy movement, especially for growing arms in children’s clothes!
Making Full Bust and Small Bust Adjustments
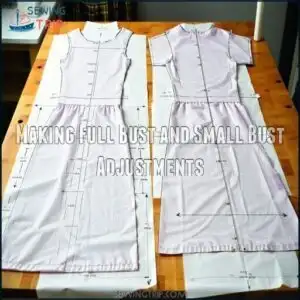
After fixing shoulder and armhole fit, focus on bust apex and dart placement for a clean bodice.
For a full bust adjustment, add paper under the muslin fitting and carefully redraw darts.
A small bust adjustment overlaps hinges for a snug pattern alteration.
Remember, pattern grading and blending sizes keep childrens clothes looking seamless and well-fitted.
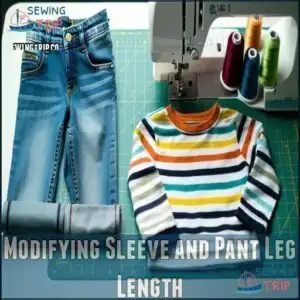
Modifying Sleeve and Pant Leg Length
Adjusting sleeves and pant leg lengths guarantees kids’ clothes fit longer.
Add pant reserves by sewing extra length and folding hems—perfect for growth. Use accordion hems for a flexible, stylish option.
For sleeves, measure shoulder to wrist and add length wisely. Cuff additions can extend wear.
Resizing children’s wear is simple with these techniques, guaranteeing comfort and practicality.
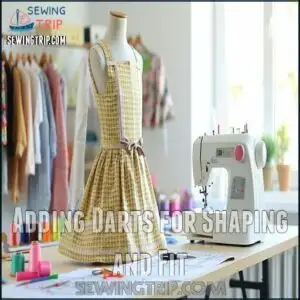
Adding Darts for Shaping and Fit
When altering kids’ clothes, darts are your secret weapon for better fit.
Start by marking proper dart placement during muslin fitting.
Explore dart types like single-point or double-ended for specific areas.
Dart manipulation helps shape fabric to match curves seamlessly.
For a better fit, consider adjusting dress bust darts accordingly.
Always test fabric contouring techniques on spare material to avoid mistakes.
Mastering this step improves every pattern alteration.
It ensures that the final product fits well and looks professional, making the effort worthwhile to achieve a better fit.
Enhancing Fit With Fabric
Choosing the right fabric can make or break how a garment fits.
By focusing on fabric weight, drape, and structure, you can guarantee your child’s clothes look great and feel comfortable.
Selecting Suitable Fabric for Garments
The right fabric choice can make or break your kids’ clothes.
Look for washability—because spills are constant—and consider fabric weight for comfort.
Match fabric drape to the sewing pattern to keep clothes from feeling stiff.
Don’t overlook print scale; oversized prints may overwhelm tiny clothes.
Check fiber content to avoid irritation and improve durability. Consider fabrics designed for children to guarantee easy maintenance.
Understanding Fabric Drape and Weight
Fabric types affect how a garment moves and feels.
Lightweight fabrics create airy, flowing drape effects, perfect for loose, playful kids’ clothes.
Heavier fabrics add structure, shaping the silhouette but might restrict comfort.
Balance weight impact and silhouette creation to suit children’swear.
Always prioritize comfort considerations when choosing fabric for alterations or refashioning, as kids need freedom to move and playful clothes.
Using Lining and Interfacing for Structure
Lining benefits go beyond aesthetics—it adds structure durability and shape retention, especially in childrenswear.
Pairing lightweight fabrics with the right interfacing types guarantees fabric compatibility for smoother alterations.
For children’s clothing alterations, lining strengthens seams and gives garments added polish.
Whether you’re shaping jackets or skirts, these small steps improve the fit and longevity of your pattern alteration efforts.
Applying Fusible Interfacing for Stability
Interfacing gives structure and stability to kids’ clothing alterations.
Use fusible interfacing to reinforce collars, cuffs, or hems. Choose from various interfacing types—lightweight for delicate fabrics, heavier for sturdier ones.
Iron carefully to prevent bubbling and guarantee fabric compatibility.
You can find specialized options for childrenswear applications.
Mastering this application technique guarantees sewing pattern alterations make childrenswear both durable and polished for everyday wear or special occasions.
Mastering Alteration Techniques
You can improve the fit of children’s clothes by practicing key alteration techniques like dart adjustment and slash-and-spread.
These methods help reshape patterns, fix common fitting issues, and create custom designs made to your child’s exact measurements.
Creating a Custom-Fit Dress Form
A DIY Dress Form is a game-changer for resizing children’s wear.
Try the duct tape method—wrap layers snugly around a body double. Add adjustable forms for versatility or consider professional forms for precision.
Cover with muslin for accurate fittings and kids’ garment alterations. This tool simplifies sewing patterns, letting you adjust kids’ garments or create custom fits effortlessly, making it a valuable tool for achieving a custom fit with ease, and it is especially useful for kids’ garment alterations.
Mastering Dart Manipulation and Slash Techniques
Darts are your secret weapon for reshaping volume and contouring kids’ clothes.
Pin dart placement carefully, guaranteeing symmetry, and adjust until the fit improves. Use slash variations to expand or shrink areas strategically, perfecting garment redesign.
Wearing ease ensures comfortable movement. By mastering these sewing techniques, you’ll transform simple pattern alterations into expertly crafted creations, giving every piece a custom feel.
Practice makes perfect!
Troubleshooting Common Fitting Issues
Fixing fit problems can save a project from a compromised design. Draglines on fabric reveal tension issues, while gaping necklines might mean the opening is too large. Uneven hems often come from poor measuring. Fabric bunching signals incorrect grain alignment.
For kids’ clothing alterations, always remeasure and adjust the sewing pattern carefully.
- Check measurements against the sewing pattern.
- Pin and adjust fabric directly on the garment.
- Mark and trim seams gradually.
- Press fabric after small adjustments.
- Restore pattern accuracy with muslin testing to ensure a proper fit, and always remeasure to confirm the adjustments are correct.
Frequently Asked Questions (FAQs)
How can I alter my clothes?
Altering clothes starts with accurate measurements.
Pin or mark where adjustments are needed, like seams or hems.
Use a seam ripper to undo stitches, then sew in your changes.
Always test-fit before finishing stitches.
How do you alter a sewing pattern?
Start by measuring key areas like chest, waist, and hips.
Compare with the pattern’s size chart.
Add or remove width at seam lines, adjust darts for shape, and modify lengths using designated marking lines, focusing on complete concepts to ensure a proper fit.
What are some easy sewing ideas for clothing alterations?
Shorten sleeves by trimming and hemming, or add fabric bands for growth.
Customize a simple dress with pockets or ruffles.
Let out seams for extra comfort or take them in for a fitted fit.
How do I make a muslin pattern alterations?
Think of muslin as your dress rehearsal.
Pin it, try it on, and mark changes with an iron-off pen.
Trim excess, adjust seams, and refine darts.
Use it to perfect your final fit.
What skills do you need to make a garment alterations?
You’ll need strong measuring skills, a solid understanding of pattern markings, and the ability to use tools like seam rippers and flexible tape measures.
Practice patience, precision, and problem-solving to adjust for perfect garment fit.
How do I choose a sewing pattern?
Did you know 80% of sewing beginners pick the wrong pattern size?
Measure your bust, waist, and hips first, then compare to the pattern’s chart.
Choose based on measurements, not clothing size, for better results.
How to adjust patterns for asymmetrical body shapes?
Start by identifying the asymmetry through precise measurements.
Adjust each side of the pattern separately, reflecting the unique proportions.
Use muslin to test adjustments, pin directly on the body, and refine for a custom fit.
What are tips for avoiding fabric distortion?
Avoid fabric distortion like a wrinkled map by keeping fabric grainlines aligned.
Pin and press carefully, use interfacing when needed, and handle fabric gently during alterations to maintain its natural drape and structure.
How can patterns be adapted for unique proportions?
Adjusting patterns for unique proportions means focusing on key areas like torso length, shoulder width, and hip placement.
Blend sizes, add darts, or shift seam lines strategically to match specific measurements and guarantee a perfect fit.
What tools simplify altering intricate design details?
Fine-tuning intricate designs feels like sculpting fabric.
Use precision tools like French curves, flexible rulers, and tracing wheels.
These help with curves, small details, and transferring adjustments, making even tricky alterations manageable and accurate.
Conclusion
Did you know kids can grow up to two inches in just six months?
That’s why mastering pattern alteration tips for children’s clothes is essential. By measuring accurately, blending sizes, and testing adjustments on muslin, you’ll save time and fabric while achieving a better fit.
Don’t skip checking grainlines and using proper tools for sharp results. With these techniques, you can create clothing that’s both functional and stylish, ensuring your child’s comfort through every growth spurt.


