This site is supported by our readers. We may earn a commission, at no cost to you, if you purchase through links.
Choose patterns based on your largest measurement, then adjust the rest. The full bust adjustment is your best friend; it adds width without distorting the shoulder fit.
When making alterations, slash-and-spread techniques create room where you need it while darts reshape fabric to follow your contours.
Remember, it’s fabric geometry, not body geometry that needs changing. Your body isn’t "difficult"—most patterns just weren’t designed with realistic curves in mind.
Table Of Contents
Key Takeaways
- Take precise measurements, focusing on your largest areas like bust, waist, and hips to save time on adjustments.
- Use the slash-and-spread method to add fullness and darts to contour fabric for your curves.
- Match patterns to your largest measurement, then blend sizes for a custom fit.
- Regularly track body changes and adapt patterns for accuracy and comfort.
Measuring Curvy Figures
You’ll need precise measurements of your curvy figure for patterns that truly honor your unique shape, so grab a flexible measuring tape and record your bust, waist, and hip measurements at their fullest points.
Taking accurate measurements now will save you hours of frustrating adjustments later, ensuring your handmade garments fit like they were created just for you, with a perfect fit that requires minimal adjustments.
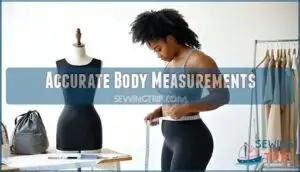
Accurate Body Measurements
With accurate body measurements, you’ll transform ill-fitting patterns into garments that hug your curves perfectly.
Take measurements while wearing your usual undergarments for realistic results.
Here’s what you need to measure:
- Bust at the fullest point
- Waist at the narrowest part
- Hips at their widest circumference
- Vertical height from shoulder to waist
- Arm length from shoulder to wrist.
Always use a non-stretchable tape and consistent reference points for precision. For accurate measurements, consider using a flexible measuring tool.
Tracking Subtle Body Changes
Regularly tracking subtle body changes guarantees your patterns stay perfectly fitted to your curvy figure.
Our bodies naturally shift due to hormonal changes, lifestyle factors, and fluctuating body composition.
Update your measurements every six months, noting even half-inch differences that can substantially impact fit.
Digital tracking apps make this process seamless, creating a personalized measurement history that empowers your sewing journey and eliminates frustrating fit issues down the road.
To get started, remember to use non-stretchable measuring tape for accuracy.
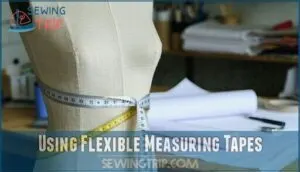
Using Flexible Measuring Tapes
Now that you’ve established a routine for tracking your measurements, let’s talk tools.
A flexible, non-stretchy measuring tape is your best friend for curvy figure patterns. Unlike rigid rulers, these tapes wrap around your body’s contours, capturing your true shape.
For ideal tape accuracy, hold it snug but not tight against your skin. Different brands offer varying material durability—fabric-coated fiberglass tapes typically outlast plastic ones while maintaining precision for all your sewing for curves projects, which require accurate measurements and a flexible tape.
Choosing Pattern Size
You’ll save yourself hours of frustration by selecting your pattern size based on your largest measurement, not your ready-to-wear clothing size.
I’ll create a short, engaging blockquote in the same tone as the provided paragraph:
Pattern success starts with your largest measurement, not store sizes—the cornerstone of flattering curves.
Once you’ve chosen a pattern that matches your fullest measurement, you can blend between sizes to accommodate your unique curves, creating a custom fit that flatters your body perfectly.
Comparing Measurements to Size Charts
The three biggest pattern sizing myths begin with confusing store sizing with pattern sizes.
Pattern size charts reflect actual body measurements, not vanity sizing used in retail.
Comparing your measurements accurately is vital for curvy figure patterns.
- Size Chart Accuracy varies across pattern companies – always check each brand’s specific measurements
- Body Type Variance means your measurements may fall across multiple sizes on the chart
- Pattern Ease Impact determines how fitted or loose the final garment will be
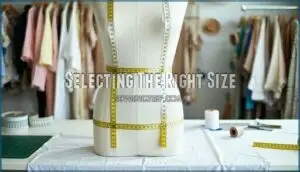
Selecting The Right Size
When selecting the right pattern size, focus on your body measurements, especially your largest one—usually hips.
Don’t rely on store sizes; compare numbers to the designer’s chart.
Factor in body proportions and fit preferences.
Size blending is key for curvy fit adjustments.
Consider designer variations, knowing plus size sewing patterns already cater to pattern alteration curvy needs.
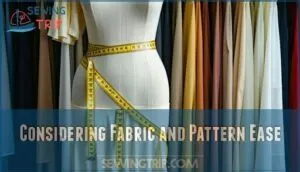
Considering Fabric and Pattern Ease
Fabric selection makes or breaks your pattern fit.
When choosing size, consider both wearing ease (movement room) and design ease (style features).
Cotton won’t give like knits do, so you’ll need more wearing ease.
Check the pattern’s recommended stretch factor, and don’t forget about layering needs.
Fabric weight considerations also play a key role in the final fit.
Your fabric’s drape dramatically affects how those curves look in the final garment.
Alteration Techniques
You’ll need specific alteration techniques to transform standard patterns into perfectly fitting garments that honor your unique curves.
These time-tested methods—including slash-and-spread for adding fullness, strategic dart manipulation to reshape around curves, and careful pivoting to preserve grainlines—will help you create clothes that fit like they were made just for you.
They will help you create clothes that fit like they were made just for you.
Slash-and-Spread Method
Ever wondered why your patterns don’t fit your curves? The slash-and-spread method is your secret weapon for adding fullness where needed.
Simply cut through pattern pieces and insert paper to create more room. For reducing volume, overlap sections instead.
Always maintain grainline integrity when making these curvy fit adjustments, and blend lines smoothly to guarantee proper fabric hang.
Explore resources for the slash spread method to find relevant products. This pattern alteration technique transforms ill-fitting garments into perfect fits!
Dart Manipulation
Dart manipulation is your secret weapon for conquering fitting challenges for curves.
By repositioning darts, you’ll create stylish contouring that flatters your figure. Different dart styles – like curved darts or multiple dart variations – can dramatically improve how garments drape on your body.
You can move existing darts to better locations without affecting overall fit, transforming pattern alteration from frustrating to fulfilling. This technique creates customized curvy fit adjustments that celebrate your unique shape, allowing for a more personalized approach to garment construction, which is a key aspect of dart manipulation.
Pivoting and Redrawing Seamlines
The art of pivoting and redrawing seamlines preserves grainline integrity when fitting curvy figures.
When traditional alterations won’t work, pivot your pattern at strategic points and redraw seamlines to create smooth passages that honor your curves.
Blend lines gently with confident strokes, maintaining the original curve character while addressing fitting challenges.
This technique guarantees your garment flows naturally, without the fabric pulling or bunching across your beautiful contours.
It ensures that the garment will fit well and look good, which is the ultimate goal of using the technique.
Fitting Curvy Body Types
You’ll transform standard patterns into perfect-fitting garments by understanding how to modify for your unique curves.
With strategic adjustments to key measurements and proper blending between sizes, you’ll create clothes that showcase your shape rather than fight against it.
Hourglass Figures
The hourglass figure presents a wonderfully defined waist and proportionally balanced upper and lower body, but may require special pattern alterations to properly accentuate curve placement.
I’ll create a short, engaging blockquote in the same tone as the paragraph about hourglass figures:
Nature gifted the hourglass with perfect proportion—your patterns should honor this divine symmetry with thoughtful alterations.
Take in the waist definition while leaving ample room for the fuller bust and hip curves when altering your pattern pieces.
Understanding how to make full bust adjustments can greatly improve the fit.
This will help to ensure that the hourglass figure is properly accentuated, with a defined waist.
Pear-Shaped Bodies
While hourglass figures celebrate balanced proportions, pear-shaped bodies need different pattern approaches.
Start with your fullest hip point measurement when selecting patterns. You’ll typically need to grade between sizes, keeping the lower body roomier while adjusting the upper portions.
A-line styles naturally complement your shape. For thigh shaping, consider additional fabric in key areas.
Balancing silhouettes becomes easier with lighter fabrics up top and structured choices for the lower body, which can help with thigh shaping, A-line styles, and overall silhouettes.
Apple-Shaped Bodies
Apple-shaped bodies carry weight around the middle, making bust accommodation your primary fitting challenge.
Focus on creating waist definition with strategic dart placement and princess seams. Balance your proportions by ensuring shoulder slope adjustments maintain visual harmony.
When pattern altering, allow extra room across the midsection while keeping shoulders and hips properly fitted. This curved figure sewing approach transforms ill-fitting patterns into garments that celebrate your natural contours, using strategic dart placement.
Rectangular Shapes
Rectangular bodies can transform into curved silhouettes with strategic pattern alterations. Create definition where nature hasn’t by using these techniques:
- Add princess seams to create gentle curves along the torso
- Incorporate strategic darts at bustline and waistline for dimension
- Choose structured fabrics that hold their shape
- Use slash-and-spread methods to add volume where needed
- Blend between pattern sizes for visual harmony
These adjustments guarantee your rectangular shape achieves balanced, curvy proportions.
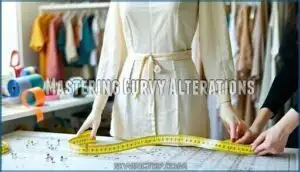
Mastering Curvy Alterations
You’ll transform standard patterns into custom-fitted garments with just a few strategic alterations that work specifically for your curves.
With specialized tools like French curves and clear rulers, you can confidently reshape necklines, modify dart placement, and blend between sizes to create clothes that truly complement your unique figure, using techniques that require confidence.
Troubleshooting Fitting Issues
While shaping different bodies requires specific techniques, identifying the root causes of fitting issues is your next challenge.
When examining your muslin mock-ups, let wrinkle analysis be your guide – they’re like a roadmap pointing to pattern problems.
| Wrinkle Type | What It Means | How To Fix |
|---|---|---|
| Horizontal lines | Too tight | Increase width/ease |
| Diagonal pulls | Imbalanced fit | Adjust shoulder seams |
| Vertical folds | Too loose | Reduce wearing ease |
Check neckline alignment and shoulder seams first – they’re the foundation of fitting challenges for curves, and understanding fitting issues is crucial for a good fit, which requires specific techniques.
Using Specialized Tools
Now that you’ve identified those fitting issues, you’ll need the right tools in your alteration arsenal. The difference between a good and great fit often comes down to precision tools.
- French curves help reshape necklines and armholes with professional-looking curves
- Grid rulers guarantee accurate measurements and straight lines
- Muslin mockups let you test alterations before cutting your fashion fabric
- Seam rippers undo mistakes without damaging fabric
- Zipper foot allows precise stitching along closures
Using these tools, tailors can also find specialized sewing products to enhance their craft.
Practicing With Sharp Sewing Tools
When altering patterns for curvy figures, your tools can make or break your success.
Keep your sewing tools sharp and well-maintained for precision work that honors your unique shape.
| Tool | Maintenance Tip | Safety Practice |
|---|---|---|
| Scissors | Sharpen regularly | Store with blade guard |
| Seam Ripper | Replace when dull | Point away from body |
| Pins | Store in pincushion | Count before and after use |
Don’t underestimate how proper fabric handling improves cutting accuracy during pattern alterations.
Adding or Removing Darts for Shaping
Mastering dart manipulation transforms how garments conform to your curves.
When adding darts, pin fabric while wearing it to identify where natural folds occur.
Strategic dart placement creates better fabric draping around curvy areas.
For removal, transfer fullness to existing seams by extending seam allowances.
Remember that pattern balance depends on body length and proportions.
A key step is locating the bust apex for accurate dart placement.
Don’t hesitate to adjust—it’s your key to conquering fitting challenges curves present.
Frequently Asked Questions (FAQs)
How to alter complicated pattern pieces?
Break down complicated pattern pieces by tackling one section at a time.
You’ll need to trace the original, use clear landmarks, and work methodically.
Don’t rush—every careful adjustment guarantees your garment fits perfectly.
When to create custom pattern blocks?
You’ve reached a crossroads. Create custom pattern blocks when you’ve made the same alterations repeatedly, when standard patterns need 3+ major changes, or when you’re ready to streamline your sewing workflow.
Best fabrics for showcasing curvy alterations?
Look for fabrics with a bit of stretch, like ponte, jersey, or stretch denim.
They move with your body and highlight alterations beautifully.
Lightweight fabrics, like rayon or silk blends, drape well on curves too.
Adjusting for asymmetrical body proportions?
Balance asymmetrical proportions by adjusting patterns for each side separately.
Measure individually, noting differences in shoulder, hip, or bust.
Blend sizes smoothly using curved rulers.
Test with a muslin mock-up to refine the fit perfectly.
How to balance style with fit needs?
Prioritize comfort by choosing styles that highlight your favorite features.
Use custom alterations like darts or blended seams for a flawless fit.
Don’t compromise; the right tweaks can make style and fit perfect partners.
Conclusion
Think of sewing for curves as sculpting with fabric—a blend of art and precision.
By mastering pattern alteration tips for curvy figures, like accurate measurements, slash-and-spread methods, and dart shaping, you’re tailoring patterns to fit you, not the other way around.
Adjusting patterns for your unique shape creates garments that flatter and feel comfortable. Don’t settle for ill-fitting designs; with practice and the right techniques, you’ll transform every project into a perfect, personal fit.

