This site is supported by our readers. We may earn a commission, at no cost to you, if you purchase through links.

Start with the root cause—most gaps happen because patterns don’t match your body shape.
If you’ve got a hollow chest or narrow shoulders, the pattern needs tweaking.
Try pivoting pattern pieces at the shoulder, overlapping sections to reduce width, or redrawing the neckline curve to follow your natural contours.
Don’t forget to adjust facing pieces too, or they’ll pull awkwardly.
Think of pattern alteration to fix gape as creating a custom blueprint for your body.
The real magic happens when you combine multiple techniques for that perfect, professional fit.
Table Of Contents
Key Takeaways
- You’ll fix gaping necklines by adjusting your pattern before cutting fabric—pivot pattern pieces at the shoulder, overlap sections to reduce width, and redraw neckline curves to match your body’s natural contours.
- You can’t ignore fabric choices when tackling gaping issues—heavy interfacing and stiff linings fight against your adjustments, so choose lighter lining fabrics and softer interfacing that work with your garment’s natural drape.
- You’ll achieve better results by combining multiple techniques—use muslin testing first, then add strategic darts or gathers while adjusting shoulder seams for a custom fit that addresses your specific body shape.
- You must transfer every adjustment to your facing pieces to prevent puckering—copy alterations precisely onto facing patterns and blend curves smoothly to maintain professional-looking results.
Identifying Neckline Issues
You’ve probably stared at a gaping neckline in the mirror, wondering why your perfectly sized pattern creates a tent-like effect that screams "I borrowed this from someone twice my size."
Identifying these pesky neckline issues starts with understanding that gaping occurs when your garment’s shoulders are too broad for your frame, your chest shape doesn’t match the pattern’s assumptions, or your fabric choice is working against you rather than with you.
Gaping Neckline Causes
Imagine this scenario: you’ve spent hours on a beautiful blouse, only to find it gapes at the neckline like a broken promise.
Gaping neckline issues stem from mismatched pattern size, incorrect shoulder slope, or fabric weight that won’t cooperate with your body shape.
Before addressing fitting issues, grab your muslin testing fabric—it’s your secret weapon for diagnosing sewing alterations before disaster strikes.
Hollow Chest Shape Problems
Some hollow chest shapes create persistent neckline gape that standard pattern alterations can’t fix. Your chest conformation affects how fabric drapes, making bodice alteration tricky.
In some cases, a sunken chest, also known as pectus excavatum, can affect chest shape.
Here’s how to tackle this challenge:
- Start with muslin testing to identify gaping patterns
- Assess posture influence on garment drape
- Remove excess fabric along neckline curves
- Add subtle darts for better chest fit
- Find balance between comfort and structure
Narrow Shoulder Fit Issues
When your shoulders don’t fill out a garment’s intended space, you’ll notice telltale signs that scream "wrong size." That shoulder slope mismatch creates a domino effect throughout your entire garment.
| Problem Signs | What You’ll See |
|---|---|
| Armhole Gaping | Fabric pools around underarms |
| Neckline Drag | Back neckline pulls away uncomfortably |
| Sleeve Issues | Armholes twist and bind oddly |
| Shoulder Wrinkles | Excess fabric bunches at shoulders |
| Poor Drape | Garment hangs like a tent |
Narrow shoulder adjustment requires muslin testing before committing to final alterations.
Fabric Choice Impact
Your fabric choice makes or breaks neckline stability. Heavy linens and cottons create stubborn gaping, while lighter materials drape smoothly against your body.
Your fabric choice is the difference between a gaping disaster and a perfectly fitted neckline that actually behaves.
Stretch factor matters too—knits need different handling than wovens. Match your interfacing weight to your main fabric, and choose lighter lining fabrics.
Considering fabric weight considerations can substantially improve your project. Wrong fabric pairing turns a perfect pattern into a gaping disaster you’ll regret wearing.
Pattern Alteration Techniques
Once you’ve identified where your neckline is gaping, you’ll need to alter your pattern pieces to create a better fit.
These proven techniques involve adjusting the pattern itself, from pivoting pieces to redrawing necklines, so you can fix the problem before you even start sewing.
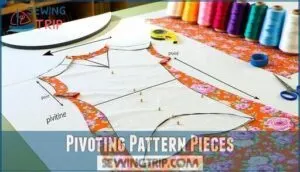
Pivoting Pattern Pieces
Anyone can master pivoting pattern pieces to eliminate gaping neckline issues.
You’ll swing your pattern pieces left or right from a key pivot point, typically at the bust point or shoulder.
This technique lets you redistribute fabric without cutting pieces apart.
Focus on precise pivot point placement and redrawing seams afterward.
The same method can be used for woven jogger pants to refine their fit.
Always do a muslin fitting check before finalizing your pattern alteration.
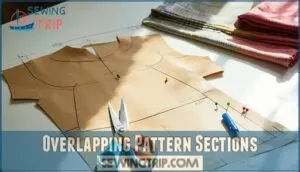
Overlapping Pattern Sections
Once you’ve made vertical adjustments to your pattern pieces, overlapping pattern sections becomes your next move for narrowing shoulders and reduce gaping.
Cut along those vertical lines you drew, then overlap the sections to match your desired width. This pattern modification technique lets you physically shrink the shoulder area while maintaining the neckline adjustment proportions.
Explore options for various pattern products. Redraw your seams afterward for clean pattern pieces.
Key adjustments include making vertical changes and then overlapping pattern sections to achieve the desired fit.
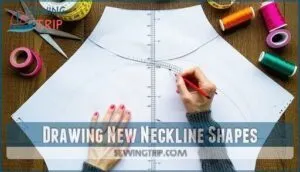
Drawing New Neckline Shapes
Your pattern’s success hinges on curve precision when redrawing necklines.
After overlapping sections, smooth out jagged edges with gentle, flowing lines that follow your body’s natural contours.
Neckline aesthetics improve dramatically when you blend shapes seamlessly from shoulder to center front.
Understanding your body shape can help address common fitting problems.
This design innovation transforms a gaping neckline into professional-looking neckline shaping through careful pattern modification.
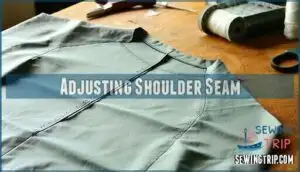
Adjusting Shoulder Seam
When your garment’s shoulders swim on you like an oversized jacket, it’s time to tackle the shoulder seams.
Start by drawing vertical lines from each shoulder point, then overlap the cut sections to achieve your ideal width. This shoulder fitting technique directly impacts shoulder slope and eliminates gaping.
Always test with muslin before making final pattern alterations—your shoulders will thank you.
Fabric Considerations Matter
You can’t ignore your fabric choices when fixing neckline gaping, since heavy interfacing or stiff linings will fight against your careful pattern adjustments like a stubborn zipper.
Pick lighter lining fabrics and softer interfacing that’ll work with your garment’s natural drape, not against it, to ensure a successful fix for the neckline gaping.
Choosing Lighter Lining Fabrics
Heavy lining fabrics fight against your main fabric, creating unwanted bulk that pushes necklines away from your body.
You’ll achieve better drape enhancement and stability improvement by choosing lighter-weight linings like silk habotai or cotton voile.
These fabric compatibility champions work with your garment’s natural flow, ensuring comfort considerations while maintaining neckline stability without the wrestling match.
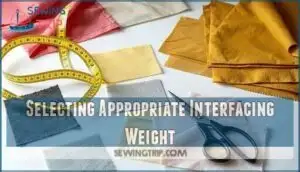
Selecting Appropriate Interfacing Weight
Your interfacing choice can make or break neckline stability.
Match interfacing weight to your fabric using a compatibility chart—when in doubt, go lighter.
Heavy interfacing creates unwanted stiffness, while soft interfacing maintains natural drape.
Test stiffness vs. drape on fabric scraps first.
Remember, woven interfacing characteristics are important for stability.
Interfacing should support your garment’s flexibility, not fight against it like an overzealous bodyguard.
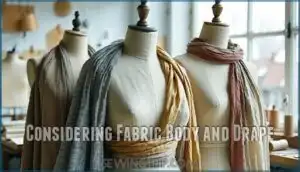
Considering Fabric Body and Drape
Your fabric’s personality directly affects how your neckline behaves.
Fabric weight and body determine whether your garment drape falls smoothly or creates unwanted gaps. Heavy fabrics like linen resist body curves, while lighter materials follow contours better.
Test drape by holding fabric against your chest—does it conform naturally or stand away?
Smart lining choice and woven alignment during pattern alteration prevent future gaping issues, ensuring a smooth garment drape and a well-behaved neckline.
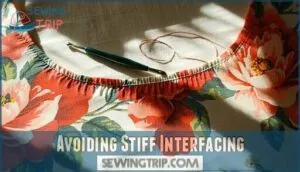
Avoiding Stiff Interfacing
Your neckline’s worst enemy? Stiff interfacing that turns fabric into cardboard. When interfacing fights against your fabric’s natural drape, gaping becomes inevitable. Think of it as forcing a ballerina into combat boots—it just doesn’t work.
Here’s your interfacing survival guide:
- Test interfacing compatibility on fabric scraps before committing to your project
- Choose fusible alternatives that match your fabric’s weight and flexibility
- Prioritize softness matters over heavy-duty support for better drape compatibility
- Select lighter lining fabrics and breathable materials that move with your body
Smart interfacing choices prevent more problems than they solve.
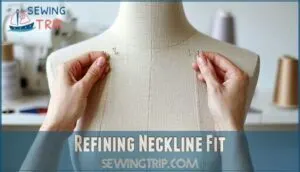
Refining Neckline Fit
You’ve got your pattern pieces adjusted, but that neckline still won’t behave—it’s time to fine-tune with precision techniques that actually work.
These hands-on methods let you steam, stitch, and shape your way to a neckline that sits exactly where it should, no more stubborn gaps or awkward pulling, using techniques that help you achieve a perfectly fitted garment with precision techniques.
Steam Pressing and Shortening Neckbands
Sometimes your neckline needs a gentle nudge rather than major surgery.
Steam pressing can work magic on stubborn neckbands that pull or pucker. Hold your iron about an inch away, letting the steam relax those fibers.
If that doesn’t solve the tension, try shortening the neckband length by taking small tucks at the shoulders—it’s amazing how much this improves overall fit.
Adding Darts or Gathers
When your gaping neckline needs strategic volume control, darts and gathers become your best friends.
These style variations offer flexible solutions for different fabric suitability challenges, transforming loose areas into perfectly fitted sections.
- Dart placement: Position darts at natural body curves like shoulder blades or bust points for seamless neckline adjustment
- Gather distribution: Space gathers evenly across problem areas to prevent bunching while maintaining garment drape
- Volume control: Use darts for structured fabrics, gathers for softer materials during pattern alteration
- Style variations: Combine both techniques strategically to address multiple fitting issues simultaneously
Using Basting for Temporary Adjustments
Before cutting into your good fabric, basting gives you the ultimate safety net for pattern alteration.
This temporary fitting technique lets you test adjustments with precise control, creating quick mockups that reveal exactly what works.
Hand-baste major seams first, then try on your garment.
You can also find tools for fabric fitting to help with this process.
The adjustment refinement process becomes foolproof when you can easily remove stitches and start over.
Combining Techniques for Custom Fit
Your fitting journey becomes a masterpiece when you blend multiple alteration methods.
Start with muslin fitting to test your hybrid alterations, then add darts while adjusting shoulder seams for seamless integration.
This iterative fitting approach lets you fine-tune each element—neckline customization, personalized adjustments, and sewing modifications—until your garment fitting achieves that coveted custom fit through strategic pattern alteration.
Finalizing Pattern Adjustments
You’ve made the hard adjustments, and now it’s time to lock them in permanently.
Think of this step like proofreading your essay—you’ll trace your altered patterns onto sturdy paper, smooth out any rough edges, and transfer every change to your facing pieces so everything matches perfectly.
Tracing Patterns for Revision
After perfecting your neckline adjustments, you’ll want to preserve your hard work.
Tracing patterns onto card stock creates a permanent record of your alterations. Think of it as insurance for future sewing projects—you won’t need to repeat the same fitting process twice.
- Pattern Preservation: Copy adjusted pieces onto sturdy card stock for longevity
- Revision Iterations: Keep original patterns intact while testing multiple adjustment versions
- Future Alterations: Save time by referencing your successful pattern modifications later
- Digital Copies: Photograph or scan traced patterns as backup documentation
Ensuring Smooth Shoulder Slope
Your pattern alteration success hinges on achieving that perfect shoulder-to-neckline shift.
After making adjustments, you’ll need to redraw curves where shoulder slope meets the neckline for seamless blending. This slope blending prevents awkward angles that scream "homemade."
Focus on armhole integration too—it’s your secret weapon for professional appearance.
| Shoulder Angle Issue | Quick Fix | Professional Result |
|---|---|---|
| Sharp angle at neckline | Redraw with gentle curve | Seamless neckline flow |
| Uneven shoulder slope | Blend with pattern paper | Natural shoulder contouring |
| Jagged armhole connection | Smooth transition lines | Clean armhole integration |
| Harsh neckline corners | Round off sharp edges | Polished neckline blending |
| Inconsistent curves | Use French curve ruler | Consistent professional look |
Addressing Full Bust Adjustments
When your garment pulls across the bust or armholes gape despite other adjustments, you’ll need a full bust adjustment.
Calculate your FBA by subtracting upper bust from full bust measurements, then divide by two.
This dart manipulation technique adds width at the bust without compromising shoulder fit.
Pattern grading alone won’t fix cup size issues—proper dart placement through FBA impact creates the perfect silhouette.
Transferring Adjustments to Facing Pieces
Your neckline adjustments mean nothing if the facing doesn’t match.
Copy every alteration you made onto the facing pattern piece—this guarantees facing alignment and prevents puckering.
Trace adjustments precisely, maintaining seamless finish quality.
Pin facing pieces to your altered bodice pattern for edge blending accuracy.
This precise stitching technique creates professional facing stabilization that won’t betray your careful pattern drafting and sewing techniques work.
To prevent fraying, consider finishing raw edges with a facing.
Frequently Asked Questions (FAQs)
Can a tailor fix a gaping neckline?
Like a puzzle missing pieces, your gaping neckline can absolutely be fixed by a skilled tailor.
They’ll adjust shoulder seams, add darts, or take in side seams to create that perfect, body-hugging fit you’re after.
What are the rules for pattern alteration?
Start by testing your fit with a muslin first—it’s your safety net.
Always trace your original pieces before cutting, keep notches intact, and blend curves smoothly.
Small adjustments make big differences.
How to fix a gaping dress without sewing?
Your dress is practically falling off your shoulders.
Grab fashion tape or safety pins to secure gaping areas temporarily.
Try layering with a camisole, adjusting straps, or using double-sided tape for quick fixes.
How to fix a gaping armhole in sewing?
Pinch excess fabric at the armhole and mark where it gapes.
Take in the side seam or add small darts to remove fullness.
Test fit frequently, and adjust gradually until the armhole lies flat against your body.
How to fix gaping after weight loss?
Research shows 80% of people experience clothing fit issues after significant weight loss.
Take in side seams first, then add darts at the bust and waist.
Consider shortening shoulder seams if gaping persists around necklines.
Can I alter ready-to-wear garments effectively?
Yes, you can successfully alter ready-to-wear clothes!
Focus on simple adjustments like taking in side seams, shortening hems, or adding darts.
Complex changes involving necklines or shoulders work best with professional help.
What tools are essential for pattern alterations?
You’ll need sharp fabric scissors, a seam ripper, measuring tape, pins, marking tools, and tracing paper. Don’t forget a good ruler and French curve for redrawing smooth lines after adjustments.
How much seam allowance should I add?
Add 5/8" seam allowance for most alterations, giving you wiggle room to adjust.
You can always trim excess later, but you can’t add fabric back. **It’s like insurance for your fitting experiments.
When should I seek professional tailoring help?
Seek professional help when you’ve tried multiple adjustments without success.
When working with expensive fabrics, or when dealing with complex alterations like major shoulder adjustments that require specialized expertise and experience.
Conclusion
Like Cinderella’s perfectly fitted gown, your garments can achieve that flawless silhouette with the right adjustments.
Master pattern alteration to fix gape by combining pivoting techniques, strategic overlapping, and custom neckline curves.
Remember to adjust facing pieces alongside main pattern pieces for seamless results.
Don’t rush the process—baste first, test fit second, then commit to permanent changes.
With practice, you’ll transform ill-fitting patterns into custom blueprints that celebrate your unique body shape perfectly, achieving a custom fit.
- https://thethriftystitcher.co.uk/6-ways-to-fix-a-gaping-neckline
- https://www.reddit.com/r/sewhelp/comments/154dngl/how_to_fix_gaping_in_pattern
- https://zunessewingtherapy.com/gaping-adjustment-to-pattern-and-finished-garment
- https://designerstitch.com/pattern-alteration-for-a-gaping-neckline
- https://www.nationalsewingcircle.com/class/pattern-alterations-fixing-fit-issues

