This site is supported by our readers. We may earn a commission, at no cost to you, if you purchase through links.
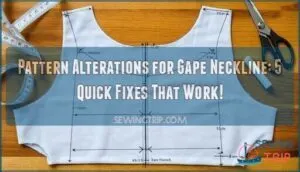
The culprit’s usually excess fabric that doesn’t match your body’s unique measurements. Start by pinching out the extra material at the neckline, then transfer those adjustments to your pattern pieces.
Create darts or wedges to remove surplus fabric, redraw the neckline curve to fit your chest shape, and don’t forget to adjust your facing pieces too. Think of it as tailoring the pattern to your body’s blueprint rather than forcing yourself into someone else’s measurements.
The real magic happens when you understand why certain alterations work better for different body types.
Table Of Contents
Key Takeaways
- You’ll fix gaping necklines by pinching out excess fabric and transferring those adjustments to your pattern pieces – create darts or wedges to remove surplus material and redraw the neckline curve to match your chest shape.
- Your gaping neckline stems from body-pattern mismatches, such as a hollow chest shape, narrow shoulders, or incorrect sizing – understanding the root cause helps you choose the right alteration technique for your specific body type.
- You must adjust both your main pattern pieces and facing pieces identically – transferring the same alterations to all related pieces prevents puckering, mismatched seams, and maintains professional consistency throughout your garment.
- You’ll prevent future gaping by stabilizing woven necklines with stay stitching, interfacing tape, or fusible strips – these techniques act like insurance, preventing stretch during construction and maintaining your neckline’s shape through wear and washing.
Causes of Gaping Necklines
Understanding why your neckline gaps is the first step to fixing it, and trust me, you’re not alone in this frustrating fitting issue.
Several common culprits cause this problem, including hollow chest shape, narrow shoulders, incorrect pattern size, bust cup mismatch, and excess fabric around the neckline area, which can be summarized as issues related to incorrect pattern size.
Hollow Chest Shape
A hollow chest creates a natural dip below your collarbone, causing fabric to pool and creating that frustrating gaping neckline.
Your hollow chest isn’t a flaw—it’s just a fitting challenge that deserves the right alteration technique.
When your upper chest volume is limited, garments simply can’t drape properly against your body’s contours.
Here’s what happens with hollow chest pattern alterations:
- Collarbone prominence creates space between fabric and skin
- Neckline drape suffers when there’s insufficient chest volume to fill the garment
- Posture influence can worsen existing neckline fitting issues
- Garment fit requires specific adjustments to accommodate your body’s unique shape.
To address this, consider pivoting pattern pieces for a better fit.
Narrow Shoulders
When you’ve got narrow shoulders, there’s simply not enough body width to fill out the garment properly.
This creates excess fabric that bunches around your neckline, causing that annoying gape.
Your shoulder slope can’t support the fabric’s natural drape, so pattern grading becomes off.
The result is a poor garment fit that screams for neckline alterations and specific alteration methods, which can be a real challenge to achieve a proper fit.
Incorrect Pattern Size
You’ve measured twice and cut once, but your neckline still gaps like a broken promise.
Often, incorrect pattern size creates this frustrating issue. Size chart issues and measurement inaccuracy lead to excess fabric around the neckline.
Grading problems between sizes affect ease allowance, causing pattern compatibility nightmares. Pattern alterations become necessary when your measurements don’t match the pattern’s assumptions perfectly, leading to a need for pattern alterations.
Bust Cup Size Mismatch
When your bust measurement fits but the neckline still gapes, you’re dealing with cup size impact that creates neckline distortion.
Standard pattern grading doesn’t account for fuller busts, leaving excess fabric pooling at your chest.
This bust cup size mismatch requires specific alteration methods like full bust adjustments during toile fitting to redistribute fabric properly across your torso.
Excess Fabric Around Neckline
When pattern grading doesn’t match your frame, excess fabric creates that dreaded neckline gape.
Your shoulder slope might be different from the pattern’s assumption, causing fabric drape issues around the collar area.
This mismatch becomes obvious during muslin fitting – the neckline shape just won’t sit right.
Smart pattern alterations target this excess fabric, transforming a gaping neckline into a perfect fit.
Pattern Alteration Techniques
Now that you’ve identified what’s causing your neckline to gape, it’s time to fix the pattern itself using proven alteration methods.
These techniques work by reshaping pattern pieces to match your body’s unique contours, eliminating excess fabric where it doesn’t belong, which helps in achieving a better fit using alteration methods.
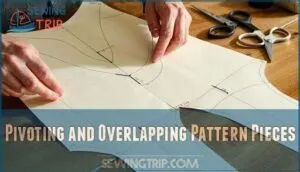
Pivoting and Overlapping Pattern Pieces
Now you’ll fix that gaping neckline using pivoting and overlapping pattern pieces.
Hold your pattern steady with a stiletto at the shoulder pivot point while rotating the top piece until seams align perfectly.
For bust apex alterations, slash from shoulder to waist, then overlap the desired amount.
Remember that fit alterations are necessary for correct proportions for your body type.
Mark your overlap amount guide clearly, keeping grainline considerations intact, and remember to adjust facing piece adjustments using the same technique.
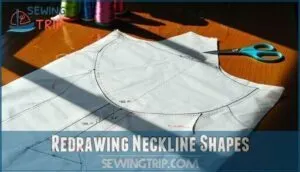
Redrawing Neckline Shapes
Once you’ve pinpointed the problem areas, redrawing neckline shapes becomes your next mission.
Grab curved drafting tools to create symmetrical neckline curves that’ll make your garment sing.
Start by sketching the new curve directly onto your pattern, then smooth those edges like you’re frosting a cake.
This neckline alteration sets the stage for a professional finish that actually fits your body, and helps you achieve a garment that sings.
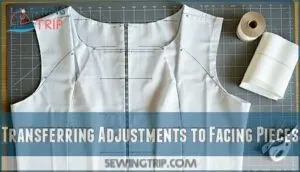
Transferring Adjustments to Facing Pieces
Once you’ve redrawn your neckline, transferring adjustments to facing pieces guarantees facing consistency throughout your garment.
Use tracing methods like carbon paper to duplicate exact measurements onto facing patterns. Hand basting technique helps maintain pattern symmetry during alterations.
When making facing alteration changes, apply identical adjustments to both bodice and facing pieces for seamless neckline adjustments and professional results.
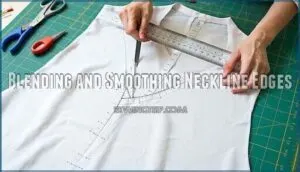
Blending and Smoothing Neckline Edges
Once you’ve pinpointed the perfect neckline shape, blending neckline edges with a curved ruler creates that professional finish you’re after.
This neckline alteration step eliminates awkward corners and uneven curves that scream "homemade."
Your pattern alteration guide isn’t complete without smooth passages—they’re what separate amateur attempts from polished results when altering sewing patterns to fix neckline gaping. This step is crucial for achieving a professional finish.
Fixing Gaping Necklines
You’ve identified what’s causing that annoying gap, and now it’s time to fix it with precise pattern adjustments.
These techniques will transform your loose, unflattering neckline into a smooth, body-hugging fit that actually stays where it belongs, providing a smooth solution to your problem.
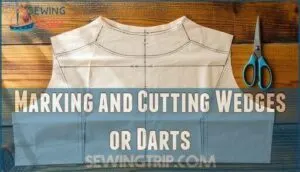
Marking and Cutting Wedges or Darts
Now you’ll pinpoint exactly where to place your corrections.
Mark a wedge onto your pattern that’s as wide at the neckline as the excess you pinned out.
Draw dart legs meeting at the armhole, avoiding notches.
For symmetrical darts, divide excess fabric evenly between both sides.
Accurately transferring the dart shape requires precise dart marking.
This precise dart placement eliminates neckline gape while maintaining proper pattern balance and facing adjustments, ensuring a smooth finish.
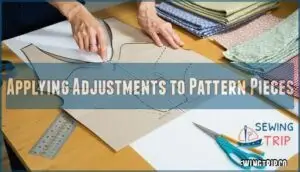
Applying Adjustments to Pattern Pieces
Once you’ve marked your wedges, it’s time to make those pattern adjustments stick.
Slash your pattern pieces from the neckline down to where your dart ends, then overlap and tape the sections together.
Keep your center front on grain during pattern modification.
Remember that addressing narrow shoulder issues can substantially improve the fit.
Don’t forget facing adjustments—they need the same treatment to prevent neckline gape issues later, which is a critical aspect of pattern modification.
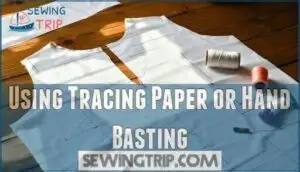
Using Tracing Paper or Hand Basting
Why struggle with wonky neckline alterations when tracing patterns and basting stitch techniques guarantee accurate results? These methods prevent costly fabric mistakes while ensuring your neckline alteration stays perfectly positioned.
- Accurate Tracing: Transfer pattern adjustments using tracing paper for marking precision
- Basting Benefits: Test-fit alterations before permanent stitching prevents neckline gape disasters
- Facing Adjustments: Hand basting maintains pattern consistency across all pieces.
Many sewers find tracing paper helpful for pattern alterations.
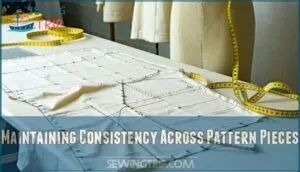
Maintaining Consistency Across Pattern Pieces
When you alter one pattern piece, you’ll need to adjust all related pieces to avoid a sewing nightmare. Your facing adjustments must mirror your bodice changes exactly, or you’ll get puckering and mismatched seams.
For added stability, consider using fusible web options on facing pieces. Transfer your pattern adjustments systematically to maintain muslin matching and proper pattern grading consistency.
| Pattern Piece | Adjustment Type | Key Considerations |
|---|---|---|
| Front Bodice | Dart/Wedge Removal | Maintain grainline accuracy throughout |
| Back Bodice | Shoulder Width | Match seam allowance adjustments precisely |
| Facing Pieces | Mirror Front Changes | Verify notch placement stays aligned |
Stabilizing Woven Necklines
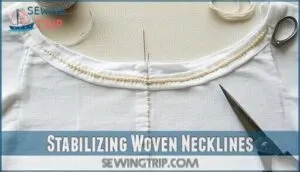
You’ll want to stabilize nearly every woven neckline you sew, since 99% of them stretch during construction and wear.
Think of stabilization as insurance for your neckline – it prevents that annoying sag that turns your crisp V-neck into a droopy mess after just one wash.
Staystitching and Iron-on Interfacing Tape
Since most woven necklines stretch during construction, you’ll want to secure them with stay stitching or iron-on interfacing tape.
These Staystitching Benefits include preventing neckline gaping and maintaining shape.
For Bias Necklines, apply interfacing within seam allowances using proper Application Techniques.
This neckline stability method works on various Interfacing Types, ensuring your neckline alteration stays put through countless wears.
You can also find products for this issue.
Using Stay Tape or Twill Tape
Both stay tape and twill tape work like insurance for your necklines.
Apply narrow stay tape along curved edges using Tape Application techniques, while twill tape reinforces seams directly.
Choose bias-cut options for Bias Necklines to guarantee proper Curve Conformance, delivering rock-solid neckline stability without adding bulk, and these sewing techniques excel at Preventing Stretch during construction.
Applying Fusible Interfacing Strips
Instead of wrestling with stretchy necklines, you’ll find fusible interfacing strips work like magic.
Cut lightweight interfacing slightly narrower than your seam allowance, then iron onto the wrong side of your neckline curve.
This neckline stabilization method offers excellent fabric compatibility across interfacing types.
Test your fusible options on scraps first—proper application techniques guarantee your interfaced facings maintain their shape beautifully, using a method that is almost like magic.
Ensuring Fabric Recovery and Stability
Test your fabric recovery by stretching a small swatch—good fabrics bounce back to their original size.
Smart sewers know: fabric that snaps back means necklines that stay put.
Poor recovery means your neckline will bag out over time.
Prewashing importance can’t be overstated; it prevents shrinkage surprises.
Choose interfacing weight carefully for woven stabilization methods.
Knit fabric recovery varies greatly, so bias-cut considerations require extra attention to fabric stability before cutting.
Refining Neckline Adjustments
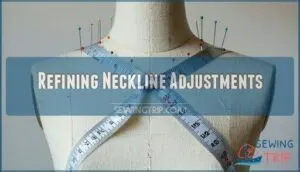
After you’ve stabilized your neckline, you’ll need to fine-tune those adjustments to achieve a perfect fit that won’t embarrass you at your next dinner party.
These final refinements transform your gaping neckline from "loose sweater disaster" into a polished garment that actually flatters your figure.
Selecting Appropriate Clothes and Fabrics
Once you’ve stabilized your neckline, selecting the right garments becomes your next victory.
Gaping often signals clothes that’re too large for your body size or shoulder width. Check if shoulders slip off or the garment feels baggy around your torso. Consider sizing down when excess fabric pools around your neckline.
- Match fabric drape to neckline shape – lightweight linings help delicate fabrics follow body contours naturally
- Choose occasion appropriate styles – fitted woven tops work better than loose cuts for narrow shoulders
- Consider fabric body weight – heavier fabrics may overwhelm petite frames and create unwanted gaping
- Follow a personal style guide – document which neckline shapes flatter your specific body proportions
Applying Preventative Measures Like Stay Stitching
Before you even cut your fabric, stay stitching becomes your secret weapon against neckline gaping disasters.
Apply this simple technique along curved seams to prevent stretching during construction. You’ll stabilize bias-cut areas and maintain original measurements throughout your sewing tutorial process.
Staystitching benefits include preserving neckline shape and preventing those frustrating adjustments later.
Smart preparation saves hours of neckline gape fix headaches.
Using Interfaced Facings for Stability
Interfaced facings act like your neckline’s personal bodyguard, preventing gaping and maintaining shape.
Choose interfacing weight that matches your fabric – lightweight for silk, medium for cotton. To further enhance the finish, consider finishing raw edges for a polished look.
Here’s your game plan:
- Interfacing Types: Fusible works for most projects, sew-in for delicate fabrics
- Facing Shapes: Cut facings to mirror your neckline curves exactly
- Grain Direction: Match facing grain to garment pieces
- Understitching: Prevents facings from rolling outward
Frequently Asked Questions (FAQs)
Can a woven top fit a gaping neckline?
Yes, you can fix a gaping neckline on woven tops through pattern alterations.
You’ll need to remove excess fabric by creating darts, adjusting shoulder width, or reshaping the neckline curve for a better fit.
How do you fix a gaping neckline?
Fix frustrating fabric flaws by pinching out excess at the neckline, creating darts for a custom fit.
You’ll need to adjust facing pieces too, ensuring they match your new neckline shape perfectly.
What does a gaping neckline mean?
A gaping neckline means your garment’s neckline stands away from your body instead of lying flat.
It creates unwanted gaps, usually caused by hollow chest shape, narrow shoulders, or incorrect pattern sizing.
Why is there a gap at the back neckline?
A back neckline gap typically happens when your shoulders are too narrow for the pattern, creating excess fabric.
The garment’s designed for broader shoulders, so it literally hangs away from your neck area, creating a back neckline gap.
Can a gaping neckline ruin your outfit?
Like a crooked picture frame stealing focus from beautiful artwork, a gaping neckline absolutely can sabotage your entire look.
It draws unwanted attention, creates unflattering silhouettes, and undermines your confidence when you’d rather shine.
Why do you adjust the front and back neckline?
You adjust both front and back necklines to maintain balance and symmetry in your garment.
When you change one side, the other needs matching alterations to prevent pulling, twisting, or uneven drape that’ll ruin your finished piece.
Can a tailor fix a gaping neckline?
Don’t worry about the cost—yes, a professional tailor can absolutely fix your gaping neckline.
They’ll adjust the pattern, add darts, or modify the fit to eliminate excess fabric and create a smooth, flattering silhouette.
They will work to ensure the final result is satisfactory.
How to fix a gaping boat neckline without sewing?
Try fashion tape or double-sided tape to secure the neckline to your chest.
Safety pins hidden inside can also work.
For temporary fixes, use a camisole underneath or add a decorative brooch to gather excess fabric.
How do I stop my V-neck dress from gaping?
V-neck gaping happens when there’s excess fabric or poor fit.
Pin out the excess at your neckline, mark where it bunches, then create small darts or tucks to eliminate the gap and improve the dress’s fit, focusing on complete concepts like these to enhance the overall appearance.
What causes a gaping neckline?
Picture fabric pulling away from your chest like a curtain that won’t close.
Your hollow chest shape, narrow shoulders, incorrect pattern size, or bust cup mismatch creates excess fabric that simply can’t lay flat.
Conclusion
Like a perfectly fitted puzzle piece, mastering pattern alterations for gape neckline issues transforms your sewing from frustrating to fantastic.
You’ve learned to identify the root causes, apply precise adjustments, and stabilize your necklines properly.
Remember that each body is unique, so don’t hesitate to make multiple muslins until you achieve the perfect fit.
With these techniques in your toolkit, you’ll create garments that hug your neckline beautifully rather than gaping awkwardly away from your body, which is a truly fantastic outcome.

