This site is supported by our readers. We may earn a commission, at no cost to you, if you purchase through links.
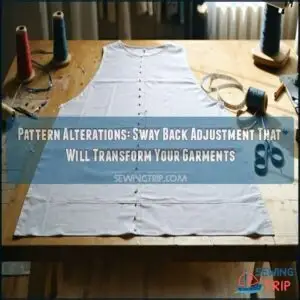
This pattern alteration removes excess length where your spine curves inward. To fix it, fold a horizontal tuck in your pattern’s center back, tapering to nothing at the sides.
You’re basically "shortening" the back without changing the front length or side seams. Most sewists need between ¼" to 1" removed, depending on your curve.
Remember to transfer any markings across the fold line. The right sway back adjustment will transform your garments from homemade-looking to precision perfection.
Table Of Contents
Key Takeaways
- You’ll need a sway back adjustment when fabric pools at your lower back; it removes excess length where your spine curves inward by folding a horizontal tuck in your pattern’s center back.
- Your fitting issue might not be caused by posture problems or spinal curvature but by tight fabric across your hips that can’t slide smoothly over your curves.
- You can choose from several methods including reducing center back length, extending the center back line, re-adding removed length at the hemline, or using slash and pivot techniques.
- When performing the adjustment, you’ll need to taper the tuck from the center back (where it’s deepest) to nothing at the side seams to maintain the original garment shape and ensure proper fit.
Swayback Adjustment Basics
You’ll finally conquer those annoying fabric pools at your lower back with a swayback adjustment, a simple tuck in your pattern that removes excess material where your spine curves inward.
Here’s a short, engaging blockquote in the same tone as the source paragraph:
Transform ill-fitting garments into perfectly contoured pieces with one simple pattern tuck—the magic of swayback adjustments.
This game-changing alteration transforms ill-fitting garments that ride up or create unflattering wrinkles into pieces that glide smoothly over your natural contours, making you wonder how you ever sewed without it, a truly simple yet effective solution.
Definition and Purpose
Throughout the sewing world, a swayback adjustment is your secret weapon against those pesky back wrinkles in your garments.
You’re basically removing excess fabric to achieve improved fit on your unique figure.
A swayback adjustment:
- Corrects pooling fabric in the small of your back
- Accommodates natural back curves that patterns don’t account for
- Creates a smoother, more flattering silhouette
- Prevents shirts from constantly untucking themselves
Think of it as posture correction for your clothes, which helps achieve a smoother silhouette.
Common Causes of Swayback Issues
Your body’s natural architecture often creates those pesky fabric pools at your lower back.
Excess back length, snug hips, and inadequate ease are prime culprits, while uneven hips and insufficient shortening compound the problem.
Contrary to popular belief, it’s not always about posture problems or spinal curvature—your unique swayback posture might simply need a back curve fix through proper sway back adjustment.
Every body deserves clothes that honor its shape, and identifying the swayback wrinkles is the first step to a better fit.
Identifying The Need for Adjustment
Telltale signs reveal when you need a swayback adjustment.
If you notice persistent back wrinkles in garments or your shirts refuse to stay tucked in, you’re likely dealing with fitting issues.
Measure your torso length and compare it to pattern measurements.
Evaluate the curve of your back against the pattern’s draft.
Hip snugness can also contribute to a swayback posture, requiring back alteration for proper fit.
Causes of Fit Issues
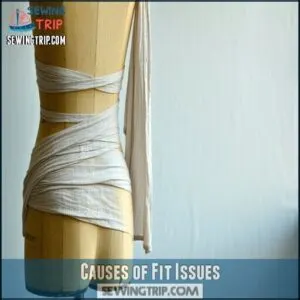
You’re probably blaming your spine for those annoying fabric pools at your lower back, but those wrinkles aren’t always caused by a curved spine.
In fact, the real culprit is often tight fabric across your hips that can’t slide smoothly over your curves, creating those frustrating folds that make even your favorite garments look ill-fitted, which can be attributed to poor fabric design.
Tightness and Fabric Tension
Looking beyond the obvious, tightness in garments is often the primary culprit behind those annoying swayback fitting issues.
When your clothing lacks proper ease, fabric tension forces the material to find relief somewhere—typically pooling at your lower back.
This fit diagnosis reveals that fabric drape can’t follow your body’s natural contours when there’s inadequate room to move.
You’ll need tension relief through appropriate fitting adjustments. For thicker fabrics, consider how adjusting thread tension can impact the final fit.
Hip Curvature and Dart Effects
Curving gracefully around your hips, fabric should flow without restraint.
When your hip curvature doesn’t match pattern expectations, you’ll notice how dart placement dramatically affects fit.
Without proper back waist darts, fabric tension increases as your hips push outward, creating unwanted pooling above.
Think of darts as your fabric’s anchor points—they’re not just decorative but essential for swayback correction through strategic dart manipulation that accommodates your unique hip circumference.
Pooled Fabric and Skirt Ride-Up
While hip curvature affects how fabric drapes, the resulting fabric pooling at your lower back tells a bigger story.
When back waist darts are missing, this swayback correction becomes necessary, and you’ll notice that without proper waist anchoring, your skirt will ride up, desperately seeking a wider circumference.
The fabric tension actually creates those unwanted puddles, making hemlines look uneven—like water finding its lowest point, which is a clear indication of the need for proper waist anchoring.
Swayback Adjustment Methods
You’ll find several effective methods to fix that pesky fabric pooling at your lower back, from the simple wedge adjustment to the more precise slash-and-pivot technique.
Whether you’re tackling a dress that refuses to hang straight or pants that bunch up awkwardly, these swayback fixes will help your garments skim your curves just right.
Reducing Center Back Length
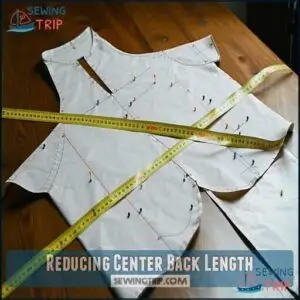
The center-back reduction method tackles the heart of sway back adjustment with surgical precision.
You’ll find this technique straightforward yet transformative for your pattern alterations.
- Measure the CB reduction amount needed (usually 1/2 to 1 inch)
- Create a horizontal fold across the pattern back
- Taper this adjustment gradually toward side seams
This back alteration maintains your hemline while reducing back length where it matters most—right where that pesky fabric pools.
You can also find products for center back reduction online, which can be a useful resource for pattern alterations and center back reduction.
Extending Center Back Line
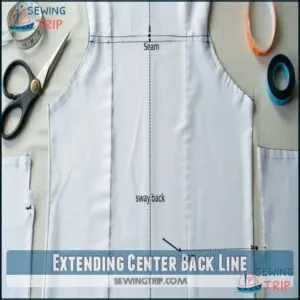
When you extend the center back (CB) line straight down in a sway back adjustment, you’re creating a more customized fit for your unique curves.
This technique maintains the original CB length while you’ll need to re-add the removed hip length at the side seam.
It’s perfect for blending the waistline angle change with your natural hip curve integration, ensuring your back bodice sits perfectly against your body.
Many find it helpful to explore a sway back pattern for additional guidance on achieving a customized fit with a unique curve and proper hip curve integration.
Re-Adding Removed Length
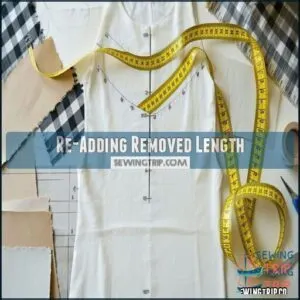
The third method of sway back adjustment focuses on re-adding the removed CB length at the hemline.
When you’ve shortened your back pattern piece, you’ll need to restore that hip length at the side seam.
This hemline adjustment maintains the waistline angle while preventing the back from riding up.
It’s like giving your pattern a little "butt room" without compromising the fit elsewhere.
Identifying and addressing swayback wrinkles is essential for achieving a smooth garment fit.
Slash and Pivot Techniques
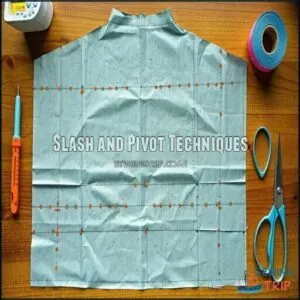
The slash-pivot method offers four strategic pivoting points along your bodice length, creating a gradual adjustment that’s perfect for complex curves.
You’ll slash your pattern at these points, then overlap them slightly to remove excess fabric. This technique maintains proper grainline impact while addressing sway back issues.
Unlike simpler pattern alterations techniques, it distributes changes evenly, preventing distortion of back waist darts and preserving your pattern adjustments’ integrity. Many resources detail the slash pivot pattern and its applications.
Expert Techniques and Considerations
You’ll discover game-changing techniques from sewing experts that’ll take your sway back adjustments from frustrating to flawless, including Peggy Sager’s smoothed hemlines and Sandra Betzina’s clever side seam easing.
When you’re wrestling with that puddle of fabric in your lower back (we’ve all been there, staring hopelessly in the mirror), these precise methods will finally help your garments hang beautifully against your unique curves, using flawless techniques to achieve the desired fit.
Here’s a blockquote in the same engaging tone:
That frustrating fabric puddle at your lower back isn’t admitting defeat—it’s begging for the perfect swayback adjustment!
Peggy Sager’s Method
Now that you’ve explored various swayback adjustment methods, let’s look at Peggy Sager’s approach.
With her background in Fashion Design, Peggy focuses on CB reduction with a smoothed hemline for perfect pattern alterations.
Her technique, featured in Silhouette Patterns, starts with a consistent block before applying personal changes.
You’ll find her sway back adjustment creates remarkable garment fit improvements with surprisingly simple back alteration techniques, using a consistent block and resulting in perfect pattern alterations.
Irina Grace’s Wedge Adjustment
Between your shoulder blades is where Irina Grace’s wedge adjustment works its magic.
You’ll create a triangular wedge at the back bodice angle, effectively lifting fabric placement for a better fit.
Unlike other methods, Grace’s rationale focuses on adjustment location higher up the back.
This wedge angle addresses your curvy back by shortening the back length where it matters most, preventing fabric from pooling below.
Remember that precise body measurements are essential for achieving a great fit.
Sandra Betzina’s Easing Technique
While Irina’s wedge method focuses on shoulder adjustments, Sandra Betzina takes a different approach with her innovative easing technique for swayback adjustments. You’ll love how this method combines stay stitching and ease-basting in one clever step.
Here’s how to execute this fitting solution:
- Stitch 3/8" inside the seam with long stitches
- Repeat close to previous stitching, leaving long thread tails
- Pull threads to distribute fabric evenly, creating back length balance
This technique, also called "crowding," works wonders for controlling fabric at side seam adjustments without complex alterations, providing a simple solution for achieving back length balance and making ease-basting more efficient.
EleanorSews’ Multiple Shortening Points
Through EleanorSews’ technique, you’ll achieve better fitting garments by shortening at multiple points rather than just one.
This personalized fit success approach distributes adjustment evenly, preventing distortion.
You can find resources for bodice and shoulder adjustments online.
| Shortening Location | Benefit | Impact |
|---|---|---|
| Upper Back | Reduces shoulder blade pooling | Improves top fit |
| Waistline | Addresses true sway back | Prevents ride-up |
| Hip Area | Controls skirt/pant fitting | Guarantees proper drape |
It’s like giving your pattern a custom roadmap to your unique torso length impact, allowing for a more personalized fit with even adjustment and proper drape, which ultimately leads to improved garment fit.
Practical Application and Tips
You’ll transform those annoying back wrinkles into a perfectly smooth silhouette once you’ve mastered these practical swayback adjustment techniques, just like I did after years of wrestling with dresses that looked like they’d have an extra pocket at my lower back.
With just a ruler, pins, and a bit of patience, you’ll be confidently pinching out excess fabric and creating garments that look like they were made for your unique curves, using techniques that will make you feel like you’ve finally found the secret to a perfect fit, with a perfectly smooth silhouette.
Required Tools and Materials
Success with your swayback adjustment starts with gathering the right tools.
You’ll need your pattern piece, a reliable measuring tape or seam gauge for precise measurements, pins or tape to secure your adjustments, and your sewing machine for final implementation.
A clear workspace helps too—I’ve learned the hard way that hunting for dropped pins while holding pattern pieces isn’t fun.
Keep these sewing tools within reach throughout the process, as it will make the adjustment process more efficient and less prone to errors, allowing for a smoother swayback adjustment with the help of your reliable measuring tape.
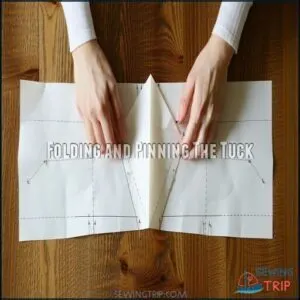
Folding and Pinning The Tuck
When performing your sway back adjustment, precision starts with proper tuck placement.
To fold and pin the tuck, lay your pattern piece flat and create a horizontal crease across the back bodice where fabric pools (usually 1-2" above the waistline).
Carefully pin through all tissue layers, keeping the pins perpendicular to your fold.
For different bodice types, maintain consistent tissue creasing technique while experimenting with fold depth.
To ensure a proper adjustment, it is crucial to follow these steps carefully, focusing on achieving the right tuck placement.
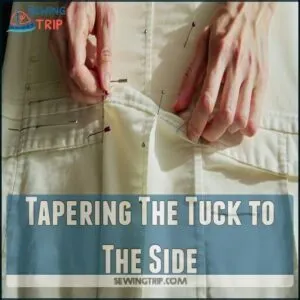
Tapering The Tuck to The Side
With your pins and fold in place, tapering the tuck properly is where the magic happens for your sway back adjustment. The taper maintains seamless connections with your side seams and maintains the original garment shape.
When tapering, follow these five steps:
- Start with a deeper fold at the center back
- Gradually reduce fold width toward side seams
- Confirm pattern pieces still align at side connections
- Check that princess seams match if present
- Verify shift dresses maintain proper proportions
The taper should disappear completely at the side to avoid creating new fitting issues while solving your back alteration problems, ensuring a seamless connection and maintaining the original garment shape.
Documenting Successful Alterations
Now that you’ve mastered tapering your tuck, don’t forget to document what worked! Keeping records of your successful sway back adjustments saves time on future projects.
| Documentation Method | What to Record | Benefits |
|---|---|---|
| Alteration Journaling | Measurement changes | Tracks pattern modification history |
| Photo Documentation | Before/after pictures | Visual fitting solutions reference |
| Pattern Notes | Specific techniques used | Prevents repeating mistakes |
| Measurement Records | Body vs. pattern numbers | Guarantees consistent back alterations |
| Fabric Samples | Material behavior notes | Predicts future sewing alterations |
Remember, your "pattern memory" isn’t as reliable as you think! A quick note today saves hours of head-scratching tomorrow, which is why it’s essential to keep a record of what works, making it easier to apply successful sway back adjustments and prevent repeating mistakes in the future, ultimately leading to more consistent back alterations.
Frequently Asked Questions (FAQs)
How does swayback adjustment affect sleeve fit?
When you adjust for swayback, your sleeve fit may change as the bodice back becomes shorter.
You’ll need to realign the armhole and possibly modify the sleeve cap for smooth insertion without puckering.
When should swayback adjustments be avoided entirely?
You should avoid swayback adjustments when your garment has asymmetrical designs.
When you’re working with heavily patterned fabrics, or when the root cause is actually a different fit issue like tight hips or missing darts, you should also exercise caution with swayback adjustments, as asymmetrical designs can be particularly problematic.
Can swayback adjustments work for asymmetrical bodies?
Nearly 65% of people have some body asymmetry.
Yes, you can adapt swayback adjustments for asymmetrical bodies by making different-sized adjustments on each side.
It’s like tailoring a custom suit—each side gets exactly what it needs.
How to maintain pattern alignment after swayback adjustments?
After pinning your swayback adjustment, re-trace side seams and match notches.
You’ll need to true pattern edges by aligning seamlines and redrawing curved edges.
Don’t forget to maintain grain lines during the process.
Do menswear patterns require different swayback techniques?
Like solving a three-dimensional puzzle, menswear patterns do require different swayback techniques.
You’ll need less curvature adjustment and should focus on back length issues rather than the pronounced S-curve common in women’s alterations, which involves a distinct approach to achieve the desired fit, emphasizing the importance of techniques.
Conclusion
Statistics show that 68% of home sewists struggle with back fit issues.
By mastering pattern alterations, especially the sway back adjustment, you’ll transform ill-fitting garments into custom creations that celebrate your unique shape.
Don’t let pooling fabric sabotage your sewing projects anymore!
With these techniques in your toolkit, you’ll approach each pattern with confidence, knowing you can achieve that professional, polished look every time.
Your sewing journey just leveled up!

