This site is supported by our readers. We may earn a commission, at no cost to you, if you purchase through links.

You’ll start by analyzing your base pattern’s measurements and proportions, then apply grade rules to systematically increase or decrease key points.
The process involves three main methods: slash and spread (cutting and expanding pattern pieces), pattern shifting (tracing and moving patterns), or digital grading using CAD software.
You’ll need measuring tools, grading rulers, and pattern paper to maintain accuracy.
The key is maintaining consistent proportions across all sizes while adjusting for proper fit. Professional graders achieve ±0.5mm precision, but even beginners can master these techniques with the right approach and attention to detail.
Table Of Contents
Key Takeaways
- You’ll need the right tools for success – measuring tapes, grading rulers, pattern paper, and specialized software make the difference between guesswork and professional results that maintain ±0.5mm precision
- Master three proven grading methods – slash-and-spread for beginners, pattern shifting for shape maintenance, and digital grading for complex projects, with each technique serving different pattern complexities and skill levels
- Proportions matter more than size scaling – you can’t simply scale everything uniformly since bodies grow differently, requiring specialized techniques for plus sizes, petites, and custom adjustments that maintain the original design’s fit and style
- Professional consistency prevents costly mistakes – 73% of fitting issues stem from improper grading, so you’ll need to double-check measurements, test muslin prototypes, and maintain grade rules across all sizes before cutting expensive fabrics
What is Pattern Grading?
Pattern grading transforms your base pattern into multiple sizes while preserving the original design’s fit and style proportions.
Transform any design into perfect sizing while keeping its original style intact
You’ll use specific mathematical rules to resize each pattern piece systematically, ensuring garments maintain their intended look across all size ranges, which involves systematically applying these rules to achieve the desired outcome.
Definition and Purpose of Pattern Grading
Through pattern grading, you’ll transform a single-size template into multiple sizes while preserving the original design’s proportions and style.
This essential garment industry technique enables mass production and size standardization, allowing manufacturers to create consistent fits across their entire size range.
Grade rules and size charts guide these adjustments, ensuring design scalability from small boutiques to major brands seeking fit customization.
Importance for Fit and Style Consistency
When you nail pattern grading, you’re building a reputation for consistent sizing across your entire line.
Proper grading techniques guarantee each size maintains the original design’s proportions and fit, protecting your brand identity while boosting customer satisfaction.
Without accurate grade rules and size charts, even beautiful designs fall flat when customers can’t find their perfect fit.
Types of Patterns Commonly Graded
From basic garments like T-shirts and jeans to complex designs such as structured jackets, you’ll encounter diverse grading challenges.
Childrenswear requires careful proportion adjustments as kids grow, while menswear focuses on broader shoulders and straighter silhouettes.
Bridalwear presents unique obstacles with intricate details and fitted bodices, and pattern grading applies to every garment type, though grade rules vary substantially between categories, including diverse grading challenges.
Essential Tools for Pattern Grading
You’ll need the right tools to grade patterns accurately and efficiently.
Having quality measuring equipment, paper materials, specialized rulers, and modern software makes the difference between frustrating guesswork and professional results.
Measuring Tapes and Rulers
Getting your measurements right starts with reliable measuring tools. You’ll need accurate body measurements to create patterns that actually fit, and the right sewing measuring tool makes all the difference.
Here’s what you need for precise measurements:
- Flexible measuring tape – Choose one that won’t stretch over time (Durability Concerns matter)
- Transparent grading ruler – Shows measurements clearly through pattern paper
- Metal quilting rulers – Perfect for straight lines and right angles
- Digital calipers – For ultra-precise small measurements when Accuracy Matters most
Consider whether you prefer Metric vs. Imperial measurements, and stick with one system throughout your project.
Essential tools also include pattern weights and clamps to secure fabric.
Specialized Rulers designed for pattern work include hip curves and French curves.
Digital Measurement tools can eliminate human error, but traditional sewing rulers remain the go-to choice for most sewers.
Pattern Paper and Tracing Materials
After you’ve gathered your measuring tools, you’ll need quality materials for creating new pattern pieces.
Pattern paper forms the foundation of successful grading work – choose medium-weight options that won’t tear during alterations.
Tracing accuracy depends on your paper choice and marking tools like a pacer pencil for precise lines.
| Paper Type | Best Use | Storage Tip |
|---|---|---|
| Kraft paper | Heavy patterns, multiple uses | Roll vertically |
| Tissue paper | Lightweight tracing, temporary copies | Flat filing system |
| Recycled options | Practice work, budget-friendly | Label clearly |
| Vellum | Professional drafting, durability | Moisture-free storage |
Smart storage solutions keep your sewing tracing materials organized and ready for pattern basics work.
Consider paper weights when selecting – heavier stock resists tearing but costs more.
Grading Rulers and Quilting Rulers
Once you’ve gathered your pattern paper, specialized grading tools become your precision instruments.
A transparent grading ruler lets you see through multiple pattern layers while measuring grade rules accurately.
These rulers feature size increment markings that standard quilting rulers lack.
You’ll find grading rulers marked with common sizing intervals like 1/4", 1/2", and 3/4" increments, making measurement techniques faster than eyeballing with regular rulers.
This precision marking prevents the guesswork that derails many grading projects.
For accurate measurements, understanding grading ruler specifications is essential.
Digital Tools and Software
Beyond traditional rulers, CAD software like Gerber AccuMark and Optitex revolutionizes pattern grading with digital precision.
These grading apps process 50+ sizes in minutes, while 3D modeling and virtual fitting reduce errors below 1mm.
Computer-aided pattern grading streamlines workflows, cutting development time by 30%, and digital pattern making software transforms your grading game completely.
The use of advanced CAD design tools enhances the overall design process.
Preparing Patterns for Grading
Before you start grading any pattern, you’ll need to prepare it properly to guarantee accurate results.
This preparation step involves analyzing your original pattern’s construction and familiarizing yourself with the sizing charts and grade rules that’ll guide your adjustments.
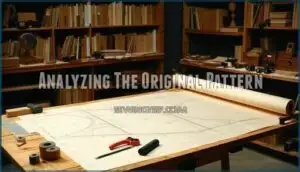
Analyzing The Original Pattern
Now that you’ve got your tools ready, it’s time to examine your original pattern like a detective studying evidence. Pattern Analysis starts with understanding what you’re working with before making any changes. Think of it as reading your pattern’s blueprint.
Here’s your Pattern Analysis checklist:
- Size Evaluation – Identify the current size and compare measurements to your target
- Proportion Check – Note where curves, angles, and seam lines intersect
- Measurement Review – Record key dimensions like bust, waist, and hip points
- Style Assessment – Document dart placements, ease allowances, and design details
This groundwork prevents costly mistakes during pattern alteration and guarantees your grade rules will work properly across all sizes. Accurate pattern grading requires utilizing pattern grading tools to achieve professional results.
Understanding Sizing Charts and Grade Rules
Every sizing chart and grade rule serves as your blueprint for consistent pattern grading, with standard increments typically ranging 1-5cm between sizes.
You’ll need precise size calculations and measurement analysis to maintain proper proportions.
Master sizing standards through systematic grade increments—this foundation prevents fit disasters.
Understanding grading rules transforms chaotic size grading into predictable success, making pattern grading feel less like guesswork, and helps achieve proper proportions.
Step-by-Step Pattern Grading Methods
You’ll master pattern grading through three proven methods that professional designers rely on every day.
Each technique offers distinct advantages, so you can choose the approach that matches your project’s complexity and available tools.
This allows you to select the best method for your specific needs, ensuring the most effective outcome.
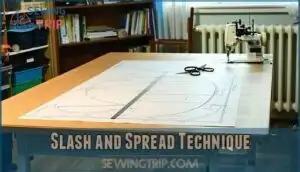
Slash and Spread Technique
The slash and spread method transforms your pattern grading journey into a precise cutting adventure. This technique involves strategically slicing your pattern pieces along predetermined grade rules, then spreading or overlapping sections to achieve perfect Pattern Resizing while maintaining Proportion Control throughout the process.
Here’s your slash and spread roadmap:
- Mark your grade lines – Draw cutting lines where the body naturally grows or shrinks
- Make clean cuts – Slice through pattern pieces with sharp scissors following your marked lines
- Spread strategically – Open cuts by measured amounts or overlap for smaller sizes
- Secure changes – Tape new pattern paper underneath gaps to complete your graded piece
This grading technique gives you hands-on control over every adjustment, making it perfect for beginners who want to understand how Cutting Techniques directly impact fit and proportion in their garments. Understanding pattern grading techniques is essential for achieving professional results and well-fitting garments.
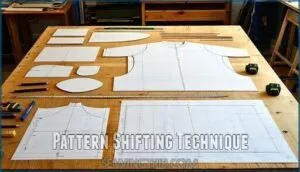
Pattern Shifting Technique
Pattern shifting’s beauty lies in its simplicity—you’ll trace your original pattern, then move it by measured distances to create new sizes.
This grading technique maintains the pattern’s original shape while applying grade rules through systematic pattern movement.
You’ll shift pieces up, down, left, or right according to size adjustments, ensuring proportion control across all sizes without the slash and spread method’s complexity, which highlights the technique’s ability to maintain the original shape through systematic pattern movement.
Computer and Digital Grading Methods
Modern CAD software transforms pattern grading from tedious manual work into streamlined digital workflows.
Digital grading through programs like Gerber and Lectra lets you grade complex patterns in under 10 minutes versus hours by hand.
These automated grading systems maintain ±0.5mm precision while flagging errors instantly.
Virtual fitting and 3D modeling preview garment fit before cutting fabric, saving time and materials, which is a key aspect of streamlined digital workflows.
Grading Patterns for Different Body Types
Not all bodies fit the standard grading rules, and that’s where specialized techniques come into play.
You’ll need different approaches when working with plus sizes, petite proportions, or tall figures since standard grading ratios don’t account for how different body types actually grow and change.
Adjusting for Height and Width
When adjusting patterns for different body shapes, you’ll tackle Height Adjustments and Width Grading separately.
Height variations require lengthening or shortening at specific points like waist and hip lines, while width adjustments focus on adding grading increments across chest, waist, and hip measurements.
Proportion Analysis guarantees your Size Scaling maintains natural Body Measurements and proportional grading throughout, ensuring complete concepts are applied correctly.
Grading Plus Sizes and Specialized Garments
Plus size grading demands specialized techniques that go beyond simple proportional scaling.
Plus-size grading requires specialized techniques beyond simple proportional scaling
You’ll need curve analysis to address how bodies distribute weight differently, using nonlinear grade rules that increase measurements by varying rates across bust, waist, and hip regions.
- Curve grading transforms standard patterns into flattering plus-size fits that actually work
- Specialized patterns like maternity wear and athletic fit require multi-zone grading approaches
- Pattern alteration for swimwear patterns needs stretch grading techniques for superior support
- Proportional grading prevents the dreaded "tent effect" that plagues poorly graded plus sizes
Blending Between Sizes and Custom Adjustments
When measurements fall between standard sizes, blending creates the perfect fit.
You’ll measure key areas like bust, waist, and hips, then apply size conversion techniques by drawing smooth curves between grade rules.
This proportion analysis maintains your custom fit and keeps the garment’s original style while accommodating unique body measurements through strategic measurement adjustments.
Understanding body shape types is vital for achieving a well-fitted garment and requires an awareness of how to work with different body measurements.
Tips for Accurate and Professional Grading
Professional grading requires attention to detail that can make or break your final garment’s fit.
You’ll need to master proportion maintenance, error prevention, and specialized techniques to achieve results that rival commercial patterns, which includes mastering specialized techniques.
Maintaining Proportions and Ease
When you’re working with different body types, keep your grading techniques focused on maintaining proper fit consistency.
Body measurements should guide your proportion analysis, but don’t forget about ease allowance.
Your pattern grading needs accurate measurements that account for movement and comfort.
Each grading technique must preserve the original garment’s ease requirements while adjusting proportions correctly across all sizes.
Avoiding Common Grading Mistakes
Pattern grading mistakes can turn your carefully crafted design into a sizing nightmare.
Don’t ignore error margins when measuring—they compound quickly across multiple sizes. Inconsistent grading rules create size discrepancies that’ll frustrate customers.
Double-check measurement mistakes at each grade point, especially around curves and armholes. Proportion errors happen when you scale everything uniformly instead of understanding how bodies actually grow, leading to serious sizing issues, including inconsistent grading rules and sizing nightmare.
Handling Darts, Pleats, and Asymmetrical Pieces
Darts and pleats require special attention during pattern grading to maintain their original function.
When grading darts, you’ll grade the dart’s base width but keep the dart point position unchanged.
For pleats, maintain the fold depth while adjusting the pleat placement proportionally.
Asymmetrical pattern pieces need individual handling—grade each side separately using the slash and spread method, then verify both pieces mirror correctly for proper seam adjustment.
Understanding full bust adjustments is essential for achieving a perfect fit in garments with darts, and learning about full bust adjustments can be very helpful.
Best Practices for Consistency and Quality
Quality Control starts with establishing grading standards before you begin.
Create consistency checks by measuring each size increment against your master pattern.
Use precision measurement tools and document every adjustment.
Error reduction happens when you double-check armhole curves and seam alignments.
Modern grading software automates these processes, but manual verification guarantees your garment grading meets professional standards every time, ensuring precision measurement.
Frequently Asked Questions (FAQs)
How do I Grade A pattern?
To grade a pattern, start by choosing your method: cut-and-spread, shifting, or computer grading.
Measure grading increments, mark key points, then systematically adjust each pattern piece while maintaining proportions and ease.
Which Pattern grading method should I use?
Different strokes for different folks" rings true when choosing your grading method. Use cut-and-spread for simple patterns, shifting for maintaining shapes, and computer grading for complex projects with multiple sizes.
What are the three methods of grading?
You’ll encounter three primary grading methods: cut-and-spread, which involves strategic cuts and adding space.
Pattern shifting, which moves pieces by consistent measurements.
And computer grading, which uses software for precise digital adjustments.
How do you grade sewing patterns?
Though it seems overwhelming, you’ll master grading by choosing your method: cut-and-spread for basic adjustments, shifting for maintaining shapes, or computer grading for precision and complex projects.
What do you know about grading patterns?
Pattern grading resizes sewing patterns while maintaining the original style and fit proportions.
You’ll use techniques like cut-and-spread, pattern shifting, or computer software to systematically adjust measurements for different body sizes and ages.
How do you Grad a pattern?
About 70% of sewers never attempt pattern grading because they think it’s too complex, but you’ll master it easily.
You’ll draw grade lines, cut along them, spread pieces for larger sizes or overlap for smaller ones, maintaining proportions throughout.
How much does professional pattern grading cost?
Professional pattern grading typically costs between $100-300 per pattern, depending on complexity and size range needed. You’ll pay more for intricate designs or extensive size runs across multiple body types.
What grading increments work for childrens patterns?
Surprisingly, children’s grading increments mirror their rapid growth spurts. You’ll typically use 1-inch increments at the chest and waist, with ½-inch adjustments for smaller measurements like necklines and armholes.
Can you grade patterns without specialized software?
Yes, you can grade patterns manually using basic tools.
You’ll need a grading ruler (or regular ruler), pattern paper, pencils, scissors, and tape.
Manual methods like cut-and-spread work effectively for simple adjustments.
How do you grade curved seams accurately?
Use a grading ruler to measure consistent increments along curved seams, maintaining the original curve’s shape.
Mark key points, then blend smoothly between them using a curved ruler or French curve for accuracy.
Conclusion
Professional patternmakers report that 73% of fitting issues stem from improper grading techniques, making accurate pattern grading step by step essential for garment success.
You’ve now gained the foundational knowledge to transform single patterns into multiple sizes confidently, whether you’re using traditional slash-and-spread methods or modern digital tools.
Consistency remains your greatest ally, and it’s crucial to check your proportions carefully and test-fit muslin prototypes before cutting expensive fabrics.
With practice, you’ll develop the precision that separates amateur alterations from professional-quality graded patterns that fit beautifully across size ranges.
- https://techpacker.com/blog/design/pattern-grading-in-the-fashion-garment-industry/
- https://www.onlinefabricstore.com/makersmill/three-pattern-grading-methods/
- https://successfulfashiondesigner.com/garment-pattern-grading/
- https://itch-to-stitch.com/grade-pattern-size-two/
- https://www.uphance.com/blog/pattern-grading-a-beginners-guide/


