This site is supported by our readers. We may earn a commission, at no cost to you, if you purchase through links.
 When you’re deciding between pressing seams open or closed, consider your project’s needs.
Press seams to one side for stronger construction since the fabric layers reinforce each other.
This method works well for traditional piecing and machine quilting.
However, press seams open when multiple seams meet at one point to reduce bulk and create flatter intersections.
Open seams also make hand quilting easier and help when working with thick fabrics like flannel.
Most quilters press backing seams open for smoother results.
Your fabric weight, quilting method, and pattern complexity all influence this choice, and mastering both techniques opens up countless possibilities to create a better quilt.
Table Of Contents
Key Takeaways
- Choose pressing method based on your project’s specific needs – Press seams to one side for stronger construction in traditional piecing, or press open when multiple seams meet to reduce bulk and create flatter intersections.
- Consider your fabric and quilting method – Heavy fabrics like flannel work better with open seams to minimize bulk, while delicate fabrics may distort when pressed to the side. Hand quilting becomes easier with open seams, but machine quilting benefits from side-pressed seams.
- Don’t limit yourself to one technique per quilt – You can combine both methods strategically within the same project, using open seams in high-bulk areas while pressing to the side where blocks connect for optimal strength and alignment.
- Master proper pressing technique for professional results – Set seams first with your iron, then press toward darker fabrics to hide seam lines, and let each seam cool completely before handling to ensure crisp, flat results.
Pressing Seams Basics
When you press your seams, you’ll choose between two main methods: pressing them open or pressing them to one side.
Each technique affects your quilt’s strength, appearance, and how easily you can match seams when piecing blocks together. Pressing them open will affect the quilt’s strength.
Advantages of Pressing to The Side
Pressing seams to the side transforms your quilting from good to exceptional.
This traditional method creates stronger, more durable quilts that withstand years of use and washing.
Here’s why pressing seams to the side works so well:
- Seam Strength – Both fabric layers support your stitching line
- Nesting Seams – Opposing seam allowances lock together for perfect alignment
- Stitch Security – Fabric protects threads from wear and tear
- Block Emphasis – Creates subtle dimension in your patchwork
- Patchwork Stability – Reinforces block structure during assembly
Disadvantages of Pressing to The Side
While pressing seams to the side offers strength benefits, it creates notable drawbacks.
Block Size Issues arise when extra fabric makes your blocks slightly smaller than intended.
Seam Thickness adds unwanted bulk, creating Quilting Difficulty during free-motion work.
Unintended Emphasis can highlight wrong areas of your design.
Fabric Distortion becomes problematic with delicate materials that can’t handle side-pressed seam allowance stress, leading to issues with Seam Thickness and Block Size Issues.
Importance of Seam Pressing in Quilting
Whether you choose pressing seams open or closed, proper technique determines your quilt’s success.
Seam pressing affects multiple aspects of your finished project:
- Seam Integrity – Proper pressing prevents thread breakage and fabric stress
- Fabric Stability – Correct direction maintains block shape and prevents distortion
- Quilting Ease – Well-pressed seams make machine quilting smoother
- Block Alignment – Strategic pressing creates perfect intersections
- Professional Finish – Consistent technique elevates your quilting results.
Using specialized pressing tools helps maintain curves.
Pressing Open Techniques
When you press seams open, you’ll separate the fabric layers to reduce bulk and create flatter blocks.
This technique works best for intricate designs and areas where multiple seams meet, though it requires more time and care than pressing to one side, particularly for achieving flatter blocks.
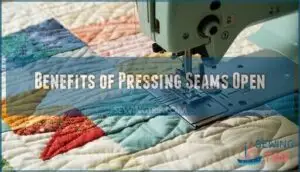
Benefits of Pressing Seams Open
When you’re dealing with complicated blocks, pressing seams open creates a smoother surface that makes your quilting life easier.
This flat seam pressing technique offers significant bulk reduction, especially where multiple seams meet. You’ll find easier quilting becomes possible with intricate designs when pressing seams flat eliminates those thick spots.
Many quilters find using the right seam pressing tools is essential for achieving perfectly flat seams.
| Benefit | Result |
|---|---|
| Reduce Bulk | Flatter quilt top |
| Even Surface | Better stitch quality |
| Less Thickness | Simplified free-motion quilting |
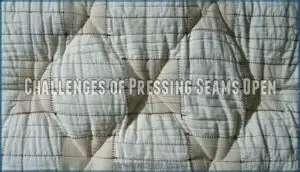
Challenges of Pressing Seams Open
Open seams create several hurdles you’ll need to navigate.
Seam strength decreases substantially without fabric backing the stitched line.
Matching seams becomes trickier since they can’t nest together like pressed-to-the-side seams.
Time consumption increases as you carefully wiggle each seam open.
Batting migration occurs more easily through exposed stitching lines, and fabric distortion may happen during the pressing process, which can be a significant issue due to batting migration and fabric distortion.
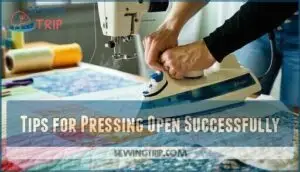
Tips for Pressing Open Successfully
You’ll achieve better results when pressing seams open by adjusting your stitch length to 2.0 for stronger seams.
Use a pressing cloth for delicate fabric handling to prevent scorching.
Work slowly along long seams for accuracy, and press from the center outward. Medium iron temperature is ideal for most tasks.
Choose quality pressing tools for seams, and finger-press bulky corners first to avoid puckering before applying heat, ensuring a smooth finish with quality pressing tools and attention to delicate fabric.
Pressing to The Side Methods
Pressing seams to the side creates stronger quilts through strategic fabric placement.
This method involves folding both seam allowances toward one side rather than splitting them apart.
The technique builds fabric stability by doubling the material behind each seam line.
Master these key techniques for successful side pressing:
- Press toward darker fabrics to hide seam lines from the quilt front
- Use seam nesting by pressing adjoining seams in opposite directions
- Create stitch security by covering thread lines with fabric layers
- Apply firm pressure with your iron to set crisp, flat seams
- Work systematically through each block before assembly
This approach enhances patchwork durability since fabric reinforces every sewn line.
When you press seams closed, the doubled fabric prevents thread exposure and potential breakage.
Seam nesting allows perfect alignment when joining blocks – opposing seam allowances lock together like puzzle pieces.
Using a tailor’s ham aids in shaping curved seams.
These seam techniques create the foundation for quilts that withstand years of use.
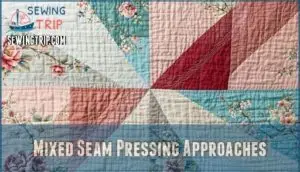
Mixed Seam Pressing Approaches
You don’t have to choose just one pressing method for your entire quilt project.
Why limit yourself to one technique when you can master both for quilting perfection?
You can combine pressing seams open and pressing to the side within the same quilt to reduce bulk in busy areas while keeping strong seams where you need them most.
Combining Pressing Open and to The Side
You can master both pressing seams open and pressing to the side within a single quilt through Hybrid Seam Pressing techniques.
This Strategic Bulk Reduction approach uses pressing seams open in high-bulk areas while pressing to the side for Enhanced Seam Nesting where blocks connect.
Pattern-Specific Pressing creates the perfect balance between seam allowance strength and flatness throughout your quilting seam pressing workflow.
Considerations for Mixed Techniques
Hybrid Seamwork requires balancing multiple factors when mixing pressing techniques.
You’ll need to take into account fabric properties—heavyweight materials behave differently than delicate cottons.
Pattern Specificity matters too, as complex blocks demand different approaches than simple strips.
Aesthetic Balance weighs against Functional Durability in your decision-making.
Proper preparation involves cutting seam allowances to reduce bulk.
Test pressing seams both ways on sample blocks before committing to your quilting techniques throughout the entire project, ensuring proper preparation.
Recommendations for Specific Quilt Patterns
Different quilt patterns demand specific seam pressing strategies for superior results.
Lone Star quilts require consistent clockwise pressing to prevent bulk at center points.
Bargello quilts benefit from alternating seam directions between strips.
Appliqué quilts need open pressing around curved edges.
Paper piecing works best with side pressing for stability.
Match your pressing technique to your pattern’s structural needs.
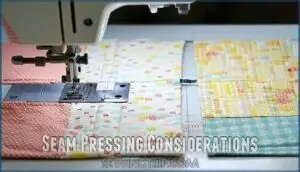
Seam Pressing Considerations
When you choose how to press your seams, you’ll need to take into account your fabric type, quilt pattern, and desired finish.
Different fabrics and designs work better with specific pressing methods, so understanding these factors helps you make the right choice for each project, considering the overall desired finish.
Fabric Type and Seam Pressing
Three key fabric types require different seam pressing techniques.
Heavy fabrics like flannel benefit from pressing seams open to reduce bulk.
Delicate fabrics often distort when pressed to the side, making open pressing safer.
Bias seams need careful handling to prevent stretching regardless of fabric weight.
Explore flannel pressing products for superior results.
Consider grain direction and stretch factors when choosing between pressing seams open or closed for desirable results, using the right techniques for each fabric type.
Quilt Pattern and Seam Direction
Your quilt pattern dictates seam direction choices more than personal preference.
Complex quilt blocks with multiple intersections require pressing seams open to reduce bulk, while simple patterns benefit from side-pressed seams for strength.
Consider fabric grain and bias seams when deciding direction. Block complexity influences whether you’ll press toward darker fabric or open seams entirely.
Your aesthetic choice matters most.
Achieving Flat Blocks and Seamless Quilts
Flat blocks start with consistent pressing and proper tools.
Setting seams with your iron flattens stitches into fabric, reducing quilting seam bulk effectively. Use wool pressing mats that reflect heat, creating flatter results.
High-quality mats offer enhanced heat retention. A wooden tailor’s clapper traps moisture after pressing, ensuring seams stay crisp.
For display quilts, open seams create smoother surfaces, while practicality vs. appearance guides your quilting seam pressing techniques, considering the importance of proper tools.
Frequently Asked Questions (FAQs)
Should you press seams open or closed?
Press seams to the side for stronger quilts and easier piecing alignment.
Press open when you need less bulk or flatter blocks.
Your project’s needs and personal preference should guide your choice.
What is the proper technique for pressing seams?
Use your iron’s cotton setting and press—don’t drag—the seam flat first.
Then, press seam allowances toward the darker fabric or as your pattern directs.
Let each seam cool completely before handling.
Which way do you press seams on quilt backing?
Like building a foundation for a house, you’ll want to press backing seams open to minimize bulk.
This creates a flatter surface that’s easier to quilt through and prevents those pesky lumps.
Which way to press quilt border seams?
Border seams typically get pressed toward the darker fabric to hide them from the quilt’s front.
You’ll want consistent pressing direction around all borders for professional results and easier quilting later.
What pressing tools work best for seams?
A hot iron’s your best friend here—you’ll need a quality steam iron, pressing mat, and wooden seam presser.
These tools guarantee crisp, flat seams that’ll make your quilting journey smoother and more professional-looking.
How does thread weight affect seam pressing?
Heavier thread weights create more bulk when you’re pressing seams, making them harder to flatten completely.
Lighter threads press smoother and create less visible impressions, giving you cleaner results in your finished blocks, with smoother seams being an added advantage.
Should batting type influence seam pressing choices?
Don’t put all your eggs in one basket—batting type absolutely affects your seam pressing decisions.
Thicker batting like wool requires open seams to reduce bulk, while thinner cotton batting handles side-pressed seams beautifully.
When to press seams during block assembly?
Press seams after joining each pair of pieces, then again after completing rows or sections. This step-by-step approach prevents fabric shifting and guarantees accurate alignment when assembling your final block.
How to fix incorrectly pressed seam allowances?
Simply re-press your seams in the correct direction using steam and firm pressure.
Work slowly to avoid stretching fabric.
If seams won’t cooperate, lightly dampen them first, then press again with proper technique.
Conclusion
Ironically, the "right" way to handle pressing seams open or closed depends entirely on your specific project needs.
You’ll discover that fabric weight, quilting method, and pattern complexity all guide your decision.
Press seams to one side for stronger construction in traditional piecing.
Choose open seams when multiple intersections create bulk or when hand quilting.
Master both techniques, and you’ll have the flexibility to tackle any quilting challenge with confidence and achieve professional results.

