This site is supported by our readers. We may earn a commission, at no cost to you, if you purchase through links.
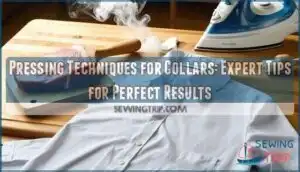
Press seam allowances before turning your collar right-side out, then use steam and firm pressure to create crisp edges. Work from the center outward, using a pressing cloth on delicate fabrics.
For pointed collars, press the tip first, then smooth toward the seam line. The secret lies in building layers gradually – don’t rush the process.
Temperature control makes or breaks your results, and there’s a specific sequence that professional tailors swear by, emphasizing the importance of temperature control.
Table Of Contents
Key Takeaways
- You’ll need specialized tools like a tailor’s ham for curved surfaces, a point presser for sharp corners, and a clapper tool to lock in crisp seams while fabric cools.
- Press your seam allowances before turning the collar right-side out, then work from the center outward using steam and firm pressure to create professional edges.
- Temperature control makes or breaks your results – match your iron’s heat to your fabric type, with cotton needing high heat and silk requiring gentle steam.
- Trim seam allowances at angles and use interfacing on one collar layer for structure, as proper preparation prevents bulk and creates sharp, lasting points.
Pressing Collar Basics
Before you press your first collar, you’ll need to understand the fabric choices and interfacing requirements that create professional results.
Cotton fabrics give collars crisp edges, while silk creates softer looks.
Cotton delivers sharp precision, silk whispers elegance—your fabric choice shapes your collar’s entire personality.
Adding interfacing to one layer provides the structure that keeps your collar looking sharp after washing.
Choosing Collar Fabric
Two fabric choices can make or break your collar’s appearance.
Cotton creates crisp collar finish with excellent structure, while silk offers elegant drape.
Consider fabric weight – lightweight fabrics need interfacing support, heavy ones press beautifully alone.
Match fiber content to your garment’s needs.
Weave structure affects how fabric holds its shape.
Color considerations matter for pattern matching and overall design harmony.
Interfacing for Structure
Proper interfacing transforms floppy fabric into crisp, professional collars that hold their shape beautifully.
You’ll need interfacing sized to your collar minus seam allowances, applied only to the under collar for maximum structure.
- Fusible types bond permanently with heat, while sew-in options offer flexibility for delicate fabrics
- Match weight selection to your fabric – lightweight for silk, medium for cotton
- Follow grain direction and cut interfacing shapes precisely for perfect collar stiffness techniques
Peter Pan Collars
Peter Pan collars charm with their rounded edges and feminine appeal, making fabric choices essential for success.
Cotton creates structure while silk adds elegance, but both need proper interfacing types for stability.
When pressing shirt collars with this styling option, use gentle heat and steam.
Position the collar on your tailor’s ham, following collar pressing techniques that emphasize the curved shape, for a crisp collar finish and to achieve professional results, which require patience and the right collar ironing tips.
Stand-up Collars
Stand-up collars demand different collar pressing techniques than their rounded cousins.
You’ll need precise fold techniques and patient pressing for success with any standup collar. The collar height and neckline fit determine your approach, while your interfacing choice provides essential support structures.
Here’s what makes stand-up collars shine:
- Collar Height – Measure twice, press once for perfect proportions
- Closure Types – Button bands need extra attention during pressing
- Collar Shaping Methods – Use steam and patience for crisp collar finish
- Support Structures – Proper interfacing prevents collar collapse when pressing shirt collars
Preparing Collar Seams
When you’re working with collar seams, you’ll need to focus on three main steps that make the difference between a homemade look and professional results.
Start by sewing your collar corners with precision, then carefully turn the collar right side out.
Finish by pressing those collar points until they’re sharp and crisp.
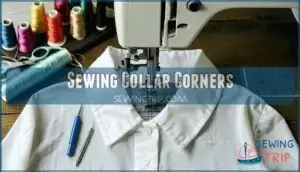
Sewing Collar Corners
Sharp corners make the difference between amateur and professional-looking collars.
You’ll need precise techniques to achieve point perfection without bulk.
| Technique | Method | Benefit |
|---|---|---|
| Double clipping | Cut from both sides at sharp angle | Eliminates excess fabric |
| Short stitches | Switch to 2mm length before corners | Maintains control and precision |
| Seam reduction | Trim to 1/4" allowance | Prevents bulk in curved areas |
| Needle method | Stitch over needle for sharp turns | Creates crisp corner angles |
| Corner reinforcement | Fold back and catch outer collar | Guarantees neat turning results |
These collar shaping methods prevent bulk while delivering clean results, ensuring a professional finish.
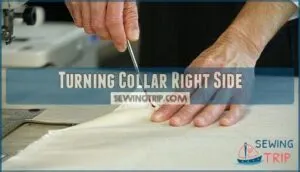
Turning Collar Right Side
After sewing collar corners, you’ll turn your collar right side out carefully. This step transforms your flat collar pieces into their final shape. Use point turner tools to push out corners without damaging fabric.
Here’s how to turn collars properly:
- Trim cornering seam allowance to reduce bulk
- Insert point turner tool gently into corners
- Push fabric outward slowly for achieving sharp points
- Smooth seams flat before pressing
Understitching benefits include preventing rolling seams and preventing bulkiness in your finished collar. Proper pressing helps maintain fabric stability and block shape. This ensures a professional finish to your garment.
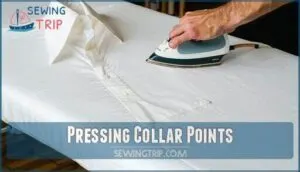
Pressing Collar Points
Two things make or break collar points: your point presser and patience.
After turning your collar right side out, slip a bamboo point presser inside to push fabric into sharp corners.
Press gently with your iron, working from the point outward, this prevents rounding and maintains collar symmetry.
Trim excess seam allowance beforehand for cleaner results.
Pressing Collar Curves
When you’re pressing collar curves, you’ll need specialized tools like a tailor’s ham or curved pressing surface to match the collar’s natural shape.
These tools prevent flat spots and wrinkles that happen when you try to press curves on a flat ironing board, giving you smooth, professional results every time.
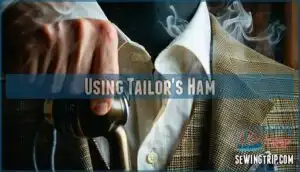
Using Tailor’s Ham
After preparing your collar seams, the tailor’s ham becomes your secret weapon for professional results.
This curved pressing surface mimics body contours, making it perfect for collar pressing.
Ham size matters – choose one that matches your project scale. Check fabric compatibility before applying heat.
Angle matters when positioning your collar; prevent distortion by supporting curves naturally. These advanced techniques transform amateur work into polished craftsmanship.
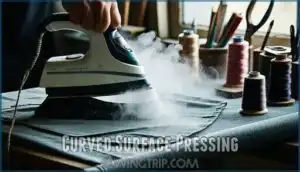
Curved Surface Pressing
Mastering curved collar pressing transforms your finished garment from amateur to professional.
You’ll need the right surface that mirrors your collar’s natural shape. Ham alternatives work perfectly when your tailor’s ham isn’t available.
- Dowel shaping creates smooth curves by supporting fabric from underneath during steam pressing
- Point pressers help navigate tight curves without creating unwanted creases in seam allowances
- Preventing pleats requires slow, deliberate movements around curved areas
- Steam pressing collars softens fibers for easier shaping on curved surfaces
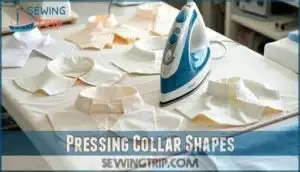
Pressing Collar Shapes
Different collar shapes demand unique pressing approaches for Collar Point Perfection.
Round Peter Pan collars need gentle curved pressing motions, while sharp triangular collars require precise 3D Collar Pressing techniques.
Steam pressing helps achieve Curved Collar Shaping on bias-cut styles.
Focus on Collar Symmetry by pressing both sides equally, using consistent pressure and heat for professional results.
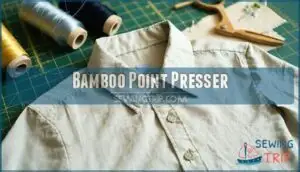
Bamboo Point Presser
A bamboo point presser brings precision to your collar pressing equipment arsenal. This sustainable tool excels at collar point pressing with its dual-ended design – the pointed tip creates sharp corners while the rounded end opens seams perfectly.
Here’s how to maximize Point Presser Uses for Collar Point Perfection:
- Push out collar points using the sharp tip for crisp edges
- Press seams open with the rounded end before final pressing
- Mark temporary creases to guide your pressing techniques
The Bamboo Durability makes this one of the most reliable pressing tools. You can purchase a point presser for your sewing needs.
Unlike Alternative Tools, bamboo won’t scratch delicate fabrics or leave marks. Perfect your Pressing Angles by holding the tool at a slight slant when working corners – this prevents fabric bunching while creating professional results on all collar types.
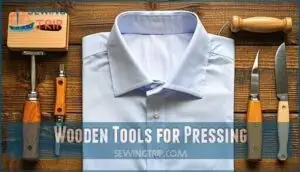
Wooden Tools for Pressing
Wooden tools elevate your collar pressing game beyond basic equipment.
A tailors clapper flattens seams and creates razor-sharp edges on collars and cuffs. The point presser reaches tight corners where your iron can’t go.
A wooden pressing tool helps achieve crisp points.
Wood selection matters—hardwood tools last longer and distribute pressure evenly. Keep these pressing techniques tools clean and treat them with mineral oil for proper tool maintenance.
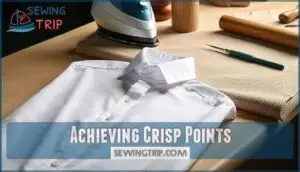
Achieving Crisp Points
Sharp collar points make the difference between homemade and professional-looking garments.
Start by trimming seam allowances at angles, leaving just enough fabric to prevent fraying. Use point turner tools to gently push corners out from the inside.
Press with your iron’s tip at medium heat, working slowly along edges. Understitching corners prevents rounding and maintains crisp edges permanently.
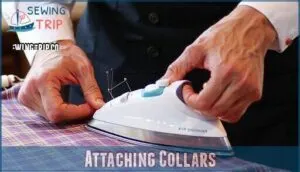
Attaching Collars
You’ll sew your collar pieces wrong sides together, then carefully position them along the neckline before pinning and stitching them in place.
Press each attachment point as you work, ensuring the collar lies flat against the garment and the seam allowances stay crisp and even, which helps the garment look professional.
Strategic Collar Placement
When you’re ready to attach your collar, smart placement saves time and prevents frustration.
Position your collar closer to your body to minimize collar movement during pressing.
This setup creates better body proximity and allows for more controlled work.
Here’s how to set up for success:
- Place collar flat on your ironing board for even pressure distribution
- Keep your iron within easy reach to maintain an efficient workflow
- Position collar pieces so you can press each section without repositioning
- Align collar edges with board edges for consistent results
Strategic placement means you’ll spend less time wrestling with fabric and more time creating professional-looking collars.
Your sewing flow improves when everything’s within arm’s reach.
Sewing Collar Pieces
Before you even think about pressing, you’ll want to sew your collar pieces with precision.
Set your stitch length to 2.5mm and adjust thread tension for your fabric type.
Choose the right needle type—sharp for cotton, ballpoint for knits.
Pay attention to seam allowance and fabric grain alignment.
For structured styles, consider using heavyweight interfacing options.
These details make pressing easier later and create professional-looking collars that’ll impress everyone, with a focus on achieving quality results.
Attaching Collar to Garment
Once you’ve sewn your collar pieces together, position the collar along the neckline with matching seams aligned perfectly.
Pin strategically for even distribution, ensuring collar alignment stays consistent, then baste first to prevent puckering.
Then sew permanently while maintaining proper seam allowances, and keep collar attachment smooth by securing collars gradually.
Working from center outward is crucial for professional results, as it ensures a smooth and even attachment of the collar, and by doing so, you will achieve a proper seam.
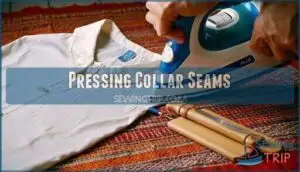
Pressing Collar Seams
After you’ve attached your collar to the garment, you’ll need to press the seams properly to create a professional finish.
Use a clapper tool to flatten the seams while they’re still warm from steam, then press the seams open with your iron’s tip to eliminate bulk and create clean lines.
Using Clapper Tool
When pressing collar seams, you’ll find the clapper tool becomes your secret weapon for professional results.
This wooden pressing tool locks in sharp seams while fabric cools, creating crisp edges that stay put.
Press your collar seam with steam, then immediately apply the clapper with firm pressure. The wood draws heat away, setting the seam permanently flat.
Many tailors find a wooden seam tool indispensable for achieving sharp, professional-looking seams, and it’s a key part of creating a professional finish.
Steam Pressing for Shape
Steam transforms fabric into your willing partner during collar pressing.
Set your iron to match fabric needs – cotton loves high steam, silk prefers gentle mist.
Hold the iron slightly above collar curves, letting steam penetrate fibers for natural shaping.
This technique offers superior collar shape retention compared to dry pressing.
Watch for steam damage on delicate fabrics by testing first, to ensure the best results with gentle mist.
Pressing Seams Open
After shaping your collar with steam, you’ll need to open those seam allowances for a professional finish.
Position your iron’s tip along each seam, moving slowly to help the fabric relaxation process. Keep iron temperature appropriate for your material while applying gentle pressure. Press from the wrong side first, then check the right side pressing results.
- Seam allowance marks disappear when you use proper preventing imprints techniques with cardboard strips
- Your collars transform from amateur to professional with careful attention to each pressing step
- Steam becomes your ally in creating crisp, lasting seams that hold their shape beautifully
Reshaping Collars
When your collar doesn’t lay flat or has lost its shape, you can use steam and careful pressing to fix the problem.
Start by trimming any excess fabric, then apply steam while pressing the collar into its correct position until it holds the shape you want.
Using Steam to Reshape
Hot steam works like magic on stubborn collars that won’t cooperate.
Your iron’s steam setting becomes your best friend here, and you should adjust moisture levels based on your fabric – cotton loves high steam while silk prefers gentle puffs.
Hold the iron slightly above the collar, letting steam penetrate the fibers, which awakens fabric memory.
This heat makes reshaping easier than wrestling with dry, stubborn material, utilizing the steam setting effectively.
Pressing Collar to Desired Shape
Precision makes all the difference when pressing collar to desired shape.
Position your collar on the ironing board, then apply steady pressure while moving the iron in smooth strokes.
Focus on collar symmetry by checking both sides match perfectly.
Use steam shaping for stubborn areas, and employ curve manipulation techniques around rounded edges.
Point definition requires gentle pressure at collar tips, utilizing curve manipulation techniques for optimal results.
Trimming Excess Fabric
After pressing collars to shape, you’ll need to trim excess fabric for professional results.
Bulky seam allowances create lumps that show through your finished garment, so proper trimming is essential.
Here’s your trimming checklist:
- Grade seam allowances by cutting them to different lengths, preventing thick layers
- Clip curves carefully to eliminate puckering when pressing collar shapes
- Reduce corner bulk with fabric scissors for crisp, clean points
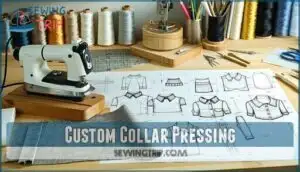
Custom Collar Pressing
When you’re designing your own collar shape, you’ll need to sketch it on pattern paper and transfer it to fabric before cutting.
You can then test your custom design with scrap fabric first, pressing it with the same techniques you’d use for regular collars to verify it holds its shape properly.
Creating Custom Collar Shapes
Beyond traditional collar patterns, you can sketch unique collar shapes on paper, adjusting curves and angles for personal flair.
Start with shape experimentation using scrap fabric to test your designs before cutting expensive materials.
Remember to add proper seam allowance around your custom shapes, and use fusible interfacing for structure.
Let your creativity guide the collar shaping process.
Transferring Collar Shapes
Once you’ve sketched your custom designs, it’s time to transfer those collar shapes onto pattern paper.
Trace your design carefully, adding seam allowance around all edges. Pattern adjustments become easier when you mark key points like curves and corners.
Knowing accurate body measurements is vital for achieving the best fit.
Test each shape on scrap fabric first – this prevents costly mistakes with your good fabric and makes proper collar shaping possible.
Pressing Custom Collars
Custom collars need special attention during pressing.
Test your design first using scrap fabric testing to avoid mistakes on your final piece.
Apply gentle steam and controlled pressure to shape unique collar shapes without distorting the curves, and work slowly around creative curve experiments, letting each section cool before moving on.
Your custom design iteration deserves patient, methodical pressing for professional results.
Advanced Collar Pressing
You’ve mastered basic collar pressing, but professional-level results require specialized techniques like pad stitching and expert pressing sequences.
These advanced methods will transform your collars from good to exceptional, giving you the crisp, structured finish that separates amateur work from professional tailoring with exceptional results.
Tailored Collar Construction
Customized collars demand fastidious construction beyond basic sewing.
Canvas shaping provides the foundation, while interlining choices determine structure and drape.
You’ll need to stabilize the undercollar bias to prevent stretching during pressing.
Professional tailoring requires strategic fabric placement and careful collar stabilization techniques.
This methodical approach transforms ordinary collars into expertly crafted pieces that maintain their shape through countless wears and pressings.
Pad Stitching Technique
Mastery in collar construction relies on pad stitching technique, a hand-sewing method that secures interfacing while maintaining flexibility.
This traditional approach creates lasting collar shape stability through strategic thread placement.
Essential pad stitching elements include:
- Thread Choice Matters – Use silk thread for durability and invisibility
- Stitching Density Impact – Closer stitches under roll line, wider spacing elsewhere
- Hand Pad Stitching – Small diagonal stitches through canvas and fabric layers
- Pad Stitching History – Traditional tailoring method predating modern fusible interfacing
Expert Pressing Sequence
Following the right pressing sequence transforms collar construction from guesswork into precision craftsmanship.
Start with Strategic Loading your collar closer to your body on the ironing board for efficient workflow.
Apply Even Pressure through Section Pressing, working from points inward to achieve Seam Symmetry.
This methodical approach to how to press collars guarantees Collar Stabilization and professional results every time.
Collar Pressing Tips
You’ll achieve professional collar results when you press your fabric before cutting and use the right tools for each step.
Smart pressing techniques prevent shiny marks on your fabric and help you create collars that look store-bought instead of homemade.
Pressing Fabric Before Sewing
Smart sewers know that fabric preparation sets the foundation for flawless collars.
Press your fabric before cutting to guarantee grain alignment and wrinkle removal. This step controls shrinkage and creates a stable base for precise collar construction.
Use your iron with a pressing cloth to smooth out any creases. Properly stabilized fabric makes sewing easier and produces professional-looking results every time, ensuring a solid foundation for flawless collars.
Avoiding Pressing Marks
Fabric imprints can ruin your collar’s professional appearance.
Place protective barriers like cardboard or scrap fabric between seam allowance and main fabric when pressing. Control temperature carefully – too hot creates shiny marks on delicate fabrics.
Use steam usage sparingly on synthetic materials. To prevent these issues, consider using a pressing cloth.
Test pressing techniques for sewing on scraps first. These simple steps prevent permanent damage to your collar fabric, and using a pressing cloth can be very helpful to avoid delicate fabrics issues.
Using Right Pressing Tools
Choosing the right pressing tools makes all the difference in achieving that professional collar press.
Your iron temperature settings must match your fabric—cotton needs high heat while silk requires gentle warmth.
Pressing cloths protect delicate materials from scorching. A tailors ham supports curved collar shapes perfectly, while a sleeve board handles narrow spaces.
These collar pressing techniques separate amateur work from professional results, and are essential for achieving a high-quality finish with the right tools.
Frequently Asked Questions (FAQs)
How do you make a custom collar?
Custom collars appear in 40% of high-end garments.
Start by sketching your design on pattern paper, then transfer the shape onto fabric.
Cut two pieces, apply interfacing to one layer, sew together, and press for crisp edges.
How do you make a collar look professional?
Use interfacing for structure, press with a tailor’s ham for curves, and apply steam carefully.
Trim seam allowances evenly, use a point presser for crisp edges, and finish with a clapper tool.
How do you tack a collar?
Think tacking means permanent stitching? Actually, it’s temporary!
Pin your collar in place, then make loose running stitches through all layers.
These hold everything steady while you sew the final seam, then remove them.
How do you reshape a collar?
Steam the misshapen collar lightly, then place it on a tailor’s ham.
Press gently with an iron while shaping by hand.
Let it cool completely before moving to set the new shape permanently, this step is crucial to permanently set the new shape.
How do you use a clapper on a collar?
Picture your collar crisp and sharp after pressing.
Place the wooden clapper directly over the steamed seam while it’s still hot.
Press down firmly and hold for several seconds, letting the wood absorb heat and set the crease perfectly.
How to stiffen a collar?
Apply interfacing to one collar layer before construction for structure.
Steam-press the finished collar while it’s slightly damp, then use a clapper to flatten seams.
Let it cool completely before moving, ensuring the structure is set.
How do you press collars?
Start by pressing the collar flat to set stitches.
Use a tailor’s ham for curved edges, then press points with a point presser tool.
Steam lightly and let cool completely before moving, this step is crucial for curved edges to set properly.
What are the pressing techniques?
You’ll master pressing by using proper heat settings, protective cloths, and specialized tools like tailor’s hams.
Press seams flat first, then open or to one side, finishing on the right side for professional results.
What are the methods in attaching a collar?
Like threading a needle with confidence, you’ll attach collars using three main methods.
The three methods include the flat method where you sew collar pieces together first, the sandwich method sandwiching neckline between collar layers, or the facing method using bias tape.
How can you make crisp sharp points on a collar?
Trim seam allowances to reduce bulk, then use a point turner or bamboo tool to push out corners from the inside.
Press with steam, using a pressing cloth to protect fabric while creating razor-sharp edges.
Conclusion
Perfect collars aren’t just about having the right tools—they’re about understanding that every fabric responds differently to heat and pressure.
You’ve now mastered the essential pressing techniques for collars that separate amateur sewers from skilled craftspeople.
Remember, patience beats speed every time.
Your iron temperature, pressing sequence, and tool selection will determine whether your collar looks homemade or professionally finished.
Practice these methods consistently, and you’ll create collars that rival those found in high-end garments.
- https://ninjatransfers.com/pages/optimize-your-heat-press-the-right-way-to-load-for-speed-accuracy?srsltid=AfmBOopvcCuCTrm5_URCEFekHYKB83si0NejpXeM7j4QHE9YiUVrnfDQ
- https://www.youtube.com/watch?v=V1Gi5UAzUJ8&pp=0gcJCdgAo7VqN5tD
- https://sewing.patternreview.com/SewingDiscussions/topic/116756
- https://weallsew.com/secrets-sewing-perfect-collars/
- https://www.reddit.com/r/sewing/comments/12dlpw2/any_tips_on_how_to_sew_collarscollar_stands_onto/

