This site is supported by our readers. We may earn a commission, at no cost to you, if you purchase through links.
First, always thread your machine carefully—missteps here cause jams and tension troubles.
Check your needle often; dull or bent needles lead to skipped stitches or damage.
Use quality thread—cheap ones fray, snap, and clog your machine.
Clean your bobbin area regularly; lint buildup is a common culprit for strange noises and uneven stitching.
Adjust tension settings to match your fabric type, and don’t forget to oil your machine (if it’s not self-lubricating).
Treat your machine like a partner, not a tool—it’ll reward you with smooth, hassle-free sewing.
Want truly flawless stitches?
It’s in the details, and following these steps will help you achieve smooth sewing.
Table Of Contents
Key Takeaways
- Thread your machine carefully with the presser foot up – Follow the exact threading path through all guides and tension disks, as improper threading causes 80% of machine problems, including tangles, skipped stitches, and tension issues.
- Replace your needle every 8-10 hours of use – Match the needle type to the fabric (universal for cottons, ballpoint for knits) and check for bent or dull needles that cause skipped stitches, thread breaks, and fabric damage.
- Clean your bobbin area regularly and maintain proper tension – Remove lint buildup from the bobbin case and feed dogs, then adjust tension settings gradually while testing on fabric scraps to prevent puckered seams and uneven stitches.
- Use quality thread and oil your machine monthly – Cheap thread frays and breaks easily, while regular lubrication of moving parts prevents mechanical issues, strange noises, and premature wear that leads to costly repairs.
Threading and Tension
Most sewing machine problems stem from incorrect threading or improper tension settings, which cause tangled thread, uneven stitches, and fabric puckering.
You’ll solve these issues by always threading with the presser foot up, following your machine’s threading path exactly, and adjusting tension gradually while testing on fabric scraps to address improper tension settings.
Proper Threading Techniques
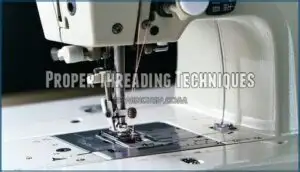
You’ll prevent most threading headaches by following the proper Threading Order with your presser foot raised.
Start by placing your thread spool correctly, then guide the sewing machine thread through each Thread Guide systematically.
Complete your Bobbin Loading according to your manual’s specifications.
Remember, improper threading causes 80% of machine problems, so take your time with thread management fundamentals.
Correct Tension Settings
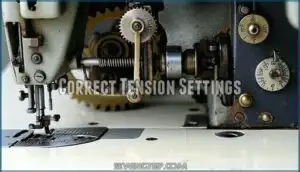
Perfect tension creates beautiful stitches where upper and lower threads interlock smoothly in the fabric’s center.
Your sewing machine tension dial controls this delicate balance, while bobbin case tension affects the lower thread’s pull.
- Tension Dial Guide: Start with manufacturer’s recommended settings, then adjust gradually using test fabric scraps
- Thread Type Impact: Match thread weights in bobbin and needle to prevent uneven tension pulls
- Fabric Weight Effect: Heavier fabrics need higher tension settings than lightweight materials for proper stitch formation
Thread Breakage Prevention
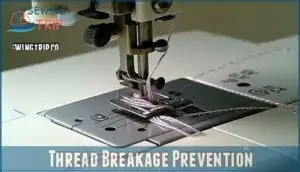
Thread breakage usually stems from improper threading or poor thread quality.
Start by rethreading your machine with the presser foot up, following the correct thread path through all guides. Check your needle size matches your thread weight, and verify bobbin tension isn’t too tight.
Replace old, brittle thread with fresh, high-quality options to minimize machine vibration-related breaks and ensure a smoother sewing experience with proper thread quality.
Balancing Upper and Lower Threads
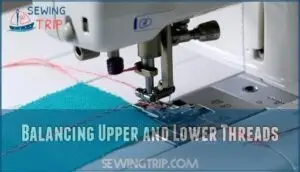
When your stitches look like a tug-of-war gone wrong, you’ve got tension trouble.
Your tension dial guide starts with matching thread weight matters to fabric type impact.
Test stitch analysis reveals whether needle thread tension or bobbin tension needs adjustment.
Follow bobbin threading tips carefully, then gradually adjust sewing machine thread tension settings until upper and lower threads interlock smoothly without puckering.
Needle and Fabric Handling
Your needle choice determines whether you’ll create smooth, professional seams or face frustrating skipped stitches and fabric damage.
Proper needle selection, combined with correct fabric handling techniques, prevents most common sewing problems and guarantees consistent stitch quality throughout your projects, which is crucial for achieving professional results.
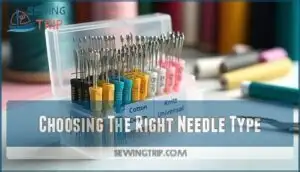
Choosing The Right Needle Type
Since needle type dictates sewing success, matching your sewing machine needles to fabric type prevents most stitching headaches.
Sharp needles slice through woven cottons cleanly, while ballpoint needles gently separate knit fibers without damage.
Universal needles handle basic fabrics adequately, but specialty needle guide recommendations matter when working with leather, denim, or delicate materials where needle size matters most.
Selecting the correct needle is simplified with a detailed size chart.
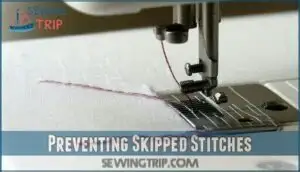
Preventing Skipped Stitches
Skipped stitches frustrate sewers, but needle condition matters most.
Skipped stitches? Start with sharp needles and quality thread—your secret to smooth stitching and frustration-free sewing!
Replace your needle every eight hours to maintain sharp points. Check thread quality—cheap thread breaks easily and causes skips.
Verify proper needle positioning by pushing it firmly to the top. Adjust thread tension settings gradually while testing on fabric scraps.
Slow your machine speed when working with delicate materials.
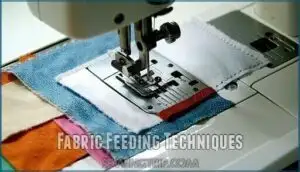
Fabric Feeding Techniques
Mastery over fabric feeding transforms your sewing experience from frustrating to flawless.
Your feed dogs control everything, so proper fabric handling prevents most feeding issues.
- Adjust Feed Dog Height for different fabric weights – thicker materials need higher settings
- Use Walking Foot for layered fabric feed and stretchy materials that slip
- Select Specialty Feet based on your feed technique requirements for superior results
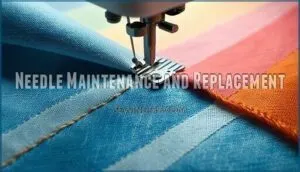
Needle Maintenance and Replacement
Proper needle care extends your machine’s life and prevents costly repairs.
Replace sewing machine needles every 8-10 hours of use or when you notice thread breaking, skipped stitches, or fabric damage.
A bent needle causes immediate problems, so inspect regularly.
Store needles in their original packaging to prevent damage.
| Needle Type | Fabric Use | Replacement Signs |
|---|---|---|
| Universal | Cotton, polyester blends | Dull point, thread shredding |
| Ballpoint | Knits, jerseys | Runs in fabric, skipped stitches |
| Denim | Heavy fabrics, canvas | Bent needle, breaking thread |
Never attempt sharpening needles—replacement costs less than machine repairs.
Proper needle disposal protects others from injury.
Quality needle storage prevents bent tips and extends needle lifespan substantially.
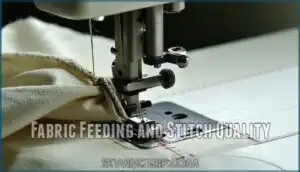
Fabric Feeding and Stitch Quality
Your machine’s feed dogs and tension settings directly control how smoothly fabric moves through your sewing machine and determine the quality of every stitch.
When these components aren’t working properly, you’ll notice puckered seams, uneven stitches, and fabric that won’t feed correctly through the machine, resulting in poor overall quality with uneven stitches.
Adjusting Feed Dog Settings
Feed dogs control how fabric moves through your machine, but they’re not one-size-fits-all. Getting the right feed dog height and pressure foot adjustment makes all the difference between smooth stitching and fabric bunching nightmares.
- Center feed dogs on the needle plate for ideal alignment
- Adjust height using screws – clockwise raises, counterclockwise lowers
- Lower feed dogs completely for free-motion quilting and embroidery work
- Match settings to fabric type – lightweight needs gentler pressure
- Check 0.05-0.5mm clearance between needle hook and feed dogs
Maintaining Smooth Fabric Feed
Beyond just adjusting feed dog height, maintaining smooth fabric feed requires careful attention to presser foot pressure and stitch length impact.
Different fabric types demand specific settings—lightweight materials need less pressure while heavy fabrics require more.
Clean your feed dogs regularly to prevent inconsistent fabric feed, and consider differential feed use for stretch fabrics to eliminate feeding issues completely, which involves adjusting the feed dogs.
Preventing Puckered and Distorted Seams
Puckered seams happen when your machine fights against the fabric instead of working with it.
High tension settings pull threads too tight, creating those annoying bunches.
Here’s your fix:
- Reduce upper thread tension – Start with small adjustments
- Match your presser foot pressure to fabric weight
- Use quality thread – Cheap thread breaks tension balance
Achieving Consistent Stitch Quality
Consistent stitch quality depends on maintaining steady sewing speed and proper tension settings.
High-quality thread prevents breakage while correct stitch length control guarantees even seams.
Regular sewing machine cleaning and lubrication keep mechanisms smooth.
Fabric stabilization techniques reduce shifting during stitching, and monitor seam appearance throughout your project, adjusting settings when needed for professional results.
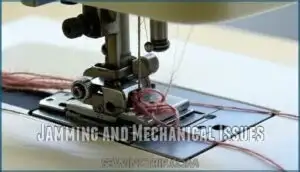
Jamming and Mechanical Issues
When your sewing machine starts making strange noises, gets stuck, or won’t release fabric, you’re dealing with jamming and mechanical issues that can stop your project cold.
These problems often stem from thread tangles, bent needles, or timing issues, but you can fix most of them yourself with the right techniques.
Clearing Thread Jams
When your machine seizes up with tangled thread, don’t panic.
Turn off power and gently remove fabric without forcing it.
Clear thread jam causes by lifting the needle plate removal and cleaning the bobbin case cleaning thoroughly.
Remove all thread bits and lint removal from tension disks.
These jam prevention tips restore smooth operation, though you’ll need to reset tension after jams for ideal sewing machine troubleshooting.
Preventing Needle Breakage
Sharp needles are your first line of defense against breakage disasters. Match needle size to fabric thickness—heavy denim demands size 16, while delicate silk needs size 9.
Check needle condition before each project, replacing bent needles immediately. Slow your sewing speed on thick materials, and verify needle type compatibility with your fabric.
Regular alignment checks prevent costly needle snaps.
Troubleshooting Strange Noises
When your sewing machine starts making unusual sounds, stop immediately.
Identifying sounds helps pinpoint problems—grinding suggests lint buildup, clicking means loose parts.
Start cleaning lint from the bobbin area and needle plate.
Next, try oiling machine components per your manual.
If inspecting parts reveals damage or strange noises persist, seek professional help for proper sewing machine repair.
Maintaining Machine Timing
Perfect sewing machine timing keeps your needle and hook dancing in harmony.
When timing goes off, you’ll hear strange noises, see skipped stitches, or worse – broken needles.
- Check needle bar position – make certain it’s perfectly aligned when the hook catches the thread loop
- Inspect timing belt wear – replace frayed or stretched belts immediately
- Verify feed dog synchronization – confirm they move smoothly with needle cycles
Professional timing adjustments prevent costly repairs.
Maintenance and Troubleshooting
Regular cleaning and part inspection keep your sewing machine running smoothly and prevent costly repairs.
You’ll save time and frustration by establishing a simple maintenance routine that catches problems before they become major issues, which is a key part of prevent costly repairs and maintenance.
Regular Machine Cleaning
Dust accumulation and lint build-up are silent saboteurs of smooth sewing.
Stick to a regular cleaning schedule—dust off the exterior, clean components under the throat plate, and remove lint from the bobbin case.
Don’t skip oiling mechanisms as per your manual.
Proper maintenance requires the correct sewing machine lubricant.
| Task | Frequency | Tools Needed | Purpose |
|---|---|---|---|
| Bobbin Cleaning | Weekly | Brush, Tweezers | Prevent thread jams |
| Lint Removal | After each use | Lint Brush | Promote smooth stitching |
| Oiling Mechanisms | Monthly | Machine Oil | Reduce friction, wear |
| Exterior Dusting | Weekly | Microfiber Cloth | Keep machine dust-free |
The maintenance tasks are designed to ensure your sewing machine operates efficiently, with tasks like bobbin cleaning and lint removal being crucial for preventing issues like thread jams and promoting overall machine health.
Inspecting and Replacing Parts
Occasionally, inspect your sewing machine parts to keep everything in top shape.
Check feed dog wear, bobbin case alignment, and motor brush health for proper function. Examine cord condition and replace the lightbulb if needed.
Removing lint, using compressed air, and tightening loose components guarantee smooth sewing. Consider feed dog options if yours is worn.
Quality sewing machine replacement parts make sewing machine maintenance easier, preventing future sewing machine problems.
Identifying and Fixing Common Issues
Tangled thread, bunched fabric, or uneven stitches? Pause and analyze the issue.
Stitch problem analysis often highlights mechanical error diagnosis or user error correction. Check threading, tension settings, and needle type first.
Sewing machine troubleshooting reduces downtime, while regular preventative maintenance tips help. For persistent sewing machine problems, inspect guides, clean debris, and avoid rushing—patience guarantees smoother sewing sessions.
Scheduling Professional Maintenance
Scheduling sewing machine professional repair guarantees longevity and reliability.
Aim for service frequency based on usage—yearly for regular sewing, sooner if issues arise.
Check technician qualifications to avoid warranty impact.
Track repair history to spot recurring problems.
Considering the maintenance cost, regular sewing machine service saves more in the long run by avoiding costly machine repairs with preventative measures, ensuring overall reliability.
Frequently Asked Questions (FAQs)
How to prevent sewing machine problems?
Think of your sewing machine as a car—it thrives on care.
Clean lint, use quality thread, match needle to fabric, and rethread anytime stitches falter.
Regular maintenance keeps problems at bay and sewing smooth.
What are the most common sewing machine problems?
You’ll often face issues like tangled threads, uneven stitches, broken needles, or fabric not feeding smoothly.
Improper threading, dull needles, incorrect tension, and dirty machines are typically the culprits.
Regular maintenance keeps things running smoothly.
How do you keep a sewing machine running?
While neglect destroys machines, regular care keeps yours purring.
You’ll thread correctly, replace needles every 8-10 hours, clean lint from bobbin areas, oil moving parts monthly, and use quality thread for smooth operation.
How to diagnose sewing machine problems?
Start by identifying symptoms: thread tangles, skipped stitches, or fabric bunching.
Check threading, needle condition, and tension settings first. Listen for unusual sounds.
Test stitch quality on scrap fabric to pinpoint the exact issue.
Why is sewing machine maintenance important?
Like a trusty steed from yesteryear, your sewing machine needs regular care to perform reliably.
You’ll prevent costly breakdowns, extend its lifespan, and maintain consistent stitch quality by cleaning, oiling, and replacing worn parts regularly, which will also help in maintaining consistent stitch quality.
Why is my sewing machine not working properly?
Your sewing machine likely has threading issues, wrong needle type, or tension problems.
Check if you’ve threaded correctly with the presser foot up, replaced your needle recently, and adjusted tension settings properly, to address potential tension problems.
What is the most common problem for a sewing machine?
Threading troubles plague most sewers—it’s the culprit behind 80% of machine malfunctions.
You’ll find tangled thread, skipped stitches, and tension nightmares disappear when you properly thread your machine with the presser foot raised.
Why is the thread looping under my fabric?
Your upper thread tension is too loose, causing loops beneath the fabric. Increase the tension dial gradually and test on scrap fabric until stitches lock properly between fabric layers.
What is the number one problem when a machine doesn’t sew properly?
Like a recipe missing its main ingredient, improper threading tops the troubleshooting list.
You’ll find most sewing headaches stem from incorrect thread paths through guides and tension disks, creating loops, breaks, and uneven stitches, which can be attributed to incorrect thread paths.
How to store a sewing machine properly?
Store your machine in a dust-free environment with the cover on.
Keep it away from moisture and extreme temperatures.
Remove thread, clean thoroughly, and oil moving parts before long-term storage to prevent rust.
Conclusion
Picture your sewing machine humming contentedly as fabric glides smoothly beneath the presser foot—that’s the reward of diligent care.
Preventing sewing machine problems doesn’t require advanced technical skills, just consistent attention to detail.
You’ll find that regular threading checks, proper needle maintenance, and routine cleaning transform frustrating sewing sessions into enjoyable creative time.
When you treat your machine with respect and follow these preventive measures, you’re investing in years of reliable stitching performance.

