This site is supported by our readers. We may earn a commission, at no cost to you, if you purchase through links.

The most common problems sewing fleece include fabric stretching during stitching, skipped stitches from dull needles, and puckered seams from incorrect tension settings.
You’ll also encounter issues with static cling, excessive shedding, and difficulty cutting clean edges.
Solutions start with using a ballpoint needle, adjusting your machine’s tension, and employing a walking foot to prevent stretching.
Stabilizing fleece with tissue paper underneath helps achieve smoother seams, while proper thread selection prevents breakage.
Understanding your specific fleece type—whether anti-pill, microfleece, or polar fleece—changes your approach entirely, and mastering these fabric-specific techniques transforms your sewing experience completely.
Table Of Contents
Key Takeaways
- Use the right needle and foot combination – Switch to a ballpoint needle (size 12/80 or 90/14) and add a walking foot to prevent fabric stretching, skipped stitches, and uneven feeding that plague fleece projects.
- Adjust your machine settings for fleece’s unique properties – Increase stitch length to 3-4mm, reduce presser foot pressure, and dial down thread tension to prevent puckering and fabric distortion while maintaining smooth seams.
- Stabilize fleece during sewing – Place tissue paper underneath seams or use temporary stabilizers to control the fabric’s stretchy nature and prevent your machine’s feed dogs from "eating" the material.
- Choose quality materials and prep properly – Pre-wash fleece to remove loose fibers, select 100% polyester thread for strength, and replace needles frequently since fleece dulls them quickly, causing snags and poor stitch quality.
Minky Plush Fabric Challenges & Solutions
You’ll find minky plush fabric incredibly soft and luxurious, but its stretchy nature can turn simple sewing projects into frustrating challenges.
This ultra-plush fleece requires specific techniques to manage its tendency to stretch, shed, and shift during construction.
Stretchiness & Softness
Taming minky’s stretchy nature feels like wrestling with a cloud, but you can win.
Fleece fights back, but the right tools turn chaos into cozy masterpieces.
Use a walking foot and longer stitches to prevent fabric distortion. Keep your hands light—don’t pull or tug while sewing.
A stabilizer underneath helps control fleece stretchiness and prevents seam puccering. Your fabric will thank you for the gentle treatment.
Notions & Needles
Beyond choosing the right fleece, your tools make or break the project. Needle dullness kills seams fast—fleece eats needles like candy.
Here’s your gear checklist:
- Needle for fleece: Size 12/80 universal or stretch needle, replaced every project
- Thread for fleece: 100% polyester thread—cotton snaps under stress
- Walking foot: Prevents fabric shifting and uneven feeding
- Fabric clips: Skip pins that leave holes; clips grip without damage
Sharp rotary cutters slice cleanly through thick layers. To avoid skipped stitches, it’s important to select appropriate needle sizes for the fabric weight.
Washing & Drying
Prewashing minky plush prevents fleece fabric challenges like excessive stretching and shrinkage control issues.
Use cold water temperature and gentle detergent choice to maintain softness.
Air drying methods work best—avoid high heat that causes pilling prevention problems.
Cold water washing reduces stretching while preserving that luxurious feel you’re after.
Quilting Techniques
Quilting with minky fabric doesn’t have to feel like wrestling a slippery octopus. Start by positioning your minky on the bottom layer—this prevents your cotton quilt top from puckering against the fleece fabric issues.
Use medium-length straight stitches (2.5-3.0mm) to avoid those annoying fleece puckering seams that plague many quilters. A walking foot becomes your best friend here, ensuring even fabric feed while stabilizing fleece naturally.
Skip heavy fleece batting; lightweight polyester works better without creating bulk. For binding techniques, try self-binding by folding minky edges twice over your quilt top—no traditional binding needed since fleece doesn’t fray. Many quilters choose fleece for its suitability as easy quilt backing.
Test your quilting techniques on scraps first, adjusting tension as needed for smooth seam finishes.
Shedding & Fraying Management
Minky’s fiber-shedding nature creates mess during sewing, but smart management prevents chaos.
Pre-washing fleece removes loose fibers before they scatter across your workspace, while gentle handling during cutting reduces fiber breakdown.
Here’s your shedding control strategy:
- Run a lint roller over fabric surfaces before cutting to capture loose fibers
- Use edge sealing techniques like zigzag stitching or serging to prevent fleece fraying
- Apply fray prevention methods such as fabric glue on raw edges for extra security
Reduce pilling by choosing quality fleece and avoiding excessive handling.
To maintain the fabric’s integrity, consider pH neutral detergents when washing fleece projects.
Proper seam finishing techniques minimize future shedding while maintaining your project’s professional appearance.
Baby-Friendly Considerations
When choosing safe fabrics for baby items, always prioritize lightweight fleece under 200 GSM to prevent overheating.
Select anti-pill varieties to minimize shedding risks.
Use gentle seams with 1/4-inch allowances and flatlock construction for soft textures against delicate skin.
Prewash washable fleece to remove chemicals, ensuring durable construction that withstands frequent washing while solving common fleece sewing problems.
Sewing Fleece With Brother LS14S
You’ll find that the Brother LS14S can handle fleece projects, but this entry-level machine comes with specific limitations when working with thicker fabrics.
Understanding how to adjust your technique and machine settings will help you avoid common frustrations like skipped stitches, uneven feeding, and tension problems, which can be mitigated by adjusting your approach to include complete concepts.
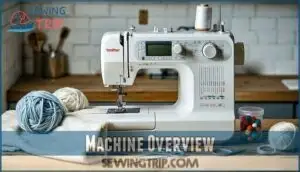
Machine Overview
The Brother LS14S serves as your reliable partner for conquering fleece sewing challenges.
This mechanical machine offers 14 built-in stitches and features a top-loading bobbin system with transparent cover for easy thread monitoring. While it lacks decorative options, it covers essential fleece requirements perfectly.
Key Machine Features for Fleece Success:
- Machine Settings: Adjust stitch length to 3.5-4mm for ideal fleece handling
- Needle Selection: Use 90/14 universal or ballpoint needles, replacing frequently due to fleece’s dulling effect
- Thread Choice: Select polyester thread for strength and slight stretch compatibility
- Foot Attachments: Consider adding Brother F034N walking foot to prevent layer slippage
Proper tension adjustment and cleaning after each project prevent common fleece sewing problems.
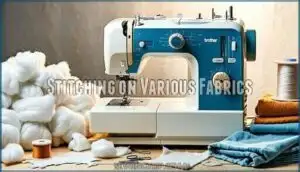
Stitching on Various Fabrics
While the Brother LS14S handles cotton and wool beautifully, fleece sewing problems arise due to insufficient motor power for thick materials.
You’ll encounter fleece stitch issues like skipped stitches and uneven seams from feed dog limitations. Common issues include loud "thumpy" vibrations signaling mechanical strain.
For solutions, switch from straight stitches to zigzag (setting 3) – straight stitches snag fleece badly. Adjust tension to 4-5 and use longer stitch lengths to prevent puckering.
Needle selection matters: replace needles every 4-5 hours of fleece sewing to avoid snags. Stabilizer use helps – place tissue paper under seams to prevent fabric chewing.
The Walking Foot accessory improves fabric feeding substantially. Test tension adjustment on scraps first, and clean your machine frequently since fleece lint accumulates rapidly.
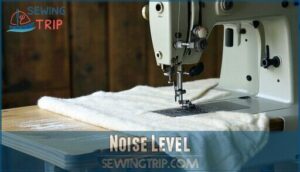
Noise Level
Brace yourself for some serious racket when your Brother LS14S tackles thick fleece projects. This machine doesn’t whisper sweet nothings while working—it announces every stitch with authority.
The metal chassis amplifies vibrations, creating a symphony of mechanical sounds that might surprise first-time users.
Here’s what you’ll hear during fleece sewing sessions:
- Motor hum intensifying as the machine powers through dense layers
- Needle noise becoming more pronounced with each penetration
- Machine vibration transferring through your work surface
- Fabric resonance creating additional acoustic feedback
- Room acoustics amplifying every mechanical sound
Common issues arise when sewing fleece on this machine, but solutions exist. Place foam padding underneath to reduce vibration transfer, or consider your workspace’s room acoustics—hard surfaces amplify noise more than carpeted areas.
While the LS14S handles fleece admirably, its noise level reflects the extra effort required for thicker materials.
User-Friendly Experience
You’ll appreciate how smoothly the LS14S operates for fleece projects.
The threading path follows clear instructions, and stitch selection remains straightforward even for beginners tackling fleece sewing challenges.
| Feature | Benefit for Fleece |
|---|---|
| Top-loading bobbin | Easy thread monitoring |
| Dial controls | Quick tension adjustments |
| Built-in storage | Organizes fleece notions |
| Integrated foot pedal | Reduces workspace clutter |
| 14 stitch options | Covers fleece sewing solutions |
Simple patterns work best with this accessible sewing machine’s ergonomic design, making fleece projects manageable for new sewers.
Making Clothes
Creating fleece garments with the LS14S requires smart pattern adjustments to accommodate fabric thickness.
You’ll master seam finishes using zigzag stitches for stretch areas, preventing fleece stretch through proper tension settings.
Layering fleece demands careful handling to avoid fabric distortion and fleece puckering.
For activewear fleece projects, address fleece tension problems early and prevent fleece skipped stitches with ballpoint needles.
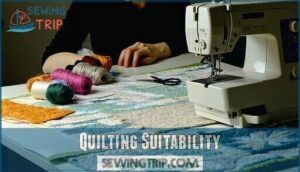
Quilting Suitability
The LS14S machine’s essential stitches handle fleece quilting projects with surprising capability.
While it lacks specialized quilting features, you can create beautiful fleece quilts by managing fabric challenges properly.
- Fleece Weight management: Use longer stitch lengths (3.5-4) to prevent fleece puckering and accommodate thick layers
- Stabilizing Fleece: Place tissue paper under seams to prevent feed dogs from "eating" stretchy fleece during quilting
- Seam Bulk reduction: Keep quilting patterns simple to avoid fleece tension problems and fleece skipped stitches at intersections
Portability for Travel
Pack your creativity and hit the road with confidence. The Brother LS14S transforms into your portable fleece-sewing companion, offering surprising travel durability without compromising performance.
Its compact storage design and lightweight packing make it ideal for crafting adventures.
Consider these travel advantages when sewing fleece projects:
- Lightweight Packing: Weighs just enough to feel sturdy while remaining easy to transport in your car or RV
- Travel Durability: Metal chassis construction withstands bumps and movement during transport without affecting stitch quality
- Compact Storage: Fits neatly into small spaces, making it perfect for vacation rentals or friend’s homes.
You’ll appreciate the easy cleaning after fleece projects, especially when lint accumulates during travel sewing sessions.
Consider purchasing a machine with built-in stitch options for versatile crafting.
The machine’s wrinkle resistance means no worrying about fabric distorting during transport.
Whether troubleshooting minor issues or preventing stretching problems, this portable solution keeps your fleece projects on track wherever you roam.
Included Accessories & Storage
Your LS14S comes with essential accessories stored in the built-in compartment. You’ll find bobbins, needles, and presser feet organized for easy access.
The accessory variety covers basic sewing needs, though additional needle cases and specialized feet for sewing fleece may require separate purchases. This storage solution keeps everything tidy while troubleshooting fleece projects.
For superior performance, it’s vital to explore available Brother accessories to enhance your sewing experience, which can include specialized feet for sewing fleece.
Quality Assessment & Comparison
When comparing the Brother LS14S for fleece sewing troubleshooting, you’ll find it handles fabric ratings and fleece grades adequately for basic projects.
However, quality control becomes evident during performance tests—this machine struggles with heavyweight fleece distortion that premium models handle effortlessly.
For simple fleece sewing tips, it works, but frequent fleece sewing mistakes reveal its limitations in material comparison testing.
Terry Cloth Fabric Challenges & Solutions
Terry cloth’s looped texture creates unique sewing challenges that can frustrate even experienced sewers.
You’ll face issues like excessive shedding, fraying edges, and fabric snagging that require specific techniques to overcome, including dealing with excessive shedding.
Washing & Drying Concerns
Terry cloth’s absorbent loops make washing tricky.
Use cold water to prevent fabric shrinkage and fiber breakdown. Skip fabric softeners—they reduce water resistance and cause lint buildup.
Air dry when possible; high heat increases fleece pilling and shedding. If using a dryer, choose low heat with dryer balls to maintain fluffiness without fraying the delicate loops.
Following proper fleece washing tips is essential to extend the life of your fleece garments. Use cold water and avoid high heat to preserve the quality of your clothing.
Edges & Fraying
Raw edges demand attention before they become a headache.
Use zigzag stitches or serging for reliable edge finishing that prevents unraveling.
Apply fray stopper liquid to problem areas, or try seam binding tape for extra security.
Fabric stabilizers help control loose threads during construction.
A fabric shaver removes any fuzzy bits after completion, keeping your terry cloth projects looking professional and lasting longer.
For ideal results, understanding fray stopper properties is essential to prevent fraying and ensure your projects turn out well.
Shedding & Messiness
Nobody enjoys fighting fabric that sheds like a molting cat. Terry cloth fleece creates messy workspaces through fiber loss and lint accumulation.
Pre-wash your fabric to minimize shedding, then use a lint roller before cutting. Keep your machine clean – fleece distortion worsens when lint clogs feed dogs.
Manage pilling by choosing quality fleece and avoiding excessive handling during construction. To achieve a professional finish, consider following proper sewing terrycloth tips to reduce bulk and prevent fraying.
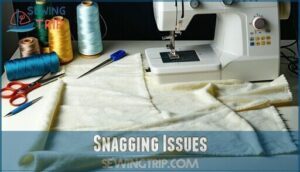
Snagging Issues
Snagging presents another challenge when working with terry cloth’s looped surface. The raised loops catch easily on rough needles, damaged presser feet, or even your fingernails during handling. Fabric snags can quickly turn a smooth project into a frustrating mess, but you can stay ahead of these issues with smart preparation.
Here’s how to prevent snagging before it starts:
- Replace your needle frequently – dull or damaged needles cause more snags than sharp ones
- Check your presser foot for rough spots that might catch terry cloth loops
- Handle fabric gently during cutting and positioning to avoid stretching loops
- Keep your workspace clean and free of sharp objects that could snag passing fabric
When snagging does occur, don’t panic. Use a small crochet hook or blunt needle to gently pull the snagged loop back through to the wrong side of the fabric. This approach helps to minimize damage and allows you to continue working with your terry cloth project, maintaining its original quality and avoiding further snags.
Baby-Friendly Features
When creating soft fabrics for your little one, prioritize baby safety above all else.
Terry cloth’s gentle care properties make it perfect for fleece toys and infant apparel.
Choose babyfriendly materials free from harmful chemicals.
These sewing fleece tips guarantee your projects stay cozy: pre-wash fabrics, use ballpoint needles, and test tension settings.
Sewing fleece for baby items requires extra attention to breathability.
Master fleece sewing for cozy blankets using proper fleece sewing techniques that prevent overheating while maintaining comfort.
Next Steps for Sewing Success
Your fleece sewing journey doesn’t end with mastering basic techniques—it’s just the beginning of your creative adventure. Fabric Preparation becomes second nature as you tackle more challenging projects, while Machine Settings adjustments turn from guesswork into confident tweaks.
Ready to level up your fleece game? Here’s your roadmap:
- Master advanced fleece sewing techniques like French seams and bound edges that eliminate bulk while creating professional finishes
- Expand your Project Planning** skills by tackling multi-fabric combinations, mixing fleece with cotton or denim for stunning contrasts
- Develop your Troubleshooting** instincts by keeping a sewing journal documenting what works (and what doesn’t) for different fleece weights
- Challenge yourself with complex patterns like jackets with multiple seams, where fleece distortion management becomes vital
Understanding thread weight options is essential for achieving professional-looking results.
Remember, every skipped stitch and puckered seam teaches valuable lessons. Your sewing fleece tips arsenal grows with each project, transforming yesterday’s fleece sewing problems into today’s fleece sewing troubleshooting victories. Soon you’ll be sharing your own sewing tips with fellow crafters.
Frequently Asked Questions (FAQs)
What is the problem with fleece fabric?
You’ll face stretching, distortion, and pilling when sewing fleece.
The fabric’s synthetic fibers pull easily, creating uneven seams.
It also sheds, dulls needles quickly, and requires special techniques to prevent fraying.
What is the best sewing machine setting for fleece fabric?
Like setting an old-fashioned gramophone needle, you’ll need longer stitches (3-4mm), reduced presser foot pressure, lower thread tension, and a ballpoint needle to tame fleece’s stretchy nature.
What is the best stitch to use on fleece?
Use a straight stitch with a longer length (3-4mm) to prevent stretching and distortion. You can also try a narrow zigzag stitch for added flexibility and stretch accommodation.
Why does my fleece seam pucker after stitching?
Pesky puckering plagues your project because you’re pulling the fabric while stitching or using too short a stitch length.
Increase your stitch length to 3-4mm, use a walking foot, and let the machine feed the fabric naturally without tugging.
How do I prevent fleece from jamming machines?
Clean your machine regularly to remove fleece lint buildup that clogs mechanisms. Use a walking foot to feed fabric evenly, reduce presser foot pressure, and sew slowly to prevent jamming.
Can I use regular pins on fleece fabric?
You can use regular pins on fleece, but they aren’t ideal.
Fleece’s stretchy nature makes pins slip and create distortion.
Fabric clips or pins with Teflon coating work better for secure, stretch-free hold.
Why do my fleece buttonholes look messy?
Like frayed threads unraveling a tapestry, fleece’s stretchy nature distorts buttonholes without proper stabilization.
You’ll need fusible interfacing or sew-in stabilizer underneath the buttonhole area to prevent fabric from stretching and creating messy, uneven holes.
How to stop fleece from curling while cutting?
Fleece’s stretchy nature makes it curl when you cut.
Place pattern weights on fabric instead of pins, which stretch and distort edges.
Cut with sharp scissors or rotary cutter to prevent pulling.
Conclusion
Mastering problems sewing fleece isn’t rocket science—even though your grandmother might’ve used a spinning wheel instead of a sewing machine.
You’ve learned that fabric stretching, skipped stitches, and tension issues are common problems sewing fleece presents.
Armed with ballpoint needles, walking feet, and proper stabilization techniques, you’ll transform challenging fleece projects into smooth sailing.
Remember, each fleece type requires specific handling, so practice these solutions and watch your sewing confidence soar.

