This site is supported by our readers. We may earn a commission, at no cost to you, if you purchase through links.
Your quilt top is pieced with precision, but the batting you choose determines whether your finished quilt becomes a stiff, lifeless blanket or a soft heirloom that drapes beautifully across a bed. Most quilters focus entirely on fabric selection and piecing techniques, then grab whatever batting sits on the store shelf without realizing this hidden layer controls warmth, weight, washability, and how those careful stitches will look once the binding goes on.
Getting batting right means understanding fiber content, loft, and preparation methods that match your project’s purpose. Whether you’re working on a summer throw that needs breathability or a bed quilt that must survive years of washing, these quilt batting tips and tricks will help you select, prep, and care for the foundation that brings your quilting vision to life.
Table Of Contents
Key Takeaways
- Your batting choice controls how your quilt drapes, stays warm, and holds up over time—cotton shrinks but breathes naturally, polyester keeps its loft without shrinking, and 80/20 blends split the difference for everyday quilts.
- Proper prep matters more than most quilters think: add 3-4 inches on all sides for sizing, let batting relax flat for 24-48 hours to remove creases, and skip prewashing unless you’re using older cotton that might shrink 3-5%.
- Match your batting to how you’ll actually use the quilt—bed quilts in cold climates need polyester or wool for warmth, wall hangings work best with low-loft cotton to keep lines crisp, and summer throws require breathable cotton.
- Follow the stitch-distance guidelines printed on your batting package and baste every 4-6 inches with pins to prevent shifting, bunching, and those frustrating gaps that show up after washing.
Choosing The Right Quilt Batting
Picking the right batting is like choosing the foundation for a house—it shapes everything that comes after. The material you select affects how your quilt looks, feels, and holds up over time.
Choosing the right batting is like choosing a house’s foundation—it shapes everything your quilt becomes
Let’s walk through the key factors that’ll help you make the best choice for your project.
Comparing Cotton, Polyester, and Blends
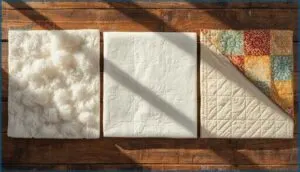
Cotton batting brings heavyweight warmth and breathable softness but shrinks about 5% after washing. Polyester offers lightweight durability with zero shrinkage and excellent loft retention, though it can beard through fabric. An 80/20 cotton-poly blend balances both worlds—moderate shrinkage rates, easier quilting ease, and reliable fiber properties.
Ultimately, the decision depends on the quilter’s preference and the specific needs of the project, such as whether to prioritize a traditional, breathable feel. Your batting fiber selection impacts everything from cost analysis to how your finished quilt drapes and performs.
Matching Batting Type to Quilt Purpose
Once you know how each fiber performs, the real question is: what’s your quilt going to do? Choosing quilt batting gets easier when you match it to your project’s life.
- Bed quilts for cold climates work best with polyester or wool batting—both trap warmth without excessive weight.
- Wall hangings and show pieces shine with low-loft cotton to keep crisp lines visible.
- Summer throws need breathable cotton batting for comfort in warmer months. For a flatter finish, consider low loft batting.
Understanding Loft, Weight, and Warmth
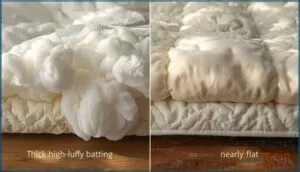
Loft measurement tells you how thick your batting is—high loft means puffy, low loft means flat. Weight factors into handling, with polyester around 3.2 ounces per square yard and cotton at 4 ounces.
Mind the loft when considering warmth levels: more quilt loft traps air for better insulation. Batting thickness and insulation types together determine your quilt warmth, not weight alone.
Eco-Friendly and Specialty Batting Options
Beyond traditional choices, you can pick batting that’s kinder to the planet. Bamboo fibers need less water and pesticides than cotton, delivering a soft drape with minimal shrinkage. Recycled insulation made from plastic bottles reduces landfill waste while staying durable. Organic cotton batting skips harsh chemicals, and natural blends like soy offer renewable, lightweight options. Specialty fibers bring eco-friendly innovation to your quilt batting selections.
Preparing Batting for Quilting Success
Getting your batting ready is just as important as choosing the right type. A little prep work can save you from headaches later when you’re piecing everything together.
Here’s what you need to know before you start quilting.
Proper Batting Sizing for Quilts
Size it right, and you’ll save yourself headaches later. Calculating batting size means adding 3 to 4 inches on all sides of your quilt top for domestic quilting. If you’re using a longarm frame, bump that to 4 to 6 inches.
Proper quilt size calculations prevent shifting during stitching and make trimming easier. Waste minimization comes naturally when you choose standard dimensions wisely, and technique adjustments make possible cost efficiency without sacrificing coverage.
Relaxing and Flattening Batting Before Use
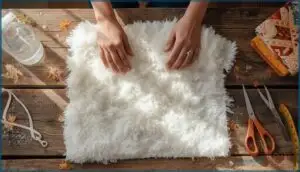
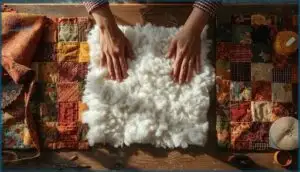
Before you layer your quilt, let batting relax for 24 to 48 hours flat on a clean surface—fiber preparation that eliminates most creases naturally.
For stubborn wrinkles, toss quilt batting in the dryer on low with a damp cloth for 10 to 20 minutes. This flattening technique restores loft without a prewash, ensuring proper batting storage and wrinkle removal for smoother quilting.
When to Pre-Wash (and When Not To)
Should you prewash quilt batting? Most modern battings don’t need it—polyester won’t shrink, and many cottons resist shrinkage. But prep smart: prewash old, inherited, or spilled-on batting for cleanliness.
Cotton batting shrinks 3–5%, so prewashing prevents fabric shrinkage surprises and puckering later. Pre-wash benefits include softer texture and better fabric compatibility, boosting quilt durability and achieving that polished finish you’re after.
Handling and Cutting Batting Without Damage
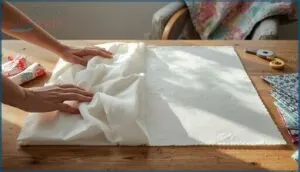
Batting handling can make or break your project. Lay your batting flat on a clean surface and smooth out creases gently—no stretching. For cutting tools, skip the rotary cutter; use sharp batting scissors instead to protect fibers.
When calculating batting size, add 3–4 inches per side.
Proper fiber protection and damage prevention start with batting storage: roll it loosely, keep it dry, and respect the orientation marked on the label.
Essential Batting Tips for Quilting Techniques
Once you’ve chosen and prepared your batting, it’s time to think about how you’ll actually quilt it.
Different quilting methods work better with certain batting types, and following a few key guidelines will save you from frustration down the road.
Here’s what you need to know to match your batting to your technique and get the results you’re after.
Following Manufacturer Stitch-Distance Guidelines
Follow stitch distance ratings printed on your batting package—they’re there for a reason. These manufacturer guidelines tell you the maximum space allowed between quilting lines to prevent shifting and maintain batting durability.
For example, Warm and Natural allows up to 10 inches apart, while wool battings like Hobbs Heirloom require closer quilting at 3 inches. Tighter stitching than the max improves quilt longevity and stitch quality.
Batting Orientation and Scrim Placement
Think of batting like fabric—it has a right side and a grain that impacts your quilt’s stability. Getting orientation and scrim side placement correct prevents bearding, keeps your quilt flat, and makes needle penetration ease a breeze.
Here’s what you need to know:
- Place the right side up (smooth side without needle-punch holes) toward your quilt top to reduce fibers poking through
- Align grain with quilt edges to prevent warping and maintain batting stability impact
- Position scrim toward the backing to support smooth stitching and preserve loft
- Check manufacturer labels for specific orientation instructions on your quilt batting
- Test orientation troubleshooting by running your hand across both surfaces—the smoother side faces up
Hand Quilting Vs. Machine Quilting Batting Choices
Your quilting method shapes which quilt batting works best. Hand quilting thrives with low loft polyester or wool—both offer quilting ease and warmth factor without resistance. Machine quilting prefers cotton or 80/20 blends for stitch visibility and stability under dense stitching.
Loft preference matters too: thinner batts suit hand work, while medium loft accommodates machine speed. Watch fiber migration in polyester unless you keep stitch distance tight.
Choosing Batting for Appliqué and Foundation Piecing
Appliqué and foundation paper piecing demand low to medium loft batting to reduce bulk and show off your detailed work. Cotton-poly blends bring you durability and softness, while bamboo-cotton batting offers hypoallergenic comfort—though it shrinks about 3%.
Scrim benefits include stability that prevents shifting during intricate stitching. Polyester maintains crisp edges without puckering. Your stitch distance stays flexible with these battings, supporting clean stitch definition throughout.
Avoiding Common Batting Mistakes
Even experienced quilters can run into batting problems that throw off an entire project. A few small missteps during prep or assembly can lead to puckering, bunching, or a quilt that just doesn’t lie flat.
Let’s look at the most common batting mistakes and how you can avoid them from the start.
Preventing Shifting and Bunching
When quilt layers shift during stitching, inadequate basting is often the culprit. Pin basting with safety pins every four to six inches reduces movement by 30%, while a walking foot cuts shifting by half. Dense stitch density—quilting every two to four inches—locks the quilt sandwich in place.
Layering and basting a quilt properly, especially with batting scrim aligned correctly, prevents bunching and keeps your quilt layers stable.
Calculating Batting Size Accurately
Getting your batting size right starts with adding six inches to both your quilt’s width and length. This oversize allowance gives you wiggle room during quilting.
Check your batting width against the quilt size—if it’s narrower, you’ll need to piece it with a half-inch seam allowance.
Online calculators simplify yardage calculation by factoring in your quilting method and dimensions.
Layering and Basting With Batting
Before you smooth your first layer, clear a large flat surface and start with your backing fabric right-side down. Position the batting on top, then add your quilt top.
Pin placement every three to four inches from center outward keeps quilt layers stable. Spray adhesives offer an alternative basting technique, but proper layering order and pin spacing prevent shifting better than any shortcut.
Selecting The Right Batting for Beginners
When you’re starting out, the right batting for different projects transforms stitching challenges into wins. Here’s what beginner quilters need:
- Polyester batting – forgiving spacing, lightweight, and easy-care battings that tolerate wider quilting lines
- Low loft – simpler loft control and handling than puffy alternatives
- Scrim benefits – stabilizes fibers, preventing shifting
- Consider project end-use – everyday quilts need durability; heirlooms want natural breathability
- Match quilt batting options to skills – closer stitching requires practice
Caring for Quilts With Different Battings
Your quilt’s batting isn’t just about how it feels when you finish stitching—it also shapes how you’ll care for it down the road. Different batting materials respond differently to washing, drying, and everyday handling.
Let’s walk through the essentials so your quilts stay beautiful and functional for years to come.
Washing and Drying Recommendations
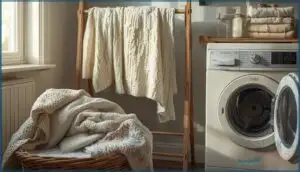
Once your quilt is finished, protect it with smart laundry care. Use gentle detergent and cool wash settings with cold water to prevent fiber degradation and shrinkage control. Air drying flat is best, but you can tumble dry on cool dry for short periods. Avoid harsh chemicals that damage batting fibers.
Different batting types need different drying methods—polyester tolerates heat better than delicate wool or cotton blends.
Maintaining Quilt Loft and Drape
Your quilt’s drape depends on how well you handle compression resistance. Store quilts loosely folded to preserve loft recovery—tight packing flattens batting permanently.
Shake out quilts regularly to restore airflow and maintain material effects like polyester’s bounce or cotton’s flat elegance.
Density impact matters too: avoid over-quilting, which stiffens fabric and reduces drape. Smart handling influence keeps your quilt batting options performing beautifully for years.
Best Practices for Quilt Longevity
Want your quilt to last decades instead of years? Fiber damage and incompatible combinations are the biggest threats to quilt durability, but smart quilt care and maintenance changes everything.
- Limit washing frequency—only when truly dirty
- Use cold water with gentle detergent, no bleach or softeners
- Air dry or tumble on low heat to preserve batting integrity
- Store in breathable cotton bags, never plastic
Avoid common batting mistakes like harsh chemicals or high heat, and your quilt appearance will stay beautiful while quilt longevity increases dramatically. These washing techniques, storage solutions, and repair strategies protect your investment.
Labeling Quilts With Batting Information
Think of your quilt label as a care manual—future owners can’t preserve what they don’t understand. Include batting type, loft, and fiber content so quilters know exactly how to wash and store your work. This simple step protects quilt longevity while connecting makers to their creations.
| Label Element | What to Include |
|---|---|
| Batting Type | 100% cotton, polyester, wool, or blend specifics |
| Loft/Weight | Low, medium, or high loft designation |
| Brand/Manufacturer | Name if known for quality reference |
| Special Treatments | Pre-washed, eco-friendly, or specialty notes |
| Care Instructions | Washing temperature and drying method |
Printed fabric labels and QR codes represent emerging trends, linking to detailed batting information and quilt care videos for lasting guidance.
Frequently Asked Questions (FAQs)
Can you reuse batting from an old quilt?
Yes, you can reuse batting from old quilts after washing and inspecting it carefully. However, expect reduced loft and possible compression issues. Frankenbatting smaller scraps together works well for practice projects.
How do you store unused batting long-term?
Store batting in a cool, dry space with stable temperature control and humidity levels around 50%.
Roll or fold it loosely, avoid plastic bags, and protect from light for best material storage.
Can different batting types be combined in one quilt?
You can combine different batting types like cotton, polyester, and 80/20 cotton-poly blends, but matching loft and thickness prevents quilting difficulties.
Consider durability considerations and care recommendations when selecting combinations for best results.
What causes batting to beard through quilt fabric?
Ever notice those pesky fibers poking through your quilt top? Bearding happens when loose fabric weave, dull needles, polyester batting fibers, static electricity, or poor thread quality allow batting to migrate through your quilt’s surface.
Conclusion
You might think batting is just filler, but it’s the backbone of every quilt you make. Quilt batting tips and tricks give you control over drape, warmth, and longevity—turning fabric layers into something that lasts.
Choose fiber content that matches your purpose, prep it properly, and follow stitch guidelines. Your quilts will feel softer, wear better, and look exactly how you imagined when you bound that final edge.
- https://www.datainsightsmarket.com/reports/quilt-batting-1132882
- https://www.wiseguyreports.com/reports/quilt-batting-market
- https://www.verifiedmarketreports.com/product/quilt-batting-market/
- https://www.linkedin.com/pulse/north-america-quilt-batting-market-size-2026-piqmc
- https://www.diaryofaquilter.com/choosing-batting-for-a-quilt/

