This site is supported by our readers. We may earn a commission, at no cost to you, if you purchase through links.
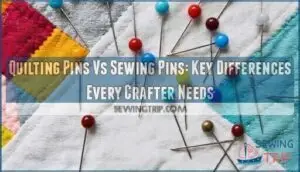 The battle between quilting pins vs sewing pins comes down to length and purpose.
Quilting pins stretch nearly twice as long as regular sewing pins—about 1¾ inches versus 1 inch—making them perfect for piercing through thick quilt sandwiches without bending.
You’ll also notice quilting pins sport larger glass or colorful plastic heads that won’t melt under your iron, while standard pins have tiny metal heads that can vanish into fabric like magic tricks gone wrong.
Regular sewing pins work great for lightweight garments, but they’re simply too short for quilting’s multi-layer demands.
The right pin makes all the difference between smooth sailing and a frustrating poke-fest, which is why choosing the correct type is crucial for a successful project.
Table Of Contents
Key Takeaways
- Choose quilting pins for thick projects – You’ll need 1¾-2 inch quilting pins when working with multiple fabric layers, like quilt sandwiches, while standard 1-1¼ inch sewing pins work best for lightweight, single-layer fabrics.
- Glass heads won’t melt under your iron – You should pick glass-head pins over plastic ones when you’re pressing seams frequently, since plastic heads can melt and create a gooey mess on your fabric.
- Ball-point pins prevent snags on knits – You’ll want ball-point pins with rounded tips for stretchy fabrics, like jersey and fleece, as they separate fibers instead of piercing them like sharp-pointed regular pins.
- Proper storage keeps pins sharp and safe – You should use magnetic trays or quality pincushions to organize your pins, prevent floor scatter, and maintain their sharpness while keeping them easily accessible during projects.
Pin Types
You’ll find four main pin types when you’re shopping for your next sewing or quilting project, and each one’s designed for different fabrics and tasks.
From slender glass head pins that glide through delicate silk to sturdy plastic head pins that won’t melt under your iron, choosing the right type can make the difference between smooth stitching and frustrating snags.
Glass Head Pins
Glass head pins slip through delicate fabrics like silk and chiffon without leaving a trace.
Glass head pins glide through silk like whispers through air, leaving your delicate fabrics perfectly pristine.
These fine heads won’t snag or tear your precious materials, making them perfect for lightweight sewing projects.
While they lack the heat resistance of plastic alternatives, their precision makes up for durability concerns.
Replace them when they dull, and you’ll keep your delicate work looking flawless every time.
Plastic Head Pins
Plastic head pins solve a common sewing headache – melting under your iron’s heat. These colorful champions feature rounded plastic heads that won’t turn into gooey messes when you’re pressing seams. Unlike their glass cousins, plastic head pins handle high temperatures without breaking down, making them perfect for synthetic fabrics and delicate materials.
The vibrant color variety helps you spot pins quickly on busy fabric patterns. Different plastic types offer varying melting points, so you’ll find options for most ironing concerns. Their smooth, rounded design prevents snagging on delicate threads.
- Bright pink pins standing out against navy cotton
- Purple heads visible on floral prints
- Yellow pins marking dart placements clearly
- Red heads catching light on satin fabric
- Green pins organizing pattern pieces efficiently
Choose plastic head pins when heat resistance matters most, especially for delicate materials or when working with high temperatures. They are a crucial tool for any sewing project that requires precision and care.
Ball-Point Pins
Working with stretchy knit fabric? Ball-point pins are your best friend for snag prevention.
These fabric pins feature rounded tips that gently separate fibers instead of piercing them like regular sewing pins or quilting pins.
The ballpoint design glides through jersey, fleece, and heavyweight sweaters without creating runs.
Choose quality pin types from best brands for reliable performance.
Silk Pins
When you’re working with silk fabrics and delicate projects, silk pins become your secret weapon.
These specialized fine pins feature razor-sharp points and ultra-thin 0.5mm shafts that won’t leave permanent holes in precious materials.
- Extra-fine glass heads that won’t melt under your iron’s heat
- Shorter length than quilting pins but thinner than regular sewing pins
- Perfect pin alternatives for lightweight fabric without snags or tears
Pin Lengths
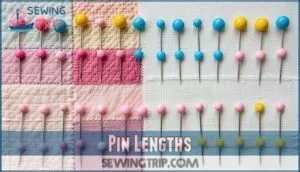
When you’re staring at a wall of pins at the craft store, length isn’t just a number—it’s your secret weapon for project success. Quilting pins stretch from 1 1/2 to 2 inches, giving you the reach to penetrate thick quilt sandwiches without your fingers cramping.
Sewing pins clock in shorter at 1 to 1 1/4 inches, perfect for lightweight fabrics where long pins would just get in your way. Optimal length depends entirely on project type and fabric thickness.
Those short pins shine when you’re piecing delicate silk or working with single-layer cotton. But when you’re wrestling with batting, backing, and a quilt top? You’ll thank yourself for grabbing those extra-long quilting pins.
Rust can also be problematic, so consider pins that resist corrosion. Pin visibility matters too—longer pins stick out more, making them easier to spot and remove.
Handling ease improves with the right length choice. Stock up on various pin lengths because nothing’s worse than fighting the wrong tool for the job.
Pin Heads
Looking at your pins, you’ll notice quilting pins sport bright, colorful heads that practically shout "look at me!"
While sewing pins keep things subtle with smaller, often clear or metal heads.
The best part about those chunky quilting pin heads is they won’t melt when you accidentally iron over them, unlike some plastic-headed sewing pins that’ll leave you with a gooey mess, which can be frustrating and require extra cleaning, especially if the pins have plastic-headed parts.
Bright Colors for Quilting
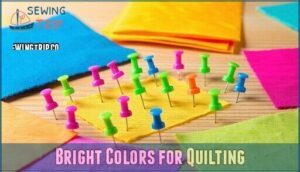
Picture a rainbow scattered across your quilt top – that’s what bright colors bring to your quilting game.
These vibrant quilting pins aren’t just pretty faces; they’re your secret weapon for project organization.
You’ll spot a hot pink pin from across the room, while a dull silver one plays hide-and-seek in busy fabric prints.
Color coding transforms chaos into clarity.
Use red pins for one section, blue for another, and suddenly you’re tracking progress like a pro.
The visibility benefits are huge when you’re working with multiple layers – no more squinting to find pins buried in batting.
Bright colors create perfect fabric contrast against most materials, making removal a breeze.
Your aesthetic choices matter too; cheerful pins add personality to the process.
Whether you’re quilting or general sewing, colorful pins turn mundane pinning into something that actually sparks joy.
Glass Won’t Melt
Heat resistance makes all the difference when you’re ironing around pins.
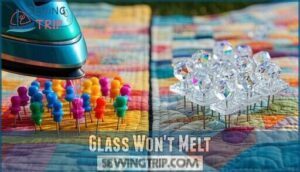
Glass head pins won’t betray you under high temperatures, while plastic heads can melt faster than butter on hot pavement. Glass durability means your pins survive repeated pressing sessions without warping or losing their heads.
Here’s why glass beats plastic for heat resistance:
- Withstands scorching iron temperatures without melting points becoming an issue
- Maintains perfect shape through countless pressing sessions
- Saves money by lasting years longer than plastic alternatives
- Prevents messy disasters on your favorite fabrics
Choose glass head pins for serious quilting projects requiring frequent ironing.
Pin Shafts
Pin shafts are the backbone of your quilting arsenal.
Quilting pins feature thicker shaft diameter and superior shaft material compared to sewing pins, handling multiple fabric layers without bending like a wet noodle.
Look for heavyweight steel with rust resistance that’ll last through countless projects.
Shaft thickness matters – thicker shafts prevent frustrating bends when piercing dense cotton batting.
Test shaft flexibility on fabric scraps first.
Different pin materials offer varying needle compatibility, so match your shaft to your fabric weight.
The right pin shafts make piecing feel effortless instead of wrestling fabric into submission.
Pin Points
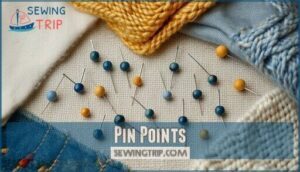
Choose your pin points like a surgeon selects scalpels—precision matters more than you think. The difference between round and sharp pin points can make or break your project’s success.
Sharp-tipped straight pins slice through woven fabrics cleanly, while rounded ballpoint pin points push fabric strands aside instead of cutting through them. This prevents fabric damage on knits and stretchy materials. Blunt points might seem gentler, but they can actually cause more harm by forcing fibers apart roughly.
Point angles determine how smoothly your quilting pins and sewing pins penetrate different materials. Sharpness matters because dull pin tips create larger holes and can snag delicate threads. To avoid these issues, it’s important to know how to sharpen pins.
- Sharp points excel with tightly woven cottons but require gentle handling to avoid splitting fibers
- Ballpoint pin points are your knit fabric’s best friend since they slip between yarns without breaking them
- Point maintenance involves replacing bent or dulled pins before they damage your precious fabric
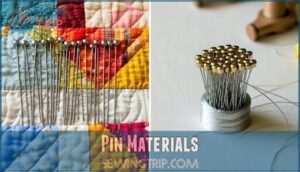
Pin Materials
When you’re picking pins for your next project, the material makes all the difference in how smoothly things go.
Steel Durability shines in quilting pins, where stainless steel construction prevents rust stains on your precious fabrics. Sewing pins often feature Nickel Content for that extra smoothness when sliding through delicate materials.
Here’s what you need to know about pin materials:
- Stainless steel offers superior Rust Prevention for long-term projects
- Nickel-plated pins glide effortlessly without snagging threads
- Material Flexibility varies between steel types and affects pin longevity
- Cost Comparison shows stainless steel costs more but lasts longer
Your quilting pins need that extra strength to punch through batting and multiple fabric layers, while sewing pins can be lighter for everyday stitching.
Consider glass head pins for heat resistance. Smart material choices mean fewer bent pins and smoother sailing on all your creative adventures.
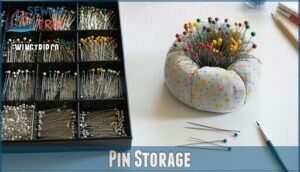
Pin Storage
You’ll want to keep your quilting and sewing pins organized and within easy reach, especially since quilting pins are longer and can easily get mixed up with your regular sewing supplies.
Whether you choose a magnetic tray that grabs pins like magic or a trusty pincushion that’s been your sewing buddy for years, good storage keeps your pins sharp and prevents the dreaded "pin hunt" under your sewing table.
Magnetic Trays
Magnetic trays transform your quilting supplies chaos into organized bliss. These handy helpers grip your quilting pins and sewing pins with magnetic strength, preventing the dreaded floor scatter when you bump your workspace.
Smart crafters love portable trays that travel to classes or retreats. Consider tray sizes based on your project needs—smaller ones for quick fixes, larger for marathon quilting sessions.
DIY magnetic options work too if you’re feeling crafty. You can even find a variety of options online.
The magnetic organization keeps everything visible and accessible, making pin storage a breeze instead of a headache.
Pincushions
Convenience becomes your best friend when you’ve got a trusty pincushion nearby.
These soft cushions hold your quilting pins and sewing pins right where you need them, preventing those frustrating mid-project hunts.
You’ll find pincushion materials ranging from traditional sawdust filling to modern crushed walnut shells.
DIY pincushions let you customize with fabric scraps or repurpose vintage teacups.
Ergonomic pincushions with wrist straps keep pins accessible while you work.
For crafters, consider purchasing specialized sewing products for ideal organization.
Unlike magnetic trays that only grab metal, pincushions accept any pin type.
Choose pincushion styles that match your workspace – from classic tomato shapes to sleek modern designs.
Smart pin storage means smoother sewing sessions every time.
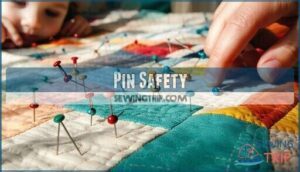
Pin Safety
Watch out for those sneaky pin pricks – they’re like tiny ninjas waiting to catch you off guard! Whether you’re using quilting pins or sewing pins, pin safety starts with smart handling habits.
Always grab pins by their heads, never the pointy end. Keep a magnetic tray nearby so you’re not fumbling around with loose pins. Before sitting down or leaning over your work, do a quick palm sweep – trust me, your backside will thank you later.
Broken pins pose serious injury risks, so toss them immediately with safe disposal methods. If you’ve got little ones around, consider child safety measures like storing pins in secure containers – ingestion hazards are no joke with curious toddlers.
Check your pins regularly for rust prevention, replacing any that look sketchy. For extra peace of mind, pin alternatives like clips work great for bulky layers. Remember, these sharp helpers deserve respect, and they’ll reward you with countless beautiful projects.
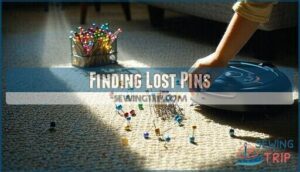
Finding Lost Pins
Pin-hunting adventures happen to every quilter and sewist. When quilting pins or sewing pins go missing, grab a flashlight and sweep it across the floor—metal catches light beautifully.
Magnetic sweepers work like magic, pulling hidden pins from carpet fibers and corners. Run your hands slowly across surfaces for pin retrieval tools that your eyes missed.
Keep magnetic trays nearby as preventative measures, and always check pincushions before moving them. For child safety, vacuum frequently and shake out projects before washing.
Finding lost pins requires patience, but these visibility solutions save future finger pricks.
Appreciating Your Pins
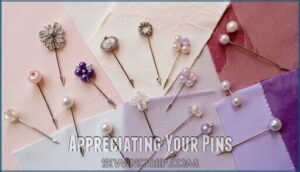
After hunting down those sneaky pins, it’s time to show them some love. Your pins are the unsung heroes of every project, whether you’re using sturdy quilting pins or delicate sewing pins.
These tiny tools demonstrate incredible pin longevity when you practice proper pin care. From basic straight pins to specialty varieties, pin variety has expanded through pin evolution to meet every crafter’s needs.
Appreciating pins means recognizing their pin value and pin benefits—they hold your world together, one stitch at a time, making pin differences matter. Regular use can lead to dullness, but you can sharpen sewing needles to extend their lifespan.
Frequently Asked Questions (FAQs)
What is the difference between quilting pins and sewing pins?
Quilting pins are longer, stronger workhorses designed for thick fabric layers – think two inches versus sewing pins’ inch-and-a-half.
You’ll grab quilting pins for heavy-duty projects, while sewing pins handle delicate, lightweight fabrics perfectly.
What pins to use for quilting?
You’ll want longer, sturdier pins for quilting projects.
Choose 1½ to 2-inch quilting pins with colorful heads—they’re perfect for piercing multiple fabric layers without bending.
Stainless steel works best for durability.
Can I use safety pins instead of sewing pins?
Yes, you can use safety pins instead of sewing pins for temporary holding, but they’re bulkier and slower to work with.
They won’t damage your machine if accidentally sewn over, making them safer for beginners.
What are sewing pins called?
You’ll find sewing pins go by several names depending on their design.
They’re called straight pins, dressmaking pins, or fabric pins.
Some folks call the all-metal versions satin pins, while others use specific names like glass-head or ball-point pins.
How can I tell when my pins need replacing?
Like old friends showing their age, you’ll know it’s time for new pins when they’re bent like pretzels, rusted, or leave snags in your fabric.
Replace them when they’ve lost their sharp point or smooth glide.
What’s the best way to clean and care for my pins?
Clean your pins regularly by wiping them with a soft, dry cloth to remove fabric fibers and oils.
Store them in a dry pincushion or magnetic holder to prevent rust and keep points sharp.
Are there any good alternatives I can use instead of pins for some projects?
Sewing clips are your best bet! They grip fabric securely without leaving holes.
Wonder clips work great for thick seams, while magnetic pin cushions keep metal pins organized.
You’ll love how clips speed up your workflow.
What are some creative ways I could repurpose my old pins?
Transform your old pins into handy craft tools.
Use them as tiny awls for poking holes, mini paint stirrers, or cake-testing needles.
They’re perfect for cleaning small crevices or creating textured art effects.
Can I use quilting pins for garment sewing?
Yes, you can use quilting pins for garment sewing.
They’re longer and thicker than regular sewing pins, which makes them great for heavy fabrics but might leave bigger holes in delicate materials.
Do quilting pins work with knit fabrics?
My friend tried using quilting pins on jersey knit and created tiny snags everywhere.
You’ll want ball-point pins instead—they slip between knit fibers without catching, while quilting pins’ sharp points can damage stretchy fabrics, which is why using the right type of pin is crucial for working with jersey knit.
Conclusion
Understanding the quilting pins vs sewing pins debate transforms your crafting experience from frustrating to fantastic.
Choose quilting pins for thick layers, choose sewing pins for delicate fabrics, and choose the right storage to keep them organized.
Your projects deserve pins that match their purpose—whether you’re piecing together a cozy quilt or hemming a silk blouse.
With proper pin selection, safety habits, and a magnetic tray nearby, you’ll tackle any sewing challenge with confidence and fewer accidental pokes.
- https://en.wikipedia.org/wiki/Stash_Records
- https://www.staples.com/Clips-Fasteners/cat_CL10102
- https://www.sewcaroline.com/best-quilting-pins/
- https://www.createforless.com/buying-guides/sewing-and-quilting/sewing-pins-types-and-sizes.aspx
- https://www.onlinefabricstore.com/makersmill/picking-the-perfect-pins-for-your-project/

