This site is supported by our readers. We may earn a commission, at no cost to you, if you purchase through links.
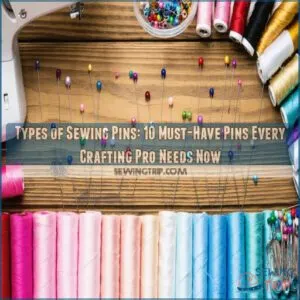 You’ll need various types of sewing pins for different projects.
Straight pins, ballpoint pins, glass head pins, silk pins, and plastic head pins are essentials. Each type serves a purpose, like ballpoint pins for stretchy fabrics or silk pins for delicate materials.
Understanding the types of sewing pins and their uses will help you master your sewing skills and achieve professional-looking results.
Now, let’s explore how to choose the right pins for your next project and discover your full sewing potential.
Table Of Contents
Key Takeaways
- You’ll need to choose the right type of sewing pin based on your fabric type, project needs, and personal preference to ensure a smooth sewing experience.
- Different pins serve specific purposes, such as ballpoint pins for knit fabrics, glass head pins for heat-resistant crafting, and silk pins for delicate materials, so it’s essential to select the right one for your project.
- Pin length, thickness, and head type are crucial factors to consider when choosing a pin, as they affect the pin’s performance and the quality of your sewing work.
- By understanding the various types of sewing pins and their uses, you’ll be able to master your sewing skills, achieve professional-looking results, and work efficiently with different materials and techniques.
Straight Pins
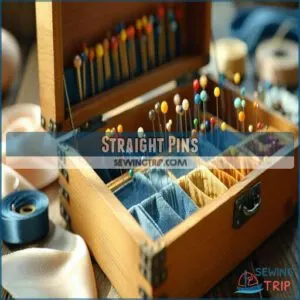
You’ll find straight pins in every sewing kit, from basic plastic-headed ones to specialized glass-headed varieties designed for ironing.
These essential tools come in various lengths and thicknesses to match your fabric type, letting you secure everything from delicate silk to sturdy denim with precision.
These essential tools are vital for any sewing task, and their variety ensures that you can work with different fabrics effectively.
Ballpoint
Like a gentle rain on delicate petals, ballpoint pins glide effortlessly through knit fabrics without causing damage.
These specialized pins feature rounded tips that separate fabric fibers instead of piercing them, making them perfect for stretchy materials.
You’ll find they prevent fabric slippage and maintain pin precision when working with jerseys, spandex, or other elastic materials.
The ball head pins offer superior control compared to traditional sharp pins, ensuring your seams stay perfectly aligned.
For delicate knits where extrasharp points might cause snags, ballpoint tips are your best ally.
When selecting the right tools, consider the importance of proper knitting pins to achieve professional results with ballpoint pins and maintain pin precision.
Glass Head
Mastering precision sewing starts with glass head pins, the professional’s choice for heat-resistant crafting.
Unlike plastic head pins, these pins feature smooth, rounded glass heads that won’t melt under your iron’s heat.
They’re available in vibrant colors for enhanced pin visibility during detailed work.
The glass types offer superior durability compared to pearl head pins, while maintaining gentle fabric interaction.
You’ll appreciate their versatility across various crafting uses, from quilting to dressmaking.
Their strength and heat resistance make them essential for pressing seams, and their strength and heat resistance make them essential for pressing seams.
For ideal results, consider using high-quality glass head pins to achieve professional finishes.
Silk
While glass head pins resist heat, silk pins excel at protecting your most precious fabrics.
These ultra-fine pins feature an exceptionally slim diameter perfect for luxury threads and delicate sewing. You’ll appreciate how smoothly they glide through silk fabrics and lace without leaving visible holes or snags.
When working with high-end materials, these specialized pins prevent damage while securing layers firmly in place. Their precise engineering makes them ideal for bridal wear, heirloom pieces, and fine lingerie projects.
For the best results, it’s imperative to choose the right silk sewing pins to guarantee a professional finish.
Plastic Head
While silk pins excel at precision, plastic head pins offer unique versatility in your sewing toolkit.
These colorful companions bring both function and flair to your projects, with features that set them apart:
- Pearl head pins and decorative straight pins add visual appeal while securing fabrics
- Plastic headed pins come in various sizes for different fabric weights
- Head durability varies among plastic types – some resist melting better than others
- Plastic heads provide excellent grip without damaging delicate materials
Just remember: Keep your iron away from these pins, as they’ll melt under direct heat, and always consider the durability and grip of the plastic heads to ensure the best results for your projects.
T-Pins
Standing tall with their distinctive T-shaped heads, T-pins excel at securing thick fabrics and heavy-duty materials.
These sturdy upholstery pins feature longer shafts than standard straight pins, making them perfect for multiple fabric layers.
You’ll find them invaluable when working with heavy upholstery, draping on dress forms, or securing batting in place.
Their robust design prevents bending, even with the thickest materials, and they are a key tool for working with thick fabrics.
Pin Heads
You’ll find three main types of pin heads in your sewing kit: plastic heads that are budget-friendly but can melt, glass heads that resist heat during ironing, and metal heads that offer durability for heavy-duty projects.
Each pin head style serves a specific purpose in your sewing journey, from basic mending tasks to professional garment construction, and understanding these differences is key to a successful sewing experience with the right durability.
Plastic
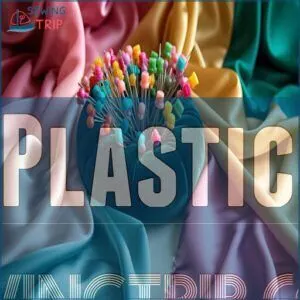
Plastic head pins offer reliable performance for everyday sewing tasks, but you’ll need to watch out for their melting point.
These affordable pins come in vibrant colors that make them easy to spot on your fabric. While plastic headed pins work well for most projects, they’re not your best choice when pressing seams with a hot iron.
- Extra fine pins with plastic heads work perfectly for delicate fabrics like chiffon and silk
- Plastic pin heads come in various sizes, from tiny 0.5mm up to chunky 0.8mm options
- Bright-colored plastic heads help you quickly locate pins in your fabric
- Most plastic types maintain their durability through repeated use
Glass
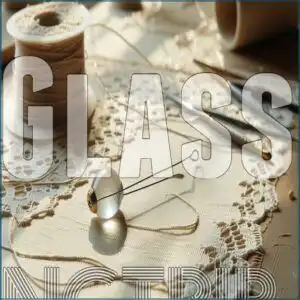
You’ll love the elegant clarity that glass head pins bring to your sewing projects.
These transparent beauties offer unmatched pin visibility, especially when working with intricate patterns.
While plastic pins might melt under your iron’s heat, glass headed pins boast impressive heat resistance – they’ll maintain their shape even at high melting points.
Glass pins shine brightest when you’re handling delicate materials like silk or lace.
Their smooth, polished heads glide effortlessly through fine fabrics without catching or snagging.
Plus, the clear glass heads make it easy to spot and remove them as you work.
For precise pattern matching or detailed quilting work, these pins won’t let you down.
Their durability and see-through tops make them a smart investment for any serious crafter.
Metal
Metal pins with sturdy heads offer exceptional durability for your sewing projects.
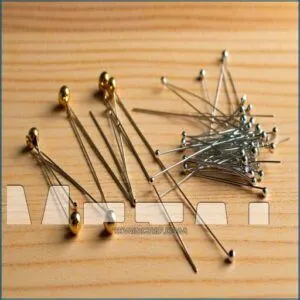
Nickel-plated steel pins resist bending when working with multiple fabric layers, while stainless steel pins provide reliable rust resistance.
These metal pin heads sit flush against fabric, preventing snags and ensuring smooth movement through materials.
You’ll find brass pins particularly useful for delicate work, as they combine strength with a gentler touch.
Steel sewing pins excel in quilting projects, where their unbendable nature keeps layers perfectly aligned.
For heavy-duty tasks, nickel pins deliver the extra stability needed to maintain precise positioning throughout your crafting process, providing reliable rust resistance and ensuring smooth movement.
Pin Lengths
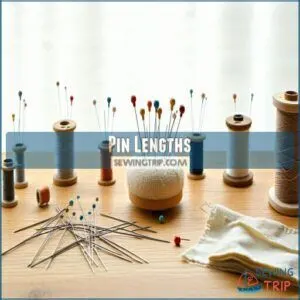
Pin length determines your control over fabric layers and project precision. Here’s what you need to know about choosing the right size:
- Short pins (3/4 to 1 inch) excel with delicate fabrics and intricate details, letting you navigate tight curves without distortion.
- Medium length pins (1 to 1-1/2 inches) serve as your everyday workhorses, handling most fabrics while maintaining stability.
- Long pins (1-1/2 to 2 inches) master thick materials like denim and wool, keeping multiple layers perfectly aligned.
Select pin length based on your fabric weight and project complexity for best results. Understanding the correct pin thickness options is also important for achieving professional-looking results.
To ensure the best outcome, consider the project precision required and choose your pins accordingly. This will help you achieve a polished finish and maintain control over fabric layers.
Sharp Vs. Dull Pins
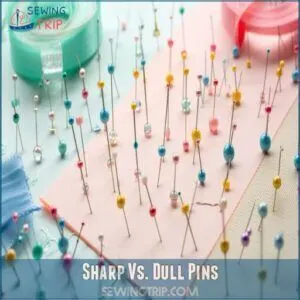
You’ll immediately notice the difference between sharp and dull pins when sewing.
Sharp pins glide through fabric like butter, while dull ones can cause needle damage and fabric tears.
Here’s a quick guide to understanding pin sharpness:
| Pin Type | Sharpness Level | Best Use |
|---|---|---|
| Glass Head | Ultra-Sharp | Delicate Fabrics |
| Quilting | Very Sharp | Multiple Layers |
| T-Pins | Sharp | Heavy Materials |
| Ball Point | Rounded Sharp | Knit Fabrics |
| Plastic Head | Standard Sharp | General Use |
For ideal sewing accuracy and pin maintenance, replace pins when they snag or feel rough to touch.
Regular inspection guarantees your projects stay damage-free.
To achieve the best results, understanding the different sewing pin types and their specific uses is important for sewing success.
Thin Vs. Thick Pins
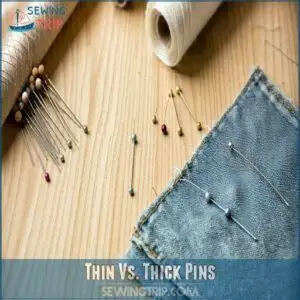
Choosing the right pin thickness can make or break your sewing project’s success.
Thin pins with sharp tips work best for delicate fabrics, while thicker pins provide stability for heavyweight materials.
Here’s a quick guide to selecting the right pins:
| Pin Type | Diameter | Best For |
|---|---|---|
| Extra Fine | 0.4-0.5mm | Silk, chiffon |
| Standard | 0.6mm | Cotton, linen |
| Heavy Duty | 0.7-0.8mm | Denim, canvas |
For perfect sewing precision, match your pin diameter to your fabric’s thread count and weight.
Using pins that are too thick can damage delicate materials, while pins that are too thin may bend in heavy fabrics.
When working with various fabrics, considering the right sewing pin types is essential for achieving professional results.
This includes understanding how different pin types interact with different fabrics to ensure the best outcome for your sewing project, focusing on the importance of delicate fabrics and heavyweight materials.
Pin Materials
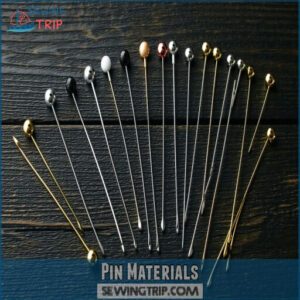
You’ll find that most sewing pins are made from nickel-plated steel, stainless steel, or brass for durability and rust resistance.
Your choice of pin material matters since nickel-plated steel pins work with magnetic pin cushions, while brass pins won’t rust but aren’t magnetic.
Nickel
When you’re working with fabric layers, nickel-plated pins deliver exceptional rust resistance and smooth gliding action.
Their corrosion protection keeps them sharp and reliable for years of crafting.
- The nickel plating creates a metal alloy surface that prevents snags and pulls
- Sharp points penetrate multiple fabric layers without damaging fibers
- Large metal pin heads provide excellent grip while staying flat against your work
You’ll appreciate how these nickel-free alternatives maintain their shine and strength.
The thin pins slide effortlessly through delicate materials, while their sturdy construction handles heavier fabrics with equal precision.
Steel
While nickel-plated options shine, steel pins stand as the backbone of any serious sewing kit.
These straight pins feature a thin diameter for precise fabric penetration, with sharp points that glide smoothly through layers.
You’ll find steel pins in various styles – from magnetic pins perfect for quick pickup to rust-resistant versions that’ll last years.
The metal thickness varies too, letting you match the right pin to your project.
For everyday sewing tasks, standard steel pins won’t let you down, making them a reliable choice for any sewing kit.
Brass
Brass pins gleam with durability and charm, offering a perfect balance of strength and gentleness for your sewing projects.
These classic metal alloys resist corrosion better than their nickel or steel counterparts, making them a reliable choice for long-term use. Brass plating provides excellent rust resistance while maintaining sharp points that easily penetrate fabric layers.
- Traditional brass pins feature superior strength-to-weight ratios
- The soft metal composition prevents snags in delicate fabrics
- Vintage brass sewing pin materials often maintain their quality for decades
- Pin corrosion rarely occurs with proper storage and maintenance
These time-tested tools remain popular among sewists who value both functionality and heritage. The choice of pin type depends on the specific pin length requirements for each project, ensuring the best results.
Specialty Pins
You’ll find specialty pins designed for specific sewing tasks, from extra-long quilting pins that secure multiple fabric layers to ultra-fine applique pins perfect for detailed work.
These task-specific pins will help you tackle complex projects with greater precision and confidence.
Quilting
Quilting pins form the backbone of your patchwork projects, offering stability and precision when securing multiple fabric layers.
These specialized tools feature longer lengths and thicker shafts than standard pins, ensuring your quilt sandwich stays perfectly aligned.
Here’s a quick guide to quilting pins:
| Feature | Basic Quilting Pins | Glass Head Quilting | Extra Fine Quilting |
|---|---|---|---|
| Length | 1.75-2 inches | 2-2.25 inches | 1.5-1.75 inches |
| Best For | Cotton fabrics | Heat exposure | Delicate fabrics |
| Head Type | Plastic flat | Glass ball | Metal flat |
| Thickness | 0.7mm | 0.6mm | 0.5mm |
| Price Range | $3-5/100 | $6-8/100 | $7-10/100 |
Select sharp sewing pins with glass heads for pressing tasks, as they won’t melt under your iron’s heat.
When choosing quilting pins, consider the type of fabric you are working with, as different pins are suited for cotton fabrics, delicate fabrics, or heat exposure.
Applique
While quilting demands sturdier options, appliqué work calls for precision and finesse.
Appliqué pins are specifically designed to secure delicate fabric pieces without leaving visible holes.
Consider using appropriate appliqué materials for your project.
When selecting appliqué pins, consider these four essential options:
- Extra-fine silk pins (0.4mm) slip through delicate fabrics with minimal damage
- Short sequin pins (¾") work perfectly for small appliqué pieces
- Glass-head pins resist heat when pressing appliqué edges
- Ballpoint pins prevent snags on stretchy appliqué fabrics
Fabric preparation begins with choosing the right pins.
Needle selection matters too—pair your appliqué pins with appropriate needles for best results.
Thread choices, stabilizer options, and edge finishing techniques all work together with proper pinning for professional results.
You’ll appreciate how quality appliqué pins keep everything aligned without distorting your careful work.
Pin Alternatives
You’ll discover several practical alternatives to traditional pins, including sewing clips and temporary fabric tape, that can effectively hold your materials together.
These pin substitutes are particularly valuable when working with bulky fabrics, vinyl, leather, or in situations where you want to avoid making tiny holes in your precious materials.
Clips
While specialty pins serve their purpose, sewing clips offer a game-changing alternative for your fabric handling needs.
These pin alternatives excel at holding multiple layers together without leaving permanent holes or marks.
You’ll find various clip types to suit different projects – from gentle fold-over clips perfect for delicate silks to sturdy binder clips that grip heavyweight materials.
Fabric grips and hemming clips work especially well on slippery fabrics where traditional pins might cause snags or damage.
Their strong, toothy grip keeps seams aligned while providing clear visibility of your work area.
Plus, binding tools like these allow you to quickly adjust and reposition fabric without repeatedly inserting and removing pins.
Consider adding a mix of clip sizes to your toolbox – they’re particularly handy for temporary holds during fitting sessions.
Tape
While sewing clips offer great hold, adhesive tape provides another versatile solution for fabric management.
You’ll find this temporary alternative especially useful when working with delicate or slippery materials that traditional pins might damage.
- Double-sided tape creates invisible seams and perfect hems
- Masking tape works well for pattern matching and marking
- Packing tape helps secure large fabric pieces temporarily
- Temporary tape assists in basting without leaving residue
When selecting tape for your project, consider the fabric weight and finish.
Light fabrics pair well with removable masking tape, while heavier materials might need stronger options like duct tape.
Remember to test the tape on a scrap piece first to make sure it won’t leave marks or damage your fabric.
Pin Safety
The art of pin handling requires both skill and caution to prevent unwanted finger pricks.
Prioritize safety by keeping pins in a magnetic holder or pin cushion, never in your mouth or scattered on surfaces.
When working with nickel-plated pins, be mindful of potential nickel allergies and opt for alternative materials if needed.
| Safety Aspect | Risk Level | Prevention Tips |
|---|---|---|
| Storage | Medium | Use magnetic holders |
| Handling | High | Grasp pins firmly |
| Disposal | Low | Seal in container |
Keep your workspace organized by immediately disposing of bent or rusty pins in a sealed container.
Insert pins perpendicular to fabric edges, and remove them by pulling straight out rather than at angles.
For injury prevention, always work in well-lit areas and maintain a dedicated pin storage system accessible only to adults.
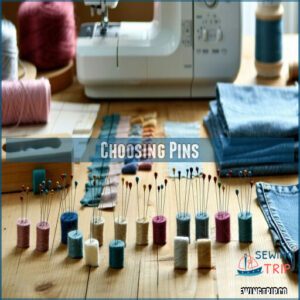
Choosing Pins
When choosing pins, consider your project’s needs.
Here are key factors:
- Fabric type
- Pin length
- Pin head
- Rust-proof materials
- Hand comfort.
For more details, explore this helpful guide on quilting pins versus sewing pins.
Selecting the right pins guarantees a smoother sewing experience, so pick wisely to master your sewing projects with ease and control over fabric types and thickness.
Frequently Asked Questions (FAQs)
What are the different types of sewing pins?
You’ll discover various pins, including glass head, ballpoint, quilting, and pearlized, each designed for specific fabrics and projects, offering control and precision in your sewing endeavors.
How to choose the right pin for sewing?
You’ll select the right pin by considering fabric type, weight, and project needs, then choosing a pin with the appropriate length, thickness, and head type for a secure hold.
What type of sewing pin do I Need?
Like a master key, you need a pin that fits your fabric’s unique lock, considering length, thickness, and head type to guarantee a perfect stitch, every time, with ease and precision.
This sentence forms a complete concept, and there are no other distinct ideas to separate.
What is a straight pin for sewing?
You’ll use a straight pin, also known as a basting or hemming pin, for general sewing, as it’s sharp, thin, and suitable for medium-weight fabrics, making it a versatile option.
What kind of pins to use for sewing?
You’ll need sharp, thin pins for delicate fabrics, while thicker pins suit heavier materials, and ballpoint pins work well for knit fabrics, considering fabric type and project requirements.
How many types of pins are there?
You’ll find numerous pin types, including glass head, ballpoint, quilting, and pearlized pins, each suited for specific fabrics and sewing tasks, offering various lengths, thicknesses, and head types.
What are tiny pins called?
You’ll discover tiny pins are often called applique pins or extra-fine pins, designed for delicate fabrics and small projects, offering precision and control for intricate sewing tasks and detailed work.
What are long pins called?
You’re the master of your sewing domain, and long pins are called quilting pins, perfect for holding multiple layers of fabric together with ease and precision.
What pins work best for velvet fabrics?
You’ll want to use sharp, thin pins with a small head, like silk or extra-fine pins, to prevent damaging velvet fabrics and guarantee a smooth sewing experience.
Can sewing pins be used for embroidery?
You can use sewing pins for embroidery, but choose thin, sharp pins with small heads to avoid damaging delicate threads and fabrics, ensuring precise stitching and control.
Conclusion
Now that you’ve got the lowdown, it’s time to pin down your sewing skills.
You’re cutting to the chase by learning about the various types of sewing pins.
Mastering the right types of sewing pins will take your projects to the next level, so choose the best ones for your needs and become a pro at working with different materials and techniques using the right types of sewing pins.
- https://www.onlinefabricstore.com/makersmill/picking-the-perfect-pins-for-your-project/?srsltid=AfmBOorHrEUOGhKme70dN-iW2RIYKLv3XXDo6W7tbimyr5SzN9xK_oiC
- https://www.poundametre.com/blogs/sewciety-fabric-blog/understanding-sewing-pins-and-their-uses
- https://www.seasonedhomemaker.com/my-little-pin-village/
- https://www.thesewingdirectory.co.uk/guide-to-pins/
- https://www.joann.com/on/demandware.static/-/Sites-joann-project-catalog/default/dwdd24b1ca/images/hi-res/project/pdf/0178662P5.pdf

