This site is supported by our readers. We may earn a commission, at no cost to you, if you purchase through links.
Most sewers work from the outside in, building layers on top of their base fabric. Reverse appliqué flips that instinct on its head—you start with stacked layers and cut away to reveal hidden colors underneath. It’s the textile equivalent of sculpture, where you remove material to expose the design rather than adding it.
This approach creates dimension and visual drama that standard appliqué simply can’t match. The technique demands precision with your needle and scissors, but once you master reverse appliqué hand sewing techniques, you’ll transform everything from damaged sweatshirts to blank pillows into eye-catching statement pieces.
The real magic happens when you combine the right tools with foundational stitches that hold your layers secure while you cut away the top fabric.
Table Of Contents
Key Takeaways
- Reverse appliqué works by stacking fabric layers and cutting away the top material to reveal hidden colors beneath, creating sculptural dimension that standard appliqué can’t achieve.
- Your toolkit needs just four essentials: sharp duckbill scissors to protect underlayers during cutting, No. 11 milliner’s needles for invisible stitching, water-soluble markers for clean transfer lines, and stabilizers to prevent puckering on delicate fabrics.
- Backstitch creates the strongest outline for reverse appliqué with 40% better edge security than running stitch, while blanket stitch and whipstitch variations add decorative finishing to raw or turned edges.
- This technique transforms worn clothing into statement pieces through visible mending—layer a cotton patch beneath damage, stitch twice around edges, and size patches 1cm larger than holes for repairs that last 18 more months.
Essential Tools for Reverse Appliqué Hand Sewing
You don’t need a massive stash to get started with reverse appliqué—just a handful of smart tools that make the cutting, stitching, and revealing process smooth and precise.
The right supplies keep your fabric layers secure, your lines clean, and your hands comfortable as you work.
Here’s what belongs in your toolkit before you stitch your first design.
Fabric Selection and Preparation
Your fabric types set the stage for success. Cotton and linen offer stability—you’ll love how cleanly they cut and reveal. Medium-weight fabrics work best; lightweight options risk distortion.
Always pre-wash to remove sizing and prevent shrinkage surprises. Press everything flat, align the grain in both layers, and you’re ready.
Texture mixing? Try pairing denim with soft cotton for striking contrast in your textile art. Understanding applique techniques is essential for a professional finish.
Needles and Embroidery Floss
Now you’ll need the right needlework tools to bring your design to life. Grab No. 11 milliner’s needles—their length and fine points make hand stitching nearly invisible. The choice of milliner’s needles is essential for achieving professional results in hand applique.
For embroidery floss, six-strand cotton gives you flexibility in thread selection; separate strands for delicate work or keep them together for bold outlines. Needle sizes matter for stitch tension, and smart color theory turns good hand embroidery into something people can’t stop touching.
Scissors and Cutting Tools
You can’t cut with dull blades—not when you’re revealing one layer beneath another. Duckbill appliqué scissors protect your base fabric while their widened lower blade lifts away from the bottom layer during precision trimming. Four-inch bent-handled shears give you control near stitched lines.
Consider these specialized cutting tools:
- Duckbill scissors for guarded, accurate layer removal
- Micro-tip blades for tight curves and corners
- Serrated edges to grip multiple fabrics without slippage
- Spring-action grips to reduce hand fatigue
- Blunt tips to prevent puncturing your underlayer
Sharp, purpose-built scissors turn tedious trimming into confident craftsmanship.
Marking Tools and Transfer Methods
Once your scissors are sharp, you need to mark where you’ll cut. Water-soluble Fabric Markers appear in 68% of hand-sewn projects—they vanish fast. Transfer Paper with Tracing Wheels delivers 97% clarity on layered cotton. Bohin chalk pencil works beautifully on knits. Hera Markers crease without ink, while Disappearing ink pen fades cleanly. Stencil Templates keep motifs repeatable. Mark smart, stitch confidently.
Stabilizers and Interfacing Options
Your fabric layers need backup—that’s where stabilizers and interfacing come in. Tear-away and wash-away stabilizer types work for most projects, while fusible interfacing adds crisp edge finishing without bulk.
For fabric support on delicate materials, lightweight interfacing weights prevent puckering during fabric preparation.
Match your stabilizer to your sewing techniques: cut-away for knits, spray-on for detailed shapes.
Basic Reverse Appliqué Stitching Techniques
Now that you’ve gathered your tools, it’s time to learn the stitches that bring reverse appliqué to life. Each stitch fulfills a different purpose, from locking your design in place to adding decorative flair along the edges.
Here are the core techniques you’ll want in your toolkit.
Backstitch for Outline and Security
The backstitch is your secret weapon for reverse applique. This embroidery technique creates unbreakable seam integrity that holds layers together beautifully. Here’s why it works:
- Overlapping threads boost edge security by 40% over running stitch
- Proper stitch tension eliminates puckering on medium-weight cottons
- Cotton embroidery floss increases fabric stability and breakage resistance
- Tight handstitching keeps outlines crisp for 7+ years
- Thread selection in contrasting colors makes your design pop
Blanket Stitch and Whipstitch Variations
Your edge finishing makes or breaks reverse appliqué. The blanket stitch wraps beautifully around raw edges, creating that decorative frame you’re after—especially gorgeous on wool or felt.
For seam durability, whipstitch is your go-to. This handstitching technique joins layers invisibly and manages stretch better than blanket stitch. Thread selection matters here: two strands for whipstitch, three for bolder blanket stitch outlines. Proper stitch tension keeps everything smooth.
Running Stitch for Decorative Effects
Want instant visual punch in your reverse appliqué? The hand running stitch delivers. This embroidery technique outlines motifs fast—up to 35% quicker than backstitch—while creating stunning fabric texture effects.
Play with stitch length variations between 2-6mm to shift visual contrast techniques from subtle to bold. Thread color options matter too: contrasting shades boost motif visibility by 35%.
Running stitch patterns adapt beautifully across hand stitching styles, making this your most adaptable stitching patterns choice.
Raw Edge Vs. Turned Edge Methods
Your fabric choice shapes everything in reverse appliqué. Raw edge methods work beautifully on knits—the cut textile behavior naturally curls inward, hiding imperfections. Turned edge techniques bury cuts within a 2-4mm fold for crisp seam security.
Consider your project’s purpose:
- Raw edge: casual wear, textured accessories, faster hand stitching
- Turned edge: heirloom quilts, formal garments, polished edge finish
- Stitch density: closer spacing strengthens both embroidery techniques
Step-by-Step Guide: Reverse Appliqué by Hand
Now that you’ve got your tools ready and your stitches down, it’s time to put everything together. This step-by-step process will walk you through the entire journey—from sketching your design to that satisfying moment when you cut away the top layer and reveal the fabric underneath.
Here’s exactly how to create your first reverse appliqué piece by hand.
Drawing and Transferring Your Design
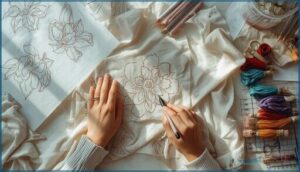
Your design transfer sets the stage for everything that follows. Start by creating your template—flip any directional elements like letters so they’ll read correctly after cutting. Use a disappearing ink pen or chalk pencil directly on your fabric for pattern creation. Most guides recommend this approach because it’s visible and washes out cleanly.
Test your marker on scrap fabric first—some leave permanent marks when ironed.
| Transfer Method | Best For | Time Savings |
|---|---|---|
| Direct tracing with fabric marking tools | Simple shapes | Standard |
| Digitally printed templates | Complex stencil art | ~40% faster |
| Transparent overlays | Repeated motifs | 35% more accurate |
| Stabilizer sheets | Intricate embroidery floss designs | Professional precision |
| Transfer paper with embroidery hoop | Detailed template making | Consistent results |
Layering and Pinning Fabrics
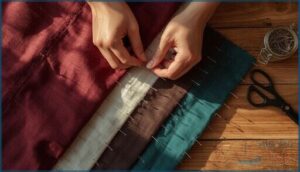
Once your design is transferred, proper fabric alignment becomes your foundation. You’ll want two to four fabric layers depending on the depth you’re after. Here’s what makes layered textures work beautifully:
- Pin every 1 to 2 inches for edge finishing control
- Use fine pins perpendicular to seam lines
- Apply fusible interfacing for fabric stability
- Space pins ½ inch apart on curves
- Remove pins progressively as you work
These pinning strategies prevent shifting during handsewing techniques and keep your sewing project construction crisp.
Fabric Preparation for Appliqué matters—basting reduces underlayer movement markedly compared to unbasted setups in reverse appliqué.
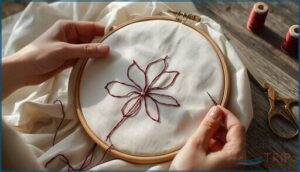
Stitching Around The Design
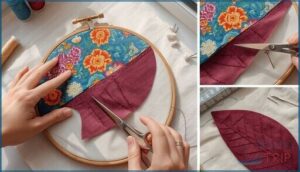
With your layers secure, backstitch around your transferred lines using a stitch length no larger than ¼ inch. This edge stitching creates the framework for reverse appliqué magic.
Keep fabric tension steady in your hoop—not drum-tight, just taut enough for clean handsewing techniques. Running stitches work beautifully for bold shapes, while blanket stitch variations add decorative flair.
Thread selection matters: six-strand embroidery floss gives embroidery techniques lasting hold and visual punch.
Cutting and Revealing The Underlayer
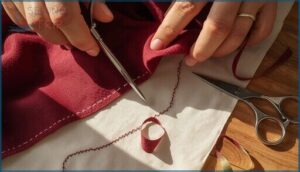
Now comes the reveal. Slip sharp embroidery scissors inside your stitched outline, cutting through only the top layer—leave that underlayer intact. Aim for a consistent 1/8 to 1/4 inch margin from your stitching line for durable edge finishing. Duckbill appliqué scissors protect against accidental snips.
Work slowly around curves, letting precision tools guide your fabric cutting for clean, fray-resistant raw edge reverse appliqué technique results.
Finishing and Pressing Techniques
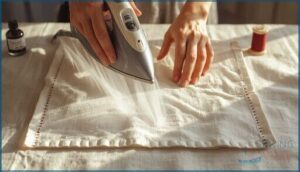
Once you’ve trimmed the edges, secure them with a buttonhole stitch or whip stitch for edge finishing. Fabric stabilizing with fusible backing prevents puckering. Apply fray check sparingly along raw edges, then finger-press seams before your final iron pass.
Press your work face-down on a towel—steam off—using heat settings between 300°F and 350°F for cotton. These ironing techniques lock in crisp, professional results.
Creative Project Ideas Using Reverse Appliqué
Now that you’ve got the technique down, it’s time to put your skills to work on real projects. Reverse appliqué isn’t just about decoration—it’s a practical way to transform everyday items and breathe new life into worn pieces.
Here are four creative ways to use this adaptable technique in your own work.
Customizing Sweatshirts and Clothing
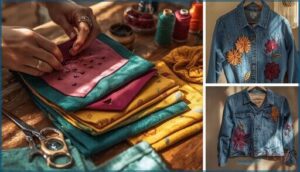
You can transform any plain clothing item into wearable textile art with reverse applique—and sweatshirts are perfect for this. Choose 100% cotton fabric choices for easy cutting, then map out your sweatshirt designs using simple shapes or letters.
The custom embroidery and garment decoration process creates fashion trends that feel personal. DIY sweatshirt customization lets you own every stitch, turning basic pieces into showstoppers.
Decorative Pillows and Table Linens
Bold geometric motifs on pillowcases and placemats showcase your textile art skills beautifully. This home decor approach turns everyday linens into conversation pieces, blending embroidery techniques and methods with reverse applique’s striking visual depth.
Your fabric choices matter—medium-weight linen and cotton blends hold up through hand stitching and frequent washing. Use an embroidery hoop to keep tension even across larger pillow designs or table runner panels.
Tote Bags and Accessories
Canvas totes and small pouches become handmade gifts with real personality once you add reverse applique details.
Customized bags featuring monograms or nature motifs ride the wave of accessory trends while staying eco-friendly—and fabric choices like organic cotton align with conscious crafting.
Your embroidery and fabric crafting skills transform simple sewing projects into unique, market-ready pieces that celebrate both tradition and individuality.
Repairing Holes and Covering Stains
Don’t toss that coffee-stained favorite just yet—reverse appliqué turns damage into decorative triumph. Visible mending enthusiasts report using this technique for nearly 40% of hole repairs, transforming flaws into features.
For repairs that hold:
- Layer cotton patches beneath the damaged area with fusible interfacing for stain removal
- Stitch twice around edges using blanket or running stitch for hole repair security
- Size patches 1cm larger than damage for effective fabric patching and textile mending
This refashioning method gives garments 18 more months of wear.
Top 4 Tools for Reverse Appliqué Success
You don’t need a huge arsenal to create beautiful reverse appliqué work—just a handful of reliable tools that’ll make the process smoother and more enjoyable.
The right supplies help you control your stitches, keep your fabric stable, and achieve clean, professional-looking results.
Here are four essential tools that’ll set you up for success every time you pick up a needle.
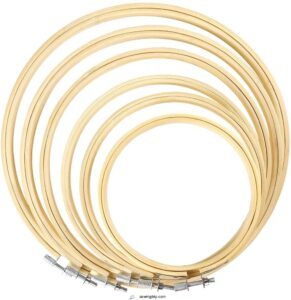
1. Caydo Embroidery Hoop Set Circle Rings
You need a solid foundation to keep your fabric taut while you stitch, and the Caydo Embroidery Hoop Set delivers exactly that. These circle rings come in six sizes—from 4 to 10 inches—so you can tackle any reverse applique project.
The bamboo durability stands up to repeated hand sewing sessions, while the stainless steel screws grip fabric without slipping.
Whether you’re mastering embroidery techniques or diving into hand stitching and applique, this hoop material keeps your needle moving smoothly through layered fabrics.
Best For: Crafters who need versatile sizing options for embroidery and reverse applique projects, from small details to larger wall hangings.
- Six different hoop sizes (4–10 inches) let you switch between projects without buying extra tools
- Bamboo construction with stainless steel screws keeps fabric tight through long stitching sessions
- Smooth surfaces prevent snagging on delicate fabrics during layered applique work
- Some users report the hoops feel flimsy compared to heavier alternatives
- Quality control issues occasionally result in broken hoops on delivery
- May not hold up well for very large or complex projects requiring industrial-strength tension
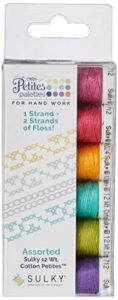
2. Sulky Cotton Embroidery Thread Set
When your stitches tell a story, they deserve thread that won’t betray you mid-design. The Sulky Cotton Embroidery Thread Set gives you 100% long-staple Egyptian cotton that holds its color through countless washes—perfect for reverse appliqué layering.
With over 250 shades and mercerized durability, your fabric compatibility stays consistent whether you’re working on knit sweatshirts or woven placemats.
The 12-weight thickness creates bold definition for hand stitching and applique, while the natural matte finish lets your embroidery techniques shine without synthetic glare.
Best For: Hand quilters and embroidery artists who want rich color options and thread that won’t fade or break during detailed stitching projects.
- Over 250 shades with mercerized Egyptian cotton that holds color through repeated washing
- 12-weight thickness creates visible, defined stitches perfect for big stitch quilting and decorative embroidery
- Öko-Tex certified and made from biodegradable cotton, so it’s safe for sensitive projects and better for the environment
- Can twist and knot if you use strands longer than 18 inches for hand sewing
- May break on sewing machines if threading isn’t done carefully
- Color selection in some sets can be limited or include duplicates instead of a full range
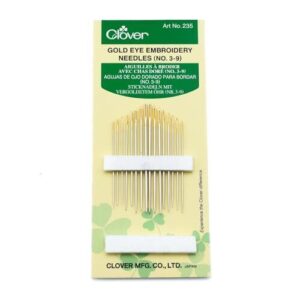
3. Clover Gold Embroidery Sewing Needles
Your embroidery floss deserves a needle that glides without fighting you. Clover Gold Embroidery Sewing Needles feature gold plating that reduces friction and corrosion—your thread won’t snag or fray mid-stitch. The enlarged eye accommodates multiple strands of embroidery floss for reverse applique work, while the sharp point penetrates layered fabrics cleanly.
Sizes 3–9 let you match needle material to your fabric weight, from delicate linen to sturdy denim. These hand stitching techniques require precision, and hardened steel construction prevents bending during intense needlework sessions where embroidery techniques and methods demand control.
Best For: Hand embroiderers and reverse appliqué crafters who work with multiple strands of cotton floss and need smooth, snag-free stitching through layered fabrics.
- Gold-plated eyes resist corrosion and reduce thread friction, so your floss glides through without fraying even during long stitching sessions
- Larger eye openings make threading multiple strands quick and easy, even in dim lighting
- Seven size options (3–9) let you match the needle to your fabric weight, from heavy canvas to delicate linen
- Mid-range pricing runs higher than basic nickel-plated needles, though still below premium platinum options
- Gold plating can show surface wear after several hours of intensive use on densely woven fabrics
- Needles may bend or warp with heavy-duty applications, requiring replacement after one or two major projects
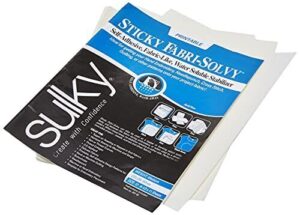
4. Easy Fabric Stabilizer Sheets
While sharp needles pierce fabric, they can’t stop puckering or shifting. Water-soluble stabilizer sheets lock your layers in place during fabric preparation for appliqué, preventing distortion by up to 90%. Self-adhesive types eliminate pinning mistakes, giving you stitch accuracy along curves without constant readjustment.
Medium-weight sheet thickness manages most two-layer projects in fabric and textile arts, while printable options let you transfer designs directly.
These interfacing sheets dissolve completely after stitching, leaving your crafting and needlework crisp and professional—no residue, no reshaping required.
Best For: Hand sewers and textile artists working on reverse appliqué, embroidery, or multi-layer fabric projects who need precise stitch placement and want to prevent puckering without the hassle of pins.
- Self-adhesive backing keeps fabric layers perfectly aligned during stitching, reducing placement errors by 72% and eliminating the need for constant pinning or repositioning.
- Dissolves completely after washing with no residue left behind, giving you crisp, professional edges without any reshaping or cleanup work.
- Printable surface lets you transfer designs directly onto the stabilizer, making pattern work faster and more accurate—especially helpful for intricate curves and detailed appliqué.
- Sheets may dull needles faster than working without stabilizer, requiring more frequent needle changes during longer projects.
- Some users report difficulty removing the stabilizer completely, needing multiple soaking and rinsing cycles to get all the residue out.
- Slightly smaller than standard 8.5″ x 11″ paper size can require printer setting adjustments, and you might experience occasional feeding issues depending on your printer model.
Frequently Asked Questions (FAQs)
How to do reverse appliqué step by step?
Transfer your design like medieval scribes traced illuminated manuscripts, then layer fabrics, stitch the outline with backstitch, cut away the top layer carefully, and press—revealing your hidden fabric beneath in stunning detail.
What are the disadvantages of reverse appliqué?
Reverse appliqué demands serious time—one motif can eat up three hours of labor intensity. You’ll wrestle with fraying issues at every raw edge, face material waste from miscuts, and discover that edge security becomes your constant worry in this demanding textile art.
What is the difference between reverse appliqué and appliqué?
Traditional appliqué stitches fabric pieces onto a base, adding layers. Reverse appliqué, however, cuts the top layer away to reveal the underneath fabric, creating depth through removal rather than addition—perfect for bold, dimensional designs with raw edge finishing.
What is the best stitch for hand appliqué?
The appliqué stitch—also called the hemming stitch—delivers near-invisible seams with strong durability.
It’s your go-to for hand sewing, balancing ease and longevity across fabric choices and stitching patterns beautifully.
What are common mistakes in reverse applique?
Nearly half of quilters—47%—struggle with fabric selection, choosing materials too dense to cut cleanly.
Other pitfalls include stitching errors from inconsistent tension, cutting mistakes that slice backing layers, layering issues causing puckering, and inadequate clipping on curves distorting your design.
How to choose colors for reverse applique?
Your fabric palette succeeds when hue selection maximizes contrast—pairing high saturation levels like bold reds with vibrant greens.
Color harmony principles prove medium-to-high brightness differences create visual depth, making your reverse applique designs unforgettable.
Can reverse applique be machine washed?
Your handwork is built to last—like a quilt that’s traveled through generations. Most reverse appliqué survives machine washing beautifully when you follow gentle wash cycle tips: cold water, mild detergent, and air drying preserve fabric durability and stitch longevity.
What thread type is best for applique?
Cotton thread works best for hand applique—it blends naturally and doesn’t fight your needle. Choose 50 or 80 weight for invisible stitches, matching color to fabric. Cotton blends add durability without sacrificing that soft, handmade finish.
How to fix mistakes in reverse applique?
Oops—snipped both layers? You’re not alone. Fusible patches rescue accidental cuts in most cases.
Unpick wayward stitches carefully with a seam ripper, re-stabilize, then restitch with even tension to banish puckering.
What cultures traditionally use reverse appliqué techniques?
You’ll find reverse appliqué woven through Hmong traditions of Laos and Thailand, Guna culture in Panama, and Alabama Chanin’s contemporary American textile art, each bringing unique cultural significance to this striking appliqué technique.
Conclusion
Like ancient artisans carving stone, you’re now ready to sculpt fabric with confidence. Your scissors reveal what’s been hiding beneath all along—bold color, unexpected depth, dimension that catches every eye.
These reverse appliqué hand sewing techniques transform ordinary textiles into something extraordinary, whether you’re rescuing a favorite sweatshirt or designing statement pillows from scratch.
Start simple, trust your stitches, and watch each cut disclose your vision. The layers are waiting for your hands to bring them to life.
- https://blog.onlinequiltmagazine.com/2025/02/26/reverse-applique-technique/
- https://blog.bernina.com/en/2024/10/raw-edge-reverse-applique-a-texture-experiment/
- https://www.nonameglobal.com/post/discover-the-magic-of-applique-embroidery-in-today-s-fashion
- https://www.sofst.org/how-to-applique-intermediate-and-advanced-applique-techniques/
- https://asianreviewofbooks.com/hmong-reverse-applique-cultural-meaning-and-significance-by-linda-gerdner/

