This site is supported by our readers. We may earn a commission, at no cost to you, if you purchase through links.
You’ll alternate knit and purl stitches in a simple checkerboard pattern – knit the purls and purl the knits from the previous row.
This creates a bumpy, seed-like texture that looks identical on both sides.
Cast on any number of stitches, then follow this rhythm: knit one, purl one across the row, then flip your work and repeat the opposite of what you see.
The beauty lies in its forgiving nature – mistakes practically disappear into the natural texture.
Once you’ve mastered this fundamental technique, you’ll discover why experienced knitters often return to this meditative stitch pattern for its surprising versatility.
Table Of Contents
Key Takeaways
- You’ll master the basic technique by alternating knit and purl stitches – you knit the purls and purl the knits from the previous row to create the distinctive bumpy texture that looks identical on both sides.
- You can work with any stitch count, but the pattern differs slightly – odd numbers let you repeat the same row every time, while even numbers require alternating between two different row instructions.
- You’ll find this pattern forgiving and beginner-friendly – mistakes practically disappear into the natural texture, and the fabric lies flat without curling, making it perfect for scarves, blankets, and borders.
- You can easily adapt seed stitch for circular knitting – just place stitch markers to track your progress and maintain consistent tension to avoid gaps between rounds when creating seamless tubes for hats and cowls.
Seed Stitch Basics
Seed stitch creates a textured, bumpy fabric by alternating knit and purl stitches in a simple two-row pattern.
You’ll love this beginner-friendly technique because it’s reversible, lies flat, and hides small mistakes while you’re learning.
Perfect for beginners – seed stitch is forgiving, reversible, and naturally lies flat!
Alternating Knit and Purl Stitches
Creating seed stitch knitting means alternating knit and purl stitches in a simple, rhythmic pattern.
You’ll work opposite stitches above each other – if you see a knit stitch below, you’ll purl above it, and vice versa.
The alternating knit and purl stitches create these key characteristics:
- Stitch Repeats follow a simple two-stitch pattern across each row
- Knit Patterns emerge as small bumps that resemble scattered seeds
- Purl Techniques alternate with knit stitches to prevent stacking
- Yarn Choices work well since the pattern accommodates various weights
Reversible Knitting Pattern
Your seed stitch pattern creates identical fabric on both sides—no right or wrong side exists.
This reversible knitting pattern makes it perfect for scarves, blankets, and borders where both sides show.
Unlike stockinette stitch that curls, seed stitch lies flat naturally.
The alternating knit and purl stitches create uniform knit textures regardless of which side faces forward, giving you versatile fabric types for any project.
Understanding the seed stitch basics is essential for mastering this technique and creating beautiful, textured fabrics.
Forgiving Pattern for Beginners
You’ll rarely worry about making mistakes with seed stitch’s forgiving nature.
Mistakes disappear into seed stitch’s bumpy texture—perfect for building knitting confidence.
This pattern naturally hides minor tension variations and small errors, making it perfect for building confidence.
- Error Tolerance: Uneven stitches blend into the textured pattern
- Stitch Flexibility: Easy to correct mistakes without unraveling rows
- Pattern Simplification: Only requires knit and purl knowledge
- Knit Forgiveness: Dropped stitches are less noticeable
- Beginner Tips: Practice reading your knitting to identify stitch types
Knitting Seed Stitch
Now you’re ready to put your knitting skills to work and create the distinctive bumpy texture that makes seed stitch so popular.
You’ll need just yarn, knitting needles, and basic knit and purl techniques to get started.
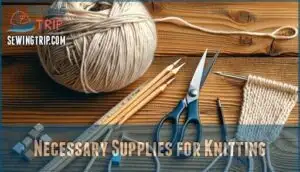
Necessary Supplies for Knitting
You’ll need basic supplies to get started with seed stitch. Grab some yarn in your preferred weight and fiber choices—worsted weight works great for beginners.
Pick knitting needles that match your yarn’s recommended size. Add scissors for cutting, a tapestry needle for weaving ends, and stitch markers if you’re planning circular needles work later.
Choosing the right yarn types is essential for a successful project.
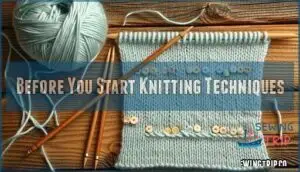
Before You Start Knitting Techniques
Before starting your seed stitch project, master these foundational knitting techniques.
Choose medium-weight yarn and US size 8 needles for best results. Practice tension control by keeping consistent pressure—not too tight, not too loose.
Make a small swatch first to test your gauge. Place stitch markers every ten stitches to track your progress.
These beginner knitting tips guarantee your caston techniques create even, professional-looking seed stitch patterns. To achieve a textured appearance, understand the seed stitch basics to improve your knitting skills, and master the seed stitch.
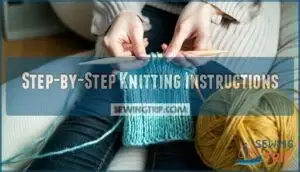
Step-by-Step Knitting Instructions
Now you’ll follow the seed stitch pattern with your chosen Knitting Tools and proper Needle Size.
Cast on your desired Stitch Count, then begin Row 1: knit one, purl one across.
Row 2: purl one, knit one.
This seed stitch tutorial creates the classic texture through alternating stitches.
Maintain consistent Tension Control throughout your knitting stitch patterns.
Your Yarn Selection affects the final appearance, so practice this seed stitch pattern until the knitting instructions feel natural.
To achieve the best results, this is vital for using the right knitting needle sizes for your project.
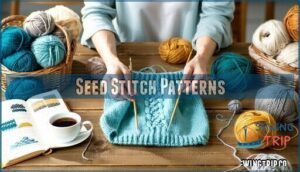
Seed Stitch Patterns
Once you’ve got the hang of basic seed stitch, you’ll want to know about the different patterns you can create.
The main difference comes down to whether you’re working with an even or odd number of stitches on your needle.
Even Seed Stitch Pattern
Even seed stitch works with an even stitch count, creating perfect symmetry in your knitting.
This seed stitch pattern delivers consistent fabric texture through simple row repeats that make seed stitch knitting accessible for beginners.
Here’s your even seed stitch tutorial:
- Row 1: Knit 1, purl 1 across all stitches
- Row 2: Purl 1, knit 1 across all stitches
- Repeat: Continue alternating these two rows for desired length
Odd Seed Stitch Pattern
Working with an odd stitch count creates a simpler row repeat for your seed stitch pattern.
Cast on any odd number of stitches, then knit one, purl one across every single row.
This pattern adjustment eliminates the need to alternate between different row instructions, allowing your seed texture to emerge naturally as knits sit above purls throughout your knitting.
These seed stitch tips make odd seed stitch designs perfect for beginners seeking straightforward seed stitch knitting without complex pattern tracking.
Seed Stitch Variations
Beyond basic seed stitch lies a world of textured fabrics waiting for exploration.
Double seed stitch creates chunkier fabric effects through four-row repeats, while seeded rib combines ribbing with seed stitch texture for elastic edges.
Chevron seed stitch arranges bumps in zigzag patterns, and diamond brocade uses strategic stitch modifications to form geometric reversible seed stitch designs.
To achieve the desired texture and drape, consider using seed stitch techniques for your projects with seed stitch to create the perfect drape.
Knitting in The Round
You’ll love knitting seed stitch in the round because it creates seamless tubes perfect for hats and cowls.
The technique requires just a few adjustments to the flat knitting pattern, but the results are worth it.
Method for Circular Knitting
Circular needles work perfectly for seed stitch pattern when knitting in the round.
Cast on your stitches, place a stitch marker to track your starting point, and join without twisting.
The reversible knit stitch pattern flows seamlessly around your project.
Keep yarn tension consistent and manage your cable length properly. You’ll knit rounds continuously, creating beautiful textured fabric without seams.
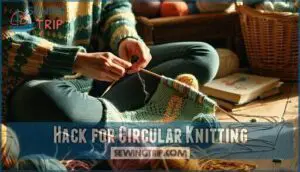
Hack for Circular Knitting
Here’s a simple circular tips hack that’ll save your sanity: place stitch markers every 20-30 stitches to track your seed stitch pattern progress.
When knitting in the round, you can’t easily see your work’s wrong side, making it tricky to spot mistakes.
These needle tricks break your project into manageable chunks, so you’ll catch errors before they multiply, which is a result of smart yarn management.
This approach means fewer headaches later, as it allows for a more controlled and error-free knitting experience.
Avoiding Gaps in Circular Knitting
Gaps between your first and last stitches can spoil your beautiful seed stitch pattern.
Keep your yarn snug but not tight when moving between rounds on circular needles.
- Pull your working yarn firmly after completing each round to close any visible gaps
- Use stitch markers to track your beginning round position for consistent yarn management
- Maintain steady purl tension throughout your reversible knit stitch pattern for even fabric
Seed Stitch Texture
You’ll instantly recognize seed stitch by its distinctive bumpy texture that looks like tiny seeds scattered across your fabric.
This unique pattern creates a flat, stable surface that won’t curl at the edges like other knitting stitches.
What is Seed Stitch Texture
Something magical happens when you alternate knit and purl stitches—each bump creates a textured landscape that feels like tiny seeds scattered across fabric.
This seed stitch texture forms through deliberate knit purl balance, where stitches never stack vertically.
| Texture Quality | Description |
|---|---|
| Visual Appeal | Small bumps create organic seed-like surface |
| Tactile Feel | Firm yet flexible with moderate stretch |
| Fabric Formation | Lies completely flat without curling edges |
| Stitch Repeatability | Consistent texture patterns throughout project |
| Versatility | Perfect for borders, scarves, and structured pieces |
Your reversible knit stitch pattern emerges from this simple alternating rhythm, making knitting seed stitch an ideal foundation for mastering texture patterns in your stitch knitting guide.
Seed Stitch Vs Moss Stitch
You’ll spot key differences when comparing these knitting stitches.
While seed stitch alternates every row, American moss stitch stacks two identical rows before switching.
This pattern difference creates distinct texture contrast between the two techniques.
Understanding the seed stitch basics is essential for mastering these stitches.
- Stitch Comparison: Seed stitch uses a two-row repeat, moss stitch needs four rows
- Pattern Differences: Seed stitch creates immediate knit purl alternation across rows
- Fabric Analysis: Moss stitch produces longer, more stretched texture than seed stitch’s dense bumps
Preventing Ribbing Effect
Instead of letting your seed stitch morph into ribbing, focus on stitch tension and yarn choice for proper fabric drape.
When knits stack over knits, you’ve created ribbing—not the reversible knitting texture you want.
Check your knit density and maintain consistent edge control.
Remember: knit the purls, purl the knits to prevent this common mistake, ensuring proper edge control.
Common Issues and Solutions
Even experienced knitters sometimes run into trouble with seed stitch, but don’t worry—these problems have simple fixes.
You’ll learn how to spot common mistakes and get back on track quickly.
Ribbing Transformation
Even experienced knitters can watch their beloved seed stitch morph into ribbing when they accidentally stack identical stitches. This Fabric Evolution happens when you knit the knits and purl the purls instead of doing the opposite, creating unwanted vertical columns that destroy the scattered texture.
- Stitch Modification occurs when you work two consecutive knit or purl stitches, breaking the alternating pattern
- Texture Shift begins at row starts—purling when you should knit initiates the Knit Transformation to ribbing
- Pattern Adaptation requires "reading" your stitches: knit the purl bumps, purl the knit V-shapes
- Ribbing contracts fabric width while seed stitch lies flat—a clear sign of knitting stitch techniques gone wrong
- Reversible knitting demands consistent opposition: if it looks like a knit, purl it; if it’s a purl bump, knit it
Understanding hand stitched techniques can also help in mastering seed stitch knitting by applying similar principles of texture and pattern creation.
Losing Place in Pattern
When you lose your spot in the seed stitch pattern, don’t panic—it happens to everyone!
Look at your knitting to identify knit and purl stitches, then continue the alternating pattern.
Stitch markers help track pattern repeats, while row counting prevents confusion.
| Problem | Quick Fix |
|---|---|
| Can’t tell knit from purl | Knit stitches look like V’s, purls like bumps |
| Lost count of rows | Use a row counter or tally marks |
| Pattern looks wrong | Check if you’re knitting purls and purling knits |
| Tension varies | Relax your grip and maintain consistent yarn management |
Binding Off in Pattern
When you finish your seed stitch project, binding off in pattern maintains that seamless edge you’ve worked so hard to create.
Simply knit the knit stitches and purl the purl stitches as they appear while casting off, this bind off tip guarantees your edge finishing matches your stitch pattern perfectly.
Providing stitch security and pattern completion without disrupting the beautiful texture is crucial for a professional finish, and this method ensures that your project looks complete and polished, with a perfect edge finishing.
Mastering Seed Stitch
You’ve learned the basics of seed stitch, and now it’s time to polish your skills with advanced techniques that’ll make your knitting look professional.
These mastery tips will help you tackle tricky situations like working with odd stitch counts and memorizing the pattern without constantly checking your notes.
Tips for Memorizing Seed Stitch
Memorizing seed stitch becomes second nature when you focus on reading your knitting rather than counting rows. The "knit the purls, purl the knits" hack eliminates pattern recall stress completely. Your hands develop knit rhythm through consistent practice, making stitch memory automatic.
- Pattern Recall: Use the hack method after your setup row – knit any purl stitch you see and purl any knit stitch from the previous row
- Stitch Memory: Practice identifying V-shaped knit stitches versus bumpy purl stitches on sample swatches before starting projects
- Memorization Tricks: Place a stitch marker after your first row to remind yourself when the "opposite stitch" rule begins
Casting on for Seed Stitch
When starting your seed stitch project, choose the Long Tail Cast On method for clean edges.
For flat knitting, cast on an odd number of stitches to keep pattern instructions identical on both sides.
Circular projects need even stitch counts to prevent starting and ending with identical stitches.
Maintain consistent yarn tension throughout casting on to create uniform seed stitch edges that won’t pucker or stretch.
Mastering the Long Tail Cast technique involves understanding casting on methods to achieve professional results.
Knitting Seed Stitch With Odd Stitches
Working with an odd number of stitches makes seed stitch beautifully symmetrical.
Cast on odd number of stitches, then knit 1 purl 1 pattern across every row, ending with knit 1.
This creates perfect knit purl balance and maintains the reversible pattern naturally.
Use a stitch marker to track your progress through row repeat patterns, especially when you’re learning this seed stitch edge technique.
Frequently Asked Questions (FAQs)
Is seed stitch knit one purl one?
Here’s the straight dope: seed stitch isn’t simply knit one, purl one.
You’ll alternate knit and purl stitches, but you’re "reading" your work—knitting the purls and purling the knits to create that bumpy texture.
Do you need an odd number of stitches for seed stitches?
No, you don’t need an odd number of stitches for seed stitch.
You can work it with either even or odd stitch counts, though the instructions differ slightly between the two.
What’s the difference between moss stitch and seed stitch?
Two peas in a pod? Not quite!
Seed stitch alternates knit-purl every stitch and row, creating identical sides.
Moss stitch works knit-purl for two rows, then switches, making a chunkier texture with more definition.
How do I substitute seed stitch for other stitch patterns in a pattern?
Replace stitch-for-stitch when gauge matches. Seed stitch uses more yarn and creates less stretch than stockinette. Add extra rows for length since it’s denser. Check pattern fit carefully before committing.
What is the best cast on method for seed stitch?
Long-tail cast-on works beautifully for seed stitch because it creates an even, stable edge that won’t curl. You’ll get clean, professional-looking results that perfectly complement the textured stitch pattern.
How do I adapt seed stitch for lace knitting?
Incorporate seed stitch sections between lace panels rather than mixing them directly. The seed stitch’s stable structure provides rest areas and frames delicate lace motifs beautifully, creating stunning textural contrast.
Can you fix dropped seed stitches?
Surprisingly, dropped stitches happen to everyone.
You can fix them by picking up the dropped stitch with your needle, then working up each ladder rung by pulling the horizontal strand through the loop above until you reach your current row, which involves picking up the dropped stitch and working through the ladder rungs.
How do you increase in seed stitch?
Increases blend seamlessly into seed stitch by maintaining the alternating pattern.
Make your increase, then continue the knit-purl sequence.
The new stitch should oppose its neighbor—if you’re increasing after a knit, purl the new stitch, to maintain the alternating pattern.
What yarn weight works best for seed stitch?
DK weight yarn works best for seed stitch because it clearly showcases the textured bumps while maintaining good stitch definition.
You’ll get crisp alternating knits and purls that make the pattern pop beautifully.
How do you decrease in seed stitch?
Maintain the stitch pattern while decreasing by working two stitches together in pattern. If you’re on a knit stitch, knit two together; on a purl, purl two together.
Conclusion
Mastering seed stitch knitting opens doors to countless projects, from cozy scarves to elegant blankets.
You’ve learned the basics, practiced the techniques, and discovered solutions to common problems.
Now you can create beautiful, textured fabric with confidence.
Remember to knit the purls and purl the knits as you work each row.
With practice, this versatile pattern becomes second nature.
Start your next project today and enjoy the meditative rhythm of seed stitch knitting.
- https://www.allaboutami.com/knitting-beginners-knit-seed-stitch
- https://www.dummies.com/article/home-auto-hobbies/crafts/knitting-crocheting/how-to-knit-the-seed-stitch-197594
- https://www.yarnspirations.com/blogs/how-to/how-to-seed-stitch-in-knitting
- https://sheepandstitch.com/library/moss-stitch-for-beginners
- http://www.ravelry.com/patterns/library/gap-tastic-cowl

