This site is supported by our readers. We may earn a commission, at no cost to you, if you purchase through links.
The secret lies in preparation—proper grain alignment and stabilizing slippery fabrics can make or break your project’s final fit.
Table Of Contents
- Key Takeaways
- Essential Tools for Cutting Fabric
- Preparing Fabric Before Cutting
- Choosing The Right Cutting Technique
- How to Read and Place Sewing Patterns
- Cutting Straight Lines and Shapes
- Cutting on The Bias for Flexibility
- Preventing Common Fabric Cutting Mistakes
- Advanced Fabric Cutting Techniques
- Maintaining and Sharpening Cutting Tools
- Step-by-Step Guide to Cutting Fabric
- Frequently Asked Questions (FAQs)
- Conclusion
Key Takeaways
- Invest in quality cutting tools – You’ll get professional results with sharp fabric scissors for detailed work and rotary cutters for straight lines, but keep blades sharp and replace rotary blades every 4-6 projects.
- Prepare your fabric properly – Wash, press, and align the grain before cutting. Proper preparation prevents shrinkage, distortion, and fitting issues in your finished project.
- Master pattern placement techniques – Save fabric and ensure a proper fit by understanding grainlines, using pattern weights instead of pins, and planning efficient layouts that minimize waste.
- Choose the right cutting method for your fabric – Different materials require different approaches: bias cutting for flexibility, layered cutting for multiple pieces, and special techniques for delicate or slippery fabrics.
Essential Tools for Cutting Fabric
You’ll need the right tools to transform fabric from flat material into precise pattern pieces that fit together perfectly. Sharp fabric scissors, rotary cutters, cutting mats, and accurate marking tools form the foundation of clean, professional-looking sewing projects.
Fabric Scissors Vs. Rotary Cutters
Fabric scissors offer exceptional precision cutting for detailed work, while rotary cutters excel at straight lines and multiple layers. Your scissor sharpness affects cut quality—invest in high-carbon steel blade materials for durability. Handle ergonomics matter during long cutting sessions. Rotary cutters require cutter safety practices since blades stay exposed. Choose fabric scissors for curves, rotary for efficiency. Both tools master different sewing techniques perfectly. Mastering proper cutting tool essentials is vital for achieving professional results in sewing projects.
Cutting Mats and Rulers
A quality cutting mat protects your work surface and keeps rotary cutter blades sharp longer. Self-healing mats with grid alignment help you measure accurately without constantly reaching for rulers. Choose 18×24 inches minimum for most sewing projects. Clean mats regularly to maintain their self-healing properties.
Pair with clear acrylic edge rulers for perfect grainline alignment and precise measurements every time. Using the right cutting mat tools can substantially improve your sewing experience.
Marking Tools for Accuracy
Your cutting mat sets the stage, but marking tools transform your fabric into a precise canvas. Chalk markers and fabric pens let you trace sewing patterns accurately onto any material. Sewing gauges help measure seam allowances, while tracing wheels transfer pattern markings through paper.
These tools work alongside your rotary cutter and pattern weights, ensuring your grainline stays true and cuts stay sharp.
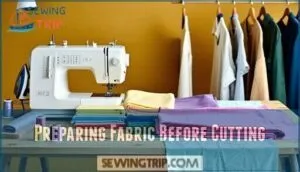
Preparing Fabric Before Cutting
Success with fabric cutting starts with proper preparation – it’s the difference between professional results and frustrating mistakes.
You’ll save time and fabric by washing, pressing, and stabilizing your materials before making that first cut.
Washing and Ironing Fabric
Before cutting your fabric, you’ll want to prep it properly to avoid surprises later. Start with Pre Wash Treatment – wash your fabric using the same method you’ll use for the finished garment. This prevents Fabric Shrinkage from ruining your hard work.
After washing, iron while damp for easier pressing. Use Steaming Techniques for delicate fabrics that can’t handle direct heat.
Aligning and Straightening Grain
After washing and pressing, you’ll need proper grain alignment for professional results. The grainline runs parallel to the selvage edge, while crossgrain runs perpendicular. Here’s your roadmap:
- Find the selvage edges – these finished edges show your fabric’s natural grainline
- Square up corners using a cutting mat’s grid lines for precision cutting techniques
- Pull gently on bias areas to remove stretch and restore fabric’s original shape
- Check crossgrain alignment by folding fabric selvage to selvage – edges should match perfectly
- Mark grain lines with chalk before placing your sewing pattern for straight cut methods
Stabilizing Slippery Materials
Silky satins and slick fabrics love to slip away from your sewing scissors like butter on a hot pan. Use tissue paper underneath or spray-on fabric stabilizers to tame these rebels. Pin through both layers, keeping your rotary cutter steady.
Interfacing techniques work too—fusible interfacing adds grip without bulk. Material clamping helps maintain grainline alignment while cutting crossgrain pieces.
Choosing The Right Cutting Technique
You’ll choose from three main cutting approaches based on your project’s needs and fabric type. Manual cutting with scissors gives you complete control for detailed work, while rotary cutters speed up straight lines and multiple layers.
Manual Cutting Methods
Mastering Manual Skills with traditional Hand Cutting Tools transforms your fabric preparation into an art form. Sharp fabric scissors deliver outstanding Precision Techniques when you follow the grainline carefully. Keep blades perpendicular to the fabric, never lifting the material while cutting. This method offers superior control over intricate curves and detailed sewing patterns, ensuring remarkable Cutting Accuracy every time.
Understanding the importance of fabric grain alignment is vital for achieving professional results in sewing projects.
Rotary Cutting for Straight Lines
Through careful technique and proper tools, your rotary cutter becomes the benchmark for straight-line precision. This method delivers up to 40% faster cuts than scissors while maintaining professional accuracy across multiple fabric layers.
Essential rotary cutting fundamentals:
- Cutting Mat Selection requires a 24" x 36" self-healing mat to protect blades and surfaces
- Straight Edge Techniques demand transparent acrylic rulers with clear grainline markings for accurate alignment
- Rotary Blade Maintenance means replacing blades when cuts drag or show frayed edges
- Fabric Grain Management starts with proper pressing and selvage alignment before any cuts
For vital results, it’s essential to choose the right best rotary cutter for your specific needs.
Die and Laser Cutting Overview
Die cutting tools and laser cutting machines modernize fabric cutting for mass production. These automated systems use precision engineering to stamp identical shapes from multiple fabric layers simultaneously. While your rotary cutter and fabric scissors work perfectly for home sewing patterns, industrial die cutting refines fabric usage and maintains consistent grainline alignment.
Laser cutting machines offer precise accuracy for your sewing kit projects. The precision of laser cutting machines relies on sophisticated laser cutting technology to produce intricate designs.
How to Read and Place Sewing Patterns
Reading sewing patterns correctly prevents costly fabric waste and guarantees your finished project fits properly. You’ll need to understand grain lines, plan efficient layouts, and choose between pinning or weighing methods to secure your pattern pieces.
Understanding Pattern Grain Lines
Pattern alignment starts with reading the grainline arrow on your sewing pattern. This straight line shows you exactly how to position each piece on your fabric for proper drape and fit.
Here’s your Grain Line Basics checklist:
- Find the grainline arrow – Look for the long straight line with arrows on each pattern piece
- Align with fabric selvage – Position the arrow parallel to your fabric’s finished edge
- Measure twice, cut once – Use a ruler to verify the grainline stays parallel across the entire pattern piece
- Pin at both ends – Secure the pattern along the grainline before cutting to prevent shifting
Proper Fabric Orientation through Pattern Alignment guarantees your finished garment hangs correctly and maintains its shape.
Straight Grain Cutting depends on accurate Grain Line Management from the start.
Pattern Layout for Minimal Waste
Smart fabric optimization starts with strategic layout planning. Arrange your sewing pattern pieces like puzzle pieces, fitting them together tightly while respecting grainline directions. Fold fabric in half when possible to cut matching pieces simultaneously. Place larger pattern pieces first, then fill gaps with smaller ones. This cutting strategy increases fabric efficiency and reduces waste for beginners and experts alike.
Pinning Vs. Weighing Patterns
You’ve got two solid methods for keeping sewing patterns in place during cutting. Traditional fabric pinning works well for most projects, giving you precise pin placement along pattern edges. However, pattern weights offer better weight distribution across larger pieces, preventing fabric shifting without creating holes.
Pattern weighing is particularly handy for delicate fabrics where pins might damage the material. Both methods boost cutting accuracy when used properly with your sewing essentials.
Cutting Straight Lines and Shapes
You’ll master straight cuts and perfect shapes once you understand the fundamentals of proper cutting technique and tool selection. Whether you’re cutting flowing curves or crisp corners, the right approach transforms your fabric pieces from rough approximations into professional-looking components.
Tips for Accurate Straight Cuts
Sharp fabric scissors are your best friend for achieving ruler-straight cuts. Keep your blade perpendicular to the fabric while following the grainline for perfect Fabric Grain Alignment. Use Precision Measuring Tools like clear quilting rulers as guides.
Never lift fabric while cutting—this prevents Cutting Error Prevention mishaps. Apply steady, confident pressure through each slice, ensuring your rotary cutter stays true to marked lines for impeccable Straight Edge Techniques.
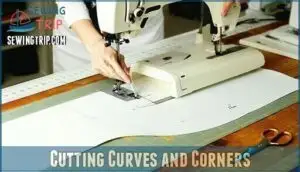
Cutting Curves and Corners
Mastering curves and corners transforms your sewing from amateur to professional. These challenging cuts require patience and the right approach to achieve smooth, professional results.
- Use fabric scissors for curves – Rotary cutters work best on straight lines, while scissors give you control around curves
- Cut in small increments – Make several short snips rather than long cuts to maintain smooth curve accuracy
- Follow the grainline carefully – Mark your fabric notching points before cutting to guarantee proper alignment during assembly
- Leave extra seam allowance – Add an extra ⅛ inch when cutting curves to account for trimming and adjustments during construction
Using Templates for Consistency
Templates transform your sewing from guesswork into precision. You’ll cut identical pieces repeatedly without measuring each time. Templates boost Template Accuracy and Cutting Efficiency while maximizing Fabric Optimization through consistent Pattern Repeatability.
| Template Type | Best For | Tools Needed |
|---|---|---|
| Cardboard | Basic shapes, curves | Fabric scissors, pencil |
| Plastic/Acrylic | Repeated use, durability | Rotary cutter, ruler |
| Paper | Single-use patterns | Sewing patterns, weights |
Templates enable Precision Crafting by eliminating human error in measurements. Place your template on fabric, trace around edges, then cut with confidence using proper sewing techniques and quality sewing tools.
Cutting on The Bias for Flexibility
Bias cutting transforms rigid fabrics into flowing, form-fitting pieces by cutting at a 45-degree angle to the fabric’s grain. You’ll discover this technique creates stretch and drape that’s perfect for fitted garments and elegant curves.
What is Bias Cutting?
Bias cutting means slicing fabric at a 45-degree angle to the grainline, creating stretchy textiles with remarkable flexibility. This cutting technique transforms rigid woven fabric into flowing material that drapes beautifully around curves. Unlike straight grain cuts, bias fabric moves with your body, making flexible seams possible.
Proper grain alignment at this diagonal angle reveals the fabric’s hidden stretch potential for elegant sewing projects. To achieve professional results, understanding bias cutting techniques is essential for working with curved edges and stretchy fabrics.
When to Use Bias Cuts
You’ll want bias cuts when creating garments that need to hug curves or flow gracefully. Think fitted bodices, draped necklines, and flowing skirts that move with your body.
Bias cutting tips include using this technique for binding tape, stretchy waistbands, and curved seams where fabric stretch prevents puckering. The grainline manipulation allows textile manipulation that straight cuts can’t achieve, giving you flexible seams for professional garment draping results.
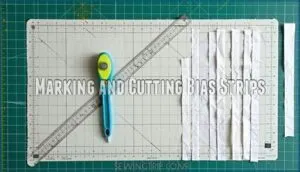
Marking and Cutting Bias Strips
Precise Bias Strip Marking starts with identifying your fabric grain. Use a rotary cutter and ruler to mark 45-degree angles from the grainline. Measure strip width consistently—typically 1.5 to 2 inches for binding. Cut with confidence, keeping your blade sharp.
These Bias Techniques create flexible strips perfect for curves and binding edges in sewing projects. Understanding the fabric grain basics is essential for achieving professional results in sewing on the bias.
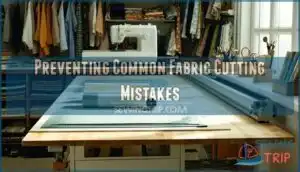
Preventing Common Fabric Cutting Mistakes
Even experienced sewers can make cutting mistakes that waste fabric and ruin projects. These common errors happen when you rush the process or skip important preparation steps.
Avoiding Pattern Shifting
Pattern shifting happens when your sewing patterns move during cutting, creating misaligned pieces that won’t fit together properly. Secure fabric stabilization starts with a flat cutting surface and proper pattern alignment along the grainline.
Use pattern weights instead of pins when possible—they won’t shift like pins can. Keep fabric tension control steady by avoiding pulling or stretching while cutting.
Your rotary cutter or sewing scissors work best when fabric stays completely still throughout each cut.
Preventing Fabric Fraying
When sharp sewing scissors slice through fabric, they can trigger unwanted fraying that’ll sabotage your project’s polished finish. Smart sewers use fray prevention methods like pinking shears or fabric sealing products applied immediately after cutting.
Edge finishing techniques include serging raw edges or applying fray-resistant treatments before handling. Cut edge management becomes essential with delicate materials—consider your grainline direction and switch to a rotary cutter for cleaner cuts that resist unraveling.
Checking Measurements Before Cutting
Double-check your measurements before making any cuts—this simple step prevents costly fabric shrinkage mistakes and cutting errors. Use ruler calibration to verify accuracy, especially when measuring yourself for custom sewing patterns.
Check grainline alignment twice, as precision marking saves fabric and guarantees proper fit. Remember: measure twice, cut once—this old sewing basics wisdom prevents heartbreak.
Advanced Fabric Cutting Techniques
You’ve reached the point where basic cutting skills evolve into specialized techniques that separate novice sewers from confident creators. These sophisticated methods let you tackle complex projects with precision, from cutting multiple identical pieces at once to working with temperamental fabrics that seem to have a mind of their own.
Layered Cutting for Multiple Pieces
Stacking four layers of fabric simplifies your workflow when cutting multiple identical pieces. Use sharp sewing scissors or a rotary cutter for clean, consistent cuts through layered fabric. Pin patterns securely along the grainline to prevent shifting during batch cutting.
This precision technique enhances fabric optimization while ensuring each piece maintains professional accuracy for your project. Understanding fabric grain importance is essential for achieving precise cuts and professional results.
Fussy Cutting for Pattern Placement
Fussy cutting transforms ordinary sewing patterns into stunning masterpieces by strategically positioning fabric motifs. You’ll use transparent rulers and rotary cutters to isolate specific designs—florals, geometrics, or illustrations—for intentional placement.
This technique requires careful fabric matching and pattern alignment to achieve cutting accuracy. Position templates over desired motifs, ensuring grainline alignment prevents distortion.
Your placement strategies enhance textile selection impact, creating professional results that showcase precision craftsmanship.
Cutting Delicate and Specialty Fabrics
With delicate fabrics like silk, you’ll need a feather-light touch and sharp tools. Use tissue paper under sheer materials to prevent slipping, and try a rotary cutter on quilting cotton for clean edges.
For Velvet Handling, cut single layers with nap direction marked. Lace Trimming requires careful positioning along the grainline.
Stretchy Material Techniques work best with ballpoint blades that won’t snag delicate fibers.
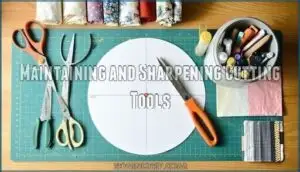
Maintaining and Sharpening Cutting Tools
Your cutting tools work hard, and they’ll reward proper care with years of precise cuts. Clean blades regularly and know when to replace them to keep your fabric cutting smooth and accurate.
Cleaning Fabric Scissors and Rotary Blades
Clean fabric scissors and rotary cutter blades regularly to prevent fabric residue buildup and maintain sharp edges. Wipe blades with rubbing alcohol or specialized cleaning solutions after each project. For scissor sanitizing, use a soft cloth to remove lint and adhesive. Apply a thin layer of oil to prevent rust. Store your sewing tools properly to extend blade life and keep your sewing essentials performing like new.
Proper maintenance involves understanding rotary cutter blade types to guarantee superior performance.
When to Replace Blades
Recognition marks the difference between sharp tools and wasted effort. Replace rotary cutter blades after 4-6 projects when you notice skipping cuts or increased cutting force. Dull blade effects include frayed edges and fabric tugging—clear sharpness testing methods for your sewing tools.
Fabric scissors need replacement when they produce jagged cuts or require excessive pressure. Following a blade replacement schedule prevents project delays and maintains precision in your sewing kit.
Safe Storage Practices
Protect your investment by storing cutting tools properly—sharp blades deserve respect and careful handling. Your sewing essentials will last longer with thoughtful Workspace Organization and smart Storage Solutions.
- Blade guards on rotary cutters – Keep that razor-sharp edge covered when not slicing fabric
- Magnetic strips for sewing scissors – Wall-mounted storage keeps blades accessible yet protected
- Dedicated sewing kit compartments – Separate sharp tools from other sewing tools to prevent damage
Climate-controlled storage is essential to avoid damp basements that cause rust, ensuring your Cutting Tool Care routine remains effective.
For Material Preservation, consider Fabric Folding around delicate pieces – Wrap specialty blades in soft cloth to protect them from damage.
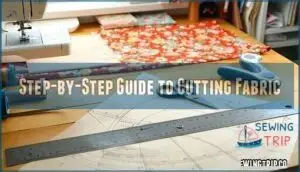
Step-by-Step Guide to Cutting Fabric
You’ll master fabric cutting by following these three essential steps that turn patterns into perfect pieces.
This systematic approach guarantees accuracy while preventing costly mistakes that can ruin your entire project.
Setting Up Your Workspace
Your Sewing Station becomes the foundation for precision cutting when properly organized. Choose a large, flat surface at comfortable standing height for your Workspace Organization. Good Lighting Essentials prevent eye strain and cutting errors—position your table near a window or add bright LED lamps.
Keep your Sewing Tools within arm’s reach using Storage Solutions like magnetic strips for scissors and divided containers for rulers. An Ergonomic Setup reduces fatigue during long cutting sessions.
Measuring and Marking Fabric
With your workspace ready, accurate Fabric Measurement becomes your foundation for successful sewing patterns. Use proper Marking Tools and verify Grain Alignment before making any marks. Precision Cutting starts with careful measuring yourself against pattern requirements.
- Check grainline direction – Align fabric grain with pattern arrows using measuring tape
- Mark seam allowances – Use fabric markers to note cutting lines clearly
- Double-check measurements – Verify pattern dimensions match your Choosing Fabric width
- Note pattern matching points – Mark notches and alignment dots for assembly
- Record Fabric Notation – Label pieces to avoid confusion during cutting
Cutting Out Pattern Pieces
Precision becomes your superpower when cutting out pattern pieces. Position your sharpest fabric scissors at a slight angle, cutting just inside the pattern lines for perfect seam allowance accuracy. Keep one hand firmly anchoring the pattern while your cutting hand moves smoothly. Remember—sewing patterns for beginners work best when you cut confidently without stopping mid-curve to prevent jagged edges.
Frequently Asked Questions (FAQs)
How do I cut fabric without a cutting mat?
Use a large table or clean floor surface with a cutting board underneath. Measure carefully and weigh down your pattern pieces with books or weights to prevent shifting during cuts.
Whats the difference between cutting knits and wovens?
Knits stretch when cut because they’re made from interlocking loops, requiring sharp scissors and gentle handling. Wovens have stable grain lines and won’t stretch, allowing firmer pressure during cutting.
How do I cut fabric with limited workspace?
**Folding fabric transforms tiny tables into cutting champions.
You’ll fold your fabric accordion-style, matching pattern pieces carefully. Use rotary cutters for precision through multiple layers. Pin strategically to prevent shifting. This technique lets you cut efficiently even on cramped kitchen tables.
Can I cut multiple fabric types together?
You can cut different fabrics together if they’re similar weight and grain direction. However, slippery or stretchy fabrics will shift, causing uneven cuts. Stack similar materials only for best results.
What angle should I hold my scissors?
Perfect positioning prevents problematic cuts. Hold your scissors at a 45-degree angle to the fabric surface, keeping blades perpendicular to your cutting line. This angle gives you better control and creates cleaner edges without fabric drag.
Conclusion
Like a sharp blade cutting through silk, mastering sewing fabric cutting techniques transforms your projects from amateur attempts into professional-quality creations. Precision starts with preparation—washing, pressing, and aligning grain properly sets the foundation.
Sharp tools, whether scissors or rotary cutters, paired with accurate marking and pattern placement, guarantee clean cuts every time. Remember to maintain your equipment regularly and practice these fundamental techniques.
With consistent application of these sewing fabric cutting techniques, you’ll achieve the precise, professional results every flawless project deserves.
- https://www.textileschool.com/464/fabric-cutting-techniques/
- https://ljdesignmfg.com/different-types-of-textile-cutting-methods/
- https://elizabethsuzann.com/blogs/blog/the-often-overlooked-impact-of-fabric-cutting-on-clothing-quality
- https://www.contrado.com/blog/most-common-sewing-mistakes/
- https://www.futuremarketinsights.com/reports/fabric-cutting-machines-market

