This site is supported by our readers. We may earn a commission, at no cost to you, if you purchase through links.
Zigzag stitching works perfectly for most fabrics – set your machine to 3-5mm width and 1.5-2.5mm length for strong coverage.
For lightweight materials, French seams create that professional store-bought look by encasing raw edges completely.
Pinking shears offer the quickest fix, creating zigzag cuts that naturally slow fraying.
Don’t skip edge finishing – it’s what separates amateur projects from garments that’ll last years through countless washes.
The right technique depends on your fabric weight and project goals, but once you know which method works when, your seams will stay crisp and your confidence will soar.
Table Of Contents
Key Takeaways
- Master three core techniques – You’ll prevent fraying with zigzag stitching (3-5mm width), French seams for lightweight fabrics, and pinking shears for quick fixes that naturally slow unraveling.
- Match your method to fabric type – You’ll get better results when you use gentle zigzag stitches on delicate materials, serged edges for heavy fabrics, and French seams for sheer fabrics like chiffon.
- Don’t skip edge finishing – You’ll extend your garment’s life significantly since proper edge finishing prevents fraying, maintains shape through multiple washes, and creates professional-looking seams that rival store-bought quality.
- Practice builds confidence – You’ll achieve professional results faster when you test techniques on fabric scraps first, choose quality tools like sharp scissors, and maintain consistent tension settings on your machine.
Sewing Fabric Edges
You’ll face frustrating fabric edges that fray and unravel without proper finishing techniques. Raw edges weaken seams and create messy projects that won’t last through regular washing and wear.
Importance of Finishing Raw Edges
Proper edge finishing transforms fabric edges from weak points into professional assets.
You’ll prevent fabric fraying while boosting comfort improvement and wear reduction.
Professional edge finishing prevents fraying while extending your fabric’s life and comfort
Raw fabric edges deteriorate quickly without proper seam finishes, but finished edges deliver cost savings through extended garment life.
- Professional Look: Clean edges create store-bought quality in homemade garments
- Comfort Improvement: Eliminates scratchy raw fabric edges against skin
- Aesthetic Appeal: Smooth, finished seams enhance overall garment appearance
- Fraying Prevention: Stops threads from unraveling during washing and wearing
Preventing Fraying and Unraveling
Raw fabric edges unravel quickly without proper attention.
Pinking shears create zigzag cuts that slow fabric fraying naturally.
Zigzag stitching locks thread fibers in place for better seam durability.
Fray Check liquid seals cut edges instantly.
Adjust thread tension carefully on delicate fabrics to prevent puckering while maintaining fabric stabilization.
| Method | Speed | Durability |
|---|---|---|
| Pinking Shears | Quick | Medium |
| Zigzag Stitch | Medium | High |
| Fray Check | Instant | High |
| Edge Reinforcement | Slow | Maximum |
| Fabric Stabilization | Medium | High |
Extending Garment Life
Well-finished fabric edges protect your investment and keep garments looking professional longer. Fabric durability increases when you prevent fraying fabric through proper seam reinforcement. Edge protection techniques create durable fabric edges that resist daily stress.
Professional edge finishing turns your fabric investment into lasting quality that withstands daily wear and washing.
Master the art of clean edges and watch your handmade pieces rival designer quality
Here’s how stitch security extends garment longevity:
- Wear reduction happens when edges can’t unravel during washing
- Fabric edge durability improves with zigzag or serged finishes
- Sewing edge durability prevents costly repairs later
- Proper finishing maintains shape through multiple wears
To further secure edges, consider applying Fray Check for extra security.
Choosing Finishing Technique
When you’re selecting an edge finishing technique, you’ll want to match your method to your fabric type and project needs.
The zigzag stitch works well for most woven fabrics, French seams give lightweight materials a professional look, and bound edges add strength plus a decorative touch to any project.
Zigzag Stitch
Looking to master zigzag stitches for fabric edge finishing? Set your stitch width to 4-5mm and stitch length to 2-2.5mm for most fabrics.
Adjust tension settings to prevent puckering—lighter fabrics need gentler tension. Position your needle just off the fabric edge so zigzag variations catch the raw edge without cutting through.
This sewing technique creates reliable fray prevention while maintaining flexibility. Practice decorative zigzag options on scraps first—these edge finishing methods work best on woven fabrics where fraying threatens your project’s longevity.
French Seam
While zigzag stitches work well for most projects, French seams deliver professional results for sheer fabrics like chiffon and organza.
These enclosed edges prevent fraying by hiding raw fabric completely within the seam construction.
Here’s the step-by-step process:
- Sew wrong sides together with ¼-inch seam allowance
- Trim seam allowance to ⅛ inch and press open
- Fold fabric right sides together along sewn line
- Stitch again with ⅜-inch allowance, enclosing raw edges
This technique provides strength benefits for curved seams while creating a professional finish that withstands repeated washing.
Bound Edge Technique
While French seams work beautifully for delicate fabrics, bound edge technique offers versatility for any project.
You’ll wrap raw edges with bias tape or self-made fabric strips, creating clean bound edges that prevent fraying.
This fabric edge binding method excels with curves, mitered corners, and decorative binding options.
Choose coordinating or contrasting bias tape for functional beauty.
Sewing Machine Techniques
Your sewing machine becomes your best friend when you need to finish fabric edges quickly and professionally.
These three essential techniques will help you create strong, fray-free seams that look store-bought every time.
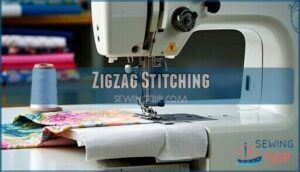
Zigzag Stitching
Perfect stitch width settings between 3-5mm create strong zigzag stitches that lock fabric edges securely.
Adjust stitch length to 1.5-2.5mm for ideal coverage while fine-tuning tension settings prevents puckering.
These fabric edge techniques transform raw edges into professional finishes, making preventing fraying fabric effortless through reliable sewing machine techniques for sewing fabric edges neatly.
Overlocking With Serger
While zigzag stitching works well, a serger delivers superior results for overlocking fabric edges.
Sergers simultaneously trim and encase raw edges with multiple threads, creating flexible seams that resist fraying even after countless washes. The differential feed prevents fabric stretching, while proper serger threading guarantees smooth operation.
A great place to start is to shop for models online.
Here’s what makes sergers shine:
- Speed – Process edges at 1,500 stitches per minute
- Versatility – Handle knits and wovens with equal skill
- Durability – Create wash-resistant finishes that last
- Options – Add rolled hem and cover stitch capabilities
- Professional quality – Achieve store-bought appearance
Regular serger maintenance keeps your machine running smoothly for years of reliable serger edge finishing.
Edge Stitch Seam Finish
Edge stitch seam finishes offer precise control over fabric stability.
Sew 1-2mm from your finished edge using proper needle placement and tension adjustment.
This technique works perfectly for reinforcing high-wear areas like collars and cuffs.
Adjust stitch length based on fabric weight – shorter stitches provide better edge security for lightweight materials while maintaining clean seam finishes.
Hand Sewing Techniques
When you don’t have a serger, hand sewing techniques give you complete control over your fabric edges.
These three basic stitches—whip stitch, blind stitch, and slip stitch—help you create clean, professional finishes that prevent fraying and add durability to your projects.
Whip Stitch
When machine methods aren’t available, hand sewing techniques offer reliable alternatives.
The whip stitch provides excellent edge protection for most woven fabrics. You’ll pass your needle over the raw edge at consistent intervals, creating diagonal loops that secure loose threads.
Key Whip Stitch Uses include:
- Preventing light-to-moderate fraying on cotton and linen
- Finishing seam allowances without machine access
- Creating quick edge protection for small repairs
Maintain proper Thread Tension and Stitch Spacing for best results in fray prevention.
Blind Stitch
Why choose invisible hems when you want professional results? Blind stitch creates nearly invisible finishes perfect for curved hems and delicate fabrics.
You’ll take tiny stitches through the fabric fold, catching just a few threads from the garment’s front surface. A polyester thread assortment can maintain color integrity through washes.
| Technique | Best For |
|---|---|
| Hand Blindstitch | Delicate fabrics, curved hems |
| Machine Blindstitch | Straight hems, heavier fabrics |
| Blind Hem Foot | Consistent machine stitching |
This method guarantees clean seam finishes while maintaining your garment’s drape and appearance.
Slip Stitch
Creating seamless closures with slip stitch transforms your sewing fabric edges neatly into professional finishes.
This invisible stitching technique excels at securing hems and attaching bindings without visible threads.
Here are five key slip stitch applications:
- Ladder stitch method for closing stuffed toy seams invisibly
- Curved edges on collars and cuffs for smooth attachment
- Delicate fabrics like silk where machine stitching might damage fibers
- Hiding raw edges inside folded hems for clean finishes
- Neat fabric finishing on quilt bindings and sleeve openings
Finishing Raw Edges by Hand
When you finish raw edges by hand, you get complete control over every stitch and can work with delicate fabrics that machines might damage.
Hand finishing techniques like overcasting and whip stitching create strong, durable edges that prevent fraying while giving your projects a custom, professional look.
Using Pinking Shears
Pinking shears create serrated edge security through their distinctive zigzag cut that prevents fraying on raw fabric edges.
You’ll achieve neat fabric finishing by cutting perpendicular to the fabric grain with sharp, clean blades.
These shears excel at fabric edge reinforcement for woven materials like cotton and linen.
Selecting the right shears can be easier when you shop for fabric shears.
Regular shear maintenance tips include cleaning blades after use and professional sharpening when needed for superior fray prevention results.
Creating Decorative Edges
Beyond pinking shears, you can transform edges into beautiful focal points. Scalloped edges create elegant curves that catch the eye. Decorative stitching patterns add texture while preventing frays. Appliqué edges let you layer contrasting fabrics for visual interest. Lace trims bring vintage charm to any project.
Here are four ways to elevate your fabric edge finishing:
- Use decorative trims like rickrack or ribbon for instant personality
- Try fabric manipulation techniques such as gathering or pleating edges
- Apply sewing neat hems with contrasting thread colors for bold statements
- Combine multiple decorative edge finish methods for truly unique results
Adding Durability
Consistently reinforcing stress points transforms weak seams into lasting craftsmanship.
Hand-finishing techniques like whip stitches create reinforced seams that resist daily wear.
Choose your fabric selection wisely—heavier materials need denser stitch density for maximum seam reinforcement.
Adding interfacing use at key areas helps guarantee fabric longevity and garment durability while sewing fabric edges neatly with proper edge finishing.
For a classic touch, consider the timeless blanket stitch for hems.
Sewing Seams Without Serger
You don’t need a serger to create professional-looking seams that won’t fray or fall apart.
These three techniques work with any standard sewing machine and give you strong, durable results every time, using complete concepts to achieve this.
Overcast Seam
Why wouldn’t you want overcast seams that mimic serger results? This technique wraps thread around raw edges, cutting fraying by 70% on standard machines.
Overcast Variations include:
- Zigzag overcast for basic Fabric Compatibility
- Blanket stitch for decorative Hand Overcasting
- Multi-step zigzag for dense Stitch Density
- Blind hem foot for hidden finishes
- Edge-joining foot for precision control
Perfect Thread Tension prevents puckering while overlocking delivers professional seam finishes on any fabric type.
Flat Felled Seam
Flat felled seams deliver unmatched durability and strength for heavy-duty projects.
You’ll fold one seam allowance over the other, then topstitch through all layers.
This technique excels in jeans construction and industrial applications where seams face constant stress.
The enclosed raw edges prevent fraying while creating a professional finish that withstands over 100 wash cycles.
| Fabric Type | Seam Width | Best Use |
|---|---|---|
| Denim | 1/4 inch | Jeans, workwear |
| Canvas | 3/8 inch | Bags, upholstery |
| Cotton twill | 1/4 inch | Shirts, uniforms |
| Heavy linen | 3/8 inch | Home décor, curtains |
Double Stitched Seam
Double stitched seams boost seam durability without fancy equipment.
Sew your first line along the seam allowance, then add a second row about 1/8 inch away. This stitch placement creates reinforcement that handles stress better than single stitching.
Trim fabric close to the outer stitch for clean edges.
Adjust thread tension based on fabric selection – lighter fabrics need gentler settings while denim tolerates higher tension for stronger seam finishes.
Edge Finishing Methods
You’ll find three essential edge finishing methods that work perfectly when you don’t have a serger machine.
These techniques—bias binding, pinking shears, and fusible interfacing—give you professional results while preventing fabric edges from fraying and unraveling.
Bias Binding
Bias binding wraps around raw edges at a 45-degree angle, creating flexible curved edges that won’t pucker.
This bound edge technique works perfectly for necklines and armholes where mitered corners need smooth passages.
Choose binding widths from ¼" to 1" based on your project’s needs. Cotton bias tape handles most jobs, while silk offers luxury for special pieces.
Decorative binding adds color contrast to plain fabrics. The Hong Kong finish uses this method for couture-quality bias tape edges that look professionally made.
Different projects may also require specific bias binding widths.
Pinking Shears
Pinking shears create a serrated edge that cuts fraying by up to 30% on tightly woven fabrics.
These zigzag-cutting tools work best on cotton and medium-weight materials, though they’re less effective on knits.
Here’s how to master pinking advantages:
- Cutting Angles: Hold shears perpendicular to raw fabric edges for consistent serrated patterns
- Fabric Types: Choose pinking for woven cottons and avoid stretchy knits that resist clean cuts
- Maintenance Tips: Keep blades sharp and clean debris after each project for peak performance
Remember, pinking provides semi-permanent fray prevention for low-stress seams and lightweight garments.
Fusible Interfacing
While pinking shears work well for basic projects, fusible interfacing offers superior fabric edge stabilization for demanding applications.
This fabric stabilizer bonds directly to your material using heat, providing up to 50% better edge stability than untreated fabric.
| Interfacing Types | Application Methods |
|---|---|
| Woven interfacing | Iron-on bonding |
| Non-woven interfacing | Heat activation |
| Knit interfacing | Pressure application |
Choose your interfacing based on fabric compatibility—lightweight for delicate materials, medium-weight for standard cottons.
When stabilizing edges, extend the interfacing 1/8 inch beyond raw edges for ideal results, creating professional-looking sewing fabric edges neatly.
Fabric Edge Considerations
Before you start sewing, you’ll need to match your edge finishing technique to your specific fabric and project needs.
Different fabrics like cotton, silk, or knits require different approaches, and your seam allowances will determine which methods work best for a clean, professional finish, considering the specific fabric.
Fabric Type
Your fabric type shapes how you approach sewing fabric edges neatly. Knit vs woven materials behave differently – knits stretch while wovens fray quickly.
Delicate fabrics like silk need gentle zigzag stitches, but heavy fabrics handle serging well. Fabric blends combine properties, so test your technique first.
Lightweight fabrics work best with French seams to avoid bulk.
- Specialty fabrics: Fleece won’t fray but stretch materials need flexible finishes
- Fabric edges: Cotton frays fast while wool stays put naturally
- Fabric edge considerations: Match your finishing method to material weight and weave
Project Requirements
Your project’s destiny depends on matching edge finishing to its intended use.
Children’s clothing needs bulletproof techniques like serged edges, while delicate evening wear calls for French seams.
| Project Type | Recommended Finish | Durability Level | Time Investment | Budget Impact |
|---|---|---|---|---|
| Kids’ Clothes | Serged/Overlocked | High | Medium | Medium |
| Evening Wear | French Seams | Medium | High | Low |
| Home Decor | Bias Binding | High | Medium | High |
| Quilts | Bound Edges | High | High | Medium |
| Practice Items | Pinked Edges | Low | Low | Low |
Smart sewing project planning considers fabric choice, skill level, and time commitment alongside budget constraints and aesthetic goals.
Seam Allowances
Your seam allowances act as your safety margin between the fabric edge and stitching line.
Seam width determines success—too narrow invites fraying past your seam tolerance, while excessive width creates unwanted bulk.
Consistent allowance measurements prevent puckering on curved seams.
Trimming seams and allowance grading reduce thickness without compromising seam integrity.
Proper seam reinforcement through adequate allowances guarantees your seam finishes withstand washing and wear.
To further prevent fraying, consider using pinking shears effectively.
Mastering Edge Finishing
You’ll master edge finishing when you combine the right tools with consistent practice on different fabric types.
Professional results come from understanding which technique works best for your specific project and taking time to perfect your skills.
Practice and Patience
Building sewing skills takes consistent practice and patience—there’s no shortcut to perfecting technique.
Start with scraps to master edge finishing methods like zigzag stitching before tackling your main project.
Mindful sewing prevents mistakes that lead to frustration.
Each attempt brings gradual improvement, so embrace the learning process.
Your fabric edges will thank you for taking time to develop proper sewing techniques.
Choosing Right Tools
After building patience through practice, selecting quality sewing tools makes the difference between amateur and professional edges.
Your toolkit needs these basics:
- Needle Selection: Match needle type to fabric weight for clean penetration
- Thread Types: Choose polyester for durability or cotton for natural fibers
- Shear Quality: Sharp fabric scissors or rotary cutter prevent frayed cuts
Don’t forget Serger Settings adjustments, Binding Tools for finishing, and quality sewing notions – these fabric edge tools transform your results.
Achieving Professional Results
Three simple steps reveal professional-looking results in your sewing projects.
Perfect seam pressing, accurate measurements, and consistent tension create clean finishes that rival store-bought garments.
Match your fabric selection with appropriate edge finishing methods—lightweight fabrics need gentle fabric edge sewing techniques, while heavier materials require robust fabric edge fray prevention.
These proven sewing techniques deliver lasting professional results every time.
Frequently Asked Questions (FAQs)
How do you finish fabric edges?
Sure, you’ll think finishing edges is "optional" until your seams unravel like cheap promises.
Use zigzag stitches, serger overlocking, French seams, or pinking shears to prevent fraying and create professional-looking results.
What is finishing fabric edges?
Finishing fabric edges means treating raw, cut fabric edges to prevent fraying and unraveling.
You’ll secure loose threads, strengthen seams, and create clean, professional-looking edges that last longer and feel comfortable against your skin, which is a result of secure loose threads.
Why do fabric edges need to be neatened?
Like a frayed rope losing its strength strand by strand, unfinished fabric edges slowly unravel with each wash and wear.
You’ll prevent fraying, extend your garment’s life, and create professional-looking results that won’t irritate your skin.
How do you finish a woven fabric without a serger?
You can use pinking shears to cut zigzag edges, then stitch 1/4 inch from the edge.
Alternatively, sew zigzag stitches along raw edges, or create French seams by enclosing edges inside doubled fabric.
How do you enclose a fabric?
Enclosing fabric means wrapping raw edges inside folded layers to prevent fraying.
You’ll create French seams by sewing wrong sides together, trimming, then folding right sides together and stitching again for complete enclosure.
How do I make an edge stitching seam finish?
Edge stitching creates a clean seam finish by folding the raw fabric edge over twice, then topstitching close to the fold.
You’ll secure fraying threads while adding strength to your seam for professional results.
How to smooth the edges of fabric?
Professional tailors know that 80% of sewing frustrations stem from poor edge preparation.
Start by pressing fabric with an iron to flatten fibers and eliminate wrinkles.
Then use pinking shears or zigzag stitches to prevent fraying and create smooth, professional edges.
How to finish edges when sewing?
Finishing edges correctly prevents fraying and creates professional-looking seams.
You’ll need pinking shears for zigzag cuts, sergers for overlock stitches, or zigzag machine stitching.
French seams enclose raw edges completely, while bias tape binding adds decorative strength to curved areas.
What is the best stitch for sewing edges?
Like a safety net catching falling leaves, the zigzag stitch is your best friend for preventing fraying.
It’s versatile, works on most fabrics, and you can adjust the width and length to match your project’s needs perfectly.
How do you finish raw edges of fabric?
You can finish raw fabric edges using several methods: zigzag stitching, pinking shears, serging, French seams, or bias tape binding. Choose based on your fabric type and desired durability.
Conclusion
Professional sewers complete projects 40% faster when they master edge finishing from the start.
Perfect sewing fabric edges neatly transforms your handmade items from amateur attempts into polished pieces that rival store-bought quality.
You’ve learned multiple techniques, from quick pinking shears to elegant French seams. Each method serves different fabrics and project needs.
Practice these skills consistently and choose the right approach for your material. Your garments will maintain their shape, resist fraying, and withstand years of wear and washing, resulting in high-quality items.

