This site is supported by our readers. We may earn a commission, at no cost to you, if you purchase through links.
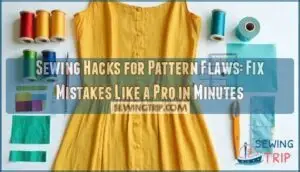
Cut too short? Add contrasting fabric strips or lace trim for length. Neckline wrong? Transform it with bias tape or decorative binding.
Waist sitting awkwardly? Create a belt or add elastic casing to adjust the fit. Pattern pieces don’t align? Use interfacing patches behind seams for invisible reinforcement.
Sleeves too tight? Insert gussets or convert to three-quarter length with decorative hems. Even major mishaps become design opportunities when you embrace creative problem-solving.
These quick fixes transform pattern disasters into custom features that look intentional. Master sewists know the best garments often come from happy accidents and clever improvisation.
Table Of Contents
- Key Takeaways
- Fixing Pattern Flaws
- Mastering Fabric Manipulation
- Creating Unique Designs
- Sewing Hacks for Fit
- Surface Design Techniques
- Embellishments and Decorative Elements
- Maintaining Sewing Tools
- Organizing Sewing Space
- Preventing Common Mistakes
- Advanced Sewing Techniques
- Frequently Asked Questions (FAQs)
- Conclusion
Key Takeaways
- Transform mistakes into design features – You can disguise pattern flaws using decorative stitches, appliqué, or strategic embellishments that make errors look intentional and add visual interest to your garments.
- Master quick sizing and fit adjustments – You’ll fix length issues by adding contrasting fabric strips, adjust waistlines with elastic casings or belts, and modify necklines using bias tape for instant pattern corrections.
- Use fabric manipulation to solve pattern problems – You can swap woven patterns for knits by sizing down, cut striped fabrics on the bias for visual impact, and choose different fabric drapes to completely change a garment’s look.
- Combine patterns creatively for custom results – You’ll create unique designs by mixing necklines and sleeves from different patterns, adding ruffles or pleats for length and interest, and using color-blocking techniques to turn basic patterns into showstoppers.
Fixing Pattern Flaws
When you discover your pattern doesn’t fit quite right, don’t panic—most flaws can be fixed with simple adjustments that take just minutes to complete.
These quick fixes will save your project and teach you valuable skills for future sewing adventures.
Shortening or Lengthening Patterns
When your favorite pattern doesn’t fit quite right, don’t toss it in the trash—transform it instead! Pattern grading and length adjustments can turn pattern flaws into perfect fits.
These sewing adjustments work like magic on any garment.
Here’s how to nail pattern alterations:
- Torso length: Add or subtract inches at the lengthen/shorten lines
- Sleeve length: Adjust at the elbow or wrist for perfect arm coverage
- Rise alterations: Modify pants patterns between waist and crotch for comfort
- Hem adjustments: Change skirt or dress lengths without affecting overall fit
- Pattern fitting: Use tissue paper to extend patterns or fold to shorten them
Adjusting Waistline Seams
When your dress pattern creates a boxy silhouette, adjusting waistline seams transforms the entire garment.
Transform your boxy dress into a flattering silhouette with strategic waistline seam adjustments.
You’ll create curves by taking in or letting out side seams at the waist. This garment transformation requires careful pattern merging to maintain proper fit through the bodice and skirt sections.
For minor adjustments, the slash and spread technique is often recommended.
| Adjustment Type | Method |
|---|---|
| Taking In | Remove 1/4" to 1/2" from each side seam at waistline |
| Letting Out | Add fabric or release existing seam allowances |
| Length Adjustment | Modify above or below waistline for proportional fit |
These sewing adjustments address common fitting issues while ensuring seam compatibility between pattern pieces. Remember, small changes make big differences in how your finished garment fits your body.
Modifying Necklines and Sleeves
Once you’ve got the waistline sorted, your neckline and sleeves can make or break the whole look.
Changing neckline shapes is like giving your garment a personality transplant – raise it for modest vibes, lower it for drama, or switch to a v-neck for flattery.
Neckline adjustment tricks include raising, lowering, or reshaping entirely.
For sleeve modifications, you can adjust sleeve length by shortening or lengthening, or change sleeve volume with bell or flutter styles.
Combining patterns requires checking pattern compatibility first – matching seam allowances prevents headaches later.
Mastering Fabric Manipulation
When your pattern doesn’t match your fabric’s personality, smart fabric manipulation can save the day.
You’ll transform drape, substitute materials, and use clever cutting techniques to make any pattern work with your chosen fabric.
Choosing Fabrics With Different Drapes
Pattern flaws often stem from poor fabric choice rather than design issues.
When you select fabrics with different Drape Properties, you’re basically performing pattern alteration through fabric manipulation.
High-drape fabrics like silk create fluid silhouettes, while low-drape materials like denim provide structure.
This Texture Variation impacts your garment’s Silhouette Impact dramatically.
Understanding how different materials affect fabric drape quality is essential for achieving the desired look.
Smart fabric choice becomes your secret sewing hack for fixing patterns.
Substituting Wovens With Knits
When you swap woven structure for knit drape, size down to compensate for stretch factor.
Knits provide natural ease, eliminating the built-in room woven patterns need.
Test fabric compatibility first—heavy knits may sag while lightweight ones lose structure.
Remove darts since knits conform naturally.
Pattern adjustments like reinforcing shoulders prevent stretching.
Your fabric choice dramatically affects the final silhouette compared to the original woven design.
Because of their looped construction, knits inherently stretch, which is a key factor to consider when working with knits and aiming for a specific final silhouette.
Cutting Striped Fabrics on The Bias
Two simple tricks transform ordinary stripes into eye-catching design elements.
Cut striped fabrics on the bias for diagonal Visual Effects that create movement and sophistication.
This Grainline Adjustments technique requires careful Fabric Waste Minimization—you’ll need extra yardage, but the stunning results justify the investment.
Bias Stripe Matching demands patience during cutting, raising the Difficulty Level slightly.
However, these sewing hacks deliver professional-looking fabric matching that elevates any garment through strategic pattern modifications.
Creating Unique Designs
You’re about to transform ordinary patterns into show-stopping designs that’ll make everyone ask where you got that amazing piece.
The secret lies in mixing and matching elements from different patterns to create something completely your own, which can be considered a complete method to produce unique designs by utilizing different patterns.
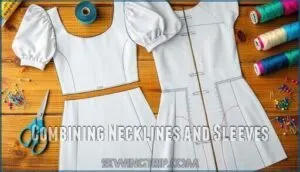
Combining Necklines and Sleeves
When you’re ready to create truly custom looks, mixing necklines and sleeves from different patterns opens up endless possibilities.
This pattern hacking technique, often called "Frankenpattern," requires careful attention to pattern compatibility and seam allowances for successful bodice integration.
Here’s your step-by-step approach:
- Match measurements – Walk the pattern to confirm sleeve shapes align with armhole circumference
- Check seam allowances – Adjust allowances at joining points to prevent puckering
- Pin shoulder seams first to anchor critical alignment points before attaching sleeves
- Baste sleeves initially to test fit and make adjustments before final sewing
- Grade seam allowances around curves to reduce bulk and create smooth transitions
This sewing hack transforms basic patterns into unique designs while maintaining proper fit and construction integrity, and allows for a seamless shift between different styles.
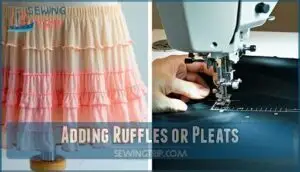
Adding Ruffles or Pleats
When you’re stuck with a pattern that’s too short or lacks visual interest, adding ruffles or pleats transforms boring basics into stunning showstoppers.
Smart ruffle placement at hemlines instantly adds length while creating movement.
Choose lightweight fabrics for delicate gathers or structured materials for bold pleats.
Control volume by adjusting pleat styles—knife pleats create sleek lines while box pleats add dramatic flair.
These pattern alterations turn simple sewing techniques into professional-looking modifications that’ll have everyone asking where you bought that gorgeous piece.
Incorporating Color-Blocking
Color-blocking transforms ordinary patterns into showstoppers by adding strategic seam allowances where you want fabric combinations to shine.
This pattern hacking technique lets you insert contrasting colors exactly where your design placement demands them. Smart garment customization means understanding color theory basics—complementary colors create drama while analogous shades offer sophistication.
Here’s how to nail colorblocking with pattern modifications:
- Plan your blocks first – sketch design placement on your pattern before cutting any fabric
- Add seam allowances – include extra fabric at block boundaries for clean, professional joins
- Test combinations – try different fabric combinations on scraps to preview your final look
These sewing hacks turn basic patterns into custom masterpieces that look professionally designed.
Sewing Hacks for Fit
When your pattern doesn’t fit quite right, don’t panic—you’ve got options that’ll save your project and your sanity.
These quick fixes for skirts, fabric swaps, and sizing adjustments will turn those "oops" moments into "aha!" victories.
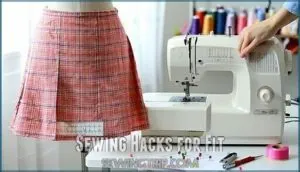
Adjusting Gathered or Pleated Skirts
Getting your pleats and gathers to behave isn’t rocket science, but it does require some finesse.
When adjusting gathered or pleated skirts, focus on waistband adjustment first – measure twice, cut once.
Control pleat depth by redistributing fabric evenly around the waistline.
For perfect gathering density, use crochet thread with zigzag stitches for uniform skirt volume.
These sewing hacks guarantee even distribution whether you’re working with delicate gathers or structured pleats during skirt reshaping and garment fitting.
Swapping Knit for Woven Fabric
Swapping knit fabric for woven patterns requires careful consideration of fabric drape and stretch percentage.
You’ll need pattern alterations since knit’s flexibility changes garment structure and fitting.
Adjust pattern ease by sizing down one size to compensate for knit’s natural stretch.
Consider different seam finishes—knits need stretch stitches while woven patterns assume straight seams.
Test garment fitting with muslin first to perfect your sewing techniques before cutting expensive fabric.
Sizing Down for Stretch Knit Fabric
When using stretch knits in woven patterns, you’ll need negative ease for proper fit.
Size down one full size since knit types offer fabric recovery that wovens don’t.
Check measurement accuracy against your body measurements, not the pattern’s finished garment size.
To avoid distortion, consider using ballpoint pins or clips when working with these fabrics.
This sewing hack prevents baggy results and guarantees your pattern alterations work perfectly with stretchy materials.
Surface Design Techniques
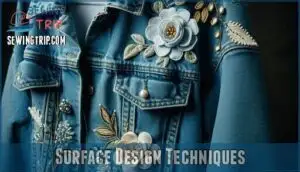
When pattern flaws leave you frustrated, surface design techniques can transform disasters into design features.
You can disguise imperfections and add visual interest using decorative stitches, lace insertions, and appliqué work that’ll make people think those "mistakes" were intentional all along, utilizing decorative stitches to enhance the overall design.
Utilizing Decorative Machine Stitches
Your sewing machine’s decorative stitches can transform pattern flaws into stunning design features.
Explore stitch aesthetics by experimenting with different thread choices—metallic threads create glamour while variegated threads add depth.
Adjust tension settings for clean pattern integration.
Apply these sewing techniques strategically: use feather stitches to disguise uneven seams or blanket stitches to reinforce weak areas.
Many sewers find inspiration in decorative machine stitches.
These sewing hacks turn mistakes into masterpieces.
Inserting Ladder Lace
Ladder lace transforms ordinary seams into stunning vintage details. You’ll insert this delicate trim between fabric layers or directly into seams for instant vintage charm.
Choose lace that complements your fabric’s color coordination – white works with pastels, while ecru pairs beautifully with earth tones. You can find various ladder lace styles online.
These sewing techniques require careful seam integration to prevent puckering. Experiment with different ladder lace variations for unique pattern making results, and ensure to select a style that fits your project’s needs, adding a touch of unique charm.
Creating Modern Appliqué Designs
Modern appliqué transforms ordinary fabric into eye-catching focal points.
You’ll combine fusible web with decorative machine stitches for professional results.
Choose cotton for crisp edges or felt for bold shapes that won’t fray.
Layer contrasting Appliqué Fabrics using proper Stitch Selection and fabric stabilizer underneath.
Strategic Design Placement creates visual impact while Mixed Media elements add contemporary flair to your applique designs.
Embellishments and Decorative Elements
When your pattern doesn’t quite hit the mark, embellishments can transform flaws into fabulous features.
You’ll discover how strategic button placement, well-positioned zippers, and clever slits can disguise imperfections while adding designer-level details to any garment.
Adding Buttons or Zippers
When you’re transforming a basic pattern into something spectacular, buttons and zippers become your secret weapons for both function and flair.
These closures can completely change your garment’s personality while solving fit issues.
- Invisible zippers create seamless closures that disappear into seams, perfect for side or back openings where you want clean lines
- Decorative closures like contrasting buttons or exposed zippers add visual interest and can distract from pattern flaws
- Button spacing tricks help adjust garment fit – closer spacing creates gathering effects, while wider spacing opens up tight areas
- Zipper types matter for different applications: regular zippers for pockets, separating zippers for jackets, and heavy-duty versions for thick fabrics
For specialized projects, consider using specific tools available to aid in invisible zipper sewing.
Experimenting With Button Placement
Beyond functional placement, you can transform garments by playing with Button Spacing and Button Size creatively.
Try Asymmetrical Designs with buttons clustered on one side, or mix large Decorative Buttons with smaller functional ones.
Double-breasted styling on single-breasted patterns creates drama.
These sewing hacks turn ordinary button placement into eye-catching design elements that showcase your creativity.
Including Slits or Openings
Strategic slit placement transforms ordinary garments into eye-catching pieces while solving common pattern flaws like tight-fitting sleeves or restrictive hemlines.
These openings aren’t just decorative—they’re functional sewing hacks that improve movement and add visual interest to your garment construction.
Here are four essential techniques for adding slits:
- Reinforce stress points with interfacing or stay stitching before cutting your opening to prevent tears
- Choose appropriate fabric weight—lightweight materials need French seams while heavy fabrics require bound edges
- Plan slit placement strategically at side seams, center back, or sleeve openings for best functionality
- Finish hem edges with bias tape, rolled hems, or facing for professional-looking opening styles that won’t fray
Maintaining Sewing Tools
You can’t sew your best if your tools are dull or dirty, so regular maintenance is a must.
A sharp pair of scissors and a clean machine can save you from a tangled mess faster than you can say "where did my needle go?
Keeping Scissors Sharp
Sharp scissors are your sewing best friend. Keep them cutting-exclusive—no paper, pins, or random materials.
Store them in protective sheaths or cases to maintain cutting angles. Clean blades regularly with rubbing alcohol, then oil the hinge pivot point.
Different scissor types need specific maintenance schedules. Fabric scissors require monthly blade sharpening, while detail scissors need quarterly attention.
Proper storage solutions prevent nicks and dulling.
Cleaning Sewing Machines
Your sewing machine needs regular TLC to prevent costly repairs down the road.
Remove lint buildup from the bobbin area and feed dogs using pipe cleaners threaded through coffee stirrers—this genius sewing hack reaches tight spots effortlessly.
Oil mechanisms according to your manual’s schedule for smooth operation.
Clean needle maintenance involves checking for burrs and replacing dull needles immediately, and a bicycle pump works perfectly for blowing out stubborn debris, making sewing machine cleaning affordable and effective.
Using Steel Wool as a Pin Cushion
Your trusty steel wool isn’t just for cleaning – it’s a clever sewing hack that keeps pins and needles razor-sharp.
Fine-grade steel wool acts as a natural sharpener while storing your pins. Choose 0000 grade for gentle needle sharpening without damage.
This alternative material prevents rust while offering pin cushion safety through its natural oils. Smart sewing tips like this transform ordinary sewing tools into multi-functional helpers for better pin cushion customization.
Organizing Sewing Space
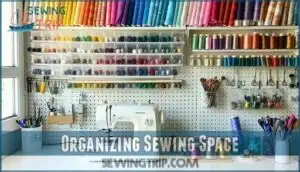
You’ll spend less time hunting for supplies when your sewing space stays organized with simple storage solutions.
These clever tricks turn everyday items into game-changing organizers that keep everything within arm’s reach.
Storing Bobbins in Toe Separators
Bobbin chaos can derail your sewing momentum faster than a dropped stitch.
Transform ordinary toe separators into portable storage solutions that keep thread colors coordinated and visible.
Drop each wound bobbin into individual foam slots for instant color coordination and easy transport.
This space-saving hack prevents tangles while keeping your essential threads organized and accessible during projects, ensuring easy transport.
Creating a Thread Organizer
Transform your old picture frame into a thread organization powerhouse by stretching dowel rods across it.
This Thread Rack DIY solution creates the perfect Spool Holder Types system for your workspace.
Keep Color-Coded Threads visible and accessible while maintaining Portable Thread Storage capabilities.
These Upcycled Organizers beat expensive thread storage boxes every time.
Your sewing organization just got an upgrade that’ll make thread spool management effortless and bobbin storage a breeze.
Using Binder Clips Instead of Pins
Forget thread organizers—let’s tackle another space-saving trick.
Binder clips work wonders when pins won’t cooperate with thick fabrics like denim or leather. These clip alternatives prevent fabric damage while securing curved seams perfectly.
Choose various clip sizes for different projects. Your sewing efficiency skyrockets when you can grip bulky materials without struggling.
These sewing shortcuts beat traditional pins every time, and are a great way to skyrockets your productivity with bulky materials and sewing shortcuts.
Preventing Common Mistakes
Even experienced sewers make fabric mistakes that can ruin an entire project if you don’t catch them early.
These simple prevention tricks will save you hours of rework and keep your sewing sessions frustration-free.
Identifying Right and Wrong Fabric Sides
You’ll avoid upside-down disasters by mastering fabric side identification during fabric preparation. Check the selvage clues first—they’re printed clearer on the right side. Textile analysis under different lighting effects reveals subtle differences in texture and appearance. Fabric stores often display the right side facing out.
- Look for sharper print direction and brighter colors on the fabric’s right side
- Feel for smoother texture—the right side typically has less nap or fuzz
- Check fabric grain identification by examining how light reflects off the surface
This simple fabric storage tip saves you from cutting pieces backwards and wasting precious seam allowance.
Preventing Thread Tangles
Thread tangles frustrate sewers, but you can outsmart them easily.
Smart sewers turn tangled chaos into threading triumph with the right prevention tricks.
Poor spool placement causes most problems—position thread so it unwinds smoothly from your machine. Check machine tension settings and match needle size to your thread weight.
Clean lint buildup regularly from your bobbin case.
| Prevention Method | Quick Fix |
|---|---|
| Use thread conditioners | Apply beeswax to thread |
| Check spool placement | Guarantee smooth unwinding |
| Adjust machine tension | Test on fabric scraps |
Using Muslin as a Stabilizer
Slippery fabrics like silk can slide around your cutting table like ice skaters on a rink.
Place muslin underneath these tricky materials to create a stable foundation. This fabric stabilizer prevents shifting during cutting and pattern tracing.
Choose appropriate muslin grades based on your project’s needs. Layering muslin works better than most stabilizer alternatives for delicate fabrics, providing a solution that prevents shifting during cutting and pattern tracing.
Advanced Sewing Techniques
You’ll master these advanced techniques to transform any sewing challenge into a professional finish. These skills turn tricky pattern problems into opportunities for creative solutions.
Sewing Invisible Zippers
Invisible zippers disappear into seams like magic when you get the technique right.
Choose a coil type that matches your fabric weight—lightweight coils work best for delicate materials. Your zipper foot choice makes all the difference; use an invisible zipper foot for professional results.
Fabric stabilizing prevents shifting during installation. Make tension adjustments to avoid thread breakage, and sew slowly to prevent puckering around the zipper tape for flawless sewing hacks.
Using a Bodkin for Elastic Threads
A bodkin transforms elastic threading from frustrating fumbles into smooth sailing.
This pointed tool guides elastic through casings without bunching or twisting, saving you precious time and sanity.
Here’s your bodkin mastery toolkit:
- Bodkin Types – Choose between safety pin-style bodkins for thick elastic, loop bodkins for delicate threads, or tweezers-style for precision work
- Elastic Tension – Keep slight tension while threading to prevent bunching, but don’t stretch the elastic beyond its natural length
- Bodkin Alternatives – Use safety pins, large blunt needles, or even tweezers when your bodkin goes missing
Securing elastic properly prevents that dreaded "elastic disappeared into the casing" moment that haunts every sewist.
For best results, measure elastic at 80% body circumference before threading.
Learning How to Use The Narrow Hemmer
Master the narrow hemmer foot by selecting proper hemmer foot types for your fabric weight—2mm for lightweight materials, 6mm for heavier ones.
Control fabric feed carefully through the scroll, pre-pressing edges for consistent starts.
Practice curved hemming tips on scraps first.
When troubleshooting hemmer issues, check for proper fabric alignment.
Create decorative narrow hems effortlessly with this essential sewing machine accessory.
Frequently Asked Questions (FAQs)
How to hack sewing patterns?
You can modify patterns by lengthening, shortening, or reshaping sections.
Try "Frankenpattern" techniques—combining different necklines, sleeves, or bodices from various patterns.
Adjust fit through slashing and spreading for volume changes or size modifications.
What is sewing hacking?
Ever wondered how to transform that almost-perfect pattern into your dream garment?
You’re about to discover pattern hacking—the art of modifying commercial sewing patterns to create custom fits and unique designs that perfectly match your vision.
Are sewing hacks your weakness?
Sewing hacks actually strengthen your skills by teaching creative problem-solving. They transform pattern limitations into opportunities, helping you customize fit, style, and function through clever adaptations and modifications.
Why do you need a sewing hack?
Like a life preserver in choppy waters, sewing hacks rescue you from pattern disasters.
You’ll need them when measurements don’t match, fabrics misbehave, or design flaws emerge during construction, saving your project, with sewing hacks being crucial in such situations.
Where can I find pattern hacking tutorials?
You’ll discover pattern hacking tutorials on YouTube, sewing blogs like Cashmerette and WithWendy, Craftsy courses, Pinterest boards, and pattern company websites that offer modification guides and techniques.
What can I use to make my sewing look better?
Research shows 75% of amateur sewers make easily avoidable mistakes that ruin their final results.
You’ll transform your work by using sharp scissors, pressing seams properly, and choosing quality interfacing.
Stay-stitching curved edges prevents stretching, while proper needle selection eliminates skipped stitches and fabric puckering.
What is pattern manipulation in sewing?
Pattern manipulation means you tweak, shift, or combine pattern pieces to change a garment’s fit or style.
You might lengthen a sleeve, adjust a neckline, or mash up two patterns—think “Frankenpattern” for custom looks.
What are advanced sewing techniques?
Advanced techniques transform your sewing from basic to brilliant.
You’ll master complex pattern manipulation, intricate surface design, and precision tailoring methods.
These skills elevate garments through sophisticated construction details and professional finishing techniques.
What is a pattern hack?
A pattern hack modifies existing sewing patterns by adjusting length, necklines, sleeves, or combining different patterns together. You’re basically "Frankenpattern-ing" to create custom designs without drafting from scratch.
How do you fix gaping armholes in patterns?
Like a loose shirt that won’t stay put, gaping armholes need tightening.
Take in the armhole seam by pinching excess fabric at the deepest gap point and gradually tapering toward the shoulder seam for a snug fit.
Conclusion
Imagine this: your sewing basket transforms from a graveyard of failed projects into a treasure chest of creative possibilities.
These sewing hacks for pattern flaws aren’t just quick fixes—they’re your secret weapon for turning disasters into designer-worthy pieces.
You’ll discover that every crooked seam and sizing mistake becomes an opportunity to showcase your creativity. With these techniques in your toolkit, you’ll approach every pattern with confidence, knowing you can handle whatever curveballs come your way.
- https://www.reddit.com/r/SewingForBeginners/comments/1dr9vby/i_messed_up_buying_a_pattern_and_got_the_wrong/
- https://pubs.nmsu.edu/_c/C228/index.html
- https://blog.closetcorepatterns.com/pants-fitting-adjustments-best-tips-for-pants-fitting/
- https://www.youtube.com/watch?v=V7pl_f2gcqI
- https://mellysews.com/common-sewing-mistakes/

