This site is supported by our readers. We may earn a commission, at no cost to you, if you purchase through links.
 To sew a test garment, start by selecting inexpensive fabric that matches your final fabric’s weight and drape.
Cut out your pattern pieces and sew them together using basic construction techniques—no need for perfect finishing since this is just for fitting.
Try on your muslin and check for fit issues like pulling, bunching, or loose areas.
Mark any adjustments directly on the fabric with pins or chalk.
Take note of where you need to add or remove fabric, adjust seam lines, or modify dart placement.
Once you’ve identified all necessary changes, transfer these adjustments to your paper pattern before cutting your good fabric.
The time spent creating this fitting sample pays off when your final garment fits perfectly without costly do-overs, and it’s a crucial step in ensuring a good fabric is used efficiently, making the process more cost-effective.
Table Of Contents
Key Takeaways
- Choose the right test fabric – You will get accurate results by selecting inexpensive fabric that matches your final fabric’s weight, drape, and stretch properties.
- Use basting techniques for easy adjustments – You will save time by using longer stitches and contrasting thread, making it simple to remove and modify seams during fitting.
- Mark adjustments directly on the muslin – You will catch fit issues by pinning and marking problem areas, such as pulling, bunching, or loose spots, while wearing the test garment.
- Transfer changes to your pattern before cutting good fabric – You will prevent costly mistakes by updating your paper pattern with all adjustments from the muslin before touching expensive materials.
Sewing Test Basics
You’ve probably experienced the frustration of cutting into expensive fabric only to find your finished garment doesn’t fit quite right.
Nothing hurts more than cutting expensive fabric only to discover your finished garment doesn’t fit.
A simple test sewing session using inexpensive fabric can save you time, money, and that sinking feeling when your dream dress becomes an expensive mistake, which can be prevented by a simple test.
Importance of Test Sewing
Nothing beats test sewing for Accuracy Assurance and Professional Results.
You’ll Prevent Mistakes that cost time and expensive fabric.
A muslin or toile acts as your test garment, revealing fit issues before you cut your final fabric.
This pattern testing approach delivers Quality Finishes and significant Time Savings, transforming your sewing from guesswork into precision craftsmanship.
Benefits of Muslin Making
Making a muslin gives you fit accuracy before touching your expensive fabric.
You’ll save money by catching problems early and build confidence through technique refinement.
This wearable toile helps with design visualization, letting you see how the garment moves on your body.
Considering fabric weight considerations is also essential for achieving the desired drape and structure.
Making fitting adjustments becomes simple when you can pin, mark, and test without fear of ruining costly materials, allowing for confident alterations.
Choosing The Right Fabric
Your fabric choice sets the foundation for accurate test results. Select muslin, calico, or any inexpensive fabric that mirrors your final fabric’s weight and drape.
A lightweight cotton won’t accurately represent how denim behaves, while stretchy knits differ dramatically from woven materials. Consider fiber content and fabric weight when making your selection.
Choose lighter colors for easy marking. For a variety of options, consider purchasing muslin fabric.
Your toile should behave similarly to your final garment fabric for meaningful test results.
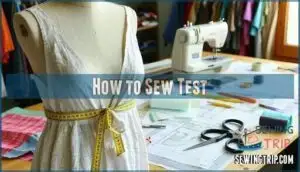
How to Sew Test
Anyone can master the art of sewing tests with the right approach and attention to detail. Testing your sewing machine settings and techniques on scrap fabric prevents costly mistakes and guarantees professional results.
This vital step helps you dial in stitch length, tension settings, and needle selection for your specific fabric choice. Sewing basics are essential for success.
- Set up your test garment – Cut main pattern pieces from muslin or affordable fabric that matches your final material’s weight and drape
- Adjust machine settings – Test stitch length, tension settings, and seam finishes on fabric scraps before assembling your toile
- Baste and fit – Use contrast thread and longer stitches to temporarily sew pieces together for easy adjustments during fitting
This sewing tutorial approach saves time and creates better-fitting garments through systematic testing and refinement.
Fabric Selection Guide
Choosing the right fabric for your test garment makes all the difference between a helpful fitting session and a frustrating waste of time.
You’ll want something that behaves like your final fabric but won’t break the bank if you need to slash and adjust multiple times, which is a critical aspect of the process.
Suitable Fabric Choices
Cotton muslin stands as your go-to choice for test garments, offering balanced weave and neutral behavior.
Calico provides another budget-friendly option with similar properties. You’ll find linen works well for natural-fiber projects, while polyester blends simulate modern garment characteristics.
Old bed sheets make excellent recycled alternatives. Consider fabric drape, fiber content, and weave type when selecting your toile material for accurate testing results.
Fabric Properties to Consider
Think of fabric properties as your blueprint for success when creating a toile or muslin.
Weight affects how your test garment hangs and moves, while drape determines flow.
Stretch factor influences fit accuracy, especially around curves.
Texture impact shows in seam visibility and pressing results.
Fiber content affects shrinkage and stability.
Color fastness prevents bleeding during construction.
Consider calico’s neutral properties – it’s why designers trust this classic choice for reliable test results.
For summer projects, consider fabrics with natural moisture-wicking abilities, which provide a natural way to keep cool.
Tips for Selecting Fabric
Smart fabric selection starts with understanding your project’s needs.
Understanding your project’s needs is the foundation of successful fabric selection.
Consider drape considerations first—choose sewing materials that behave similarly to your final fabric. Budget fabrics work perfectly for test runs, but fiber content matters more than price.
- Color Impact: Light-colored sewing fabric shows markings clearly, making adjustments easier during fitting sessions
- Pattern Matching: Select fabric shopping options with similar stretch and weight properties to your final material
- Drape Considerations: Test how your chosen sewing techniques work with different fabric properties before committing
Assembling and Fitting Muslin
Now you’re ready to build your test garment and see how it fits on your body.
You’ll cut the main pattern pieces from your chosen muslin fabric, then sew them together using simple basting stitches that make adjustments easy.
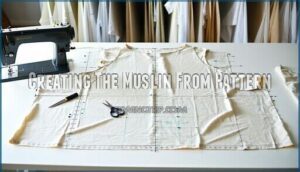
Creating The Muslin From Pattern
Start by laying out your pattern pieces on the muslin fabric with grainlines aligned properly.
Cut accurately along pattern lines, maintaining seam allowances throughout.
Mark essential notches and construction symbols for smooth garment fitting.
This toile becomes your testing ground for identifying potential fitting issues before pattern alteration begins.
Many retailers offer a variety of weights of muslin for your needs.
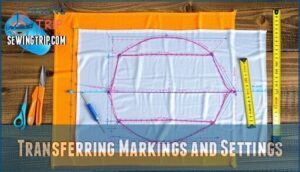
Transferring Markings and Settings
Accurate marking tools help you transfer essential pattern details to your test fabric.
Mark notches, dart points, and grain lines using washable markers or tailor’s chalk.
Check your sewing machine settings before starting – adjust stitch length to 3-4mm for easy removal later.
Use contrast thread in your basting stitch to clearly see seam lines.
This preparation guarantees seam matching accuracy and proper pattern adjustments during fitting, ensuring a successful outcome with proper pattern.
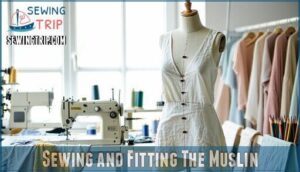
Sewing and Fitting The Muslin
When you’re ready to sew and fit your muslin, remember that speed matters less than accuracy.
Use contrasting thread and longer stitches for easy removal during adjustments.
Focus on the garment fitting process rather than perfect seam finishes.
- Check muslin grain alignment before sewing to guarantee proper drape and fit
- Baste major seams first, then pin dart placement for initial fitting assessment
- Skip muslin closures like zippers—simply pin openings during toile evaluation
- Follow proper fitting order: shoulders, bust, waist, then hips for accurate results
Consider using various muslin options for your test garment.
Making Adjustments and Finalizing
Once you’ve tried on your muslin, you’ll spot areas that need tweaking like tightness at the bust or loose shoulders.
Take your time making these adjustments because getting the fit right now saves you from heartbreak later when you’re working with your beautiful final fabric.
Identifying Fit Issues and Making Adjustments
With your toile fitted, you can spot common problems that need fixing.
Look for tightness that restricts movement, looseness that creates unflattering silhouettes, and fabric pulling or sagging that signals poor fit.
| Fit Issue | Solution |
|---|---|
| Tightness across chest | Let out side seams, adjust dart placement |
| Looseness at waist | Take in seams, reposition darts |
| Fabric pulling at armholes | Enlarge armhole opening, check pattern size |
| Sagging at bust | Reduce dart intake, adjust dart position |
| Wrinkles at shoulders | Reshape shoulder seam, check measurements |
Mark adjustments directly on your garment fitting test using chalk or pins for easy identification during pattern modifications.
Transferring Changes to Pattern
Once you’ve identified fit issues through your muslin, you’ll need to transfer those changes back to your original sewing patterns.
Use pattern tracing paper to create updated pieces, adjusting seam allowances and dart manipulation as needed.
Mark new grainlines adjustment points and update notches placement to reflect your alterations.
This pattern trueing process guarantees your sewing alterations work perfectly on the final fabric, giving you the right pattern size and fit for future projects.
Remember to consult sizing guides for the best fit.
Finalizing The Fit and Moving to Final Fabric
Once you’ve confirmed your toile achieves the perfect fit, you’re ready for the final step.
Double-check all measurements against your pattern adjustments to guarantee Pattern Perfection.
Consider your Fabric Choice carefully – select materials with similar drape and weight to your toile.
Plan your Construction Order, accounting for any Final Adjustments needed.
Your garment construction will flow smoothly with proper Fit Verification completed.
Frequently Asked Questions (FAQs)
Should you sew a muslin test pattern?
Skipping the muslin might seem like a time-saver, but you’ll likely waste more time fixing fit issues on expensive fabric.
Yes, you should sew a muslin test pattern for fitted garments to catch problems early.
What is a sewing pattern?
A sewing pattern is your template for creating garments. It’s a set of paper pieces that show you where to cut fabric and how to assemble it into clothing.
How do you sew a dress?
Like threading a needle through fabric’s story, you’ll first create or buy a pattern.
Then cut fabric pieces, pin them together, and stitch seams systematically from bodice to hem for a beautiful finished dress.
Should I make a second sewing muslin?
You’ll want to make a second muslin if your first one revealed significant fit issues or if you’re still uncertain about the adjustments you made to your pattern.
Is sewing a muslin worth it?
Think of a muslin as your sewing safety net—it catches fitting disasters before they happen.
You’ll save precious fabric, time, and frustration by testing fit first.
It’s absolutely worth making one for fitted garments or complex patterns.
How do you sew a mockup?
Cut mockup pieces from cheap fabric with similar drape to your final material.
Baste seams together using long stitches and contrasting thread.
Try on, mark adjustments, then transfer changes to your pattern before cutting expensive fabric, using this process to finalize your pattern.
How to perform a fabric test?
Cut a small piece of test fabric similar to your final material.
Try different needle sizes, thread types, and stitch settings on your machine.
Check tension, stitch quality, and seam strength before starting your project.
What is a stitch test?
A stitch test is like a dress rehearsal for your sewing machine.
You’ll run practice stitches on fabric scraps before starting your actual project.
This helps you adjust thread tension, stitch length, and needle settings to prevent mistakes on your final fabric, making it a crucial stitch test.
What fabric is used for test sewing?
You’ll use inexpensive fabric like muslin, calico, or old bed sheets for test sewing.
Choose fabric with similar drape and weight to your final fabric.
Light-colored fabrics work best for marking adjustments.
How many toiles should I make before final garment?
Most garments need just one toile to check fit and make adjustments.
For complex designs with structured bodices or fitted sleeves, you might need two toiles—one for major adjustments, another for fine-tuning before cutting your final fabric.
Conclusion
Like a dress rehearsal before opening night, learning how to sew test garments guarantees your final performance is flawless.
When you sew test versions using inexpensive fabric, you’ll catch fit issues early and avoid wasting good materials.
Your muslin becomes a roadmap for success, showing exactly where adjustments are needed.
Transfer those changes to your pattern, and you’ll cut your final fabric with confidence. This simple step transforms sewing from guesswork into precision craftsmanship.
- https://www.threadsmagazine.com/project-guides/learn-to-sew/make-a-test-garment
- https://sew4home.com/quick-tip-test-your-stitches-before-you-start-to-sew/
- https://successfulfashiondesigner.com/quality-control-in-garment-manufacturing-how-it-works/
- https://scissortailquilting.com/seam-test/
- https://www.reddit.com/r/sewhelp/comments/1ga7jo2/has_anyone_done_a_sewing_test_before/


