This site is supported by our readers. We may earn a commission, at no cost to you, if you purchase through links.
Most sewn leather projects fail at the first stitch. The needle punches through, the thread catches, and suddenly you’re wrestling with puckered seams, skipped stitches, or leather that’s stretched beyond repair. It’s not the leather’s fault—it’s yours. Unlike fabric, leather won’t forgive mistakes. You can’t unpick a seam without leaving permanent holes, and there’s no iron to press away evidence of your errors.
That’s why preparation matters more than technique. Before you position your first piece under the presser foot or thread your first saddle needle, you need the right tools in your hands and a clear understanding of how leather behaves.
Master the fundamentals—choosing appropriate needles and thread, adjusting tension correctly, and knowing when to punch holes versus when to pierce—and you’ll transform an unforgiving material into professional-grade work.
Table Of Contents
- Key Takeaways
- Preparing Leather for Sewing
- Essential Tools and Materials for Sewing Leather
- Machine Sewing Leather: Tips and Adjustments
- Hand-Sewing Leather Techniques and Best Practices
- Top 10 Recommended Products for Sewing Leather
- 1. RingSun Dark Brown Leather Sheet
- 2. Schmetz Leather Sewing Machine Needles 90/14
- 3. Schmetz Leather Sewing Machine Needles
- 4. Schmetz Chrome Microtex Machine Needles
- 5. Colonial Needle Cotton Darners Assorted Needles
- 6. C.S. Osborne Harness Needles Size 0
- 7. Tandy Leather Stitching Needles Pack
- 8. General Tools Scratch Awl Wood Handle
- 9. Cream Bonded Nylon Heavy Duty Thread
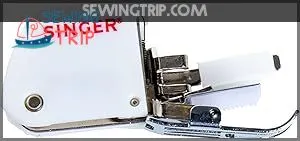
- 10. Singer Walking Presser Foot Accessory
- Frequently Asked Questions (FAQs)
- Conclusion
Key Takeaways
- Leather sewing success depends far more on preparation—choosing the right materials, tools, and needle types—than on technique alone, since leather won’t forgive mistakes the way fabric does.
- Match your needle size, thread weight, and stitch length (3.0–4.0 mm) to your leather thickness to prevent perforation tears and skipped stitches, with longer stitches actually providing stronger seams than tight ones.
- Hand-sewn saddle stitches deliver 20–30% higher tear resistance than machine lockstitches because each thread locks independently at every hole, making them ideal for high-stress leather projects.
- Pre-punching holes, using specialized presser feet like walking or roller feet, and applying surface lubrication are essential machine techniques that prevent sticking, slipping, and stretching while protecting your leather from permanent damage.
Preparing Leather for Sewing
Before you start stitching, you need to set yourself up for success with some key prep work. Getting your leather ready involves choosing the right material, marking it accurately, cutting cleanly, and prepping the surfaces.
Let’s walk through each step so your project goes smoothly from the start.
Choosing The Right Leather Type
Choosing your leather sets the stage for every project you’ll tackle. Before you cut or stitch, consider these five factors that determine success:
- Grain Quality – Full-grain retains natural character; top-grain offers consistency; corrected-grain hides imperfections.
- Tanning Methods – Vegetable-tanned strengthens over decades; chrome-tanned resists water from day one.
- Leather Thickness – Wallets need 2–3 ounces; bags require 4–6 ounces; belts demand 8–9 ounces.
- Project Suitability – Match hide density to structural demands and weight constraints.
- Comfort/Drape – Lambskin breathes and conforms; goatskin toughens but sacrifices softness.
The tanning process impacts the leather’s characteristics, with vegetable tanning taking longer than chrome tanning. Understanding fabric characteristics of leather—whether genuine or imitation leather—helps you select fabric types wisely for any leatherwork endeavor.
Tracing Patterns and Marking Stitching Lines
Once you’ve selected your leather, pattern transfer begins with precision. Use tracing film on moistened leather, pressing a stylus to create visible impression lines. For straight stitch-line spacing, mark endpoints with a leather awl or punch, then connect them with a ruler. An overstitch wheel simplifies repetitive marking on curves.
Accuracy durability depends on securing your pattern—tape prevents shifting. Strong lighting enhances visibility marks, ensuring every line guides your cutting leather and stitching flawlessly. Leathercrafters use awls to create precise stitch holes.
Cutting Leather Accurately and Safely
After marking leather, position your pattern pieces on a cutting mat. Use a sharp rotary cutter with firm, steady pressure—dull blades demand excessive force and raise injury risk.
Hand protection matters: cut-resistant gloves prevent over 70% of preventable lacerations. Measure thickness with leather calipers before cutting techniques begin, ensuring consistent depth.
Knife safety means cutting away from your body, maintaining ergonomic practices that reduce strain during repetitive hand-intensive work.
Preparing Leather Surfaces for Stitching
Once cutting is complete, you’ll want to prep the edges and surface before marking stitch holes. Moisture control keeps your awl cutting point clean and prevents mushy fibers that close up around stitch holes. Deglazing surfaces with pH-balanced cleaners strips factory finishes without damaging collagen.
- Edge beveling removes sharp corners, helping seams sit flush and preventing mushrooming during stitching
- Sanding edges through 600–800 grit creates smooth transitions for consistent awl penetration
- Burnishing agents like gum tragacanth consolidate veg-tanned leather edges before marking leather for precise stitch placement
Essential Tools and Materials for Sewing Leather
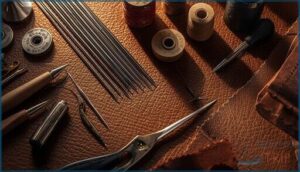
Having the right tools makes all the difference when you’re working with leather. Regular sewing supplies won’t cut it—you’ll need specialized needles, thread, and equipment designed to handle this tough material.
Let’s walk through the essential items that’ll set you up for success, whether you’re stitching by hand or running pieces through your machine.
Selecting Leather Needles for Machine and Hand Sewing
Your leather needles aren’t one‑size‑fits‑all. Machine sewing requires a chisel or knife point—usually 90/14 to 110/18—to slice cleanly through thicker leather without tearing.
Hand‑sewing needles (sizes 0–4) must match your leather thickness and thread diameter for smooth work.
Always check system compatibility: domestic machines use 130/705 H LL, while industrial applications demand specialized needle types for durability and stitch quality.
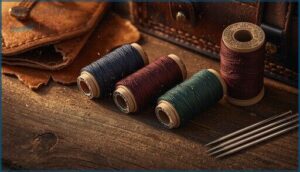
Choosing Strong and Suitable Thread Types
Beyond needle compatibility, thread material and thread weight determine whether your seam holds or tears. Bonded nylon and polyester offer the tensile strength you need—Tex 70 for wallets and fine goods, Tex 135 for bags and belts, and Tex 210 for industrial gear.
Match thread size to needle diameter and project application; waxed polyester excels for hand-sewing thread, while heavy-duty thread in bonded nylon resists abrasion on high-stress seams.
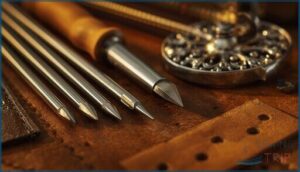
Leather Punches, Awls, and Stitching Tools
You’ll need a reliable leather punch to create clean holes—most range from 1mm to 6mm, with 3-5mm ideal for belt buckles. A stitching awl enlarges tight spots and guides thread through stubborn seams.
For punch precision and stitching consistency, consider diamond awls for flat holes and rotary punches with interchangeable heads.
Tool enhancements like ergonomic grips and an overstitch wheel or stitching groover mark spacing accurately, reflecting market trends toward multifunctional accessories.
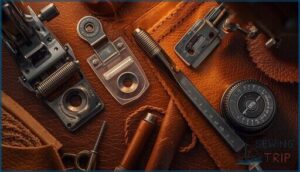
Presser Feet and Accessories for Leatherwork
The right presser foot transforms machine leatherwork from frustrating to fluid. You’ll want to rotate between a few specialized options:
- Walking Feet synchronize top and bottom layers on bulky seams
- Roller Feet glide over dense leather without dragging
- Teflon Feet (Nonstick Sole Presser Feet) prevent sticking on faux leather
- Edge Guides maintain consistent 3–5mm stitch lines
- Adjustable Foot Pressure prevents visible imprints on softer hides
Machine Sewing Leather: Tips and Adjustments
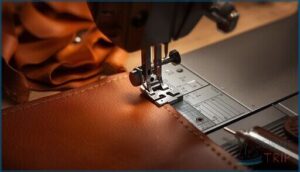
Sewing leather on a machine isn’t like stitching cotton or denim—it requires specific adjustments to avoid damaging both your material and your machine. Getting your stitch length, tension, and presser foot settings right makes the difference between a frustrating project and a clean, professional finish.
Here’s what you need to adjust before you start stitching.
Adjusting Stitch Length and Tension for Leather
When you set your stitch length between 3.0–4.0 mm, you’ll prevent perforation tears that weaken leather over time. Start with looser tension than normal fabrics—too tight, and thread cuts through the hide.
Adjusting stitch length and thread tension depends on leather thickness: thicker material needs longer stitches. Always test machine settings on scrap leather first, matching thread type matters for durability, and watch for centered lock stitches without puckering.
Using The Right Presser Foot and Feed System
Your feed dog and presser feet work like dance partners—when one stumbles, your leather shows it. Smooth presser feet glide over delicate chrome-tanned hides without leaving marks, while knurled feet offer better grip on textured surfaces like suede. A walking foot system moves the top and bottom layers together, preventing the feed dog marking that ruins soft leathers.
Match your presser feet to your project:
- Smooth feet protect delicate garment leather from surface impressions
- Nonstick Teflon presser foot prevents drag on sticky or coated hides
- Walking foot synchronizes fabric movement across multiple thick layers
Preventing Sticking, Slipping, and Stretching
Surface lubrication cuts friction at the needle zone—PTFE tape on your presser foot’s underside or silicone-based thread lubricant reduces sticking by 30–40%. Feed mechanisms need balance: too much foot pressure stretches your top layer, too little lets it slip.
Wonder Clips hold layers without permanent holes, while temporary adhesives prevent the dreaded “one-layer-ends-shorter” problem. Tension balance matters—loose enough to avoid stretch, tight enough to form clean stitches.
Creating Durable Seams and Topstitching
Once your layers move smoothly, focus on seam longevity. A 4 mm stitch length delivers peak rupture force—around 522 N in PU leather—while avoiding perforation tears. Double-topstitched seams distribute bulk evenly, resisting separation better than single rows. Pair Heavy-Duty Upholstery Thread with leather needles for abrasion resistance. Hand stitching reinforces stress points, and edge finishing seals exposed fibers, extending topstitching life under real-world wear.
Double-topstitched seams at 4 mm with heavy-duty thread resist separation and wear far better than single rows
- Stitch length around 4 mm balances thread density with material integrity
- Double rows of topstitching lock seams against rolling and pulling apart
- Bonded nylon thread resists fraying where cotton would fail
- Saddle stitch reinforcement at grips keeps hardware anchored through years of use
Hand-Sewing Leather Techniques and Best Practices
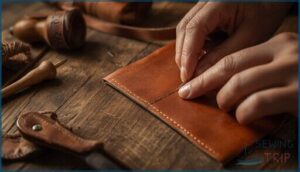
Hand-sewing leather gives you more control over your stitches and creates a polished, professional finish that machines can’t always match. You’ll need to work with the material’s natural thickness and strength, which means preparing your leather properly before you even thread your needle.
Let’s walk through the key techniques that’ll help you create durable, clean stitches from start to finish.
Pre-Punching Holes and Threading Needles
Before you can start handsewing leather with a saddle stitch, you’ll need to prepare stitching holes and thread your needles correctly. Tool selection is crucial—pricking irons or stitching chisels create evenly spaced holes, while an awl ensures they are fully opened. Hole spacing of 2.7–3.38 mm strikes a balance between strength and flexibility. Surface preparation is equally important; using a cutting mat underneath protects your bench and ensures clean holes.
Needle selection depends on tip geometry—blunt tack needles won’t enlarge pre-punched holes, while glovers needles with cutting tips can perforate leather directly. Always use waxed thread to reduce friction and tangling as you stitch.
| Leather Thickness | Recommended Thread Diameter & Needle Size |
|---|---|
| Under 1 mm | 0.4–0.6 mm thread; size 2–4 tack needles |
| 1–2 mm | 0.4–0.6 mm thread; size 2–4 tack needles |
| 2–4 mm | 0.6–0.8 mm thread; size 0–2 tack needles |
| Above 4 mm | 1.0 mm+ thread; size 000 or larger needles |
| Fine work (delicate) | Size 3 glovers needle for piercing if needed |
Saddle Stitching and Other Strong Hand Stitches
With your holes ready, you’re set to master the saddle stitch—your go-to for handsewing leather. This dual-needle technique offers significant strength because each pass locks independently, unlike the lockstitch, where one break unravels everything. Thread types matter: bonded nylon outperforms cotton under stress. Stitch geometry at 3–4 mm spacing prevents tearing. Other stitches like the box or cross stitch add reinforcement where multi-directional durability is needed.
Five Steps to Perfect Saddle Stitching:
- Cut waxed thread four times your seam length and attach leather needles to each end.
- Push the first needle through a pre-punched hole from the front side.
- Insert the second needle from the back through the same hole, crossing the threads.
- Pull both ends evenly to lock the stitch without puckering the leather.
- Repeat through each hole, maintaining consistent tension as you progress along the seam.
Use your stitching awl to keep holes clear if they compress during work.
Using Adhesives and Clips for Accurate Alignment
Before you stitch, contact cement or rubber cement ensures adhesive bond strength that holds layers exactly where you need them. Apply thin coats to both surfaces, wait 5–15 minutes of open time until tacky, then press firmly—clamping pressure matters.
Use wonder clips or binder clips instead of pins to avoid permanent holes. This alignment control keeps your leather project materials steady through every needle pass.
Finishing Edges and Locking Stitches
After your saddle stitch is complete, edge finishing transforms raw cuts into polished details. Edge beveling rounds sharp corners before burnishing techniques compress fibers for a sealed surface. Edge dyeing adds color if needed.
For structural choices, backstitching three holes locks hand-sewn seams without unraveling—unlike machine stitches. This combination delivers seam durability and clean edges every time.
Top 10 Recommended Products for Sewing Leather
Having the right products can make the difference between a frustrating project and a smooth, professional result. The tools and materials you choose directly impact stitch quality, durability, and how easy the leather is to work with.
Here are ten products that consistently deliver reliable performance for both beginners and experienced sewers.
1. RingSun Dark Brown Leather Sheet
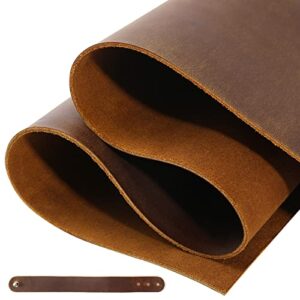
When you’re building a leather craft project, the material itself makes or breaks your work. The RingSun dark brown leather sheet delivers full-grain cowhide tanned using traditional vegetable methods, giving you that firm hand perfect for tooling and carving.
At 2mm thick, it’s substantial enough for wallets and small bags without being unwieldy. You’ll appreciate the natural grain and minimal surface correction—this authenticity accepts dyes and embossing beautifully.
Fair warning: thickness varies slightly between sheets, and durability concerns appear in some reviews, so test on scraps first before committing to your project.
Best For: DIY leatherworkers and hobbyists making wallets, belts, handbags, and small accessories who want authentic full-grain leather that takes tooling and carving well.
- Genuine vegetable-tanned full-grain cowhide with natural grain that accepts dyes, embossing, and carving beautifully
- 2mm thickness strikes a solid balance—rigid enough for structure but flexible enough for curved seams and folded edges
- Mid-range pricing makes it accessible compared to premium European hides while offering better quality than bonded or split leather alternatives
- Thickness varies between sheets and sometimes falls short of the advertised 2mm, so you may get thinner material in certain areas
- Durability concerns pop up in customer reviews, with some reporting excessive scratching and surface wear during normal use
- Natural hide means small blemishes, color variation, and grain inconsistency from sheet to sheet—which adds character but requires accepting imperfection
2. Schmetz Leather Sewing Machine Needles 90/14
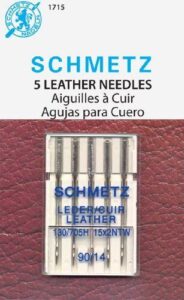
When you’re ready to move beyond universal needles, the Schmetz Leather 90/14 becomes your workhorse. This needle size manages thin to medium leather thickness beautifully, striking the right balance between penetration and stability.
The cutting point slits through fibers cleanly rather than piercing them, which means better stitch quality and reduced friction on your machine.
Compatible with all standard household machines, these needles create visible, permanent perforations—so every stitch counts. Replace them after 6–8 hours of sewing time to maintain consistent performance and extend needle lifespan.
Best For: Sewers working with thin to medium leather and vinyl who want cleaner stitch quality and better penetration than universal needles provide.
- Creates a clean slit through leather fibers instead of piercing, resulting in better stitch quality and less friction on your machine
- Fits all standard household sewing machines with a flat-shank needle system, making them easy to install
- Brown color-coded shoulder makes them easy to identify and distinguish from other needle types in your collection
- Every stitch hole is permanent and visible, so removing stitches leaves a noticeable line of perforations in your leather
- Needs replacement every 6–8 hours of sewing time to maintain performance, which can add up in cost for frequent projects
- Can break during use and may catch on glue or fuzzy interfacing, requiring careful material selection and machine setup
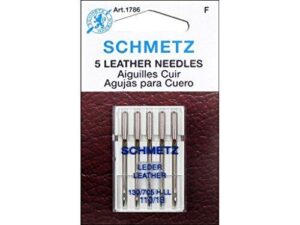
3. Schmetz Leather Sewing Machine Needles
The Schmetz leather needle system 130/705 H LL offers versatility across leather thicknesses when you need dependable needle point geometry for your projects. Their twist-cutting point penetrates material efficiently while reducing needle deflection in dense hides.
Available in metric sizes 70–120, these needles suit everything from delicate garment leather to heavy faux materials. The brown band visual identification helps you grab the right needle quickly.
Standard carded packs of five provide practical quantity for home workshops. Machine compatibility spans most household domestic lockstitch machines with flat-shank systems, making leather sewing accessible without industrial equipment.
Best For: Leatherworkers and hobbyists who want reliable, sharp needles for genuine leather, faux leather, and heavy synthetics on standard home sewing machines.
- Twist-cutting point reduces needle deflection and skipped stitches when sewing through dense, rigid materials like leather
- Brown band makes it easy to identify leather needles at a glance among your needle assortment
- Compatible with most domestic flat-shank sewing machines, so you can do quality leather work without industrial equipment
- The cutting point will damage woven or knit fabrics by slicing fibers, so these needles aren’t versatile across fabric types
- Sewing thick leather often requires slowing down your machine, which makes projects take longer
- Some users report bobbin clogging issues and have had difficulty returning them if there’s a problem
4. Schmetz Chrome Microtex Machine Needles
When precision matters on delicate or artificial leather, chrome microtex needles deliver what standard options can’t. These slim, acute-point needles use 130/705 H-M system geometry, designed specifically for tightly woven coated materials. Available in sizes 70/10, 80/12, and 90/14, they create clean stitch holes with minimal surface disruption—essential for faux leather where visible distortion weakens seams.
The chrome coating reduces friction and heat buildup, improving durability on your machine. Pack of five needles fits most household machines. Choose microtex when you need stitch precision without the cutting action of dedicated leather needles.
Best For: Quilters, topstitchers, and anyone working with faux leather or coated fabrics who needs precise stitches without visible fabric damage.
- Chrome coating reduces friction and heat buildup, extending needle life and improving performance on coated materials
- Slim acute point creates clean stitch holes with minimal surface disruption on delicate or artificial leather
- Compatible with most domestic sewing machines and works well on fine to medium-weight fabrics, microfibers, and synthetics
- Regular replacement needed for fine-point needles, especially on dense or coated layers where wear accelerates
- May not be suitable for thick, full-grain natural leather where dedicated leather needles with cutting points are preferred
- Some packages have defective packaging that makes it difficult to remove the needles
5. Colonial Needle Cotton Darners Assorted Needles
While microtex needles excel on faux leather, cotton darners from Colonial Needle offer a different approach for hand sewing projects. These assorted sizes 1–5 needles feature elongated eyes and sharp points, designed primarily for woven fabrics rather than leather.
Their needle material—hardened steel with polished finish—works adequately for lightweight hand sewing tips, though leather needles remain better for dense hides. The thread compatibility with thicker threads is useful, but expect higher insertion force on leather.
Consider these for fabric-forward sewing techniques only, reserving dedicated leather needles for serious leatherwork.
Best For: Hand sewers and menders who primarily work with woven fabrics like cotton garments, linens, and denim and need a versatile assorted needle set for darning and repair work.
- Long eyes and sharp points make threading thicker darning threads easy and allow efficient penetration of tightly woven fabrics
- Hardened steel with polished finish reduces friction and needle wear, keeping them durable across repeated stitching
- Assorted sizes 1–5 in one pack give you flexibility to match different fabric weights and thread thicknesses without buying multiple sets
- Not designed for leather—the blunt tips and longer shanks require excessive force on dense hides and risk bending or breaking
- Quality control issues reported by some users, including burrs on needle tips and disputed “Made in England” labeling that may actually be China-manufactured
- Higher insertion force needed on non-ideal materials means these needles work best within their intended fabric-mending scope rather than as all-purpose needles
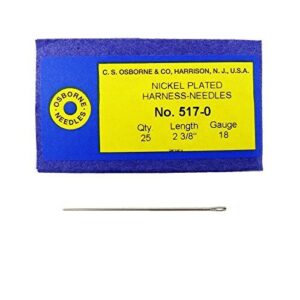
6. C.S. Osborne Harness Needles Size 0
When you’re ready to move beyond general-purpose needles, C.S. Osborne saddlery needles size 0 deliver the durability leather demands. These extra-heavy steel needles feature a rounded tip designed for pre-punched holes, preventing fiber damage that cutting points cause.
The egg-shaped eye accommodates 0.040-inch waxed thread and compatible cords. With a 2-3/8″ length and 18-gauge thickness, they excel in saddle stitching applications on belts, bags, and tack.
Available in packs of 25, these American-made needles represent a smart investment for serious leatherwork where thread pairing and material compatibility matter most.
Best For: Leatherworkers, sailmakers, and repair professionals who need heavy-duty needles that won’t bend or break when stitching thick materials through pre-punched holes.
- Extra-heavy steel construction resists bending and breaking during dense leather work
- Rounded tip prevents fiber damage by passing through pre-made holes instead of cutting through material
- Large egg-shaped eye easily accommodates heavy waxed thread and cords up to 0.040 inches
- The 2-3/8″ length may feel too short or too long depending on personal preference and hand size
- Limited to specific applications like leatherwork and sail repair, not suitable for general-purpose sewing
- Size 0 may be too small for some users who prefer working with larger, thicker needles
7. Tandy Leather Stitching Needles Pack
Tandy Leather’s stitching needles offer a practical middle ground for hand stitching on medium-weight leather projects. This 10-pack features blunt, rounded tips sized for pre-punched holes, preventing thread piercing during saddle stitching.
The extra-large eye accommodates heavier waxed polyester or nylon threads without fraying. At 2 inches long, these needles work well with leather ranging from 2–4 mm thick.
They’re durable enough for wallets, belts, and bags when used with compatible thread sizes. Their affordability and reliability make them ideal for leatherworking enthusiasts building foundational skills.
Best For: Hobbyists and crafters working on small-to-medium leather projects like wallets, belts, and bags who want reliable, affordable hand-stitching needles that won’t break the bank.
- Extra-large eye threads heavy waxed polyester or nylon without fraying, making stitching faster and less frustrating.
- Blunt, rounded tips work perfectly with pre-punched holes, preventing accidental thread piercing during saddle stitching.
- 10-pack offers great value for the price, making them ideal for building your leatherworking toolkit on a budget.
- Sharpness is hit-or-miss—some users find them too dull for certain applications, while others report they don’t penetrate thick leather easily.
- The eye size, while an advantage for thick threads, can be problematic for users working with thinner threads or more delicate projects.
- Durability concerns exist, with reports of needles breaking at the eye under tension, especially when using pliers to pull them through dense leather.
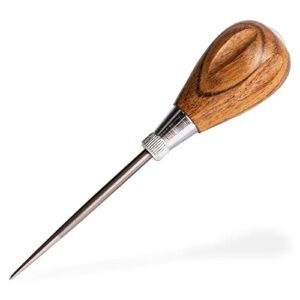
8. General Tools Scratch Awl Wood Handle
Before you start stitching, you need to mark your leather accurately—that’s where the General Tools Scratch Awl Wood Handle becomes one of the essential tools for sewing. This leather marking tool features a rust-resistant 3.5-inch blade and contoured hardwood handle ergonomic design that reduces hand fatigue during layout work.
Priced around $4 to $14 depending on the retailer, it’s a budget-friendly addition to your leather tools collection. Remember awl safety tips: always keep the sharp point aimed away from your body, and test scratch awl pricing across vendors to find the best deal for your leatherworking projects.
Best For: Leatherworkers who need an affordable tool for marking stitch lines, transferring pattern points, and creating pilot holes in soft to medium-weight leather projects.
- Budget-friendly at $4–$14, making it accessible for beginners or anyone building out their toolkit without breaking the bank.
- Rust-resistant 3.5-inch blade runs the full length of the handle for solid durability during repeated marking and light piercing tasks.
- Contoured hardwood handle fits comfortably in your hand and reduces fatigue when you’re doing a lot of layout work on belts, wallets, or small leather goods.
- Not designed for punching through thick stacks of leather—users report it can fail or deform if you try to pierce more than about 1/4 inch of material.
- Mixed reviews on sharpness and build quality, so you may need to touch up the point or check for loose fittings right out of the box.
- Creates larger, less precise holes than dedicated stitching awls, which means it’s better for layout and pilot holes than for actual sewing operations.
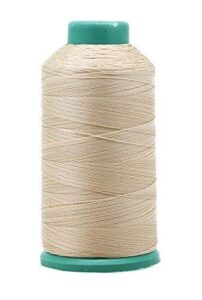
9. Cream Bonded Nylon Heavy Duty Thread
When leather sewing projects demand strength and longevity, Mandala Crafts Cream Bonded Nylon Heavy Duty Thread delivers both. This Tex 70 thread combines outstanding thread strength with outdoor durability—it resists UV rays, moisture, and abrasion.
You’ll appreciate the smooth color matching with natural leathers and clean stitch appearance on belts, holsters, and bags.
At 1500 yards for under $10, it’s ideal for heavy-duty upholstery thread needs and leather sewing tips call for reliable bonded nylon when sewing with leather by hand or machine.
Best For: Leatherworkers and DIY enthusiasts tackling heavy-duty projects like belts, bags, holsters, and upholstery who need strong, UV-resistant thread that won’t break under stress.
- High tensile strength (Tex 70 rated at ~5 kg breaking point) handles thick leather, canvas, and outdoor materials without snapping or fraying
- Bonded nylon coating reduces friction for smoother sewing through tough fabrics and extends thread life in high-speed industrial or home machines
- Excellent value at 1500 yards for under $10, with UV and moisture resistance that keeps seams intact in marine, outdoor, and automotive applications
- Requires dry cleaning only, which limits care options for finished leather goods or upholstery projects
- Tex 70 thickness may be too heavy for delicate fabrics or fine detail work, and isn’t suitable for embroidery
- Needs proper needle pairing (size 100/16 to 110/18) and correct tension adjustments to avoid skipped stitches or thread breaks on some machines
10. Singer Walking Presser Foot Accessory
When thick or layered leather shifts under your needle, the Singer Even Feed Walking Presser Foot solves the problem. Its upper feed dogs synchronize with lower feed dogs for smooth fabric feeding that prevents slippage control issues common in leather sewing techniques.
You’ll achieve professional stitch quality on soft leather, vinyl, and heavy materials—no more puckering or uneven seams. Compatible with Singer low-shank models, this presser feet accessory excels at maintaining alignment during long seam runs.
Essential leather sewing tips include adjusting operating parameters like stitch length to 3.0–4.0 mm when using this walking foot.
Best For: Quilters and leatherworkers who need to sew multiple layers or heavy materials without shifting, puckering, or misalignment.
- Synchronizes upper and lower feed dogs to prevent fabric slippage, making it perfect for thick materials like leather, denim, and quilted layers
- Maintains precise pattern matching on plaids and stripes while delivering professional stitch quality on challenging fabrics
- Compatible with multiple Singer low-shank models and works great for long seam runs on upholstery, bags, and other heavy-duty projects
- Requires regular oiling and cleaning to prevent sticking or hanging during use
- Bulky design can limit workspace and reduce maneuverability for detailed stitching
- Only works with Singer CA, CB, EA, MA, and MB series machines, so compatibility is limited to low-shank models
Frequently Asked Questions (FAQs)
Can you sew leather?
As the old saying goes, “measure twice, cut once”—and with sewing leather, machine capability matters just as much as leather thickness.
Yes, you can sew leather with proper needle selection, heavy-duty thread, and adjusted technique.
How do you sew leather?
You’ll sew leather by matching needle selection and heavy-duty thread to leather thickness, adjusting thread tension and stitch length for stitch consistency, then choosing hand sewing techniques or machine methods for seam strength.
Can you sew leather on a home sewing machine?
Yes, you can sew leather on a home sewing machine if you choose light chrome-tan hides, use leather needles sized 90/14 or 100/16, heavy-duty thread, adjust stitch length, and reduce presser foot pressure appropriately.
What should you do when sewing leather?
Many believe tighter stitches are stronger—but longer stitch lengths (3–4 mm) actually prevent leather from tearing along perforation lines.
Adjust machine settings, use leather needles, and apply proper stitching techniques for durable seams.
Can you sew a leather bag?
Absolutely. With mid-weight leather (4–6 oz), appropriate needles, and strong bonded thread, you can sew durable totes and handbags by machine or hand—perfect for everyday bag use and practical sewing leather projects.
How do you sew leather with a plier?
When handsewing leather, techniques demand more grip. Use pliers to pull needles through pre-punched holes during the saddle stitch technique—especially on thick material. Alternative tools like needle pullers work too, protecting your fingers throughout the leathercraft stitching process.
How can I make leather easier to sew?
To make leather easier to sew, soften thick areas, choose the right needle size, lengthen stitches, reduce foot pressure, and practice on scrap pieces. These adjustments prevent perforation and improve feed.
What tension should I use to sew leather?
Think of tension as the grip holding your thread in place. For leather, increase upper tension to 7–9 on domestic machines. Match thread weight to needle size.
Test on identical leather scraps first—thickness variations demand adjustment. Hand-stitching requires consistent manual pulling force on both needles.
What is the best stitch for sewing leather?
The saddle stitch stands as your strongest choice for leather. Each thread independently locks at every hole, providing 20–30% higher tear resistance than lockstitch.
For machine work, use 3–4 mm stitch length with bonded nylon thread to balance durability and material preservation.
Can I sew leather on a regular sewing machine?
Yes, but with limits. Regular machines handle soft leather up to roughly 0–4 mm thick. Use a 90/14 leather needle, increase stitch length to 0–0 mm, reduce presser foot pressure, and add a walking foot.
Thicker leather demands dedicated machines.
Conclusion
Like a craftsman sharpening tools before work begins, investing in preparation transforms sewing leather from frustrating to rewarding. The right needles, proper tension, and pre-punched holes don’t guarantee flawlessness—but they eliminate the largest sources of failure.
Your sewing leather tips and tricks matter only when built on this foundation. Start here, stay patient, and your hands will eventually produce work that lasts decades. That’s the difference between project and craft.
- https://www.fineleatherworking.com/blog/how-many-stitches-per-inch-leather/
- https://tandyleather.com/blogs/tandy-blog/how-to-choose-the-right-thread-and-needle-size-for-hand-sewing-leather
- https://www.internationalleatherclub.com/leather-needle/
- https://www.gminsights.com/industry-analysis/industrial-sewing-machine-market
- https://www.reddit.com/r/Leatherworking/comments/l0lt6s/how_do_i_measure_a_correct_amount_of_thread/


