This site is supported by our readers. We may earn a commission, at no cost to you, if you purchase through links.
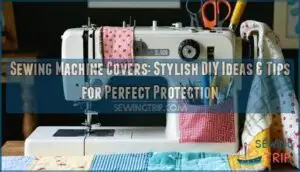
 Sewing machine covers protect your equipment from dust, spills, and damage while adding style to your craft room.
You can buy pre-made covers or make your own with just a yard of fabric and basic sewing skills. For the best fit, measure your machine’s height, width, and depth before choosing a pattern.
Sturdy cotton works well for daily use, while quilted fabrics offer extra padding. Many sewers add pockets for tools or personalize with appliqués and decorative stitching.
The right cover isn’t just practical—it extends your machine’s life and prevents those frustrating dust bunnies from settling in delicate mechanisms, which is crucial for long-term maintenance.
Table Of Contents
Key Takeaways
- You’ll protect your sewing machine from dust, spills, and damage with a proper cover, extending its life and preventing dust buildup in delicate mechanisms.
- You can choose between pre-made covers or DIY options with just basic sewing skills – measure your machine’s height, width, and depth first for the perfect fit.
- Your cover material matters – cotton offers breathability, quilted fabrics provide padding, vinyl allows visibility, and waterproof polyester resists stains and is easy to clean.
- You’ll want to customize your cover with practical features like pockets for tools, while regular cleaning and proper storage will maintain both its appearance and protective qualities.
DIY Sewing Machine Cover
Creating your own sewing machine cover is a simple way to protect your machine and add a personal touch to your workspace.
With just a few materials and basic sewing skills, you can craft a cover that fits perfectly and keeps your machine safe from dust, which is a key aspect of maintaining your equipment, and by doing so, you achieve a personal touch.
Materials Needed
Getting started with making your own sewing machine cover? You’ll need just a few essentials to keep things simple and fun.
Here’s your quick checklist:
- Fabric options: Choose cotton, waterproof polyester, or denim for durability and style.
- Batting or foam stabilizer: Adds structure to your cover for that snug, polished look.
- Trim choices: Use bias binding or decorative trim for edges, especially those curved areas.
- Closure types: Consider zippers, ties, or elastic for functionality and ease of use.
- Thread selection: Pick sturdy, high-quality thread that matches or contrasts your fabric.
Consider different cover material options for enhanced protection.
These basics will keep your sewing machine safe from dust and damage while ensuring your design shines!
Steps for Making The Cover
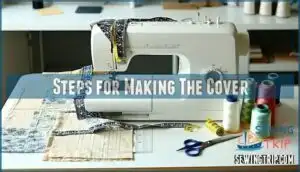
To make your sewing machine cover, measure your machine carefully for a snug fit. Choose durable sewing machine cover fabric for a custom design.
Use a sewing machine cover pattern or create your own by cutting fabric to size, adding options like padding for protection.
Sew panels together with simple stitching, and finish edges neatly for a polished look. Consider using interfacing to provide essential fabric stabilization.
Tips and Tricks for Sewing
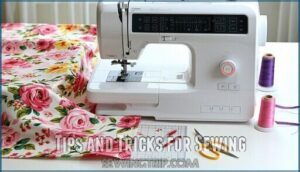
When you’ve gathered your materials and begun cutting fabric for your sewing machine covers, a few handy tricks can make your work smoother and more enjoyable.
Use a fabric marking pen to pinpoint seam finishes, ensuring precise alignment.
Curved edges? Try cutting fabric on the bias—it makes attaching trim less tricky.
Pressing techniques matter too; press binding strips beforehand for clean, sharp edges.
Opt for a walking foot when quilting layers.
It evens pressure, which gives your cover a polished texture.
Adjust thread tension carefully so stitches look clean on both fabric sides.
Need more structure? Flexible foam stabilizer does wonders, especially for open-style covers with pockets for machine accessories.
These tips keep dust protection functional and inspire future sewing projects for years to come!
Popular Sewing Machine Cover Patterns
You can find sewing machine cover patterns in a variety of sizes and designs, from quilted to vintage styles.
Many options also include customizable features, letting you add pockets or adapt the fit for your machine.
Different Sizes Available
Sized just right, sewing machine covers come in standard sizes or can be custom-fitted based on machine dimensions.
Whether you’ve got a compact or large machine, finding a snug fit is easier with clear measuring guides. For example, medium covers fit BERNINA 5 Series machines at 13”H x 17¾”W x 8”D, while large ones accommodate models like the BERNINA 7 Series.
If you’re creative, DIY options let you tailor covers to exact needs, blending size compatibility with style effortlessly.
These covers offer essential protection from dust and potential spills.
Customizable Features
Finding the right sewing machine cover? Let’s talk about making it your own! Custom sewing covers are about blending practicality with creativity.
You can add pockets for threads, scissors, and more, or consider waterproof fabric choices for easy maintenance. Include trim options like bias binding for smooth, professional finishes.
Embroidery designs give your cover a personalized touch, whether you want your name or a fun pattern stitched on. Think about size compatibility and adjustments.
Verify the cover fits snugly on your machine but leaves room for handles or attachments. Don’t forget, pockets add function while making your workspace tidy.
Tutorials, like those on SewCanShe, guide you on finishing techniques for mesh pockets or zippered options. Your personalized sewing cover can be as stylish and functional as you need—just experiment and create!
Tips for Choosing The Right Sewing Machine Cover
You’ll need to measure your sewing machine’s dimensions before choosing a cover that fits properly and protects from dust.
The right cover will both shield your machine from damage and add a personal touch to your sewing space with materials that match your style and needs, providing a way to protect your investment.
Size and Compatibility
The perfect pattern is only half the battle when choosing a sewing machine cover. Size and compatibility truly make or break your protection plan.
Before shopping or cutting fabric, measure your machine’s height, width, and depth carefully. You’ll need these numbers to match with the right cover size for your specific model.
Many standard covers work well for popular brands like Brother and Singer, but specialized machines often require custom sizing. "I once made a beautiful cover that wouldn’t fit over my machine’s handle," shares sewing instructor Lisa Chen. "Always add an extra inch for clearance."
Universal covers offer flexibility but may not provide the snug fit needed for complete dust protection. When ordering online, check the sewing machine cover dimensions against your machine measurements. To guarantee a proper fit, consider the cover’s overall dimensions before purchasing.
For oddly shaped machines or those with attached embroidery units, consider custom sizing options. The goal is a cover that slips on easily but stays put without gaps where dust can sneak in.
Material and Durability
When selecting materials for your sewing machine cover, durability matters as much as style.
Vinyl offers exceptional durability with reinforced stitching and space-saving foldability.
Cotton provides breathability while still protecting against dust.
For maximum strength, consider denim or 600D Oxford fabric, which won’t take up space and makes organization easier.
DuraWax waxed canvas delivers remarkable stability, maintaining its shape while protecting your machine.
Waterproof polyester resists creasing and deformation, plus it’s machine washable for easy care.
The best heavy-duty sewing covers combine stain resistance with practical features.
Don’t compromise on quality—your sewing machine deserves protection that lasts through years of creative projects.
Design and Style
The style of your sewing machine cover does more than just look pretty—it protects your valuable equipment while expressing your personality.
When choosing your design, think about fabric choices that complement your sewing space.
Cotton and quilting fabrics offer both durability and endless color palettes to match your room’s theme.
Don’t forget trim options that can transform a simple cover into a statement piece.
Colorful trim, decorative stitches, and pattern embellishments all enhance the cover’s aesthetic appeal.
Many sewers add practical elements to their designs, like pockets for storing small tools or see-through vinyl panels to identify the machine underneath.
For enhanced structure, consider using foam stabilizer options.
Your sewing machine cover design should blend function with style—creating a protective layer that you’ll be proud to display.
How to Care for Your Sewing Machine Cover
You’ll need to clean your sewing machine cover regularly to maintain its appearance and extend its life.
Proper storage when not in use will prevent creases and damage, keeping your cover looking as good as the projects you create with your protected machine, which helps maintain its overall life.
Cleaning and Maintenance
Regular maintenance of your sewing machine cover extends its life and keeps your workspace looking professional.
Proper care prevents dust buildup and maintains the cover’s protective qualities for your valuable equipment.
Follow these simple steps for effective cover maintenance:
- Remove dust weekly using a lint roller or soft brush to prevent particles from transferring to your machine
- Spot clean vinyl covers with mild soap and a damp cloth, allowing them to air dry completely
- Launder fabric covers according to material type—cotton covers typically handle gentle machine washing while specialty fabrics may require hand washing
- Apply fabric protector spray to non-vinyl covers every six months to guard against stains
For stubborn stains, tackle them immediately rather than letting them set.
To maintain vinyl covers, consider using a specialized cover cleaner.
Oiling mechanisms work better in a dust-free environment, which your clean cover helps maintain.
Remember that consistent lint buildup removal from both your machine and cover prevents potential sewing issues down the road.
Storage and Protection
Proper storage of your sewing machine cover is just as important as the cover itself for ensuring machine longevity. When not in use, fold your cover neatly to prevent creases and store in a dry place away from direct sunlight.
A cover can also prevent wear and tear, keeping your machine in good condition. For covers with special embellishments, turn them inside out before storing to protect decorative elements.
Don’t stack heavy items on your cover, as this can damage padding and structure. Many sewists keep a small accessory pouch with their cover for space optimization and convenient storage of cover-specific items.
This simple habit extends both your cover’s life and enhances machine protection against dust and environmental factors. The following storage methods offer various benefits:
| Storage Method | Protection Benefit |
|---|---|
| Hanging loops | Prevents wrinkles and saves space |
| Fabric bag | Shields cover from dust when unused |
| Flat drawer | Maintains shape and prevents damage |
| Rolled storage | Works for quilted or padded covers |
| Wall hook | Keeps cover visible and accessible |
By choosing the right storage method, you can ensure your sewing machine cover remains in excellent condition, providing long-lasting protection for your machine.
Common Issues and Solutions
When troubleshooting your sewing machine cover, thread bunching (or "bird nesting") is often the first sign something’s wrong.
To fix this common headache, make sure your project is fully supported while sewing to prevent fabric stretching.
Re-threading both top and bobbin threads can quickly solve the problem.
If your cover turns out sagging or floppy, add medium-weight interfacing for structure and stability.
For fitting issues, adjust your seam allowance—use 3/4"-1" if it’s too big or reduce to 1/4" if too small.
During sewing, periodically test the cover on your machine to confirm proper size match.
Regular cleaning prevents dust accumulation that can lead to vinyl cracking and snagged threads.
With proper care, your cover will provide durable protection for years to come.
Frequently Asked Questions (FAQs)
Can You Make your own sewing machine cover?
Yes, you can definitely make your own sewing machine cover.
It’s a straightforward DIY project using fabrics like cotton, vinyl, or canvas, plus batting for padding.
You’ll need basic measurements and simple sewing skills.
How to make a sewing machine cover that is easy to use?
Choose breathable fabric like cotton, measure your machine, add 2" for seam allowance.
Cut pieces for top and sides, sew them together.
Finish with bias tape or elastic for easy removal.
What is a sewing machine cover?
A sewing machine cover protects, preserves, and prolongs your machine’s life.
It’s a fitted, fabric shield that keeps dust, dirt, and debris away while you’re not sewing, preventing internal damage and maintaining functionality.
What is a good cover for a sewing machine?
For great protection, you’ll want a cover made from durable materials like vinyl, cotton, or nylon.
Look for features like pockets, water resistance, and proper sizing to fit your specific machine model.
Why is it important to cover a sewing machine when nobody is using it?
Covering your machine prevents dust buildup that can damage internal components.
It also protects from moisture, sunlight, and accidental spills.
You’ll save money on repairs and extend your machine’s lifespan substantially.
How to measure for a sewing machine cover?
Picture your trusty machine waiting for its perfect jacket.
Grab a tape measure and record the height, width, and depth of your machine.
Don’t forget to include any knobs or attachments that stick out, to ensure a perfect fit.
What type of fabric is best for a sewing machine cover?
Cotton fabric offers the best protection for your machine.
You’ll want to choose medium-weight cotton with quilting batting or fleece backing.
Vinyl sections let you see your machine while keeping dust away, this is a key feature to keep dust away.
Are sewing machine covers machine washable?
Most sewing machine covers are machine washable, depending on their material.
You’ll want to check the care instructions for your specific cover.
Vinyl covers can be wiped clean, while fabric ones typically handle gentle cycles.
How long does it take to make a sewing machine cover?
In the blink of an eye, you’ll create your cover! Typically, it takes 1-3 hours depending on your sewing experience and design complexity. You’ll need measuring, cutting, and assembly time.
Can covers be used during machine operation?
No, you shouldn’t use covers during machine operation.
They’re designed for storage only and could cause overheating or mechanical interference if left on while sewing.
Always remove your cover completely before turning on your machine.
Conclusion
Ironically, many sewists who protect their fabrics from damage often forget to shield their most important tool.
Whether you purchase or DIY your sewing machine covers, they’re essential investments in your craft’s future.
By choosing the right size, material, and design, you’ll protect your machine from dust and damage, and also add personality to your sewing space.
So don’t leave your faithful stitching companion exposed—with these tips, you can create or select perfect sewing machine covers that combine practicality with style.


