This site is supported by our readers. We may earn a commission, at no cost to you, if you purchase through links.
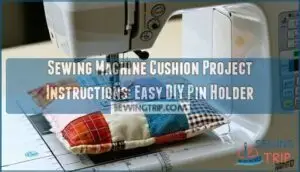
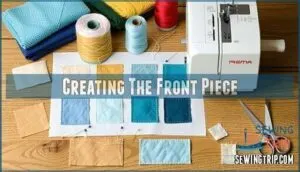
Cut fifteen squares and arrange them in a 3×5 grid pattern. Use quarter-inch seams to join squares row by row, then connect the rows. Press seams flat for clean results.
Cut elastic by wrapping it around your machine, minus 2-3 inches for proper tension. Create backing from side fabric rectangles and stuff firmly.
This clever cushion keeps pins organized right where you need them. The real magic happens when you discover the improv patchwork techniques that make each cushion uniquely yours, using fabric scraps and polyester stuffing to create a handy and unique sewing machine cushion.
Table Of Contents
Key Takeaways
- You’ll create a functional pin holder that attaches directly to your sewing machine using elastic, keeping pins within easy reach while you work
- Mix at least three different fabric scraps in a 3×5 grid pattern (15 squares total) and use quarter-inch seams throughout for professional results
- Cut elastic 2-3 inches shorter than your machine’s circumference to ensure proper tension, then stuff firmly with polyester batting for durability
- You can customize with improv patchwork techniques and decorative elements like ribbons, buttons, or appliqués to match your personal sewing style
Sewing Machine Cushion Basics
You’ll create a practical pincushion that attaches directly to your sewing machine, keeping pins within easy reach while you work.
This project uses simple techniques like patchwork piecing and elastic insertion, making it perfect for confident beginners who want to organize their sewing space, utilizing patchwork to achieve the desired outcome.
Materials and Tools Required
Success starts with the right tools.
For your sewing machine cushion project, you’ll need three essential fabric types, elastic options, and batting choices. Here’s what to gather:
- Main fabrics: At least three different fabric scraps, plus a fat eighth for sides and backing
- Hardware: One-inch wide elastic (about 15 inches) and polyester stuffing for firmness
- Tools: Sharp cutting tools, matching thread selection, and your trusty sewing machine.
Consider browsing options for a sewing machine cushion to enhance comfort.
Fabric Selection and Preparation
Choosing the right fabrics makes your pincushion both beautiful and durable.
Mix different textures and colors for visual interest. Pre-washing fabrics prevents shrinkage and bleeding later. For the best results, consider how fabric weight affects drape.
- Gather fabric scraps – Mix at least three different patterns or colors for the front piece
- Select coordinating backing fabric – Choose a fat eighth that complements your scraps
- Pre-wash all materials – Prevents color bleeding and guarantees fabric durability over time
Understanding Seam Allowances
Your sewing machine cushion project relies on precise seam allowance width for professional results.
Use ¼-inch seams throughout, maintaining consistent seams with your machine’s seam guide. For curved seams, clip notches to reduce bulk.
Finish raw edges with zigzag stitching to prevent fraying. Basic sewing machine settings are vital for peak performance.
These fundamental sewing techniques guarantee your cushion project looks polished and durable.
Constructing The Cushion
Now you’re ready to bring your cushion to life with hands-on construction. This step transforms your cut pieces into a functional pincushion that’ll attach securely to your sewing machine.
Creating The Front Piece
Now you’ll arrange fabric scraps in a grid pattern for your sewing machine cushion project.
Place fifteen squares in three rows of five each. Join squares within each row first, then connect the rows together.
Press seams flat after each step. This square arrangement creates the foundation for your cushion project.
Basting ties will come next, so focus on row joining and seam pressing now.
Adding Elastic and Backing
Now you’ll prepare your sewing machine pincushion for its final steps.
Cut your elastic by wrapping it around your sewing machine, then subtract 2-3 inches for proper tension control. Create the backing ring from your side fabric rectangles.
Here’s your elastic measurement and backing process:
- Elastic Measurement: Loop elastic around machine area, mark length, cut shorter for snug fit
- Backing Fabrics: Join rectangles into ring shape, press seams flat for clean edges
- Stitching Elastic: Zigzag stitch elastic ends together, then baste to backing unit securely
Different types guarantee proper stretch and recovery.
Sewing and Assembling The Cushion
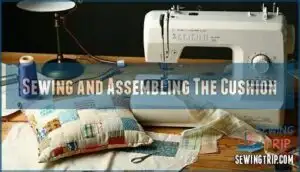
Now you’ll place the front and backing pieces together, right sides facing.
This moment marks where your cushion truly takes shape—precision here ensures professional results.
Every stitch counts when transforming scraps into your perfect sewing companion
Sew around the entire perimeter using your standard seam allowances, but leave a small opening on one side for turning.
This elastic insertion point becomes your gateway to success.
After turning right-side-out, focus on stuffing firmness – pack it well for durability.
Use high-quality polyester thread to guarantee UV resistance.
Hand sewing closes the final gap, completing your DIY cushion project assembly.
Customizing Your Cushion
Once you’ve built your basic pin cushion, you can make it truly yours with some simple customization tricks.
Personal touches like colorful patchwork, decorative ribbons, or a handy hook-and-loop attachment will transform your functional cushion into a sewing companion that matches your style.
Using Improv Patchwork Techniques
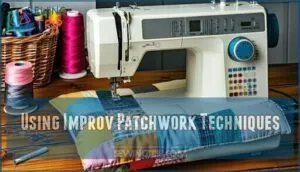
Creativity flows when you ditch rigid patterns for quilting improv techniques.
Mix scrap fabric pieces in unexpected ways, layering different textures for visual interest.
Your color palette can be bold or subtle, creating unique design variations.
This patchwork approach transforms ordinary sewing projects into personalized art.
Your sewing machine cushion becomes a canvas for experimentation and self-expression.
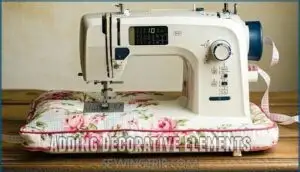
Adding Decorative Elements
Transform your handmade cushion into a masterpiece with simple decorative touches.
Ribbon embellishments and piping insertion add professional polish, while fabric appliqués create visual interest.
- Button accents – Use covered buttons for coordinated style
- Embroidery details – Add personalized monograms or patterns
- Custom appliqués – Layer contrasting fabrics for dimension
These elements elevate your sewing machine cushion pattern from basic to brilliant, creating a personalized cushion that reflects your unique style.
Consider using durable cushion buttons for a long-lasting and professional finish.
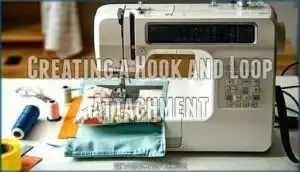
Creating a Hook and Loop Attachment
For a more permanent sewing machine accessory, consider hook and loop closures instead of elastic.
Cut velcro strips to match your cushion width. Sew hook pieces onto your machine’s surface, loop pieces onto the cushion back.
Test attachment strength by tugging gently. This DIY approach offers superior durability testing results.
Loop placement matters for stability. Consider alternative closures like snap fasteners for heavy-duty sewing machine attachment needs.
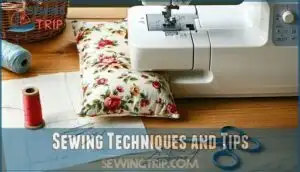
Sewing Techniques and Tips
You’ll master essential sewing techniques that make your cushion project smooth and professional.
These methods guarantee clean seams, proper elastic placement, and a finished piece that’ll last through countless pinning sessions, ensuring a professional look.
Mastering Simple Patchwork Piecing
Simple patchwork piecing transforms fabric scraps into stunning designs through smart planning.
Start with color harmony by grouping complementary fabrics. Cut fabric squares consistently, maintaining seam consistency throughout your sewing tutorial.
Arrange patchwork layouts before stitching, testing different combinations. Use proper pressing techniques after each seam.
These sewing instructions guarantee professional results in your sewing projects, making even beginner sewing patterns look polished with proper planning.
Working With Elastic and Batting
How does elastic tension affect your machine cushion pattern’s success? Getting the right balance takes practice, but these materials make all the difference.
- Elastic tension determines how snugly your cushion grips the machine
- Batting density affects pin-holding power and cushion firmness
- Elastic durability guarantees your sewing tutorial results last through daily use
- Batting alternatives like interfacing offer different stuffing options for your cushion sewing guide
Measure elastic around your machine without stretching. Cut it 2-3 inches shorter. This elastic placement creates proper tension. Join ends with zigzag stitches for elastic insertion that won’t fail during use.
Finishing Seams and Edges
Professional seam finishing elevates your machine cushion pattern from amateur to expert level.
Clean edges prevent fraying, guarantee durability, and create polished results that showcase your skills.
To prevent fraying, consider using pinking shears effectively for a professional finish.
| Finishing Technique | Best Use Case |
|---|---|
| Seam Neatening with zigzag stitch | Raw fabric edges on cotton blends |
| Edge Securing with overlock | High-stress seams and stretch fabrics |
| Corner Clipping at angles | Sharp points and curved intersections |
| Piping Insertion for borders | Decorative edges and professional finish |
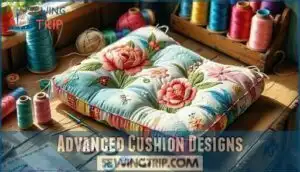
Advanced Cushion Designs
Once you’ve mastered the basic pincushion design, you can explore creative variations that make your sewing setup even more functional.
These advanced techniques let you customize size, add smart storage features, and use special materials that match your sewing room’s style.
Exploring Alternative Shapes and Sizes
Once you’ve mastered basic techniques, custom cushion design opens up exciting possibilities.
Different shapes and sizes can transform your sewing experience, offering better ergonomic cushion support and machine compatibility.
- Round cushions provide 360-degree comfort but require more fabric consumption
- Wedge shapes offer targeted sewing posture support for specific machine areas
- Mini squares work perfectly for portable machines with size constraints
Shape benefits vary based on your workspace.
Ergonomic cushioning isn’t one-size-fits-all, so experiment with dimensions that match your sewing machine comfort needs.
Incorporating Magnetic or Zipper Closures
Beyond shape variations, adding closures transforms your sewing machine pin cushion into a versatile sewing machine accessory.
Magnetic closures offer effortless access for quick pin retrieval, while zipper pouches create secure storage.
Consider closure placement carefully – magnets work best on flat surfaces, zippers excel along edges.
Strong neodymium magnets provide reliable magnetic strength without bulk.
One can even make a cover with envelope closure, which needs no special notions.
| Closure Type | Best Placement |
|---|---|
| Magnetic | Flat surfaces, hidden seams |
| Coil Zipper | Side edges, back panels |
| Invisible Zipper | Top openings, decorative areas |
| Hook & Loop | Adjustable positions, temporary access |
Secure attachment requires reinforcement at stress points.
Use fusible interfacing around closure areas to prevent fabric distortion.
For aesthetic integration, match zipper colors to your fabric or choose contrasting elements as design features.
This DIY approach creates professional-looking sewing machine accessories while maintaining functionality.
Using Specialty Fabrics and Embellishments
Elevate your sewing machine projects with textured fabrics like velvet and faux leather.
These materials add luxury but need special needles. Apply sequins and beaded embellishments for sparkle.
Use ribbon work and lace overlays to create depth. Test your sewing machine accessories first.
These fabric choices transform ordinary sewing machine customization into show-stopping pieces.
Frequently Asked Questions (FAQs)
How do you open a sewing machine pin cushion?
To open your pin cushion, find the hand-sewn closure seam.
Carefully remove those stitches with a seam ripper or small scissors.
The opening lets you access the stuffing inside for cleaning or refilling.
How do you sew a cushion in a sewing machine?
Join your fabric pieces with quarter-inch seams, right sides together. Pin edges, stitch around perimeter, leaving one side open. Turn right side out, stuff firmly, then hand-stitch the opening closed.
Who makes this cushion project for beginners?
Like a guiding light for crafters, you make this cushion project yourself.
The instructions target confident beginners, giving you step-by-step guidance.
You’ll create a functional pincushion that attaches to your sewing machine.
How many cushions should I make?
Start with one cushion to test your skills and gauge your interest.
If you enjoy the process and need more, make additional ones.
Most beginners find one sufficient for learning the techniques before deciding on extras.
How do you use a pincushion on a sewing machine?
Loop the elastic around your sewing machine’s arm or base where you’ll work.
Attach the pincushion using its elastic band.
The cushion stays put, keeps pins handy, and won’t slide around while you’re sewing, which is a very useful feature to have.
How many pincushions does a sewist need?
More hands make light work, but you’ll need at least three pincushions.
Keep one at your machine, another at your cutting table, and a third for hand-sewing projects.
Extras help when working on multiple tasks simultaneously, and having extras can make a significant difference.
How to sew a cushion with a sewing machine?
Cut your fabric pieces, join seams with 1cm allowance, add ribbon trim, create back opening with folded edges, stitch around perimeter, clip corners, and turn right side out.
Is it cheaper to make your own cushions?
Making your own cushions typically costs 30-50% less than buying ready-made ones. You’ll save on labor costs, markup, and can use budget-friendly fabrics while customizing exactly what you want.
How to make a pin cushion step by step?
Gather fabric scraps, batting, and elastic.
Create a patchwork front by sewing small squares together.
Cut backing fabric, stuff with filling, then sew edges closed leaving a small opening for final hand-stitching, which involves a complete process.
How much fabric do I need to make cushion covers?
You’ll need about three-quarters of a yard total fabric for most cushion covers.
That breaks down to half yard for the main fabric, quarter yard for accent pieces.
Measure your cushion first, then add seam allowances.
Conclusion
Successfully completing these sewing machine cushion project instructions creates a practical workspace upgrade.
Your new pin holder keeps supplies organized and accessible while you work.
The elastic attachment system works well on most machines.
Regular use proves this cushion saves time and reduces clutter.
You’ll find the stuffing maintains its shape with daily use.
This project uses minimal fabric scraps efficiently.
Your completed cushion demonstrates that simple sewing machine cushion project instructions produce useful, lasting results.
It is a project that enhances your sewing experience by keeping your workspace organized and clutter-free, making it a lasting addition to your sewing routine.

