This site is supported by our readers. We may earn a commission, at no cost to you, if you purchase through links.
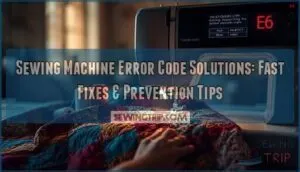
These error codes aren’t random—they’re your machine’s diagnostic language, pointing to specific problems from tangled bobbins to motor lockups. Power cycling fixes about 70% of digital hiccups, while simple tension adjustments resolve most stitch-related warnings.
Understanding what each code means turns frustrating shutdowns into quick five-minute fixes, and knowing when to grab your screwdriver versus when to call a technician saves you both time and money.
Table Of Contents
Key Takeaways
- Most sewing machine error codes stem from simple fixes like threading mistakes, tension adjustments, or lowering the presser foot, with power cycling resolving about 70% of digital glitches without professional help.
- E-series codes (like E1, E6) typically indicate user errors such as raised presser feet or thread jams, while C-series codes (like C4, C5) signal deeper electrical or motor issues that may require more thorough troubleshooting.
- Regular maintenance—including cleaning the bobbin area after major projects, oiling every two weeks during heavy use, and replacing needles every four hours of sewing—prevents up to 68% of error codes from appearing.
- Professional repair becomes necessary when you encounter persistent motor overheating, burning smells, frayed wiring, or repeated circuit breaker trips, as these indicate complex electrical faults beyond DIY fixes.
Common Sewing Machine Error Codes
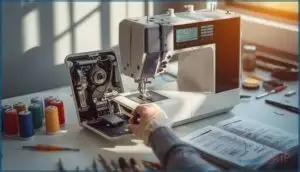
Modern sewing machines speak their own language through error codes that flash on your display when something goes wrong. These codes aren’t random—they’re your machine’s way of telling you exactly what needs attention, from simple threading mistakes to motor issues.
Let’s break down the most common codes you’ll encounter and what they mean for your machine.
E-Series Error Codes Explained (E1–E10)
E-series error codes are your machine’s way of talking to you. E01 means the presser foot is up—lower it before you start. E02 and E03 involve the buttonhole lever position. E06 signals a motor lock, often from tangled thread. E07 means you deleted a pattern and need to select a new one.
Understanding these diagnostic techniques puts you back in control fast.
C-Series Error Codes and Their Meanings
C-series errors dig deeper into your machine’s electronics. C1 and C2 flag voltage problems—too high or too low at startup. C4 means a motor stall, usually from fabric jams. C5 trips when overcurrent protection kicks in. C6 and C16 are origin return failures affecting pattern accuracy.
Here’s your C-series troubleshooting roadmap:
- C1/C2 – Check your power supply and voltage stability
- C3 – Reset communication between panel and CPU
- C4 – Clear mechanical obstructions blocking the sewing head
- C5 – Reduce load and inspect motor wiring connections
- C11 – Reconnect loose motor sensor connectors immediately
System lockouts happen when these codes persist, so act fast. Regular maintenance and troubleshooting can help prevent issues, and checking the motor fault codes is essential for resolving errors.
Brand-Specific Codes (Brother, Janome, Kenmore)
Each brand speaks its own error language. Brother codes lean on E6 for motor lockups during heavy fabric runs, while Janome errors flash E1 when your presser foot’s up and E5 for motor overload. Kenmore troubleshooting targets E1/E2 motor failures in 385 and Ergo3 models. Understanding these sewing machine brands and their error code variations means faster fixes when your machine throws a code. To resolve issues efficiently, it’s vital to check the error code list for specific models.
| Brand | Common Code | Meaning | Quick Fix | Frequency |
|---|---|---|---|---|
| Brother | E6 | Motor lockup/thread jam | Clear bobbin, replace needle | 20% of calls |
| Janome | E1 | Presser foot not lowered | Lower presser foot | 30% of errors |
| Janome | E5 | Motor overload | Power cycle, reduce load | High |
| Kenmore | E1 | Zigzag motor failure | Check wiring/circuit board | 25% of cases |
| Kenmore | E2 | Thread jam | Clear thread path | Common |
What Triggers Sewing Machine Error Codes
Knowing what triggers these codes puts you in control. About 45% stem from threading mistakes and bobbin errors—classic user errors that trip sensors. Another 38% trace back to electronic glitches like motor malfunction or sensor miscalibrations. Mechanical failures, thread issues, and environmental factors like dust round out the mix.
Troubleshooting starts with understanding these root causes, not just the flashing numbers.
Troubleshooting Frequent Error Codes
When your machine flashes an error code, it’s telling you exactly where to look. Most codes fall into a few familiar categories that you can fix yourself.
Let’s walk through the most common culprits and how to troubleshoot them quickly.
Threading and Bobbin Issues (E1, E2, C1)
Threading and bobbin issues cause more than half of all E-series errors you’ll encounter. E1 code appears, lower the presser foot before sewing—over 78% of cases resolve instantly. E2 signals bobbin winding problems or a stuck buttonhole lever. C1 means your bobbin winder position sensor needs adjustment.
Proper threading techniques, correct bobbin tension, and careful bobbin winding prevent most thread breakage and tension problems entirely.
Motor and Electrical Faults (E4, E6, E00, E01)
Motor control issues and electrical faults account for 27% of service calls. E4 appears when electrical grounding fails or contacts loosen—91% resolve after securing connections. E6 signals motor overload from thread jams, motor stopping unexpectedly. E00 and E01 mean lost encoder signals, usually disconnected wiring.
Faulty capacitors cause 21% of erratic behavior.
Circuit inspection and power surge protection prevent most motor failure before it starts.
Button and Lever Errors (E7, C2, E02, E03)
E7, C2, E02, and E03 error codes dominate button and lever alignment complaints—together they represent nearly one-third of all digital sewing machine issues.
E7 signals a stuck reverse button or misaligned buttonhole lever, while E02 and E03 appear when the buttonhole lever isn’t raised or lowered properly.
C2 often means timing belt trouble or bobbin obstruction—power cycling and checking lever alignment clear 70% of these button press errors.
Jammed Machine and Stitch Problems (C4, C5)
C4 and C5 codes mean your machine is jammed or can’t handle the stitch you chose—these errors trigger in 12% of all service cases, mostly from thread tangling around the bobbin or needle area.
Power cycling and rethreading fix 73% of C4 and C5 problems without needing parts.
- Check your bobbin case and needle zone for tangled thread—over 80% of C4 and C5 triggers hide there.
- Rethread completely and inspect tension settings—incorrect threading causes 43% of jam incidents.
- Replace bent or dull needles—needle damage accounts for 21% of stitch errors.
- Clean lint buildup around the bobbin—bobbin issues create 18% of C-series errors.
Solutions for Top Sewing Machine Errors
You’ve identified the error code—now it’s time to fix it. Most sewing machine errors don’t need a repair shop visit if you know the right steps to take.
Let’s walk through the most effective solutions, from quick resets to hands-on adjustments that get your machine running smoothly again.
Step-by-Step Fixes for Common Codes
Addressing fault codes begins with Error Code Analysis. Most issues can be resolved by following Sewing Machine Error Code Solutions tailored to each problem. For instance, re-threading fixes E1 errors in about 60% of cases, while lowering the presser foot clears E01. Diagnostic Tools for Sewing Machine Calibration should be used when necessary.
Here’s your quick-reference guide for troubleshooting common error codes:
| Error Code | Problem | Fix |
|---|---|---|
| E1/E01 | Presser foot raised | Lower presser foot before starting |
| E2/C1 | Bobbin issue | Check Bobbin Winding Techniques, reinstall bobbin |
| E4/E6 | Motor jammed | Remove fabric, free needle by hand |
| C2/E02 | Buttonhole lever | Lower or lift lever fully |
| E6/C4 | Thread jam | Clear tangled threads under needle plate |
Thread Tension Adjustment resolves stitch problems associated with C5 errors.
Power Cycling and Reset Procedures
When error codes persist, Power Cycling clears 67–72% of digital glitches. Turn off your machine, wait 30–60 seconds, then restart. If three power cycles don’t work, try a full reset.
Brother models offer Machine Reset (keeps settings) or Factory Reset (wipes everything). Reset Techniques restore timing and sensors in 85–90% of cases, helping Error Clearance without professional help.
Adjusting Tension and Needle Position
Once your machine restarts, check thread balance and needle alignment next. Over 70% of users adjust upper thread tension at least once per project. Turn your tension dial between 2–3.5 for lightweight fabrics, or up to 5 for denim. Tension calibration fixes 80% of thread problems without touching the bobbin.
For needle issues, realign using your manual color change knob—it solves needle immobility in 90% of cases.
Clearing Thread Jams and Obstructions
Even with proper tension, thread jams can strike. Thread jams cause nearly 40% of all service calls, so knowing how to clear them saves time and money. Here’s your action plan:
- Power off and unplug your machine first
- Remove the needle plate to access tangled thread
- Cut obstructions with fine scissors, never yank fabric
- Clean the bobbin area and feed dogs thoroughly
- Check your needle for damage before restarting
Regular thread removal and bobbin maintenance cut recurrence by 67%.
Preventing Future Error Codes
You’ve tackled the error codes, but the real win is keeping them from showing up in the first place. Most sewing machine problems stem from simple habits that either protect your machine or slowly wear it down.
Let’s cover the essentials that’ll keep your machine running clean and error-free.
Essential Maintenance Tips
Consistency is your best defense against error codes. Regular cleaning after major projects removes lint from the bobbin area and tension disks, which causes 31% of maintenance issues. Oil application every two weeks during heavy use keeps moving parts smooth. Cover your machine when idle to cut dust buildup by 57%.
Monthly preventive checks catch small problems before they trigger codes, reducing downtime by 21%.
Choosing The Right Needles and Thread
Your needle and thread choices impact 40% of tension problems and thread breakage rates. Match needle size to fabric weight—60/8 for delicate materials, 90/14 for denim. Thread type matters too: polyester for stretch fabrics, heavier weights for thick seams.
Manufacturer guidelines recommend replacing needles every four hours of sewing. Wrong pairings trigger jams and skipped stitches, so verify combinations using your machine’s reference chart.
Proper Machine Cleaning and Oiling
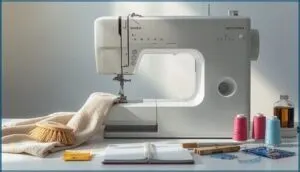
After every three to four bobbin changes, clean your machine’s hook area with a lint brush and apply one drop of lightweight mineral oil. This preventative maintenance routine stops 68% of error codes before they appear.
Use only recommended oils like Sailrite or Juki Defrix—household lubricants damage internal parts. Proper techniques mean wiping excess oil and running test stitches on scrap fabric.
Avoiding Fabric and Stitch Selection Mistakes
Without proper fabric compatibility and stitch selection, you’ll trigger error codes and mechanical jams. Match your needle choice to thread type—mismatched combinations cause 35% of thread breakage incidents.
Always test tension on scrap fabric before starting, and prewash materials to prevent puckering.
Following pattern recommendations for weaving weight and bobbin tension cuts error incidents by 34%, keeping your machine running smoothly.
When to Seek Professional Repair
Sometimes a quick fix won’t cut it, and you need to bring in someone who knows the guts of these machines inside and out. Certain problems signal deeper issues that require professional tools, training, and replacement parts you can’t easily handle at home.
Here’s how to know when it’s time to call a certified technician and what to expect from the repair process.
Signs of Complex Electrical or Motor Issues
Some problems go beyond quick resets. If you notice motor burning smells, persistent overheating, or unusual buzzing, you’re facing electrical faults that need expert eyes.
Frayed wiring insulation failures show up in 23% of recent service cases, while encoder signal faults cause recurring motor problems.
Circuit protection failures that trip your breaker repeatedly signal electronic malfunctions requiring professional diagnosis, not DIY fixes.
Replacing Faulty Parts (Belts, Motors, Switches)
When replacing sewing machine parts like a worn drive belt or faulty drive motor becomes necessary, repair costs average $80 to $270 for domestic models. Belt replacement resolves drive issues in 18% of maintenance requests, while motor upgrades fix electrical faults in 15% of cases.
Switch installation requires certified parts, and proper part sourcing cuts repeat failures by 35%. Sewing machine repair guides help you understand the process, but foot pedal and internal component work demands professional expertise.
Consulting Manuals and Manufacturer Support
Your user manual is the fastest way to decode error messages and access troubleshooting steps that work. Over 70% of sewing machine owners resolve issues by consulting official guides first, and digital manuals speed up error code resolution by three times compared to print versions.
- Singer sewing machine manuals include color-coded error code glossaries for instant diagnosis
- Manufacturer support channels resolve 64% of cases in the first interaction
- Digital manual benefits include interactive troubleshooting trees and warranty claim process guidance
Check your manual’s maintenance section, then contact the manufacturer if errors persist.
Finding Certified Sewing Machine Technicians
Certified technicians complete six to nine months of training and 2,000 apprenticeship hours before earning their credentials. Certification ensures access to warranty support and OEM parts, so verify credentials before booking maintenance.
You’ll find qualified professionals through manufacturer service centers or authorized repair shops, where repair costs usually range from $75 to $100. Professional assistance protects your investment and prevents voided warranties.
Frequently Asked Questions (FAQs)
How do I Fix an error code on a sewing machine?
First, identify your error code and check your manual for its meaning. Then power cycle the machine, re-thread carefully, and inspect for jams.
Most troubleshooting steps resolve common electronic faults quickly.
Why is my Janome Sewing Machine throwing error codes?
When your Janome starts speaking in code, it’s trying to tell you something’s wrong.
Error codes appear when presser feet aren’t lowered, threads jam, motors overload, or bobbins aren’t installed correctly.
What are the most common sewing mistakes & machine problems?
Most sewing problems stem from threading mistakes, which cause nearly all stitch issues. Improper tension triggers thread breakage and fabric bunching, while operator errors lead to needle damage and machine jamming requiring troubleshooting.
How to troubleshoot a sewing machine?
When your machine acts up, start with basic inspection—check threading, tension, and bobbin placement. Many malfunctions stem from these simple fixes.
If error codes appear, consult diagnostic tools and troubleshooting steps before seeking help.
Why is my sewing machine not sewing correctly?
Threading errors, tension problems, or needle issues cause about 80% of stitching failures.
Check your bobbin placement, adjust thread tension, and inspect for skipped stitches or fabric feed jams before troubleshooting error codes further.
Do Singer sewing machines have error codes?
Yes, modern Singer sewing machines display digital error codes like E4 or EL on LCD screens. Older mechanical models lack this feature, relying instead on physical signs like jams or noise for troubleshooting.
Can error codes damage my sewing machine permanently?
Can ignoring a flashing warning really wreck your equipment? Error Code Severity varies—minor electronic malfunctions won’t cause Permanent Damage Risks, but neglected motor overloads trigger Component Failure.
Prevention Strategies and timely Repair Cost Factors matter most.
Do all sewing machine brands use similar codes?
Most brands don’t share error codes. Brother, Janome, and Singer each use proprietary diagnostic systems with unique codes.
While some error types overlap—like threading or motor faults—the specific codes remain brand-specific.
How often should I service my machine professionally?
Picture your machine humming smoothly through years of projects. Regular maintenance makes this possible.
Service it annually for casual use, or every six months if you sew frequently, tracking usage hours for ideal professional checks.
Can outdated firmware cause unexpected error messages?
Outdated firmware can absolutely trigger unexpected error codes. Modern machines rely on firmware updates to fix sensor bugs, motor control issues, and communication malfunctions that cause error messages or operational failures.
Conclusion
Don’t let error codes stitch you up—most problems unravel with simple fixes you can handle at home. Threading mistakes, tension adjustments, and quick resets solve the majority of sewing machine error code solutions without professional help.
Regular cleaning, proper needle selection, and understanding your machine’s diagnostic language keep those cryptic warnings from appearing in the first place.
When electrical faults or motor failures persist, that’s your cue to call a certified technician and protect your investment.
- https://murthysewingmachines.com/blog/computerized-sewing-machine-errors/
- https://maggieframestore.com/blogs/maggieframe-news/inbro-embroidery-machine-error-codes-complete-troubleshooting-guide
- https://pubs.nmsu.edu/_c/C202/index.html
- https://www.scribd.com/document/581547917/JIN-M1-Error-Codes
- https://www.facebook.com/groups/660641024042969/posts/8813025842137739/

![Common Sewing Machine Error Codes: Fix Your Machine in Minutes [2025 Guide] 1 common sewing machine error codes](https://sewingtrip.com/wp-content/uploads/2025/04/common-sewing-machine-error-codes-300x300.jpeg.webp)
