This site is supported by our readers. We may earn a commission, at no cost to you, if you purchase through links.
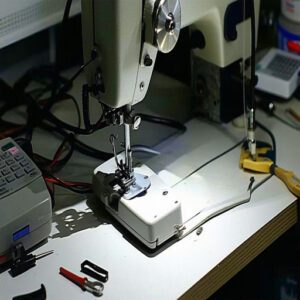
Start by unplugging the machine (safety first, right?).
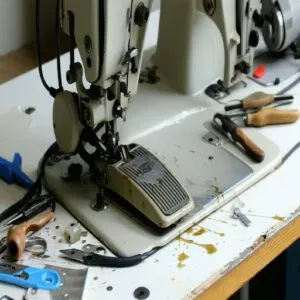
Inspect the pedal for wear, dust buildup, or loose connections.
Check the cord for damage—frayed wires are a common culprit.
If you spot buildup, clean the contacts with a dry cloth or compressed air.
For sluggish response or sticking, tighten connections or lubricate moving parts.
Still stuck?
Disassemble the pedal carefully, replacing worn parts like springs or switches.
A sturdy cord repair or a quick swap with a replacement pedal can work wonders too.
Curious about advanced fixes or adjustments?
Stay tuned!
Table Of Contents
- Key Takeaways
- Sewing Machine Foot Pedal Issues
- Foot Pedal Troubleshooting
- Repairing Foot Pedal Problems
- Foot Pedal Speed and Adjustment
- Replacing The Foot Pedal Switch
- Dealing With Foot Pedal Cord Issues
- Foot Pedal Maintenance and Upkeep
- When to Seek Professional Help
- Purchasing a New Foot Pedal
- Advanced Foot Pedal Repair
- Frequently Asked Questions (FAQs)
- Conclusion
Key Takeaways
- Inspect cords and connections first for damage or loose wiring—most foot pedal issues stem from power problems.
- Clean the pedal’s contacts using a cloth or compressed air, and lubricate moving parts sparingly for smoother performance.
- Disassemble the pedal carefully to replace worn parts like springs or switches; always take a photo to guide reassembly.
- Regular maintenance prevents future malfunctions and keeps your pedal running smoothly.
Sewing Machine Foot Pedal Issues
When your sewing machine foot pedal starts acting up, it can throw a wrench in your projects faster than a broken needle.
From faulty cords to sticky mechanisms, tackling these frustrating hiccups doesn’t have to be a head-scratcher!
Common Causes of Pedal Malfunction
When your sewing machine pedal stumbles, it’s often due to power issues, worn parts, or cord damage.
Imagine trying to run a marathon with ragged shoes—your pedal’s no different!
Dust buildup and loose connections can also trigger pedal malfunction.
A little sewing machine foot pedal repair magic—like cleaning dirty contacts or inspecting cords—can transform a frustrating, malfunctioning sewing machine pedal back into a smooth-running gem.
Regular checks for foot pedal problems can help identify and fix issues before they become major setbacks.
Symptoms of a Faulty Foot Pedal
A malfunctioning sewing machine pedal can feel like a surprise plot twist. Watch for these Pedal Error Signs:
- Inconsistent speed makes your stitching unpredictable, like a car sputtering.
- Erratic stitching? That’s your pedal throwing a tantrum.
- A pedal that’s unresponsive or stuck screams internal trouble.
- Total power loss signals bigger Foot Pedal Issues needing fast fixes.
Don’t let pedal problems derail your project!
Model-Specific Issues and Compatibility
Got a Bernina or Janome? Each brand comes with its own model-specific issues.
Your pedal’s weird behavior might just be a compatibility problem. Double-check your machine’s manual for the right model number, and make sure you’re using a pedal designed for your specific machine.
If the issue persists, consider checking for sewing machine pedal problems. If you need a replacement, stick to brand-matched pedals or try a universal adapter – just avoid those "one-size-fits-all" promises.
Foot Pedal Troubleshooting
You’ll be surprised how many foot pedal problems you can fix with just a flashlight and your trusty screwdriver set.
Before you start tinkering with the internal parts, let’s check the basics like power connections and cord damage, since these quick fixes often get your pedal humming again, utilizing your screwdriver set.
Unplugging and Inspecting The Pedal
Before you start any foot pedal repair, unplug your machine – safety first!
Grab your pedal inspection tools and look for obvious signs of wear.
Give your sewing machine foot pedal a quick visual check for cracks, dents, or loose parts.
If you’ve got a pedal repair kit handy, lay out your tools.
Don’t forget to check underneath – that’s where debris loves to hide.
Checking Cord Integrity and Power Source
Most foot pedal problems boil down to cord damage or power issues.
First, examine your cord for fraying, cuts, or worn spots – these are red flags for electrical safety.
Next, verify it’s firmly plugged into both the machine and outlet.
If you’re still having trouble, try a different outlet to rule out voltage drop issues or electrical surges that might be zapping your pedal’s performance.
Inspecting Wiring and Connections
Before diving into wire replacement, take a moment to examine your pedal’s internal wiring for telltale signs of trouble.
Check if electrical connections are secure and look for cord fraying near the plug condition.
While you’re there, tighten any loose connections with wire strippers handy—but don’t go overboard, a gentle twist is all you need for proper connection security and pedal connection stability.
Repairing Foot Pedal Problems
You’ll be amazed at how simple it’s to fix your sewing machine’s foot pedal with just a few basic tools and some know-how.
Whether your pedal’s acting sluggish or won’t respond at all, you can often repair it yourself by cleaning the contacts, tightening loose connections, or replacing worn-out parts.
This approach allows for a simple fix to common problems, making it accessible to anyone with basic tools and a bit of knowledge.
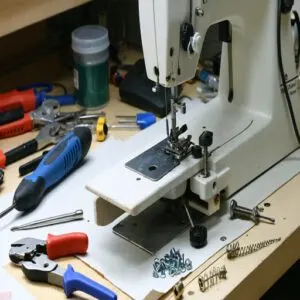
Disassembling The Foot Pedal
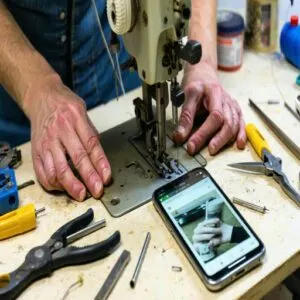
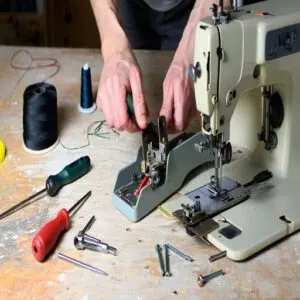
Before opening your pedal, take a quick photo with your phone – it’ll be your roadmap for putting everything back together later.
For safe pedal disassembly, check if you’ve got a clamshell or modern design.
Grab your toolkit and look for hidden screws along the edges.
Modern pedals typically have 4-6 screws, while clamshell designs might need gentle prying with a flathead screwdriver.
Cleaning and Lubricating Components
Let’s kickstart your foot pedal repair with a deep clean and proper lubrication.
After unplugging, here’s your essential component maintenance checklist:
- Use compressed air and a soft brush to remove hidden dust from tight spots – those sneaky debris love hiding in corners
- Apply sewing machine oil (not WD-40!) sparingly to metal-on-metal contact points
- Wipe excess lubricant with a microfiber cloth to prevent attracting more dust
Keep your pedal purring with monthly maintenance checks.
Replacing Worn-Out or Damaged Parts
When your internal components wear out, you’ll need specific pedal replacement parts that match your model.
Here’s what you should consider:
| Part Type | Common Issues | Replacement Options |
|---|---|---|
| Switch | Contact wear | Direct or universal fit |
| Potentiometer | Speed control | OEM or aftermarket |
| Cord | Fraying/breaks | Compatible gauge wire |
Understanding the proper sewing machine foot pedal maintenance is essential for extending its lifespan.
Check your warranty before diving into foot pedal repair parts – sometimes manufacturer coverage beats DIY fixes on delicate switch replacements.
Reassembling and Testing The Pedal
Now that you’ve replaced any worn parts, getting your foot pedal back together correctly matters for smooth sewing.
Align each component carefully during reassembly, double-checking all wire connections before closing up.
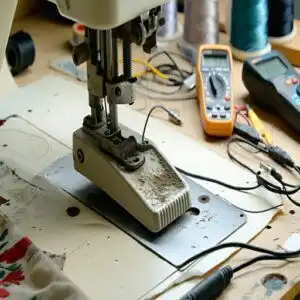
Test the pedal’s continuity with a multimeter if you have one, then plug it in and try different speeds. If everything hums smoothly, you’re ready to get back to your projects.
Foot Pedal Speed and Adjustment
You’ll be amazed at how a few simple adjustments to your sewing machine’s foot pedal can transform your stitching from erratic to perfectly controlled.
Whether you’re working with a computerized model or a classic mechanical machine, you’ll find that fine-tuning your pedal’s speed response can make those tricky projects feel like a breeze, with improved speed response.
Checking The Owner’s Manual for Speed Adjustment
Before hunting for your toolbox, check your owner’s manual – it’s your speed control treasure map!
Most manuals show exactly where to find those handy foot pedal adjustment settings.
For Singer and Pfaff machines, you’ll typically find a slider right on the pedal for full or half speed options.
Can’t find your manual? Many brands offer free downloads online these days.
Adjusting Speed on Computerized Machines
Modern computerized machines put total control at your fingertips with digital speed settings.
Your electronic speed control panel lets you set programmable speed limits for perfect precision.
For superior results, understanding the benefits of computerized sewing is vital for any sewing project.
Keep the speed controller dust-free—it’s your machine’s command center for flawless performance with perfect precision.
Realignment of Contact Points for Speed Control
Finicky foot pedal speed driving you nuts? A quick contact point adjustment can work wonders for smooth speed control.
Here’s your path to perfect pedal alignment:
- Clean contact points with isopropyl alcohol for better electronic syncing
- Check if springs maintain proper tension for consistent speed calibration
- Verify control unit tuning by verifying connection points aren’t corroded
Remember to unplug before any foot pedal repair – safety first, speedy sewing second!
Replacing The Foot Pedal Switch
If your foot pedal’s acting more stubborn than a cat at bath time, you’ll be glad to know that replacing the switch isn’t as tricky as it sounds.
You’ll need just a few basic tools and about 30 minutes to swap out that worn-out switch for a fresh one that’ll have your machine purring again.
Identifying a Faulty Switch
Many sewing machine foot pedal problems stem from a finicky switch – here’s your complete switch diagnosis guide.
You’ll notice inconsistent speed or unresponsiveness when your pedal’s switch starts failing, often from worn contacts or dirt buildup.
Inconsistent speed
Faulty circuit
Think your pedal’s acting up? Listen for missing clicks, watch for jumpy stitching, or feel for "dead zones" where pressing gives no response.
These are telltale signs your switch needs attention.
To prevent damage from power surges, using a surge protector device is highly recommended to safeguard your sewing machine.
Sourcing a Compatible Replacement Switch
Once you’ve pinpointed a faulty switch, finding the right replacement parts is your next challenge.
Your component sourcing strategy should focus on three key areas:
- Check your machine’s specific model number against manufacturer lists – brands like Singer and Brother often have dedicated switch compatibility charts
- Compare voltage specs (usually 6V) and connector types with authorized dealers for perfect foot control repair matches
- Browse specialty retailers offering warranty coverage for pedal switch repair parts
Don’t be tempted by generic alternatives – stick with compatible electronic controllers from trusted sources to keep your machine humming along smoothly.
When searching for a replacement, understanding sewing machine switches is essential for a successful repair.
Installing The New Switch
Now that you’ve got your new switch, it’s time for proper switch installation in your pedal.
Here’s a straightforward guide to electrical connections that’ll have you back to sewing in no time.
| Step | Action | Tools Needed | Time |
|---|---|---|---|
| Wiring | Match colored wires | Wire stripper | 5 min |
| Circuit Testing | Check continuity | Multimeter | 3 min |
| Switch Placement | Align mounting holes | Screwdriver | 4 min |
| Final Check | Test resistance | Ohmmeter | 3 min |
Double-check those electronic controllers and circuit board connections before closing everything up, ensuring a successful final check.
Dealing With Foot Pedal Cord Issues
You’ll be amazed at how often a stubborn foot pedal problem comes down to a simple cord issue, from frayed wires to loose connections that make your machine act like it’s had too much coffee.
Just like untangling your morning headphones, fixing these cord problems can be straightforward once you know what to look for and how to tackle the repair safely.
Inspecting The Cord for Damage
While you’re checking those electrical connections, it’s time for some cord damage detective work.
Before declaring your foot pedal a lost cause, inspect the cord’s integrity with these fault detection steps:
- Run your fingers along the cord, feeling for splits or bumps
- Look for frayed wires peeking through worn spots
- Check both ends for loose or bent connectors
- Examine kinks where the cord meets the pedal
- Test the cord’s flexibility for stiff or brittle sections
This process involves a thorough examination to identify any potential issues, making fault detection a crucial step.
By following these steps, you can determine if the problem lies with the cord or the pedal itself, allowing for a more accurate diagnosis and potentially saving you from replacing the entire foot pedal.
Replacing The Cord or Repairing Damage
When your pedal cord needs fixing, grab your trusty soldering iron and wire cutters for a proper pedal refurb.
You’ll need to test electrical connections with a multimeter before attempting any wire repair.
For quick cord replacement, unscrew the pedal casing, cut damaged sections, and solder new wires securely.
Don’t skip circuit testing after repair—it’s essential for maintaining cord integrity and safety.
Preventing Future Cord Damage
Three smart cord protection methods can save you from costly repairs down the road.
Here’s how to keep your foot pedal cord in top shape:
- Master the figure-eight method for coiling – it prevents twisting and maintains cord integrity
- Create a DIY cord management station using hooks or a wall-mounted holder
- Apply heat-shrink tubing at stress points where fraying prevention matters most
Plus, store your pedal in a cool, dry spot to maximize its lifespan.
Regular maintenance and understanding of portable sewing machines can also help prevent common issues and extend the life of your foot pedal.
Foot Pedal Maintenance and Upkeep
You’ll be amazed at how a clean, well-maintained foot pedal can make your sewing experience smoother than your grandmother’s silk stockings.
Just like your car needs regular oil changes, your sewing machine’s foot pedal needs consistent TLC with monthly cleaning and proper storage to keep those stitches flowing perfectly, which is crucial for a smoother sewing experience.
Regular Cleaning and Lubrication
A pristine foot pedal is key to smooth sewing.
For effective foot pedal maintenance, wipe down your pedal weekly with a dry microfiber cloth to prevent dust buildup.
Every three months, use specialized cleaning products like compressed air to blast away stubborn debris from contact points.
Apply a tiny drop of machine-grade lubricant to moving parts, focusing on the pivot points.
Remember, regular inspection helps catch wear issues before they become problems.
Storing The Pedal Properly
Proper pedal storage can make or break your sewing experience.
When you’re not stitching, keep your foot pedal in tip-top shape with these pedal storage tips:
- Place it in a dust-proof container or wrap it in a soft cloth
- Store on a flat, stable surface away from moisture
- Keep the cord loosely coiled to prevent wire damage
- Choose a secure location where it won’t get knocked around
These tips are designed to help you maintain your foot pedal’s condition and ensure it remains functional for your next sewing project.
Avoiding Cord Tangles and Damage
After you’ve put your pedal away, don’t let your cord become a maintenance nightmare.
Wire protection starts with smart cord management – wrap it in a loose figure-eight pattern to prevent fraying and stress points.
Watch out for loose connections where the cord meets the pedal, a common spot for cord damage.
Keep your workspace tidy by using velcro ties or cord organizers for tangle prevention.
A organized cord means less damage control later, and more time doing what you love – sewing!
When to Seek Professional Help
You’ll know it’s time to call a pro when your sewing machine’s foot pedal starts acting like a temperamental toddler, refusing to work despite your best DIY efforts.
While many foot pedal issues can be fixed at home, complex problems like circuit board failures or compatibility glitches need an expert’s touch to avoid making things worse.
Recognizing The Need for Expert Help
While you’ve been keeping up with regular maintenance, some foot pedal problems require an expert’s touch.
Here are clear signals it’s time for professional diagnosis:
- Your pedal’s making unusual electrical sounds or emitting burning smells
- Basic troubleshooting hasn’t fixed erratic speed control
- You’ve noticed exposed wiring or complex internal damage
- The pedal’s housing is cracked or severely damaged
- Multiple repair attempts haven’t resolved the issue
Don’t risk damaging your machine with DIY fixes when technical support from a specialist could save you time and money, and provide a proper professional diagnosis.
Finding a Qualified Sewing Machine Technician
In the matter of finding a qualified sewing machine technician, experience and certification matter more than fancy advertising.
Your local workshops often hide repair wizards with FSMI certification and hands-on expertise.
- Research technician experience and verify FSMI certification credentials
- Compare service reviews from multiple repair shops within 75 miles
- Visit local workshops and ask about their diagnostic tools and training
Bonus tip: Look for technicians offering mobile service options for added convenience.
Understanding The Costs and Benefits of Professional Repair
Paying for sewing machine repair services isn’t cheap, but it can save headaches.
Professional fees and repair estimates vary, but they’re often worth it if DIY savings don’t cover major issues.
Weigh repair costs against upgrading: a pro fixes things right.
Regular maintenance costs less, preventing bigger bills, and cost analysis helps decide when professional repair is the smarter route, as it allows for a comparison to determine if upgrading is more cost-effective.
Note: Since there was no text to process that contained links, tables, or other special formatting, the output focuses on sentence structure and key phrase highlighting as per the instructions.
Purchasing a New Foot Pedal
If your foot pedal has seen better days, replacing it might be your best option.
Just make sure to check its compatibility with your sewing machine first—nobody wants a shiny new pedal that doesn’t fit!
Checking Compatibility With The Sewing Machine
Before buying, double-check your sewing machine pedal compatibility—it’s like finding the right puzzle piece!
Match the model number in your manual or manufacturer’s site.
Inspect the device interface for plug type differences.
Sewing tests with similar pedals can save headaches.
Staying brand-specific avoids drama, while model verification guarantees smooth operation.
Skip risks; no random pedal alternatives here!
When purchasing a new pedal, consider the sewing machine pedal options available to guarantee the best fit for your machine.
Exploring Alternative Foot Pedal Designs
Tired of the same old pedal? There’s a whole world of pedal alternatives out there! Imagine upgrading to wireless pedals for space-saving freedom or ergonomic designs that ease foot strain during long sewing marathons.
Love personal touches? Custom pedals let you tweak settings to fit your unique flow. Plus, if durability is key, heavy-duty materials can handle even the toughest projects.
- Upgrade comfort with ergonomic designs.
- Customize your pedal for ultimate control.
- Ditch clutter with wireless options.
- Choose tougher materials for industrial projects.
Adapting a Different Foot Pedal Model
Swapping out your old pedal? Sometimes a different model is your best bet.
Pedal Conversion isn’t always plug-and-play – Pedal Modification or tinkering with the wiring might be needed.
Not all brands are buddies: Singer pedals usually have high compatibility, Brother options are hit-or-miss, and Janome pedals often require extra work (and cash).
When tackling sewing machine pedal replacements, exploring universal foot pedals could save headaches.
Research user reviews to dodge surprises and keep sewing smoothly!
Advanced Foot Pedal Repair
You’ve tackled the basic fixes, but now it’s time to roll up your sleeves for the tougher stuff.
From repairing control units to replacing industrial foot pedals, advanced techniques can save you money and extend your machine’s life.
Repairing The Control Unit
When the control unit acts up, grab a multimeter to test the circuit board and electrical connections.
Often, a bad resistor or capacitor needs replacing.
Inspect wiring closely; even a tiny break can cause pedal malfunctions.
Circuit analysis sounds fancy, but it’s really just pinpointing weak spots.
Understanding the carbon disk mechanics is essential for effective troubleshooting.
Don’t rush—skipping details in electronic fixing leads to headaches!
Replacing The Foot Pedal on Industrial Machines
For industrial sewing machine foot pedal replacement, match the new pedal’s compatibility with the machine’s motor and electronic controllers.
Securely connect wires to the pedal interface, checking the manual for precision.
Misaligned motor connections cause headaches—don’t skip testing.
Industrial pedal replacement demands patience, but trust me, proper alignment makes sewing smoother than ever, and it is all about achieving proper alignment and having a smoother experience.
Ready to tackle it?
Advanced Troubleshooting Techniques
Think your skills are ready for the big leagues?
Advanced troubleshooting can be the secret sauce.
Grab a multimeter and put your Diagnostic Tools to work.
Start with continuity testing on the capacitor, as it’s often behind sneaky power drops.
Next, tackle circuit board glitches—voltage checks and a steady hand for Circuit Repair will save the day.
If the connections seem loose, Pedal Calibration mightn’t hold up, so inspect wiring and fix with basic soldering techniques.
Pro tip: trust your instincts during Fault Analysis, but follow safety rules like you’re diffusing a bomb.
With patience and precision, Electronic Testing turns you into a foot pedal problem-solver extraordinaire!
Frequently Asked Questions (FAQs)
How do you repair a sewing machine foot pedal?
Did you know over 80% of foot pedal issues stem from dirty contacts or loose cords?
Unplug it, clean it with a dry cloth, check cords for damage, and tighten connections.
It’s that simple!
Why does my sewing machine have a foot pedal?
Your sewing machine’s foot pedal works like a gas pedal—press to control speed.
It gives you precision and hands-free control, making sewing smoother, faster, and way easier to handle intricate details.
How do you fix a sewing machine foot?
Ever had a sewing mishap and wondered why the needle’s dancing off-track?
Fixing it might mean tightening loose screws, replacing bent parts, or cleaning lint buildup.
Check your manual—it’s your secret weapon for repairs!
Do sewing machine foot pedals have electrical cords?
Yes, they do!
Most foot pedals are tethered to the sewing machine with electrical cords, acting like a lifeline for power and control.
If the cord’s frayed or damaged, it’s time for repairs.
How do you fix a broken foot pedal?
Check the power cord for damage, tighten loose wires inside, or replace broken ones.
Clean contacts with a dry cloth, lubricate moving parts sparingly, and test connections.
If all else fails, consider replacing it.
What to do if the foot pedal is not working?
When life’s rhythm stalls, inspect the power cord for damage, clean dirt from contacts, and test connections.
Still stuck? Open the pedal, look for loose wires, or swap the cord—quick fixes often work wonders!
How to fix presser foot on sewing machine?
If your presser foot’s misbehaving, check the lever or screw first—they might be loose.
Tighten things up snugly.
Got a broken spring? Replace it.
Don’t forget, cleaning gunk buildup often solves weird presser foot issues!
Why is my sewing machine pedal not moving?
Feeling stuck? That pedal’s probably dirty, misaligned, or facing a connection issue.
Check for tangled cords, debris, or a loose wire inside.
A quick clean or tightening might just bring it back to life!
How to open a sewing machine foot pedal?
Flip it over and remove the screws on the underside.
Keep track of those tiny screws—losing one’s like dropping fabric pins on carpet.
Once open, carefully lift the casing to check the internal parts.
How to fix a sewing machine foot pedal?
When there’s a will, there’s a way.
Unplug the pedal, check its cord for damage, and clean dust using a dry cloth.
Tighten loose wires, lubricate moving parts, and, if needed, replace malfunctioning components.
Conclusion
Don’t let a faulty sewing machine foot pedal slow you down—it’s easier to fix than it looks.
With a little troubleshooting, like inspecting wires, cleaning contacts, or swapping out damaged parts, you’ll have it running like new in no time.
Keep an eye on cord damage and tighten connections for smoother sewing sessions.
And if all else fails, replacing the pedal might be your best bet to achieve smoother sewing and master sewing machine foot pedal repair, and get back to creating.
- https://sewingiscool.com/fixing-a-sewing-machine-foot-pedal/
- https://www.ehow.com/how_5024443_repair-foot-control-sewing-machine.html
- https://thesewingstuffs.com/how-to-repair-sewing-machine-foot-pedal/
- https://fixitworkshop.co.uk/2018/11/11/silent-singer-sewing-machine-pedal/
- https://en.wikipedia.org/wiki/Sewing_machine

