This site is supported by our readers. We may earn a commission, at no cost to you, if you purchase through links.
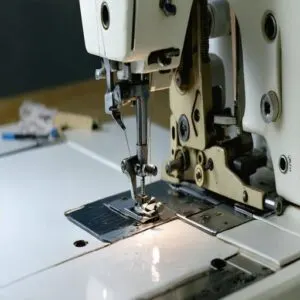
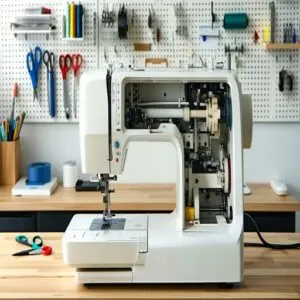
The hook, the "heartbeat" of your machine, catches the thread loop to form stitches. If you’re dealing with skipped stitches or thread breaks, it might be time for a sewing machine hook replacement.
First, match the new hook to your machine and project needs—compatibility is key. Start by removing the bobbin case and loosening screws to release the old hook. Install the new one, ensuring proper alignment and timing for smooth operation.
Regular cleaning and lubrication keep things running longer. Curious about troubleshooting tips? Stay tuned for more insights!
Table Of Contents
Key Takeaways
- Identify your machine’s hook type and ensure compatibility before replacing it to avoid skipped stitches or thread jams.
- Unplug your machine, gather your tools, and carefully remove the old hook while keeping screws organized for smooth assembly.
- Align the new hook precisely, tighten screws, and check for proper timing to restore efficient stitching performance.
- Clean and lubricate the hook area regularly to extend its lifespan and maintain smooth sewing.
Sewing Machine Hook Basics
The sewing machine hook is the component that grabs the thread loop and forms stitches, making it essential for smooth sewing.
Understanding its types, functions, and common issues helps you keep your machine running like a pro.
Hook Types and Materials
Regarding sewing machine hook types, each material has its quirks.
Metal hooks are tough and long-lasting, but Ceramic Materials are smoother and quieter.
Plastic Variants work for lighter machines, though they’re less durable.
Hook Durability impacts performance, so match your hook assembly components to your machine.
Always check sewing machine hook compatibility and Bobbin Compatibility before swapping hooks!
Hook Functions and Importance
The sewing machine hook is the unsung hero behind smooth stitching.
It grabs the thread loop, ensuring sewing accuracy and consistent stitch quality.
A worn hook can mess with thread control and machine performance, so replacing it boosts efficiency.
Understanding the sewing machine hooks is vital for superior performance.
Think of it as your machine’s heartbeat—keep it healthy for flawless stitching every time.
Invest in proper maintenance to avoid frustration!
Common Hook Issues and Symptoms
Skipped stitches? Thread breaks? Those are red flags for sewing machine hook problems.
Here’s what to look for:
- Stitch irregularities—inconsistent or uneven stitches signal tension imbalance issues.
- Thread breakage causes—a broken hook or bobbin case problems can cause constant snapping.
- Hook timing issues—misaligned parts lead to skipped stitches or no stitch formation.
Act fast—prevent further damage!
Choosing The Right Hook
Picking the right sewing machine hook isn’t just about grabbing the first one that fits—it’s about ensuring compatibility with your machine and project needs.
A poorly chosen hook can lead to skipped stitches, thread jams, and more frustration than it’s worth.
Thread Capacity and Hook Size
Hook sizing impacts thread limits, fabric thickness, and yarn capacity.
Larger hooks double bobbin size, reducing interruptions during dense stitching.
For more information on sewing machine hooks, consider the specific needs of your project.
Use this quick reference:
| Hook Type | Bobbin Size | Ideal For |
|---|---|---|
| Standard Hook | Smaller bobbin | Lightweight fabrics |
| Large Hook | Larger bobbin | Thick materials, longer runs |
| Interchangeable | Customizable options | Versatile sewing needs |
Follow a trusted hook replacement guide for precise results, ensuring the best outcomes for your sewing projects.
Machine Type and Hook Compatibility
Understanding sewing machine hook compatibility is key to smooth stitching.
Different machine models demand specific sewing machine hook types.
For instance:
- Rotary hooks: Full-circle rotation; great for industrial machines.
- Oscillating hooks: Back-and-forth motion for heavy-duty tasks.
- Hook sizing: Important for thread types and sewing speed.
- Singer Featherweight: Often uses oscillating hooks for precision stitching.
When choosing a sewing machine, consider the sewing machine type for ideal performance.
Match mechanics wisely!
Hook Replacement Considerations
Before tackling a sewing machine hook replacement, check your current hook for wear and verify compatibility with your machine.
Consider Sewing Costs and Replacement Tools before proceeding. Damaged hooks can lower Machine Efficiency and Thread Quality.
Regular cleaning and lubrication help extend longevity. Understanding hook assembly repair is vital for maintaining peak sewing performance and preventing future issues.
| Factor | Why It Matters |
|---|---|
| Hook Materials | Affects durability and performance |
| Replacement Tools | Ensures smooth repair process |
| Sewing Costs | Balances quality with budget |
| Thread Quality | Prevents stitching inconsistencies |
Hook Replacement Process
Replacing a sewing machine hook may seem tricky, but it’s straightforward with the right steps.
You’ll prepare the machine, remove the old hook, and install the new one to restore smooth operation.
Preparing The Machine for Replacement
When prepping for a sewing machine hook replacement, set your stage with intent:
- Unplug your machine – safety first!
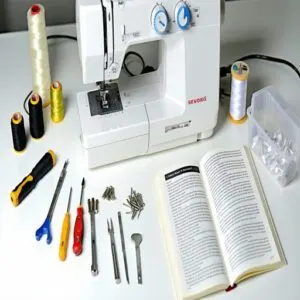
- Gather tools like screwdrivers and a lint brush.
- Clear threads and the bobbin to avoid tangles.
- Dust the area for clean operation.
- Check your manual for model-specific tips.
Now, you’re ready to proceed confidently!
Removing The Old Hook Assembly
Got your machine prepped? Let’s tackle Hook Disassembly.
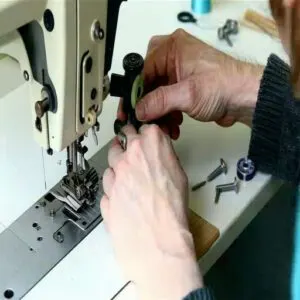
Start by loosening the screw holding the old hook assembly—it’s tricky if the balance wheel moves, so hold it steady. A ratchet screwdriver makes this smoother.
Gently wiggle out the hook; inspect for damage or debris. When replacing the hook, consider purchasing new sewing machine hooks to guarantee compatibility and peak performance.
| Step | Tool Needed | Tips |
|---|---|---|
| Locate screw | Screwdriver | Match it to screw type. |
| Hold balance wheel | Hands | Prevent unwanted movement. |
| Remove old hook | Ratchet screwdriver | Wiggle gently to avoid damage. |
Installing The New Hook Assembly
Ever feel like replacing a sewing machine hook is rocket science?
It’s not!
Follow the assembly sequence: align the hook precisely, secure it snugly during reinstallation checks, and tighten the screws firmly.
Inspect parts for damage while installing the sewing machine hook assembly.
Understanding hook assembly repair is vital for a successful replacement.
Proper hook alignment tips will guarantee smooth operation after your sewing machine hook replacement.
Stay patient—it’s worth it!
Troubleshooting Hook Issues
When your sewing machine skips stitches or makes strange noises, it’s often a sign of hook issues.
Understanding how to identify and fix these problems saves you time, frustration, and unnecessary trips to the repair shop.
Identifying Hook Timing Problems
Spotting hook timing issues isn’t rocket science, but it’s key for fixing sewing machine errors.
Watch for symptoms like skipped stitches, thread breakage, or needle hook collisions.
To check hook timing, slowly turn the handwheel and verify the shuttle hook catches the thread cleanly.
Issues? Refer to hook timing diagrams or measure needle and hook alignment for accuracy.
Adjusting Hook Timing and Alignment
When hook timing issues mess with your stitches, it’s time for a sewing machine hook adjustment.
Use alignment tools, adjust the hook’s position near the needle, and tighten screws to lock it in place.
Don’t forget tension adjustment for smooth thread catching!
Regular hook calibration keeps stitch optimization on point and makes sewing feel effortless again.
Common Issues and Solutions
A misaligned hook can mess up stitch quality, break threads, and even jam your machine.
If tension problems keep cropping up, check for wear or hook failure. Understanding hook assembly repair is vital for maintaining superior sewing performance.
During sewing machine hook replacement, clean the area and inspect parts to avoid recurring issues. For broken sewing machine hook concerns, a precise sewing machine hook repair or installation will fix most snags, involving superior sewing performance.
Maintaining The Sewing Machine Hook
Keeping your sewing machine hook in top shape requires regular cleaning, proper lubrication, and a few preventive checks.
It’s a straightforward way to avoid costly repairs and those frustrating stitching mishaps.
Regular Cleaning and Lubrication
A little regular maintenance goes a long way!
Use soft brushes or compressed air as cleaning tools to clear lint from the sewing machine hook.
Follow your maintenance schedule, applying a sewing-specific oil sparingly for lubrication—just a drop or two prevents buildup.
For best results, using the right sewing machine oil is vital.
Stick to recommended lubricant types for wear prevention, and your machine will thank you with smoother stitches!
Preventing Hook Wear and Damage
Maintaining your sewing machine hook isn’t rocket science, but ignoring it? Big mistake.
Stay ahead of issues with these five steps:
- Inspect for bent/damaged needles regularly.
- Use proper hook material selection and lubrication tips.
- Prevent wear with damage prevention methods.
- Follow maintenance schedules consistently.
- Avoid sewing over pins or zippers—trust me, your hook will thank you!
Checking Hook Tension and Alignment
To keep your machine running smooth, start with a quick hook tension check—tight threads mean trouble.
Use alignment tools to spot misfires in your sewing machine calibration.
Watch for uneven thread flow; it’s often a bobbin case adjustment waiting to happen.
Regular checks prevent hook timing issues and save you from unexpected hook assembly repairs or replacements.
Frequently Asked Questions (FAQs)
What is a hook in a sewing machine?
A sewing machine hook grabs the top thread as the needle drops, looping it with the bobbin thread to form stitches.
It’s the heart of your machine, ensuring smooth, consistent sewing every time.
How do you sew a hook?
Sewing a hook starts with placing it carefully on your project.
Hold it steady, then hand-stitch around the holes using small, tight stitches for durability.
Take your time, and don’t rush the process!
What is a rotary hook sewing machine?
A rotary hook sewing machine uses a spinning mechanism to catch the top thread and loop it with the bobbin thread.
It’s faster, quieter, and offers smoother stitches—perfect for intricate sewing projects.
Where can I buy sewing machine parts?
Finding sewing machine parts is like piecing a quilt—start online at sewing supply stores, manufacturer websites, or Amazon.
Local repair shops and craft stores often stock parts too, offering advice and ensuring compatibility.
What are the different types of sewing machine hooks?
There are vertical and horizontal sewing machine hooks.
They have different orientations: vertical hooks sit upright, aligning with the needle, while horizontal hooks lie flat underneath.
Both types manage stitches, but their orientation tweaks compatibility with specific machines.
How do you fix a broken tension on a sewing machine?
Tension troubles? Don’t cry over spilled stitches!
Check your threading path, clean lint from the tension discs, and rethread everything carefully.
Adjust the tension dial gradually, testing on scrap fabric until stitches look consistent again.
How do you fix a needle holder on a sewing machine?
Loosen the screw on the needle holder using a screwdriver, remove the old holder, and position the replacement snugly.
Tighten the screw securely.
Test with a needle to verify it’s aligned and functional.
How to remove a sewing machine hook?
Start by unplugging your machine for safety.
Remove the needle plate and bobbin case, then loosen screws securing the hook assembly.
Carefully lift out the hook, noting its orientation for smooth reassembly later.
How do I identify counterfeit sewing machine hooks?
Spot a fake hook by checking materials—real ones use high-quality metals or ceramics, not flimsy alloys.
Look for precise machining, proper branding, and smooth rotation.
Counterfeits often feel cheap, fit poorly, or skip stitches.
What safety precautions are needed for hook replacement?
Think of your tools as your allies, not enemies—always unplug the machine first.
Handle sharp parts carefully, wear safety glasses, and keep screws organized.
Rushing risks injury; patience guarantees precision and keeps you stress-free.
Conclusion
Feeling stuck on sewing machine hook replacement? Don’t worry—it’s simpler than it seems with the right tools and steps.
By identifying your machine’s needs and ensuring proper alignment and timing, you’ll avoid skipped stitches and tangled threads.
Regular cleaning and lubrication keep your new hook working like a pro, and mastering these small fixes saves time, money, and frustration.
So, grab that screwdriver and keep your sewing projects moving without a hitch!
- https://konsew.com/blog/identifying-and-fixing-hook-timing-issues
- https://www.craftsy.com/sewing/article/choosing-the-right-bobbin/
- https://www.youtube.com/watch?v=jX8N5m9Zv9g
- https://vssmb.blogspot.com/2011/07/201-hook-assembly-removal.html
- https://www.sewvacdirect.com/blog/tutorials/how-to-maintain-the-sewing-machine-shuttle-hook/

