This site is supported by our readers. We may earn a commission, at no cost to you, if you purchase through links.
Locate the light housing near the needle area and gently twist the old bulb counterclockwise to remove it. Check the base type and voltage before installing your new bulb.
Twist the replacement clockwise until snug but don’t overtighten. Most machines use 15-watt bulbs with bayonet or screw bases.
While your machine works without light, proper illumination prevents eye strain and guarantees precision stitching.
LED upgrades offer longer life and cooler operation than traditional bulbs. The right technique makes this five-minute task foolproof every time.
Table Of Contents
Key Takeaways
- You can replace your sewing machine light bulb yourself in five minutes without visiting a repair shop – just unplug the machine first, twist the old bulb counterclockwise to remove it, and install the new one by twisting clockwise until snug.
- You’ll need to check your machine’s manual or examine the old bulb to find the correct voltage, wattage, and base type before buying a replacement, as most machines use 15-watt bulbs with either bayonet or screw bases.
- LED bulbs offer significant advantages over traditional incandescent bulbs – they use 85% less energy, last 25 times longer, generate less heat, and provide brighter illumination for better stitching precision.
- Your sewing machine will continue to operate without a working light bulb, but proper lighting prevents eye strain and ensures accurate stitching, so don’t leave empty sockets exposed as they pose electrical safety risks.
Sewing Machine Lighting Basics
Your sewing machine’s light bulb helps you see stitches clearly and work with precision on detailed projects.
You’ll find two main types of bulbs in most machines: traditional incandescent bulbs that produce warm light and get hot during use, and LED bulbs that stay cool and last much longer.
Importance of Proper Lighting
Good sewing machine lighting isn’t just nice to have—it’s essential for your crafting success.
Proper illumination reduces eye strain during long projects while improving stitch visibility and fabric color accuracy.
You’ll notice increased productivity when your workspace has adequate lighting.
Quality sewing machine lighting creates better workspace ambiance, helping you tackle intricate details with confidence and precision.
Types of Sewing Machine Lights
You’ll find several sewing machine lighting options beyond basic bulbs.
Clip-on lights attach directly to your machine, while gooseneck lamps bend for perfect positioning.
Task lighting illuminates your entire workspace, and magnifying lamps combine brightness with vision enhancement.
Halogen lights offer intense illumination, though they run hotter than LED alternatives.
Each sewing machine light type serves different needs and preferences.
LED Vs Traditional Lighting
When choosing between LED bulbs and traditional bulbs for your sewing machine light, you’ll notice key differences in performance and cost.
LED bulbs offer superior light spectrum quality with cooler heat output, while traditional options provide familiar warmth at lower upfront costs.
- Energy consumption: LED bulbs use 85% less power than traditional bulbs
- Bulb lifespan: LEDs last 25 times longer, saving frequent replacements
- Heat output: Cool operation prevents fabric damage and user discomfort
- Cost comparison: Higher initial investment pays off through reduced electricity bills
- Light spectrum: Brighter, more focused illumination improves stitching precision
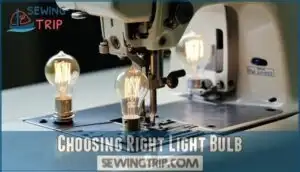
Choosing Right Light Bulb
You’ll need to check your sewing machine manual or examine the old bulb to find the correct voltage, wattage, and base type before buying a replacement.
Your machine likely uses either a push-in or screw-in bulb with specific measurements that must match exactly for proper fit and safe operation.
Compatibility and Machine Requirements
Your sewing machine needs the right bulb to work safely. Check your manual for voltage matching – most need 120V.
Wattage limits vary by model, typically 15W max. Base compatibility matters too – you’ll find bayonet or screw bases.
Bulb dimensions must fit your machine’s housing. Many retailers offer sewing machine bulbs online.
Different sewing machine bulb types work with specific models, so verify your sewing machine compatibility before buying replacement bulbs.
LED and Traditional Bulb Options
LED and traditional sewing machine bulbs offer different lighting experiences for your workspace.
Traditional bulbs produce warm, familiar light but generate heat and consume more energy. LED options provide cooler color temperature and superior brightness levels without the heat buildup.
A great option is to purchase an LED bulb for your sewing machine.
- Energy consumption: LED bulbs use 2 watts versus 15 watts for traditional incandescent bulbs
- Lifespan difference: LED light bulbs last substantially longer than standard sewing machine bulb options
- Cost comparison: Higher upfront LED costs offset by reduced replacement frequency and energy savings
Base Style and Voltage Considerations
Matching the right bulb to your machine is key.
Push-in bases and screw-in bases are common bulb base types.
Always check voltage specifications in your manual to avoid damage.
Wattage options vary, so verify compatibility.
Third-party fit isn’t guaranteed, so verify sewing machine bulb size.
Proper voltage matching guarantees a smooth sewing machine light replacement.
| Base Type | Common Use | Pros | Cons |
|---|---|---|---|
| Push-In Bases | Compact machines | Easy installation | Limited availability |
| Screw-In Bases | Older models | Widely available | May loosen over time |
| Voltage Matching | All machines | Prevents damage | Requires careful checks |
| Third-Party Fit | Various models | Affordable options | May not fit perfectly |
Replacement Process Details
You’ll need to remove the old bulb by turning it counterclockwise while pushing it in.
Then check your machine’s cover removal method.
Installing the new bulb requires proper alignment with the base and a clockwise turn to secure it in place.
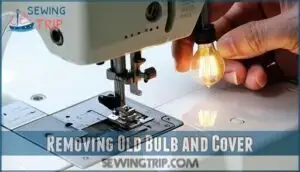
Removing Old Bulb and Cover
Before tackling your sewing machine light replacement, you’ll need the right approach for cover screw removal. Most machines secure their light covers with small screws that require a Torx screwdriver set.
Once you’ve identified the correct tool selection, gently remove the cover screws and set them aside.
For stuck bulb solutions, turn the old bulb counterclockwise while applying gentle force application, keeping proper bulb orientation in mind. Many users find replacement sewing machine bulbs essential for ideal visibility.
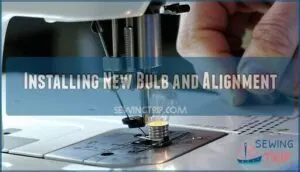
Installing New Bulb and Alignment
Once you’ve got the old bulb out, installing the new one is straightforward.
Push the replacement bulb firmly into the socket for proper alignment and secure fit. Turn clockwise if it’s a screw-in type.
Test functionality by turning on your machine before cover reattachment. This sewing machine bulb installation step guarantees your light bulb replacement works perfectly.
Machine Operation and Safety
Your sewing machine will continue to work even without a light bulb installed.
You should understand the safety risks of empty sockets and when adult supervision is needed during machine operation.
Functionality Without Light Bulb
Your sewing machine doesn’t have bulb dependency for basic operation. Most machines will run fine without a working light bulb installed.
Here’s what you need to know about operating with sewing machine light problems:
- Test your machine with the burned-out bulb still in place
- Keep the light cover secured to prevent socket safety issues
- Make certain adult supervision is provided when working without proper lighting
- Consider wattage alternatives like 10-watt bulbs for comfort
- Use the burned-out placeholder until you replace sewing bulb
Risk of Empty Sockets and Accidental Contact
Empty sockets pose real electrical safety risks during sewing machine light replacement.
Without bulb placeholders, exposed wiring creates shock prevention concerns, especially around children.
Cover security becomes essential for socket safety and childproofing sockets effectively.
Keep burned-out bulbs in place until you install replacements to prevent accidental finger contact with live electrical connections and maintain proper bulb exposure control, ensuring childproofing is effective.
Adult Supervision and Machine Usage
When operating your machine without a bulb, responsible usage becomes paramount.
While adults can safely handle supervised operation, child safety requires extra attention around exposed sockets.
Here’s what you need to know about bulb absence:
- Keep children away during sewing machine bulb installation
- Secure the cover immediately after bulb replacement
- Never leave socket risks unaddressed in family spaces
- Maintain adult supervision when demonstrating machine usage to ensure child safety and prevent accidents due to exposed sockets.
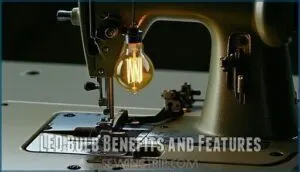
LED Bulb Benefits and Features
LED bulbs offer significant advantages over traditional incandescent bulbs for your sewing machine lighting needs.
Upgrade your sewing experience with LED technology that saves energy while delivering superior, heat-free illumination.
You’ll benefit from lower energy consumption, longer lifespan, brighter light output, and reduced heat generation that keeps your workspace cooler during extended sewing sessions.
Energy Efficiency and Long Lifespan
LED sewing machine lights deliver impressive energy savings, using 83% less power than traditional bulbs.
Your sewing machine LED bulb can last up to 50,000 hours compared to standard bulbs’ shorter lifespan.
This translates to decades of reliable lighting with reduced waste and lower electricity bills.
LED advantages include consistent performance throughout their extended service life, making them a smart long-term investment.
Environmentally Friendly and Low Heat Generation
Making the switch to LED sewing light technology cuts your carbon footprint substantially.
These Energy Savings champions consume 85% less power than traditional bulbs, creating Reduced Emissions over their 25,000-hour lifespan.
Heat Reduction keeps your workspace comfortable while supporting Sustainable Sewing practices.
When it’s time for LED Disposal, most components are recyclable, making sewing machine lighting options genuinely eco-friendly.
Frequently Asked Questions (FAQs)
Are sewing machine light bulbs universal?
One size doesn’t fit all in the context of sewing machine light bulbs.
You’ll need to check your machine’s manual or original bulb for the correct base type, wattage, and voltage specifications.
How do I know what replacement bulb I need?
Check your machine’s manual or examine the old bulb for specifications.
Look for voltage (usually 120V), wattage (commonly 15W), base type (push-in or screw-in), and size measurements before purchasing a replacement.
Are E12 and C7 bulbs the same?
Here’s the confusing part: E12 and C7 aren’t the same thing.
E12 refers to the screw base size, while C7 describes the bulb’s candle shape.
You’ll need both specifications to find your perfect match.
How often should sewing machine bulbs be replaced?
Replace your sewing machine bulbs when they burn out or start flickering.
LED bulbs last much longer than traditional incandescent ones.
You don’t need scheduled replacements—just swap them when they fail.
Can I use higher wattage bulbs safely?
Sure, let’s play with fire and fry your machine’s circuits!
Actually, don’t.
Higher wattage bulbs generate excess heat that can damage your machine’s internal components and create fire hazards.
Stick to manufacturer specifications to avoid damaging your machine.
Where to buy replacement sewing machine bulbs?
You’ll find replacement sewing machine bulbs at Ken’s Sewing Center, local fabric stores, Amazon, or specialty lighting retailers.
Bring your old bulb to match specifications, or check your machine’s manual for exact part numbers.
This will ensure you get the correct replacement, and exact matching is crucial for proper function.
What causes sewing machine bulbs to burn out?
Nothing lasts forever, even your trusty sewing light.
Heat buildup from extended use causes bulb filaments to weaken and snap.
Vibration from machine operation also stresses the delicate wire, leading to premature failure.
Are universal bulbs compatible with all machines?
Universal bulbs aren’t one-size-fits-all solutions. You’ll need to check your machine’s manual or existing bulb for base type, voltage, and wattage. Push-in versus screw-in styles matter too.
Conclusion
Picture yourself sitting at your sewing machine, working on a project with crystal-clear visibility.
Your sewing machine light bulb replacement skills now give you confidence to tackle this simple maintenance task.
You’ve learned to identify the right bulb type, safely remove old bulbs, and install LED upgrades for better performance.
Remember to unplug your machine first and avoid overtightening.
With proper lighting, your stitching accuracy improves while reducing eye strain during those long creative sessions.

