This site is supported by our readers. We may earn a commission, at no cost to you, if you purchase through links.
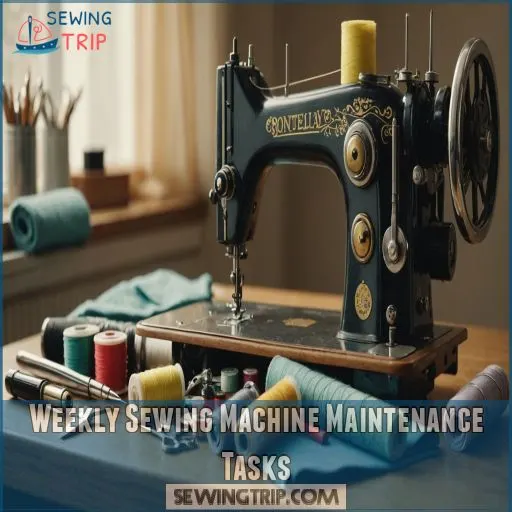
Weekly, oil those moving parts and replace needles; your fabric will thank you.
Monthly, deep clean the feed dogs and check bobbin tension. Don’t forget to update firmware if your machine’s a tech-savvy one.
Adjust tension when stitches go wonky, and always have your cleaning toolkit handy. Remember, a well-maintained machine is a happy machine. But wait, there’s more to keeping your sewing sidekick purring smoothly…
Table Of Contents
- Key Takeaways
- Daily Cleaning Routine for Sewing Machines
- Weekly Sewing Machine Maintenance Tasks
- Monthly Sewing Machine Care Checklist
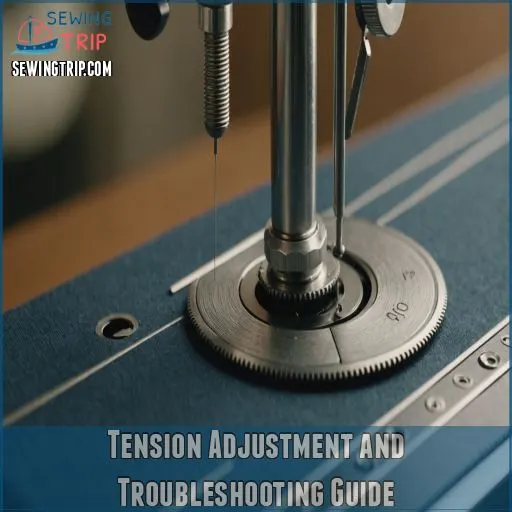
- Tension Adjustment and Troubleshooting Guide
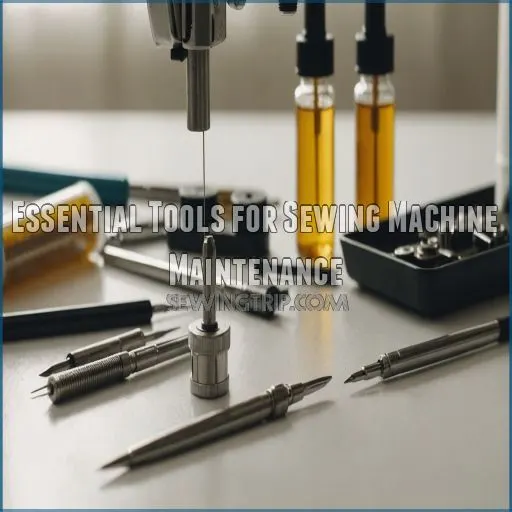
- Essential Tools for Sewing Machine Maintenance
- Professional Servicing and Repair Considerations
- Frequently Asked Questions (FAQs)
- Conclusion
Key Takeaways
- You’ll keep your sewing machine running smoothly by cleaning it daily, oiling moving parts weekly, and deep cleaning monthly.
- You should replace needles regularly, check tension often, and update firmware if applicable to maintain stitch quality.
- You’ll need essential tools like lint brushes, sewing machine oil, and screwdrivers for routine maintenance tasks.
- You should seek professional servicing annually or when you notice persistent issues, such as unusual noises or stitch problems.
Daily Cleaning Routine for Sewing Machines
You’ll keep your sewing machine humming like a well-oiled machine with a quick daily cleaning routine.
Just a few minutes of TLC each day will prevent lint buildup and guarantee smooth stitching.
Saving you from frustrating thread jams and skipped stitches down the road.
Removing Lint and Dust
Every stitch counts, so let’s keep your sewing machine dust-free!
Start by unplugging your trusty sidekick and grabbing your lint brush arsenal . Gently sweep away those fabric gremlins from the needle plate and feed dogs.
For those hard-to-reach nooks, channel your inner chimney sweep with a pipe cleaner.
Don’t forget to give the exterior a quick wipe-down – your machine deserves to shine inside and out!
Cleaning Bobbin Case Area
The heart of your sewing machine, the bobbin case area, deserves daily TLC.
Grab your lint brush and pipe cleaner – they’re your trusty sidekicks in the battle against fuzz.
Gently remove the bobbin and shuttle hook, then sweep away any lint buildup. Don’t forget those hard-to-reach nooks and crannies.
A clean bobbin case helps prevent thread snags and makes for smooth stitching.
Make this quick routine as essential as your morning coffee.
Wiping Down Machine Exterior
Now that you’ve tackled the bobbin case, let’s give your machine’s exterior some TLC. Think of it as a spa day for your trusty stitching companion.
When deciding what cleaning products to use, remember to opt for mild cleaners like Gojo with a soft cloth to avoid damaging the finish.
Grab your cleaning tools and follow these steps:
- Use a soft microfiber cloth to wipe down surfaces
- For stubborn spots, try a dab of diluted dish soap
- Avoid harsh chemicals that might damage the finish
- Don’t forget to dust those hard-to-reach nooks and crannies
Remember, a clean machine is a happy machine!
Organizing Sewing Area
After wiping down your machine, let’s tackle your sewing area.
A tidy workspace is like a well-oiled machine – it keeps you humming along smoothly.
Start by clearing flat surfaces. Corral your rulers, scissors, and rotary cutters in designated spots.
Use clear bins for fabric and labeled containers for patterns.
With everything in its place, you’ll be ready to stitch up a storm.
Weekly Sewing Machine Maintenance Tasks
You’ve nailed the daily dusting, but now it’s time to roll up your sleeves for some weekly TLC.
Just like you’d change the oil in your car, your trusty sewing machine needs regular maintenance to keep humming along smoothly.
Oiling Moving Parts
Keeping your sewing machine humming smoothly requires regular oiling. You’ll want to tackle this task weekly to make sure it runs at its best.
Here’s your quick guide to becoming an oiling pro:
- Choose the right oil: Use only clear, low-odor sewing machine oil
- Find the sweet spots: Look for oil holes and moving metal parts
- Apply with precision: Use a single drop per spot
- Avoid common pitfalls: Keep oil away from belts and wiring
Remember, a well-oiled machine is a happy machine!
Checking and Replacing Needles
Let’s zero in on needle maintenance, the heart of your sewing machine’s performance. You’ll want to check and replace needles weekly to keep your stitches sharp and your projects smooth sailing.
Here’s a handy guide to help you navigate the world of needles:
| Needle Type | Common Uses | Replacement Frequency |
|---|---|---|
| Universal | All-purpose | Every 6-8 hours of use |
| Ballpoint | Knits | After 2-3 projects |
| Denim | Heavy fabrics | When dull or bent |
Remember, a dull needle is like a tired chef – it’ll make a mess of your fabric feast!
Inspecting Power Cord and Foot Pedal
Now that you’ve checked your needles, it’s time to give your power cord and foot pedal some love.
These unsung heroes of your sewing setup need regular TLC too.
Run your fingers along the cord, feeling for any frays or exposed wires.
Don’t forget to inspect where the cord meets the machine and pedal – these spots are prone to wear.
A quick once-over can prevent shocking surprises and keep your sewing smooth sailing.
Monthly Sewing Machine Care Checklist
You’ve mastered the weekly tasks.
But now it’s time to give your trusty sewing machine some extra TLC.
This monthly tune-up will keep your machine purring like a kitten, ensuring smooth stitches and fewer tangled threads in your sewing adventures.
Deep Cleaning Feed Dogs
Your feed dogs, those little metal teeth that move fabric through your machine, need some TLC. Think of them as the unsung heroes of your sewing adventures. You’ll want to give them a thorough cleaning to keep your stitches smooth and even.
Here’s what you need to do:
- Remove the needle plate for better access
- Use a lint brush to sweep away debris
- Grab tweezers to pluck out stubborn fibers
- Inspect for burrs or damage
- Apply a drop of oil to keep things running smoothly
Lubricating Gears and Mechanisms
Clean feed dogs set the stage for smooth sewing, but proper lubrication keeps your machine purring like a well-oiled kitten.
Apply a drop of sewing machine oil to moving parts, avoiding the motor belt. For gears, use synthetic grease with PTFE.
This monthly ritual removes debris and prevents that dreaded "crusty putty" buildup. Remember, a little oil goes a long way – don’t turn your machine into a slip ‘n slide!
Examining Bobbin Tension
After greasing those gears, let’s tackle bobbin tension – the unsung hero of stitch quality.
Hold your bobbin case like a yo-yo and give it a flick.
If it drops and catches, you’ve hit the sweet spot .
Too tight? It won’t budge. Too loose? It’ll freefall faster than your favorite cookie.
Remember: "Righty tighty, lefty loosey" when adjusting that tiny screw.
Updating Firmware (if Applicable)
Moving from bobbin tension to the digital world, let’s talk firmware updates. Think of them as your sewing machine’s brain booster.
While not all machines need this monthly tune-up, it’s worth checking.
Firmware updates can improve performance, add features, and fix bugs.
But proceed with caution – updating incorrectly might turn your trusty sidekick into a fancy paperweight.
Always follow manufacturer instructions to keep your machine humming along happily.
Tension Adjustment and Troubleshooting Guide
You’ve mastered monthly maintenance, but tension troubles can still tangle your stitches.
Let’s unravel the mystery of tension adjustment and troubleshoot common issues, so you can sew with confidence and keep your machine humming along smoothly.
Identifying Tension Issues
Tension troubles got you in a tizzy? Don’t worry, you’re not alone in this stitchy situation!
Keep an eye out for telltale signs like uneven stitches, puckering fabric, or thread breakage, which can often be resolved by consulting a thread tension troubleshooting table Sewing Machine Tension Troubleshooting Tips.
These are your sewing machine’s way of waving a red flag. Loose stitches on top or tight ones underneath might mean your tension’s out of whack. Think of it as a delicate tug-of-war between your top and bottom threads.
Step-by-Step Tension Adjustment Process
Ready to tackle those pesky tension issues? Let’s get started with the step-by-step process.
Start by testing your tension on scrap fabric (Source). Adjust the tension dial settings gradually, moving one number at a time.
Remember, thread choice impacts your results. Balance top and bottom tension for even stitches.
If you’re still stumped, consult your machine’s manual or our handy troubleshooting guide. With practice, you’ll be a tension-taming pro in no time!
Common Tension Problems and Solutions
Now that you’ve mastered the tension adjustment process, let’s tackle some common hiccups you might encounter.
Uneven stitches got you in a twist? They’re often the culprit of improper threading.
If you’re battling thread bunching or looping, it’s time to play detective with your bobbin tension.
Skipped stitches? Check your needle – it might be dull or bent.
Remember, sewing’s like baking: a pinch of patience goes a long way!
When to Seek Professional Help
While you’re a DIY superstar, sometimes your sewing machine needs a pro’s touch. You’ve tried everything, but those pesky problems persist. It’s time to call in the cavalry!
Here are three signs you should seek professional help:
- Mysterious noises: Your machine’s singing the blues with unfamiliar clunks or rattles
- Stitch quality nosedive: Perfect seams are now a tangled mess
- Power problems: Your trusty sidekick won’t turn on or keeps shutting off
Don’t let your creativity unravel – a tune-up might be just the ticket!
Essential Tools for Sewing Machine Maintenance
You’ll need the right tools to keep your sewing machine humming along smoothly, just like a well-oiled orchestra.
From lint brushes to screwdrivers, we’ll cover the essential items you should have in your maintenance kit.
To make sure your trusty stitching companion stays in tip-top shape.
Lint Brushes and Cleaning Cloths
For keeping your sewing machine in tip-top shape, lint brushes and cleaning cloths are your dynamic duo. You’ll want to arm yourself with the right tools for the job.
Let’s break it down:
| Tool | Use | Pro Tip |
|---|---|---|
| Horsehair brush | Gentle lint removal | Great for delicate fabrics |
| Microfiber cloth | General cleaning | Wash separately to avoid lint |
| Vacuum attachment | Deep cleaning | Use non-rotating bristles |
Remember, a clean machine is a happy machine. Now, let’s stitch this maintenance routine into your sewing life!
Sewing Machine Oil and Lubricants
You’ve got your machine sparkling clean, but don’t put those tools away just yet! It’s time to get slick with some sewing machine oil. This liquid gold keeps your machine purring like a well-oiled kitten. But don’t just grab any old oil from the garage – your trusty stitching companion deserves the good stuff.
Here’s what you need to know about sewing machine lubricants:
- Choose the right type: Stick to oils specifically designed for sewing machines
- Consider viscosity: Low viscosity oils work best for most machines
- Apply sparingly: A little goes a long way – don’t drown your machine!
- Store properly: Keep your oil in a cool, dark place to prevent degradation
Screwdrivers and Allen Wrenches
Armed with the right screwdrivers and Allen wrenches, you’ll become a sewing machine maintenance ninja.
These tools are your secret weapons for tightening loose screws and adjusting mechanisms. Keep a set of Phillips and flathead screwdrivers handy, along with various sizes of Allen wrenches.
For those hard-to-reach spots, invest in a stubby screwdriver set . Store them in a compact tool kit for easy access during your sewing adventures.
Needle Threader and Tweezers
Needle threaders and tweezers are your trusty sidekicks in the sewing world.
Threading needles can be a real squint-fest, but a good threader makes it a breeze, especially when using different types like metal hook threaders.
Got a stubborn thread or tiny fabric bit? Tweezers to the rescue! They’re like mini-magicians, plucking out lint from tight spots.
Keep these tools clean and sharp, and they’ll have your back through thick and thin.
Professional Servicing and Repair Considerations
Even with regular DIY maintenance, you’ll need a pro’s touch now and then to keep your sewing machine humming.
Let’s explore when to call in the experts and how to prep your trusty stitching companion for its spa day at the repair shop.
Signs Your Machine Needs Professional Service
Even with the right tools, sometimes your sewing machine needs a pro’s touch.
Watch out for these red flags that scream "SOS":
- Skipped stitches: Your machine’s playing hopscotch with your fabric.
- Loud noises: It’s sounding more like a drum set than a sewing machine.
- Thread jams: Your thread’s doing the tango instead of staying on track.
- Sewing unevenly: Your straight lines look like they’ve had one too many.
Time for a check-up!
Finding a Qualified Technician
When your sewing machine needs a pro’s touch, don’t just pick any Joe with a screwdriver.
Start by asking fellow crafters for recommendations on trustworthy technicians. Check online reviews for local repair shops, but take them with a grain of salt.
Compare servicing costs and inquire about warranty information.
Remember, a skilled technician is like a machine whisperer – they will have your faithful stitching companion purring like new in no time, with a pro’s touch.
Preparing Machine for Service Appointment
You’ve found a qualified technician, now let’s get your trusty sewing companion ready for its spa day!
First, create a service appointment checklist. Jot down any quirks or issues you’ve noticed – it’ll help your tech diagnose problems faster.
Next, give your machine a quick clean-up (Source). Think of it as tidying up before the cleaner arrives – it’s just good manners!
Post-Service Care and Maintenance
After your sewing machine’s spa day, it’s time for some TLC.
Give it a gentle workout by running it without thread for a few minutes. This helps distribute oil and flush out excess.
Don’t panic if you spot a bit of oil on fabric initially – it’s normal.
For machine longevity, keep up with post-service cleaning and aim for annual professional tune-ups. Your trusty stitching companion will thank you, and remember to give it some TLC and a gentle workout.
Frequently Asked Questions (FAQs)
How to maintain a sewing machine?
Like a well-oiled machine, your sewing companion needs TLC.
Clean the bobbin area and feed dogs regularly.
Replace needles often, oil moving parts monthly, and get professional tune-ups every two years.
You’ll keep it humming smoothly for years.
How long does it take to maintain a sewing machine?
Regular sewing machine maintenance typically takes 15-30 minutes.
You’ll breeze through monthly cleanings, while annual deep cleans might eat up an hour.
It’s a small time investment that’ll keep your trusty stitching sidekick purring along smoothly.
What are the basics of sewing machine repair?
Ever feel like your trusty sewing companion’s got the sniffles?
You’ll need screwdrivers, brushes, and lubricant to nurse it back to health.
Unplug, unthread, and clean thoroughly.
Oil moving parts, adjust tension, and check timing.
You’ll be stitching smoothly in no time!
How often should you clean a sewing machine?
You’ll want to clean your sewing machine after every project.
Dust it off daily, give it a thorough interior cleaning monthly, and treat it to a professional tune-up every two years.
It’s like a spa day for your trusty stitching companion!
What is the basic maintenance of a sewing machine?
By Jove, basic sewing machine maintenance is simpler than you’d think! Clean the bobbin area, oil moving parts, and replace needles regularly.
You’ll want to dust the exterior, check tension, and give your trusty stitcher a professional tune-up biennially.
How often should a sewing machine be serviced?
Service your sewing machine annually for best performance.
If you’re a daily user, clean and oil weekly. Weekend sewers, monthly maintenance suffices.
For occasional use, a six-month tune-up keeps your machine humming.
Regular care prevents fabric faux pas! (Source)
What are the 7 common sewing machine troubles?
Picture a sewing machine rebellion: threads tangling, needles snapping, and stitches skipping.
You’re facing seven common troubles: tension issues, broken threads, puckered seams, machine seizing up, skipped stitches, incorrect bobbins, and irregular stitching.
Don’t fret, these gremlins are often easily tamed.
How do you service a sewing machine?
Unplug your machine and remove accessories.
Clean the hook, bobbin holder, and feed dogs with a brush.
Oil moving parts, check belts, and replace worn components.
Regular maintenance keeps your sewing buddy humming along like a well-oiled… well, machine!
How often should I replace my sewing machine needle?
Needles need nurturing!
You’ll want to swap your sewing machine needle at the start of each new project.
For the best performance and pristine stitches, don’t let your needle get dull. Keep it sharp, and you’ll sew smart!
Can I use automotive oil for my sewing machine?
Don’t risk your sewing machine’s health with automotive oil.
It’s like trying to feed a cat with dog food – it just won’t work.
Stick to sewing machine oil for smooth operation and longevity.
Your trusty machine will thank you!
Whats the best way to store my sewing machine?
You’d think tossing your sewing machine in a closet would suffice, right?
Wrong! Cover it with a dust-free cloth, store in a cool, dry place, and keep it upright.
Regular maintenance keeps your trusty stitching companion purring like a well-oiled kitten.
How do I prevent thread bunching under the fabric?
To prevent thread bunching, check your bobbin’s threading and tension. Thread with the presser foot up to engage tension discs properly.
Clean your machine regularly.
Like taming a wild bird’s nest, proper technique keeps your stitches smooth sailing.
Is it normal for my sewing machine to make noise?
Like a well-oiled machine, your sewing companion should hum quietly.
Some noise is normal, but clunking or squealing often signals a need for cleaning or oiling.
Regular maintenance keeps your machine purring smoothly and prevents major issues.
Conclusion
Like a well-oiled machine, your sewing companion will hum along happily with regular TLC.
By following this sewing machine maintenance checklist, you’re not just extending its life – you’re ensuring every stitch is perfect.
Remember, a clean machine is a happy machine. So, grab that lint brush, oil can, and screwdriver.
With these six steps, you’ll keep your trusty stitcher in top form, ready to tackle any project you throw its way.
Happy sewing, and here’s to many years of smooth stitching ahead!


