This site is supported by our readers. We may earn a commission, at no cost to you, if you purchase through links.
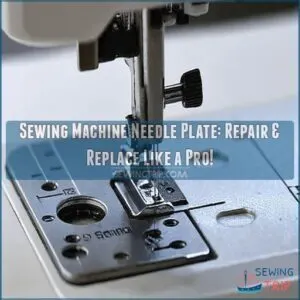
Replacing it isn’t rocket science—you’ll be a pro in no time. First, unplug your machine and raise the needle to its highest position.
Locate the tiny screws holding the plate and carefully remove them. Slide out the old plate, giving the area a quick lint-cleaning party.
Slide in your new needle plate, making sure it’s perfectly aligned. Gently secure the screws without going Hulk-mode—overtightening can spell disaster.
Match your new plate to your fabric type for silky-smooth stitching.
Regular maintenance is your secret weapon. Want to keep your machine purring like a kitten?
Table Of Contents
- Key Takeaways
- Needle Plate Problems and Solutions
- Types of Needle Plates and Uses
- Calibration and Maintenance Tips
- Removing The Old Needle Plate
- Installing The New Needle Plate
- Troubleshooting Common Needle Plate Issues
- Importance of Regular Maintenance
- Common Mistakes to Avoid
- Sewing Machine Compatibility and Needle Plates
- Frequently Asked Questions (FAQs)
- Conclusion
Key Takeaways
- You’ll save your sewing machine from costly repairs by regularly inspecting and cleaning your needle plate, catching potential issues before they become major problems.
- Proper needle plate alignment is crucial; you’ll want to carefully match the plate to your specific fabric type and machine model to prevent fabric damage and ensure smooth stitching.
- You’ll need the right tools for replacement, including a precision screwdriver and a soft brush, and you’ll want to take your time during the process to avoid damaging delicate machine components.
- Don’t overtighten screws when installing a new needle plate; you’ll want to secure it snugly but gently to prevent stress on your machine’s sensitive parts and maintain optimal performance.
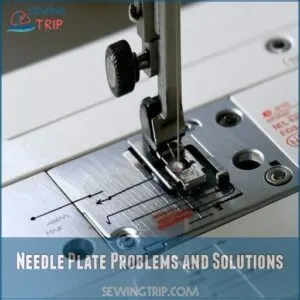
Needle Plate Problems and Solutions
Ever faced a sewing machine meltdown when your needle plate goes rogue?
Don’t worry—we’ll walk you through spotting, solving, and preventing those pesky needle plate problems that can turn your crafting dream into a fabric nightmare.
Common Needle Plate Issues
Ever found yourself in a down-and-dirty wrestling match with your sewing machine’s needle plate? Common needle plate issues can turn your crafting dreams into a tangled nightmare.
From thread buildup problems to fabric bunching solutions, these pesky sewing machine needle plate challenges can stop your creative flow faster than you can say "stitch"!
Don’t worry – we’ve got your back. Regularly inspecting and replacing your sewing machine’s needle every 8 hours can prevent common needle-related issues like thread breakage.
Causes of Needle Plate Damage
Something’s always threatening your sewing machine’s delicate needle plate.
Bent needles and forceful sewing can quickly transform a pristine plate into a disaster zone. Incorrect needle selection or poor maintenance accelerates material buildup, causing irreversible needle plate damage.
Regular inspection prevents wear and tear, catching potential issues before they transform your precision tool into a costly repair nightmare.
Preventing Fabric Damage and Breakage
When needle plate troubles strike, you’ll want to shield your fabric from unwanted snags and tears.
Master your sewing machine’s settings by adjusting fabric tension, selecting the right needle, and controlling stitch length.
Keep those pesky feed dogs in check and position your presser foot carefully to prevent fabric from disappearing into the machine’s depths.
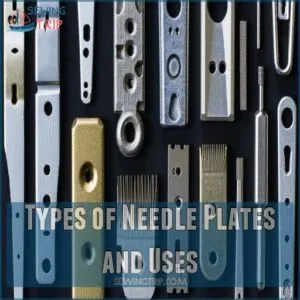
Types of Needle Plates and Uses
Not all needle plates are created equal, and choosing the right one can make or break your sewing project.
You’ll want to match your plate to your fabric type and sewing style,
so get ready to become a needle plate pro and keep your machine purring like a well-oiled, fabric-conquering machine.
Standard Needle Plates for General Sewing
After tackling needle plate problems, let’s zoom in on standard needle plates—your sewing machine’s versatile workhorse. These all-purpose plates handle most fabric types and stitch styles with ease.
- Wide hole accommodates multiple stitch types
- Supports various fabric weights
- Ideal for beginners and intermediate sewists
- Provides consistent fabric feed and support
Your standard needle plate is the Swiss Army knife of sewing machine components.
Straight Stitch Needle Plates for Delicate Fabrics
Discover the benefits of straight stitch needle plates – your delicate fabric’s best friend.
These precision-engineered plates feature a tiny, strategically placed hole that prevents fabric from slipping or bunching during intricate sewing projects.
| Fabric Type | Recommended Plate | Stitch Tension |
|---|---|---|
| Silk | Straight Stitch | Low |
| Chiffon | Narrow Hole | Extra Soft |
| Lightweight Cotton | Fine Gauge | Medium |
Mastering this plate means saying goodbye to fabric mishaps and hello to professional-quality stitches.
Specialized Needle Plates for Heavy-Duty Sewing
Anyone tackling heavy-duty sewing needs specialized needle plates that can handle intense fabric challenges.
These powerful plates transform your machine into a robust sewing warrior, ready to conquer tough materials:
- Reinforced metal construction for maximum durability
- Wider needle holes to accommodate thick threads
- Enhanced stitch stability for industrial-grade fabrics
- Increased resistance to wear and tear
- Precision-engineered for extreme sewing conditions.
Heavy-duty sewing requires these plates.
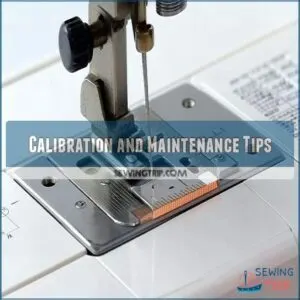
Calibration and Maintenance Tips
When your sewing machine starts acting up, it’s time to master the art of needle plate calibration and maintenance.
You’ll want to learn these pro tips that’ll keep your machine running smoothly.
And prevent those frustrating fabric snags and needle mishaps.
Adjusting The Needle Alignment Screw
After exploring needle plate types, let’s zero in on the nitty-gritty of needle alignment.
The alignment screw is your secret weapon for precision sewing. A simple twist can make or break your stitch quality. Master this technique, and you’ll prevent needle damage faster than you can say "perfect seam."
| Action | Tool Needed | Difficulty |
|---|---|---|
| Locate Screw | Screwdriver | Easy |
| Check Alignment | Magnifying Glass | Moderate |
| Adjust Position | Precision Screwdriver | Challenging |
| Test Results | Scrap Fabric | Simple |
Proper Needle Plate Alignment Techniques
Line up your needle plate with laser-like precision by carefully checking its positioning against the machine’s mounting points.
Slide the plate gently, ensuring it sits perfectly flush without gaps or wobbling.
Peek underneath to confirm alignment, making sure the needle can glide smoothly through the center hole without catching or dragging fabric during your sewing adventure.
Importance of Regular Inspection and Maintenance
Now that you’ve nailed needle plate alignment, regular inspection keeps your sewing machine purring like a well-oiled machine.
Peek under the plate monthly for lint buildup, thread tangles, or signs of wear. Catching small issues early prevents costly repairs and extends your machine’s lifespan.
Think of it as a health checkup – quick, simple, and way cheaper than emergency surgery for your trusty sewing companion.
Regular cleaning, such as removing lint and dust, also helps to prevent noise and jamming, ensuring your machine runs smoothly.
Removing The Old Needle Plate
Ready to give your sewing machine some TLC?
Removing the old needle plate is your first step for a smoother, more precise sewing experience.
So grab your screwdriver and let’s get started!
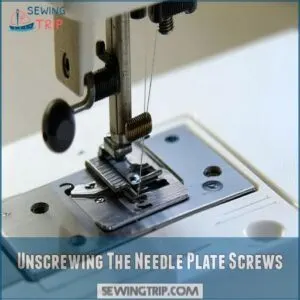
Unscrewing The Needle Plate Screws
After fine-tuning your machine’s needle plate alignment, you’ll need the right screwdriver.
The right screwdriver should be a precision screwdriver that matches your needle plate screws—typically a small Phillips or flathead. These screws can be secured with specialized needle plate screws.
Check the screw size carefully, as stripped screws can turn a simple replacement into a sewing machine repair headache.
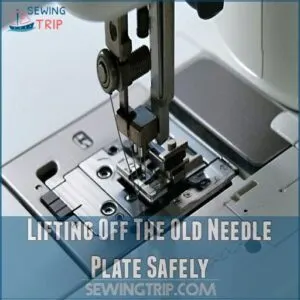
Lifting Off The Old Needle Plate Safely
With your screws safely removed, gently lift the needle plate using a flat, steady motion.
Watch for any tiny springs or small parts that might try to play hide-and-seek.
Keep your fingers nimble and your grip light—think of it like performing delicate surgery on your sewing machine.
A careful touch prevents accidental damage during needle plate removal.
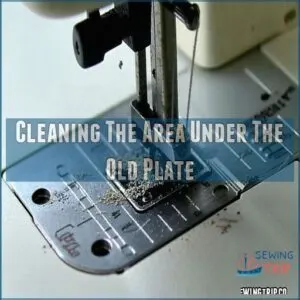
Cleaning The Area Under The Old Plate
Once you’ve lifted the needle plate, it’s time to get down and dirty with cleaning, and regular cleaning is a key part of your sewing machine maintenance routine.
Tackle those pesky dust bunnies and thread remnants hiding beneath.
Here’s your lint removal game plan:
- Grab a soft-bristled brush
- Use compressed air carefully
- Inspect for loose thread
- Check for hidden debris
- Wipe with a lint-free cloth
Your sewing machine will thank you for this thorough maintenance ritual!
Installing The New Needle Plate
Now that you’ve successfully removed the old needle plate, it’s time to breathe new life into your sewing machine with a fresh plate.
You’ll want to align the new needle plate carefully, making sure it fits snugly and securely.
because a well-installed plate is your ticket to smooth, snag-free sewing adventures.
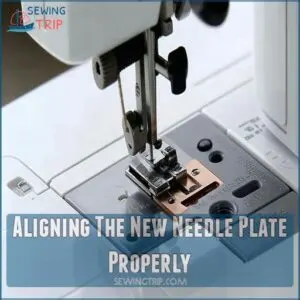
Aligning The New Needle Plate Properly
After carefully removing the old needle plate, position the new one with precision. Ensure the plate sits perfectly flush against the machine’s surface, aligning each screw hole carefully. Proper needle plate inspection is important for smooth sewing performance to avoid issues such as thread breakage and lint build-up. Take a moment to double-check the alignment, making sure every edge fits snugly without any wiggle room.
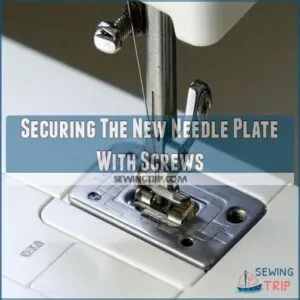
Securing The New Needle Plate With Screws
Now that you’ve aligned the needle plate, it’s time to lock it down with screws. Grab your trusty screwdriver and get ready to secure your sewing machine’s lifeline.
- Feel the power of a perfectly secured plate
- Prevent future sewing mishaps with careful tightening
- Experience the satisfaction of a professional-level repair
Carefully insert screws, turning them gently to avoid stripping or warping the delicate machine surface. Securing the needle plate is crucial for preventing sewing mishaps.
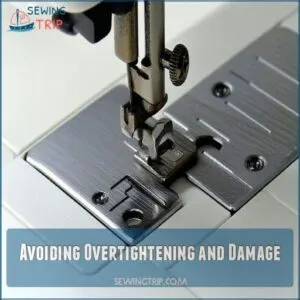
Avoiding Overtightening and Damage
Once you’ve aligned the new needle plate, grab your trusty screwdriver.
Aim for a snug fit, not a wrestling match.
Too much muscle can crack your machine’s delicate parts faster than a seam ripper through thin fabric.
Gently tighten the screws in a cross pattern, applying just enough pressure to secure the plate without sending stress signals to your sewing machine.
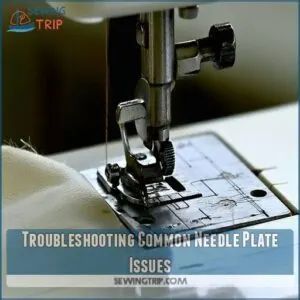
Troubleshooting Common Needle Plate Issues
Ever had your sewing project turn into a fabric-eating nightmare with needles striking the plate like a melodramatic sword fight?
Don’t worry – you’re about to become a needle plate troubleshooting ninja who’ll tackle those pesky machine mishaps with confidence and skill.
Needle Hitting The Needle Plate
After carefully aligning your new needle plate, you might still encounter needles striking metal with a jarring ping.
Check your needle alignment by rotating the adjustment screw behind the machine. Slight clockwise or counterclockwise turns can prevent bent needles and potential damage.
Different machine types require precise calibration, so watch for any unusual needle movement during test stitches.
To avoid such issues, make certain you’re using the correct needle size for fabric thickness.
Fabric Getting Stuck or Sucked In
When needles hit the plate, fabric might get sucked into your machine faster than a vacuum cleaner on steroids. Preventing this fabric fiasco requires some smart troubleshooting.
Here’s how to stop your sewing project from becoming a textile tornado:
- Check your needle plate fit carefully
- Inspect feed dogs for smooth movement
- Adjust machine tension settings
- Match needle plate to fabric type
Regular cleaning of the area under the needle plate, including dusting the thread path, can also help prevent thread bunching issues fixing thread bunching under fabric.
Smooth sailing starts with understanding your machine’s quirks and your fabric’s personality.
Broken or Damaged Needle Plates
If fabric slipping through gets you down, a broken needle plate can spell serious trouble.
Your sewing machine’s lifeline might need replacement when cracks, chips, or warping appear. Check for uneven surfaces or misaligned edges—these are red flags.
DIY fixes can work for minor damage, but major issues demand a replacement needle plate. Prevention beats repair every time, so handle with care.
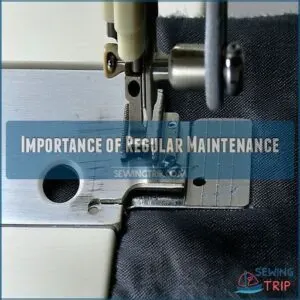
Importance of Regular Maintenance
If you want your sewing machine to be your trusty sidekick for years to come, regular maintenance is your secret weapon.
By keeping your needle plate clean, lubricated, and free from wear and tear, you’ll prevent frustrating breakdowns.
You’ll guarantee smooth, professional-looking stitches every time.
Cleaning The Sewing Machine Regularly
After battling needle plate hiccups, keeping your sewing machine clean becomes your secret weapon. Regular lint removal prevents performance nosedives and extends machine life. You can avoid pulling thread backward through tension disks by cutting near the spool and pulling forward as shown here.
- Protect your investment with quick, consistent cleaning
- Save money by preventing costly repairs
- Save like a sewing pro with a well-maintained machine
Grab your soft brushes, unplug the machine, and start your maintenance ritual every 2-3 bobbins to keep things running smoothly.
Lubricating The Machine for Smooth Operation
Keep your sewing machine purring like a well-oiled machine by understanding proper lubrication.
Regular oiling prevents friction and reduces wear, ensuring smooth sewing performance. Choosing the right oil type matters – lightweight machine oils work best.
Here’s a quick guide to help you master the art of machine lubrication:
| Oil Type | Frequency | Benefits |
|---|---|---|
| Sewing Machine Oil | Every 8 hours | Reduces friction |
| Synthetic Lubricant | Monthly | Minimizes wear |
| Specialized Textile Oils | As needed | Prevents rust |
Checking for Wear and Tear on Parts
Catching needle plate wear before it becomes a repair nightmare saves you headaches.
Look closely for telltale signs like scratches, burrs, or uneven surfaces that can snag delicate fabrics.
Inspect the needle plate cover for cracks, rust, or discoloration – these red flags signal potential part failure.
Your sewing machine’s performance depends on spotting these subtle wear indicators early.
Common Mistakes to Avoid
Let’s face it, your sewing machine’s needle plate can be a tricky little beast that’ll bite back if you’re not careful.
Avoid common pitfalls like using the wrong needle plate, skipping regular maintenance, and misaligning your needle,
or you’ll end up with a fabric disaster that’ll make even seasoned sewers cringe.
Using The Wrong Type of Needle Plate
Get hip to the needle plate pitfalls that’ll tank your sewing game!
Choosing the wrong needle plate is like bringing a knife to a gunfight – guaranteed fabric damage and sewing frustration.
Watch out for these sewing machine compatibility landmines:
- Mismatched plate for delicate fabrics
- Incorrect plate for your specific stitch type
- Using a standard plate when you need specialized equipment
Your machine deserves better than a one-size-fits-all approach!
Incorrect Needle Alignment and Calibration
A single misaligned needle can transform your sewing dream into a tangled nightmare.
When your sewing machine needle isn’t precisely calibrated, you’ll battle bent needles, skipped stitches, and fabric jams that’ll make you want to toss your machine out the window.
Precise needle plate alignment isn’t rocket science—it’s about patience, careful adjustment, and understanding your machine’s unique personality.
Failure to Regularly Inspect and Maintain
Skipping regular needle plate check-ups is like ignoring a car’s oil change – you’re setting yourself up for hidden damage and unexpected repairs.
Neglecting preventative care can shorten your sewing machine’s lifespan and lead to costly performance issues.
Your needle plate needs consistent love to keep humming smoothly, so make inspection a habit before problems snowball. Preventative care is essential.
Additionally, it’s key to have the right replacement parts, such as a new needle plate, to facilitate a proper fix and prevent further damage. Replacement parts are crucial.
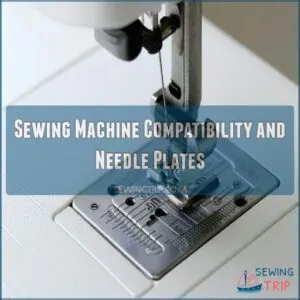
Sewing Machine Compatibility and Needle Plates
Not all sewing machines are created equal, and neither are their needle plates.
Machine compatibility and needle plate selection are crucial for smooth stitching and flawless fabric.
Checking The Owner’s Manual for Recommendations
Why settle for guesswork when your sewing machine’s manual is a treasure trove of needle plate wisdom?
Explore those pages to uncover specific manual specifics that’ll save you headaches.
Your sewing machine model’s troubleshooting guide reveals critical safety precautions and warranty details you can’t afford to ignore.
Trust the manufacturer’s expertise.
Understanding Machine-Specific Needle Plate Requirements
After checking your owner’s manual, you’ll want to get laser-focused on your specific machine’s needle plate requirements.
Each sewing machine make and model demands a unique approach.
Machine-specific plates aren’t one-size-fits-all – they’re precision tools.
Plate identification becomes your secret weapon in preventing costly mistakes, ensuring smooth stitching, and keeping your beloved machine running like a well-oiled dream.
Adapting to Different Fabric and Stitch Types
Your fabric-needle plate dance changes with every project. Different needle plate types shine when matched to specific fabric and stitch needs.
Choose straight stitch plates for delicate silks, wider plates for quilting cottons.
Tension adjustments and needle selection play key roles in preventing fabric damage.
Always test your setup on scrap material before starting your main project. Learn about various needle plate types. Always test your setup on scrap material before starting your main project.
Frequently Asked Questions (FAQs)
What is the plate on a sewing machine called?
The needle plate, or throat plate, anchors your fabric and guides it smoothly under the presser foot while your needle punches through, creating perfect stitches every time you sew.
How do you fix a needle holder on a sewing machine?
Unscrew the needle clamp carefully, remove the old needle, and align the new one perfectly.
Tighten the clamp securely, ensuring the needle sits straight and doesn’t wiggle.
Check alignment by slowly turning the handwheel.
Why is my needle hitting the needle plate?
When needle meets metal like a clumsy dance partner, you’ve likely misaligned your machine’s timing.
Check needle height, and see that it’s centered in the plate hole, and adjust the screw to realign for smooth, snag-free stitching.
What are the measurements of a sewing machine needle plate?
Your needle plate’s measurements vary by machine model.
Typically, they’re around 5 to 2 inches wide with a small center hole.
Check your sewing machine’s manual for the precise dimensions to guarantee the perfect fit.
How often should I replace my needle plate?
Replace your needle plate every 1-2 years or when you notice visible wear, damage, or misalignment.
Preventive maintenance keeps your sewing machine running smoothly and helps avoid costly repairs down the line.
Can I fix a damaged needle plate?
Minor needle plate damage can often be repaired by carefully filing rough edges or smoothing small nicks.
However, if the plate’s integrity is compromised, replacing it is your safest bet to prevent fabric snags and machine malfunctions.
Do different brands have interchangeable needle plates?
No, needle plates aren’t universally interchangeable.
Different sewing machine brands design unique plate configurations.
You’ll want to check your machine’s manual or contact the manufacturer to confirm a perfect, safe fit for your specific model.
What tools do I need for replacement?
When Sarah’s machine jammed mid-project, she discovered three must-have tools:
a precision screwdriver, needle plate removal tool (or small flathead), and a clean, lint-free cloth to wipe down surfaces during replacement.
Are aftermarket needle plates worth purchasing?
If you’re a serious sewist, aftermarket needle plates can be game-changers. They’ll upgrade your machine’s performance, offer precision for specific fabrics, and potentially save you money compared to brand-name replacements.
Conclusion
Picture yourself standing triumphant over your perfectly tuned sewing machine—you’ve mastered the sewing machine needle plate replacement!
By understanding the nuances of needle plate maintenance, you’ll extend your machine’s life and elevate your crafting game.
Whether you’re a newbie or a seasoned sewist, replacing your needle plate isn’t just about repair—it’s about precision.
Keep practicing, stay curious, and watch your sewing skills soar to new heights. Your machine will thank you! sewing machine needle plate replacement needle plate maintenance
- https://www.thesprucecrafts.com/sewing-machine-throat-plate-2821596
- https://sewingfeed.com/why-does-my-needle-keep-hitting-the-plate/
- https://www.youtube.com/watch?v=3HRcwWa_ZUQ
- https://craftingagreenworld.com/articles/replace-the-sewing-machine-needle-plate/
- https://sewingmachinetalk.com/needle-plate-problems-issues/

