This site is supported by our readers. We may earn a commission, at no cost to you, if you purchase through links.
Needle sizes range from delicate 60/8 for silk to heavy-duty 120/19 for denim, while types include universal, ballpoint, stretch, and specialty options.
The wrong needle creates skipped stitches, fabric damage, and thread breaks—like using a sledgehammer on glass. Your fabric weight and thread type determine the perfect match.
Change needles every 6-8 sewing hours to maintain peak performance. Understanding these fundamentals reveals professional results and prevents costly mistakes.
Table Of Contents
- Key Takeaways
- Sewing Machine Needle Anatomy
- Choosing The Right Needle Size
- Common Sewing Machine Needle Types
- Specialized Sewing Machine Needles
- Needle Size and Type Selection
- How to Change a Sewing Machine Needle
- Needle Lifespan and Color Coding
- Needle Troubleshooting and Maintenance
- Frequently Asked Questions (FAQs)
- Conclusion
Key Takeaways
- You’ll need to match needle size to fabric weight – use 60/8-70/10 for delicate fabrics like silk, 80/12-90/14 for medium cotton, and 100/16-120/19 for heavy materials like denim to prevent skipped stitches and fabric damage.
- You should choose the right needle type for your project – universal needles work for most woven fabrics, ballpoint needles prevent runs in knits, stretch needles handle elastic materials, and specialty needles tackle leather or embroidery work.
- You must change your needle every 6-8 hours of sewing time because dull needles cause thread breaks, fabric snags, and poor stitch quality that’ll ruin your projects.
- You can troubleshoot most sewing problems by checking your needle first – bent needles create thumping sounds, wrong needle types cause skipped stitches, and damaged needle points snag delicate fabrics.
Sewing Machine Needle Anatomy
You’ll need to understand each part of your sewing machine needle to choose the right one for your project and troubleshoot problems when they arise.
Every needle has six main parts that work together: the shank (thick top section), shaft (round middle area), eye (thread hole), point (fabric-piercing tip), scarf (small indentation), and groove (thread channel).
The parts of the needle are crucial for its function, and knowing them can help with troubleshoot problems when they arise.
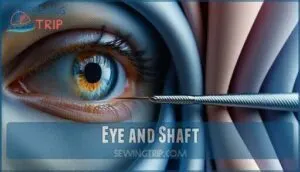
Eye and Shaft
Picture threading your sewing machine – you’re dealing with the needle’s most vital partnership.
Master your needle’s anatomy – it’s the key to flawless stitching every single time.
The eye determines which threads you can use, while shaft thickness affects how easily your needle penetrates fabric.
These sewing machine needles elements work together for ideal thread compatibility.
- A perfectly sized eye prevents thread shredding and maintains consistent tension
- Proper shaft thickness ensures smooth fabric penetration without damaging delicate materials
- Balanced needle anatomy delivers superior needle durability and prevents frustrating breaks
Eye size and shaft thickness directly impact your project’s success.
The needle’s most vital partnership is with the thread and fabric to ensure consistent tension.
Shank and Point
Understanding shank types and point geometry transforms your sewing experience.
The shank’s flat side guarantees proper needle insertion into home machines, while industrial models use round shanks.
Point geometry determines fabric piercing success:
- Universal points handle most woven fabrics smoothly
- Ballpoint needles slip between knit fibers without damage
- Sharp points slice through dense materials like leather cleanly
Choose wisely for flawless stitching results.
Scarf and Number Metric System
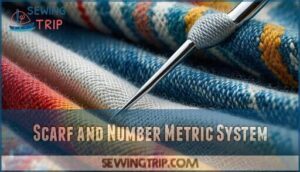
The scarf’s indentation helps your machine’s hook grab thread smoothly, preventing skipped stitches.
Both European and American measurement systems work together – European numbers show actual diameter, while American numbers indicate fabric weight compatibility.
| European Size | American Size | Best For |
|---|---|---|
| 70 | 10 | Lightweight fabrics |
| 80 | 12 | Medium-weight materials |
| 90 | 14 | Heavy fabrics |
| 100 | 16 | Extra-thick materials |
The table provides a clear comparison of European and American sizes, along with the recommended fabric weight for each.
Choosing The Right Needle Size
You’ll find that selecting the correct needle size makes the difference between smooth sewing and frustrating thread breaks or fabric damage.
The key is matching your needle’s thickness to both your fabric weight and thread type, since lightweight fabrics need thin needles while heavy materials require thicker ones to penetrate properly.
Thread Type and Fabric Weight
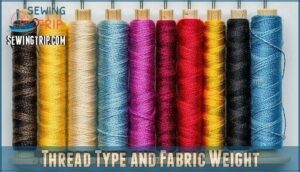
Understanding how thread weight and fabric weight work together determines your sewing machine needles success.
Thread Compatibility isn’t guesswork—it’s about matching needle size to your materials.
Here’s your fabric and thread pairing guide:
- Lightweight fabrics (silk, chiffon) need fine threads and 60/8-70/10 needles
- Medium-weight materials (cotton, linen) work with 80/12-90/14 needles
- Heavy fabrics (denim, canvas) require thick threads and 100/16-110/18 needles
- Wrong combinations cause Needle Wear, poor Stitch Quality, and Tension Adjustments headaches
Needle Size Ranges and Selection
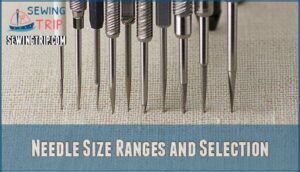
Getting your needle sizes right prevents headaches down the road. You’ll work with two sizing systems that might seem confusing at first, but they’re actually straightforward once you know the trick.
European sizing runs from 60 to 110, representing the needle’s actual diameter in hundredths of millimeters. American sizing goes from 8 to 18, serving as a general fabric weight guide.
Here’s what you need to remember:
- Size Conversion: European 80 equals American 12 for medium-weight fabrics
- Fabric Weight matching: Heavier materials need larger numbers in both systems
- Thread Matching: Thicker threads require bigger needle sizes for smooth performance
- Performance Impact: Wrong needle selection causes skipped stitches and fabric damage
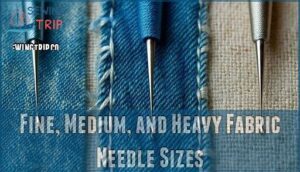
Fine, Medium, and Heavy Fabric Needle Sizes
Properly matching sewing machine needles to fabric weight guarantees perfect stitch quality and damage prevention.
Your needle selection determines project success.
| Needle Size | Fabric Weight | Examples |
|---|---|---|
| 9/70 | Fine | Silks, taffeta |
| 11/80 | Medium | Linen, satin |
| 14/90 | Medium-heavy | Lightweight denim |
| 16/100 | Heavy | Tweeds, canvas |
| 18/110 | Extra-heavy | Leather, heavyweight denim |
This fabric weight guide simplifies needle sizes for ideal thread compatibility.
Common Sewing Machine Needle Types
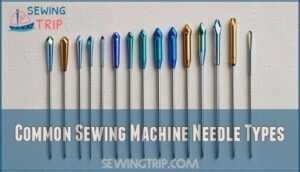
You’ll encounter five main needle types that handle most sewing projects, each designed for specific fabric challenges.
Understanding universal and other needle types, such as ball point, stretch, sharps, and quilting needles, helps you choose the right tool for smooth stitching without fabric damage.
Universal Needles
Now that you’ve mastered needle size selection, let’s explore universal needles – your go-to choice for most sewing projects.
These versatile sewing machine needles work brilliantly with woven fabrics, light knits, and synthetics. Their slightly rounded point guarantees excellent fabric compatibility without damage.
Many sewers purchase assorted needle packs to guarantee they’ve the right size on hand.
Here’s why universal needles deserve a spot in every sewing kit:
- Size Selection: Available in multiple sizes for different fabric weights
- Thread Pairing: Compatible with standard cotton and polyester threads
- Stitch Quality: Delivers consistent, professional results across various materials
Ball Point Needles
Ballpoint needles transform your knit fabric projects from frustrating disasters into smooth successes.
Sharp needles slice through dense fabrics cleanly while ballpoint needles glide between knit fibers without snagging.
These specialized sewing machine needles feature a rounded needle point that gently separates fabric fibers instead of piercing them, preventing those dreaded runs and snags that plague knit fabrics.
Ballpoint needles glide through knits effortlessly, protecting fabric loops and ensuring smooth, snag-free stitching every time.
The unique point design makes all the difference when working with jersey, rib knits, and other stretchy materials.
Unlike sharp-pointed sewing machine needle types, ballpoint needles preserve your fabric’s elasticity while maintaining excellent stitch quality.
They’re specifically engineered to avoid loop damage that can ruin your project.
You can find various needle options online.
Proper needle sizes matter tremendously for ideal results with different knit weights.
Feature Ballpoint Needle Universal Needle
Knit fabrics
Choose ballpoint needles for stress-free knit sewing adventures!
Stretch Needles
Stretch needles excel where ballpoint needles fall short with highly elastic materials.
These sewing machine needles feature specialized needle composition that prevents skipped stitches on challenging knit fabrics like Lycra and athletic wear.
Stretch needles handle demanding projects with precision:
- Lycra stitching for activewear and swimwear
- Elastic hemming on stretchy garments
- Jersey and interlock knit fabrics
- Compression fabrics requiring flexibility
- Two-way stretch materials needing secure seams
You’ll appreciate their consistent performance on tricky textiles.
Sharps Needles
Sharp needles, also called Microtex needles, are your go-to choice for precise stitching on tightly woven materials and delicate silk fabrics.
These specialized sewing machine needles feature an ultra-fine needle point that slips through dense weaves without causing snags or runs.
Here’s why you’ll reach for sharp needles:
- Perfect for silk fabrics and high-thread-count cotton
- Prevents runs in delicate woven materials
- Creates clean holes without fabric distortion
- Ideal for topstitching and detailed work
- Available in sizes 60/8 through 90/14
To find the best option, consider purchasing sewing needles online.
Quilting Needles
Three factors make quilting needles your secret weapon for perfect projects.
These specialized sewing machine needles feature tapered points that slice through multiple fabric layers and batting types without snagging.
You’ll need proper thread pairing and stitch regulation for best results.
Machine compatibility matters too—check your manual first.
Needle Size Thread Type Fabric Layers Best Use
Consider fabric weight when selecting needle sizes.
Replace needles regularly to maintain needle lifespan.
Specialized Sewing Machine Needles
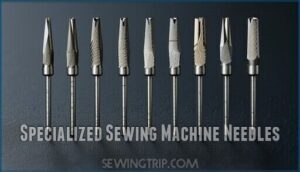
When you’re working with challenging materials like thick denim, slippery leather, or delicate embroidery threads, you’ll need specialized needles that can handle these specific tasks.
These specialized needles feature unique designs and reinforced construction that prevent common problems like skipped stitches, thread breaks, and fabric damage that regular needles simply can’t avoid.
Denim/Jeans Needles
Heavy fabrics like denim and canvas demand specialized jeans needles that won’t buckle under pressure.
These tough needles feature reinforced construction and sharp points designed for thick materials.
Key features of denim needles:
- Reinforced shaft prevents bending and breakage during heavy-duty sewing
- Sharp point penetrates multiple fabric layers without skipping stitches
- Large eye accommodates thicker threads needed for sturdy seams
- Extended durability outlasts standard needles on tough materials
- Size range from 90/14 to 110/18 matches various fabric weights
Leather Needles
When working with leather projects, you’ll discover that leather needles are game-changers for your sewing machine needles collection.
These specialized needle types feature wedge-shaped needle point designs that slice through tough materials cleanly, ensuring superior stitch quality without skipped stitches.
- Leather Types: Natural and faux leather both work perfectly
- Point Shapes: Wedge design cuts fibers instead of pushing through
- Thread Pairing: Use heavy-duty thread for best results
- Maintenance Tips: Replace after every major leather project
Available in needle sizes 90/14 to 110/18.
Embroidery Needles
Moving from leather’s tough fibers, embroidery needles tackle decorative stitching with precision.
These specialized sewing machine needles feature enlarged eyes and sharp points, making thread compatibility smooth for intricate designs.
Embroidery needles handle rayon, polyester, and cotton threads beautifully.
| Feature | Benefit |
|---|---|
| Large Eye | Reduces thread friction and breakage |
| Sharp Point | Creates clean entry through fabric |
| Smooth Shaft | Prevents thread shredding during stitching |
| Size Range | Accommodates various thread weights |
Design considerations matter when choosing needle sizes.
Stabilizer use becomes critical with dense patterns.
Hooping effects can stress fabric, so proper needle selection prevents puckering.
Needle coatings extend lifespan during heavy embroidery work.
Metallic Needles
Metallic needles solve the frustrating problem of thread shredding when you’re working with sparkly metallic thread.
Their elongated eye reduces friction and prevents those annoying breaks that ruin your project.
The needle composition often includes special coating materials that help threads glide smoothly through fabric.
These specialized sewing machine needles work differently than standard embroidery needle options.
When choosing needle types for your sewing machine, metallic needles deliver consistent results with challenging decorative threads.
Needle Size and Type Selection
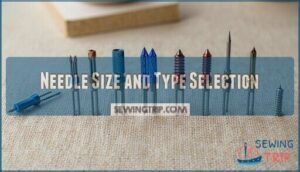
You’ll make better sewing choices when you understand how needle sizes and types work together with your fabric and thread.
Learning to match the right needle to your project prevents skipped stitches, thread breaks, and fabric damage that can turn a fun sewing session into a frustrating experience, by ensuring a proper match which is a complete concept in sewing.
Quick Reference Charts
Quick reference charts transform needle selection from guesswork into precision.
These essential guides provide instant fabric compatibility and thread matching solutions for every project.
Your needle guide should include three key sections:
- Size applications: Match needle thickness to fabric weight (60/8 for silk, 90/14 for cotton, 110/18 for denim)
- Needle types: Universal, ballpoint, stretch, and specialty options for different materials
- Troubleshooting guide: Common issues like skipped stitches or thread breaks with needle conversion solutions
European and American Sizing Systems
Understanding needle numbering systems makes sizing conversion straightforward.
European measurement uses metric equivalents—the shaft diameter in millimeters multiplied by 100. American measurement follows historical system origins, creating size discrepancies between the two scales.
Both needle sizing systems measure identical needles differently. For example, 80/12 means 0.8mm diameter.
Learning both needle sizes helps you’re choosing correctly regardless of packaging format, which is crucial for sizing conversion and understanding the needle numbering systems.
Needle Size for Specific Fabric Types
You’ll achieve perfect stitch quality when you match needle sizes to fabric weight and thread matching requirements.
The right needle selection prevents needle damage and guarantees maximum size impact on your projects.
- 60/8-70/10: Delicate fabrics like silk, chiffon, and lightweight cotton
- 80/12: Medium-weight cotton, linen, and most everyday sewing projects
- 90/14: Quilting cotton, canvas, and multiple fabric layers
- 100/16: Denim, thick upholstery, and heavy-duty materials
- 110/18: Leather, vinyl, and extra-heavy fabrics requiring maximum strength
How to Change a Sewing Machine Needle
Changing your sewing machine needle is easier than you might think, and it’s one of the most important maintenance tasks you’ll perform.
You’ll need to know when to replace your needle, how to remove the old one safely, and the proper way to insert a new needle to keep your machine running smoothly.
When to Change The Needle
Recognizing when your needle needs replacement prevents project interruption and maintains stitch quality. Replace sewing machine needles every 8-10 hours of use or after completing heavy projects.
Needle fatigue from fabric type changes affects performance. Regular intervals maintain proper needle maintenance and prevent broken needles during vital sewing moments.
| Sign | Description | Action |
|---|---|---|
| Bent needle | Needle curves or leans | Replace immediately |
| Skipped stitches | Uneven stitch formation | Check needle condition |
| Thread breaks | Frequent thread snapping | Install fresh needle |
| Fabric snags | Needle catches material | Replace worn needle |
| Thumping sounds | Unusual machine noise | Inspect for damage |
To ensure your sewing projects run smoothly, it’s crucial to monitor your needle’s condition, looking out for signs such as a bent needle, skipped stitches, or thread breaks, and take the appropriate action as described.
Visual Inspection and Thumping Sounds
Keep your ears open for trouble signals during your sewing sessions. That rhythmic thumping isn’t your machine’s heartbeat – it’s crying for help.
Needle Damage Signs reveal themselves through careful Machine Sound Analysis:
- Thumping sounds indicate a bent or dull needle piercing fabric improperly.
- Visual burrs or nicks on the needle shaft suggest immediate replacement.
- Fabric snags or pulls signal the needle tip has lost its sharpness.
- Thread shredding points to eye damage requiring urgent attention.
Regular Inspection Frequency prevents costly fabric disasters and maintains peak needle performance.
Removing The Old Needle
Safety precautions come first when removing worn needles.
Turn off your machine and unplug it completely.
Raise the presser foot, then remove thread from the needle.
Position the needle at its highest point using the handwheel.
Use needle-nose pliers if the needle feels stuck during removal.
| Step | Action |
|---|---|
| 1 | Turn off and unplug machine |
| 2 | Raise presser foot completely |
| 3 | Remove thread from needle |
| 4 | Loosen needle clamp screw |
Proper needle disposal prevents accidents after loosening screw mechanisms, and following these steps ensures safety precautions are taken, which is crucial for preventing accidents and maintaining a safe environment.
Inserting The New Needle
Once you’ve removed the old needle, grab your new one and locate the flat side of the shank.
Insert it with the flat side facing back, pushing upward until it hits the stopping point for proper insertion depth.
Secure tightening of the needle clamp screw guarantees needle alignment and prevents wobbling.
Test your needle insertion by hand-turning the wheel—this simple check protects against preventing damage during your next sewing session.
Needle Lifespan and Color Coding
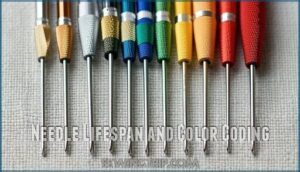
You’ll want to replace your sewing machine needle every 6-8 hours of sewing time or after completing each major project to maintain clean, precise stitches.
Most needle manufacturers use color-coded bands on the shank to help you quickly identify needle types, with each color representing a specific purpose like universal, ballpoint, or specialty needles.
Average Needle Lifespan
Now that you’ve mastered changing needles, understanding needle lifespan helps you stay ahead of potential problems.
Your needles won’t last forever, and knowing when they’re wearing out saves you from frustration down the road.
Most sewing machine needles handle 6-8 hours of continuous sewing before showing wear.
However, needle durability depends on several factors that affect how long they’ll perform at their best.
Here’s what impacts your needle’s working life:
- Usage frequency determines how quickly needles dull from repeated fabric penetration
- Material sewn affects wear rates, with heavy fabrics causing faster deterioration than lightweight ones
- Needle quality varies between brands, with premium needles lasting longer than budget options
- Storage methods influence needle condition, as proper storage prevents premature dulling
- Identifying wear through visual inspection helps you replace needles before they damage fabric
Smart needle maintenance means replacing them regularly, not waiting until they break.
Color Coding for Needle Types
Decoding Colors on sewing machine needles isn’t rocket science, but it’ll save you headaches.
Most manufacturers use a two-band system where the top color indicates needle types and the bottom shows size.
However, Brand Variations mean Schmetz’s red differs from Singer’s red.
Always check your needle guide for Color Purpose and Industry Standards.
This visual system transforms chaotic needle storage into organized efficiency, making your sewing machine needle guide actually useful.
Consequences of Using The Wrong Needle Size
Wrong needle choices turn your sewing machine into a troublemaker.
Here’s what happens when you mismatch sewing machine needles:
- Skipped Stitches: Your machine struggles to form proper loops, creating gaps in seams.
- Fabric Damage: Oversized needles punch holes; undersized ones snag delicate materials.
- Thread Breakage: Poor needle sizes stress thread, causing constant stops.
- Seam Puckering: Incorrect needle troubleshooting creates wrinkled, unprofessional results.
Needle Troubleshooting and Maintenance
Even the sharpest needle won’t perform well if you don’t maintain it properly, and recognizing common problems early can save you hours of frustration.
You’ll learn to spot warning signs like skipped stitches and thread breaks, plus discover simple maintenance tricks that keep your needles working smoothly for every project.
Preventing Damage to Fabric
Looking at color-coded needles won’t help if you’re damaging your fabric with poor needle choices. Your fabric deserves better protection than a bent needle can provide.
Needle sharpness matters more than you think. Dull needles create holes instead of clean punctures, especially in delicate weaves. Check your needle points regularly—they should pierce smoothly without snagging threads.
Match needle types to your fabric weave perfectly. Ballpoint needles slip between knit fibers, while sharp needles cut through woven materials cleanly.
| Fabric Type | Needle Point | Stitch Length | Tension Settings |
|---|---|---|---|
| Silk/Satin | Sharp/Microtex | 2.0-2.5mm | Light tension |
| Knits | Ballpoint | 2.5-3.0mm | Medium tension |
Adjust your feed dogs and stitch length appropriately. Fabric compatibility prevents costly mistakes and keeps your sewing machine needles working efficiently.
Maintaining Optimal Performance
Three simple habits will keep your sewing machine needles performing at their best. Regular Cleaning removes lint buildup that dulls needles and causes thread snags.
Needle Storage in protective cases prevents bends and nicks that ruin precision. Machine Servicing every few months guarantees proper needle alignment and timing.
Practice good needle care by changing them every 8-10 hours of sewing. These sewing machine maintenance routines prevent Avoiding Damage to your projects while extending needle lifespan.
Consistent habits create Consistent Stitching results every time.
Troubleshooting Common Needle Issues
Needle problems can turn your sewing session into a nightmare, but most issues have simple fixes you can handle yourself.
When your machine starts acting up, check the needle first. It’s often the culprit behind frustrating sewing problems that make you want to quit mid-project.
- Skipped stitches happen when you’re using the wrong needle type for your fabric or the needle’s gotten dull
- Thread breaks usually mean your needle needs replacing or you’ve got threading issues to sort out
- Fabric damage occurs when bent needles or needle dullness creates snags in delicate materials
- Needle breakage results from pulling fabric too hard or forcing thick seams without patience
- Needle installation problems cause wobbly stitching and poor performance throughout your project
Frequently Asked Questions (FAQs)
How do I know what sewing machine needle to use?
Match your needle to your fabric’s weight and type. Use smaller numbers (70/10) for lightweight materials like silk, larger numbers (100/16) for heavy fabrics like denim. Check the package for compatibility guidelines.
What is the difference between sewing needle 80 12 and 90 14?
The 80/12 needle is thinner and works best for medium-weight fabrics like cotton and linen. The 90/14 needle is thicker and handles heavier materials like denim better without breaking.
Which needle size is finer, a 9 or a 14?
A size 9 needle is much finer than a You’ll use the thinner 9 for delicate fabrics like silk, while the thicker 14 handles medium-weight materials better.
What are the 7 different types of sewing needles?
You’ll encounter seven main needle types: Universal, Ball Point/Stretch, Sharp/Microtex, Denim/Jeans, Leather, Topstitch, and Embroidery/Metallic.
Each one’s designed for specific fabrics and threads to give you perfect stitches every time.
How to choose a sewing machine needle size?
Consider your fabric’s weight first. Lightweight materials need smaller needles (60/8-75/11), while heavy fabrics require larger ones (90/14-110/18). The rule’s simple: thicker fabric equals thicker needle for clean stitches.
Why do you need a sewing machine needle?
Without this tiny metal component, your sewing machine becomes useless.
You need a sewing machine needle to pierce fabric, create holes for thread, and form stitches that hold your projects together permanently.
What is the difference between a machine and a hand sewing needle?
Machine needles have a flat-backed shank that locks into your sewing machine.
You’ll also notice machine needles are shorter and built to handle high-speed stitching, while hand needles are completely round.
What is a sewing machine needle?
Like knights wielding their trusty swords, you’ll wield a sewing machine needle—a precision tool that pierces fabric to create stitches.
It’s got a flat-backed shank, threaded eye, and sharp point designed specifically for machine compatibility.
What is the difference between a sewing machine needle and embroidery needle?
Embroidery needles have larger eyes and longer grooves than regular sewing machine needles.
You’ll use them with specialty threads like rayon or metallic that need extra space to prevent shredding and breakage.
How do sewing machine needles work?
You insert the needle through your machine’s needle bar, where it moves up and down rapidly.
As it penetrates fabric, the thread forms loops that your machine’s hook catches to create stitches.
Conclusion
Professional seamstresses change their needles every 6-8 hours of sewing, yet many home sewers use the same needle for months.
Now that you’ve mastered sewing machine needles explained, you’ll avoid skipped stitches and fabric damage that plague countless projects.
Match your needle size to fabric weight, choose the right type for your material, and change needles regularly.
These simple steps transform amateur results into professional-quality work.
Your fabric deserves the perfect needle—and so do you.

