This site is supported by our readers. We may earn a commission, at no cost to you, if you purchase through links.

First, unplug the machine and consult your manual for specific points. Apply just a drop or two of proper sewing machine oil to moving parts—too much is like drowning your machine in kindness.
Wipe excess oil away immediately, then turn the handwheel to distribute it evenly.
For most machines, oiling every 8-10 hours of use prevents that dreaded metal-on-metal screech we all know too well.
The difference between a well-oiled machine and a neglected one? It’s like night and day in stitch quality.
Table Of Contents
- Key Takeaways
- Sewing Machine Oiling Importance
- How Often to Oil Sewing Machine
- Choosing Right Sewing Machine Oil
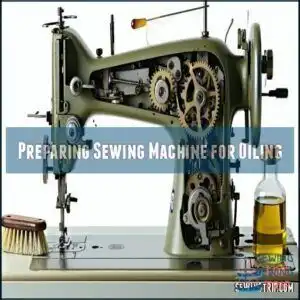
- Preparing Sewing Machine for Oiling
- Steps for Oiling Sewing Machine
- Oiling Moving Parts of Sewing Machine
- Tips for Old or Vintage Sewing Machines
- Common Mistakes to Avoid in Oiling
- Benefits of Regular Sewing Machine Oiling
- Maintaining and Troubleshooting Sewing Machine
- Frequently Asked Questions (FAQs)
- Conclusion
Key Takeaways
- Clean your sewing machine thoroughly before oiling to remove lint and debris that can mix with oil and cause damage.
- Use only specialized sewing machine oil, and avoid alternatives like WD-40 or cooking oil that can harm your machine.
- Apply just 1-2 drops of oil to moving metal parts, such as the rotary hook and needle bar, to prevent over-oiling and fabric stains.
- Oil your machine every 8-10 hours of use or when it shows signs like squeaking, uneven stitches, or sluggish performance.
Sewing Machine Oiling Importance
You’ll extend your sewing machine’s life and maintain perfect stitches by oiling it regularly, much like how your car needs oil to run smoothly.
Proper lubrication reduces friction between metal parts, preventing wear and tear while ensuring your trusty machine doesn’t protest with that tell-tale squeaking sound during your next project.
Reduces Friction and Wear
When you properly oil your sewing machine, you’re providing essential lubrication that reduces friction and wear between moving parts.
Just as a car engine needs oil to run smoothly, your sewing machine requires regular maintenance to prevent mechanical damage.
Proper machine lubrication offers several benefits:
- Minimizes metal-on-metal contact that causes premature wear
- Reduces heat buildup during extended sewing sessions
- Prevents rust formation on critical components
- Creates smoother operation with less resistance
Without adequate oil application, your machine’s parts will grind against each other, creating unnecessary friction that shortens your machine’s lifespan.
Regular maintenance tips include applying sewing machine oil to all moving parts where metal contacts metal, which helps to prevent damage and ensure a longer lifespan for your machine.
Maintains Stitch Quality
Just as friction affects your car’s performance, it impacts your sewing machine’s stitch quality.
Regular oiling guarantees:
| Issue | Without Oiling | With Proper Oiling |
|---|---|---|
| Thread Tension | Inconsistent | Balanced and even |
| Needle Movement | Jerky, can bend | Smooth, precise |
| Fabric Feed | Uneven, puckering | Consistent glide |
| Stitch Formation | Skipped or loose | Perfect formation |
You’ll notice fewer skipped stitches, proper bobbin alignment, and more consistent stitching patterns—making even complex fabric selections manageable with smooth and consistent results.
Extends Lifespan
Beyond improving stitch quality, regular oiling substantially extends your sewing machine’s lifespan. Just as your car needs consistent oil changes, your sewing machine requires proper lubrication to function at its best for years to come.
Here’s how oiling contributes to your machine’s longevity:
- Reduces friction between metal parts, preventing premature wear
- Prevents rust formation on internal components
- Keeps mechanics running smoothly, avoiding strain on the motor
- Minimizes heat buildup that can damage electrical components
With consistent sewing machine maintenance, you’ll enjoy enhanced performance and noticeably fewer repairs over your machine’s extended lifetime.
Prevents Inconsistent Stitching
When your sewing machine lacks proper lubrication, your stitches start to look like a child’s zigzag drawing.
Regular oiling prevents inconsistent stitching by keeping metal parts gliding smoothly against each other.
Without adequate lubrication, thread tension becomes unpredictable, causing skipped stitches regardless of needle quality or fabric type.
Well-oiled machines maintain consistent stitch length and guarantee proper bobbin winding.
Even if you’ve selected the perfect settings, poor maintenance sabotages your work.
One day of sewing machine oiling saves weeks of frustration with puckered seams and tangled threads.
Remember, proper lubrication isn’t just maintenance—it’s your first defense against stitch quality problems.
How Often to Oil Sewing Machine
You’ll need to oil your sewing machine every 8 hours of active use or when it starts making squeaky noises like a rusty door hinge.
For modern machines, this typically means oiling once a month if you’re a light user or after every 3-4 bobbin changes for those marathon sewing sessions.
Oiling Frequency Based on Usage
Now that you understand why oiling matters, let’s determine how often you should do it.
Your usage patterns directly dictate proper oil intervals. For daily sewers, apply oil weekly; if you use your machine 2-3 times weekly, monthly oiling is sufficient.
Heavy users should follow an 8-hour usage rule. Maintaining consistent oiling schedules prevents excessive machine wear and guarantees reliable performance every time you sit down to create.
It’s also vital to check the oil application frequency to confirm your sewing machine runs smoothly.
Signs of Needed Oiling
While frequency guides provide a schedule, your machine will tell you when it needs attention.
Listen for squeaky sounds or notice when fabric doesn’t feed smoothly—these signal friction issues.
Your sewing machine oiling guide should include watching for these warning signs:
- That heartbreaking moment when perfect stitches suddenly become irregular
- The frustrating grinding noise that makes you wince with every pedal press
- The sluggish movement that transforms quick projects into time-consuming ordeals
Stitch problems, increased resistance, and unusual noises all indicate dry machines needing lubrication, which can be signaled by squeaky sounds or irregular stitches, and ultimately lead to time-consuming ordeals.
Oiling After Cleaning
Every machine needs oiling after a thorough cleaning session. The cleaning process removes old oil and debris, creating the perfect canvas for fresh lubrication. Proper sewing machine maintenance requires this two-step approach for peak performance.
Following your cleaning routine with proper oil application extends your machine’s lifespan while ensuring smooth operation. Think of it as a maintenance schedule – clean first, then oil. This sewing machine oiling guide principle prevents contaminating fresh oil with lingering debris.
- Use cleaning tools like lint brushes to remove all dust and fabric particles
- Identify key lubrication points mentioned in your machine’s manual
- Apply a single drop of oil to each moving metal part
- Run the machine briefly to distribute oil evenly
Your machine will thank you with quieter operation and consistent stitch quality after this essential machine preparation step.
Choosing Right Sewing Machine Oil
You’ll need to use the correct lubricant to keep your sewing machine purring like a well-fed cat.
Synthetic or white mineral oil specifically designed for sewing machines will protect your precious investment.
Household oils like WD-40 or cooking oil can damage your machine beyond repair, so it’s crucial to choose the right lubricant to avoid causing harm to your precious investment.
Types of Oil
Now that you know when to oil your machine, let’s focus on what goes into the bottle.
Sewing machine oil comes in several varieties, each with specific benefits. You can find a variety of sewing machine oil products.
Dedicated sewing lubricants like Singer or Brother oils provide ideal performance for your machine. These specialized oils are typically petroleum-based or synthetic formulations designed to reduce friction without damaging components.
Always choose clear, lightweight machine grease specifically formulated for sewing equipment. Quality mineral oil works well for most machines, while synthetic oil offers superior longevity for high-usage scenarios.
Synthetic Oil Vs White Mineral Oil
When choosing between sewing machine oil types, understanding the key differences can substantially impact your machine’s performance.
- Synthetic oil offers superior protection with reduced friction, though typically at a higher price point
- White mineral oil provides longer-lasting lubrication requiring fewer applications
- Premium brands blend specialized additives that enhance both oil types’ performance
- Standard mineral oil delivers reliable results for most home sewists without breaking the bank
Both options keep your machine running smoothly when used correctly.
Regular sewing machine maintenance is vital for peak performance and longevity.
Avoiding Wrong Types of Oil
Let’s steer clear of certain oil types that can throw a wrench in your sewing machine’s performance.
Using the wrong oils can lead to serious damage:
| Oil Type | Impact | Alternative |
|---|---|---|
| WD-40 | Damages gears and plastic | Sewing machine oil |
| Cooking oil | Hardens and clogs parts | Synthetic oil |
| 3-in-1 oil | Creates sticky residue | Machine-specific oil |
| Motor oil | Too thick, attracts dirt | Clear lubricant |
| Petroleum jelly | Gums up mechanisms | White mineral oil |
Always check your manual for recommended lubricant types—your machine’s longevity depends on it.
For superior performance, choosing the right sewing machine oil is vital to maintain your device.
Preparing Sewing Machine for Oiling
Before you oil your sewing machine, you’ll need to unplug it and remove all thread, lint, and detachable parts for proper access to the moving components.
You’ll then want to clean the exposed areas thoroughly with a stiff brush, making sure to remove any stubborn lint that might prevent the oil from reaching critical friction points.
Unplugging and Removing Thread
Now that you’ve chosen the perfect oil, it’s time to prepare your machine for its mini-spa treatment. Proper preparation is the foundation of effective sewing machine oiling. Consult this vintage sewing machine guide for detailed instructions.
- Unplug your machine completely from the wall outlet for absolute power safety.
- Remove all thread from both needle and bobbin areas. Take out the bobbin case to expose critical oiling points.
- Detach the presser foot to release any remaining tension.
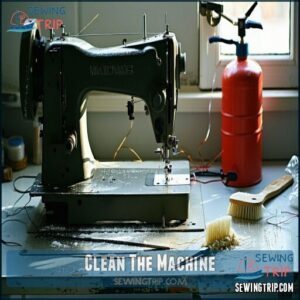
Cleaning The Machine
Begin by removing lint from your sewing machine to guarantee smooth oiling.
Grab your cleaning toolkit—a lint brush works wonders for sweeping away dust and thread bits from visible areas.
Clear debris from the bobbin area and feed dogs, where particles typically accumulate.
For stubborn grime, wipe surfaces with a clean cloth.
Don’t forget to clean the handwheel!
A thorough cleaning before oiling prevents dirt from mixing with lubricant, extending your machine’s lifespan.
Removing Presser Foot and Handwheel
Now that your machine is clean, it’s time to access those hard-to-reach spots. Removing the presser foot and handwheel provides better oil access to essential moving parts.
For the presser foot:
- Raise the presser foot lever
- Loosen the thumb screw
- Slide the foot off its shank
For the handwheel:
- Locate the center screw or release mechanism
- Hold the wheel steady while loosening
- Remove washers and spacers in sequence
- Place all small parts in a labeled container to prevent that frustrating "**where did that tiny screw go?
" moment and ensure proper maintenance of your machine, which is crucial for its long lifespan**.
Using a Stiff Lint Brush
A stiff lint brush is your go-to tool for clearing hidden debris during sewing machine maintenance.
Use short, firm strokes on feed dogs. Use circular motions in the bobbin area. Use gentle up-and-down sweeps around the needle bar. Tension discs benefit from light tapping, while shuttle races need quick back-and-forth swipes.
Keep your brush clean and dry to avoid spreading lint.
This step guarantees debris management is spot-on before continuing with your sewing machine oiling guide. Regular maintenance also involves checking for sewing machine brush quality to guarantee superior performance.
Removing Compact Lint
Even with careful brushing, stubborn lint can lurk in tiny corners of your machine.
This is where lint removal tools come in handy.
Use tweezers for snug spots, a wooden toothpick to tackle buildup, or a small vacuum attachment for compact debris.
For a polished finish, sewing machine brushes and a sewing machine cleaning kit guarantee lint-free maintenance, keeping your machine spotless and humming smoothly.
Steps for Oiling Sewing Machine
Oiling your machine doesn’t have to feel overwhelming if you follow the right steps.
With a little care and the proper technique, you’ll keep your machine running smoothly and ready for your next project.
Disconnect The Power
For proper Power Safety, always unplug your sewing machine before oiling.
Forgetting this step can lead to accidents—you don’t want an unexpected start mid-maintenance!
Disconnect the power cord and foot pedal to guarantee Electrical Precautions are met.
Think of this step as giving your machine a complete "shutdown."
It’s the first rule in every sewing machine maintenance guide to protect both you and your equipment.
Clean The Machine
With the power disconnected, it’s time to focus on cleaning before oiling.
Start by tackling lint buildup with a lint brush, ensuring thorough debris clearance. Use compressed air for hard-to-reach areas but avoid blowing lint deeper.
For stubborn dust, tweezers come in handy. Machine sanitizing isn’t complete until loose threads are gone.
Regular sewing machine cleaning keeps everything running smoothly—think of it as Dust Removal101 for your beloved machine, which is crucial for smoothly operation and requires regular maintenance.
Take Apart One Area at a Time
Disassembling your sewing machine for lubrication is all about staying organized and patient—treat it like solving a puzzle! Take your time—methodical disassembly guarantees smoother machine lubrication.
- Label each panel or part with sticky notes for easy sewing machine parts identification.
- Use small bags to store screws, labeling them by area for efficient reassembly.
- Snap photos during the cleaning sequence to track your progress.
- Group parts by section to simplify the sewing machine oiling process.
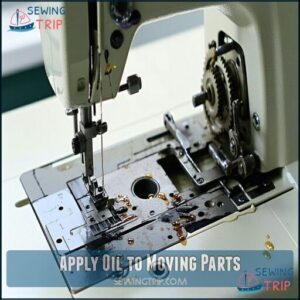
Apply Oil to Moving Parts
Once you’ve disassembled parts, it’s time to lubricate key areas of your machine.
Focus on moving parts like the bobbin area, feed dogs, needle bar, and tension discs.
Add one drop of sewing machine oil to each lubrication point—just enough to reduce friction.
Don’t forget the rotary hook and gear housing for smooth operation.
Picture seasoning a skillet—less is always better.
With this oiling guide, you’ll keep your machine running like a dream!
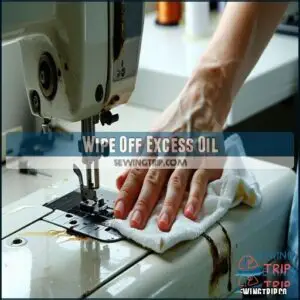
Wipe Off Excess Oil
Why deal with unsightly oil stains and slippery surfaces later? Grab a lint-free cleaning rag and wipe off excess oil after application to keep your sewing machine spotless.
Residual oil buildup can lead to lubrication mistakes or drip on fabric, ruining your project.
- Tips for prevention:
- Remove all visible oil droplets around moving parts.
- Check corners for hidden puddles of residual oil buildup.
- Keep oil-free surfaces by cleaning after oiling with a soft cloth.
Oiling Moving Parts of Sewing Machine
Keeping the moving parts of your sewing machine oiled is the key to smoother stitches and a quieter workspace.
With just a drop or two in the right spots, you’ll keep your machine running like a dream.
Oiling The Rotary Hook
The rotary hook is the heart of your machine, so don’t skip this step!
Add 1-2 drops of sewing machine oil where the rotary hook’s metal edges meet.
Spin the handwheel gently to spread the oil evenly—it’s like pampering your machine with a mini massage.
This simple maintenance step guarantees smooth stitching, reduces friction, and keeps things running quietly.
For reliable performance, regular rotary hook oiling is a must!
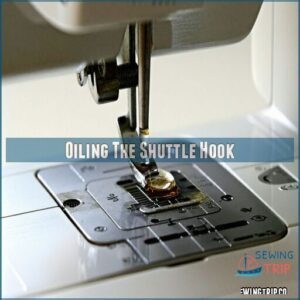
Oiling The Shuttle Hook
Your shuttle hook pulls its weight in your sewing machine’s performance, so let’s keep it in top shape with the right care.
Follow this sewing machine lubrication process:
- Add one small drop of sewing machine oil to the shuttle hook’s outer ring.
- Turn the handwheel slowly to spread the oil evenly.
- Check for any stiffness or squeaking.
- Wipe off extra oil using a lint-free cloth.
These simple sewing machine maintenance tips guarantee smooth stitching every time!
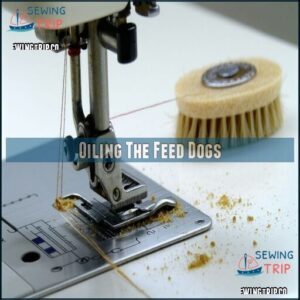
Oiling The Feed Dogs
Your feed dogs, those tiny "teeth" under the fabric, deserve attention too. Locate the feed dog mechanism and thoroughly clean lint using a stiff brush.
Add one drop of sewing machine oil where the metal pieces meet. Avoid over-oiling—less is more!
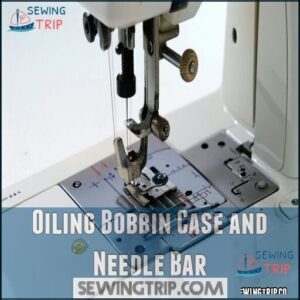
Oiling Bobbin Case and Needle Bar
The bobbin area and needle bar are key stops in your sewing machine lubrication process.
Here’s a quick breakdown:
- Add one drop of oil to the outer ring of the bobbin case and gently spin it for even distribution.
- For the needle bar, apply needle lubrication where it meets the presser foot.
- Rotate the handwheel a few times—this guarantees smooth oil application and keeps your machine maintenance on point!
Tips for Old or Vintage Sewing Machines
Your vintage sewing machine isn’t just an antique—it’s a precision instrument that needs special care regarding oiling.
You’ll need to use proper sewing machine oil (never WD-40 or cooking oil) and apply it sparingly to those metal-on-metal contact points to keep your cherished machine humming along for decades to come, with the right maintenance it can be a cherished machine.
Using The Right Type of Oil
After maintaining the moving parts, selecting the right oil for vintage machines is as essential as choosing the right thread for delicate fabrics.
For your cherished older models, always use clear, specialized sewing machine oil with the proper viscosity. The right lubricant protection makes all the difference in performance and longevity.
Four key tips for proper oil selection:
- Choose only mineral oils or synthetic oils specifically labeled for sewing machines
- Avoid harmful alternatives like WD-40, cooking oil, 3-in-1 oil, or automotive lubricants
- Look for light viscosity oil that flows freely but isn’t too thin
- Select reputable brands like Singer or Tri-flow (which contains Teflon for added protection)
Remember that quality sewing machine oil is clear, not yellow or brown, and doesn’t leave residue when applied correctly.
Avoiding Damage
Now that you’ve chosen the right oil, let’s focus on protecting your vintage sewing machine from damage.
Proper handling is your first defense against wear reduction. Never force stuck parts or overtighten screws—you’ll strip threads faster than a bobbin unwinds!
Keep oil away from rubber or leather belts to prevent longterm damage. The sewing machine oiling process requires precision; overoiling can be as harmful as using the wrong oil type.
Oil leakages aren’t just messy—they’re a machine safety hazard. Remember, that mystery lubricant in your garage isn’t worth risking your grandmother’s treasured Singer, as it can cause longterm damage and affect the vintage sewing machine.
Gentle Cleaning Methods
The vintage sewing machine in your collection requires gentle cleaning before any oiling begins.
Treat these mechanical treasures with care using these proven methods:
- Use a lint brush for delicate soft brushing around gears and crevices
- Apply compressed air to blast away stubborn dust and lint
- Wipe metal surfaces with a lint-free cloth
- Try isopropyl alcohol on cotton swabs for hardened grime
- Remove all debris thoroughly before applying oil
To ensure the longevity of your sewing machine, it is crucial to follow these steps carefully, as they are designed to preserve the mechanical treasures with the utmost care.
By following these simple yet effective methods, you can keep your vintage sewing machine in good working condition, making it ready for delicate soft brushing and other maintenance tasks.
Common Mistakes to Avoid in Oiling
You’ll save yourself headaches and repair bills by avoiding these common oiling mistakes that can turn your trusty sewing companion into a stubborn paperweight.
Even the most careful sewists can accidentally drown their machines with too much oil or reach for that handy WD-40 (a definite no-no).
Knowing what not to do is just as important as knowing what to do.
Over-Oiling
While vintage machines require regular attention, you should always be careful not to overdo it with lubrication. Proper sewing machine oiling tips are essential for maintaining your machine.
Over-oiling is a common mistake that leads to serious consequences. Just like over-watering a plant, excess sewing machine oil creates blockage issues by attracting lint and dust to moving parts.
You’ll know you’ve been heavy-handed if you notice:
- Oil stains on your fabric
- Sluggish machine performance
- Visible oil puddles inside the machine
For excess oil cleanup, run scrap fabric through your machine or place newspaper underneath to catch drips. Use a clean cloth to wipe away residue.
Remember: one tiny drop per oiling point is sufficient. Your overlocker deserves the same restraint.
Using Wrong Type of Oil
Frequently, sewers damage their machines by using wrong lubricants.
Never use WD-40, cooking oils, or 3-in-1 oil—these create sticky residue that attracts lint and causes serious oil damage.
Always choose specialized sewing machine oil with proper viscosity.
Synthetic oils offer superior performance for modern machines, while mineral oils work well for basics.
Think of it as premium fuel for your crafting companion.
The best sewing machine oil prevents corrosion and guarantees smooth operation without silicon oil complications, making it a crucial component for a smooth operation.
Neglecting Hard-to-Reach Spots
Beyond choosing the right oil, don’t overlook those sneaky hard-to-reach spots where friction points hide.
Your sewing machine contains numerous lubrication points that are difficult to access but essential for proper operation. Use a thin applicator to apply sewing machine oil to areas like the back of the needle bar and under the bobbin case.
Machine disassembly might be necessary for thorough lubrication of hidden components. A specialized sewing machine brush can help with lint removal and debris cleanup before oiling.
Remember, these hidden areas often experience the most friction, so neglecting them can lead to premature wear and squeaky operation.
Benefits of Regular Sewing Machine Oiling
You’ll enjoy smoother stitching and fewer repairs when you oil your sewing machine regularly.
Your trusted sewing companion will reward your care with years of reliable service, much like a car that purrs contentedly after an oil change, providing reliable service.
Smooth Operation
Proper oiling transforms your sewing machine’s performance dramatically. It’s like giving your faithful companion a tune-up that enhances every aspect of sewing machine efficiency.
When metal parts receive regular lubrication, they work together in perfect harmony, creating:
- Whisper-quiet operation with minimal friction between moving components
- Consistent, even stitches without skipping or tension problems
- Smoother fabric feeding with less resistance
You’ll immediately notice how the machine responds to your touch—the handwheel turns effortlessly, the motor performs efficiently, and stitch consistency improves.
Reduced Risk of Breakdown
While smooth operation improves your sewing experience, regular oiling directly prevents costly breakdowns.
Quality sewing machine oil creates a protective barrier that:
- Reduces friction between metal parts, preventing premature wear
- Maintains proper tension systems, eliminating thread jams
- Keeps motors running efficiently without strain
Following consistent maintenance schedules saves you repair costs and project delays. Think of it as insurance—a few drops of oil now prevents emergency repair bills later.
Extended Machine Life
Protecting your machine from breakdowns naturally extends to boosting its overall lifespan. Regular oiling serves as preventative maintenance that dramatically increases your sewing machine’s longevity.
Proper sewing machine oil application is essential for peak performance. With proper lubrication points identified and maintained, many sewists enjoy smooth operation for decades.
| Machine Type | Lifetime Without Oiling | Lifetime With Regular Oiling |
|---|---|---|
| Mechanical | 5-8 years | 25+ years |
| Computerized | 7-10 years | 15-20 years |
| Industrial | 3-5 years | 20+ years |
| Vintage | Already survived | Potentially endless |
With proper lubrication, many sewists enjoy smooth operation for decades, and this practice is a key factor in extending the machine’s useful life.
Maintaining and Troubleshooting Sewing Machine
You’ll avoid many headaches by combining regular cleaning with proper oiling techniques for your sewing machine.
When you notice unusual sounds or stitch problems, check your machine’s manual for troubleshooting steps that can save you from costly repairs later.
Regular Cleaning and Oiling
Regular maintenance saves you future headaches with your sewing machine.
You’ll want to establish a cleaning routine that includes dusting, de-linting, and oil application after every 8 hours of sewing time. Using proper cleaning tools, wipe the exterior with a soft cloth and remove debris from feed dogs and bobbin area with a lint brush.
For proper sewing machine lubrication, apply just one drop of sewing machine oil to each lubrication point—remember, less is more! After oiling a machine, always run a test stitch on scrap fabric.
Following these machine care tips consistently will guarantee smooth stitching for years to come.
Checking The Manual
Your sewing machine manual holds wisdom that no online tutorial can match.
These manufacturer’s guidelines contain machine-specific oil recommendations, precise oiling diagrams, and customized maintenance schedules for your model.
If you’ve misplaced it, check the manufacturer’s website or contact customer service for a digital copy.
Following these specific instructions prevents warranty issues and guarantees proper care for your particular machine, ensuring you maintain your device with the correct maintenance schedules.
Learning Machine Features
Your manual teaches the basics, but truly mastering your machine’s features elevates your sewing game.
Identify key parts that need regular lubrication by exploring your machine’s mechanics. Learn which stitch controls impact tension and require proper oiling.
Understanding bobbin management prevents thread tangles while knowing your machine’s specific oil types guarantees peak performance.
This knowledge helps you pinpoint maintenance needs before problems arise, turning routine sewing machine maintenance into second nature.
Preventative Maintenance Tips
Now that you’ve mastered your machine’s features, let’s establish some smart preventative maintenance habits.
Your sewing machine thrives with consistent care.
Keep a maintenance log and schedule these regular check-ups:
- Clean lint from bobbin area after every project
- Apply proper sewing machine oil to moving parts monthly
- Monitor stitch quality for early problem detection
- Check belt tension quarterly for peak performance
Regular maintenance involves addressing sewing machine issues to guarantee smooth operation.
Treat your machine right, and it’ll reward you with years of trouble-free sewing, which is the ultimate goal of sewing machine maintenance.
Frequently Asked Questions (FAQs)
How do I know if my sewing machine needs oiling?
Your machine’s subtle whispers tell tales of neglect. You’ll know it needs oiling when it sounds squeaky, runs rough, feels sluggish, or produces inconsistent stitches. Check after 8 hours of use.
Can I use WD-40 instead of sewing machine oil?
No, never use WD-40 in your sewing machine.
It’s not a lubricant and can damage internal parts.
Stick with proper sewing machine oil to keep your trusty companion running smoothly for years.
What can I use to lubricate my sewing machine?
Just as blood keeps your heart running, your sewing machine needs the right lubricant.
Use only specialized sewing machine oil.
Don’t use WD-40, cooking oil, or 3-in-1 oil – they’ll damage your machine.
Which part of the sewing machine should not be oiled?
You shouldn’t oil your needle, bobbin, presser foot, or plate as oil can stain your fabric.
Also avoid electronic components and plastic parts – they don’t need lubrication and might get damaged, this includes avoid.
How to oil a sewing machine?
Did you know that 78% of sewing machine issues stem from poor lubrication?
Unplug your machine, clean thoroughly, and apply 1-2 drops of sewing machine oil to moving metal parts.
Then test on scrap fabric.
How much oil should you put in a sewing machine?
Apply just 1-2 drops of sewing machine oil per lubrication point.
You’ll want to use these tiny amounts sparingly – a little goes a long way and excess oil can stain your fabrics.
What is a good oil for a sewing machine?
You’d think any oil would do, but your sewing machine needs specific sewing machine oil. It’s clear, non-staining, and designed for metal parts. Avoid WD-40, cooking oil, or 3-in-1 products.
How to oil a non motor sewing machine?
Give your machine some TLC by targeting metal-on-metal joints, like the needle bar and shuttle hook.
Just a small drop of sewing machine oil keeps things smooth.
Wipe excess oil—your fabric will thank you!
How often should you oil a sewing machine?
A well-oiled sewing machine runs like a dream—smooth and efficient.
Oil it every 8-10 hours of use, or weekly with moderate use.
Follow your manual for specifics and remember, over-oiling is as harmful as under-oiling.
How do I know if my sewing machine needs oil?
Your sewing machine needs oil if it sounds squeaky, runs clunky, or skips stitches.
Check for dry moving parts or sluggish performance.
If you use it often, oiling after cleaning keeps things running smoothly.
Conclusion
Caring for your sewing machine isn’t just routine—it’s like giving your creative partner a spa day!
Regular use of this sewing machine oiling guide guarantees smooth stitching, fewer breakdowns, and a machine that lasts for years.
Don’t skip those key steps: clean thoroughly, oil sparingly, and wipe away excess.
The difference is a whisper-quiet machine and flawless stitch quality.
So grab that sewing machine oil, stay consistent, and keep your projects running like a dream!
- https://www.wikihow.com/Oil-a-Sewing-Machine
- https://sewing.patternreview.com/SewingDiscussions/topic/127206
- https://www.applegreencottage.com/how-to-oil-a-sewing-machine/
- https://www.reddit.com/r/sewhelp/comments/1bq34nb/oiling_my_sewing_machine/
- https://help.brother-usa.com/app/answers/detail/a_id/79910/~/how-to-oil-the-machine

