This site is supported by our readers. We may earn a commission, at no cost to you, if you purchase through links.

First, unplug your machine and give it a good clean. Use the right oil – sewing machine oil, not cooking oil (unless you want a stitchy mess).
Apply small drops to moving parts, like the bobbin case and needle bar. Don’t go overboard; a little oil goes a long way.
Wipe off excess and run the machine to distribute the oil evenly.
Table Of Contents
- Key Takeaways
- Preparing Your Sewing Machine
- Choosing The Right Sewing Machine Oil
- Oiling The Bobbin Case and Needle Bar
- Oiling Moving Parts
- Maintaining Your Sewing Machine
- Tips for Old or Vintage Machines
- Common Mistakes to Avoid
- Oiling Frequency and Guidelines
- Benefits of Regular Oiling
- Troubleshooting and Maintenance
- Frequently Asked Questions (FAQs)
- Conclusion
Key Takeaways
Here are 4 key takeaways for sewing machine oiling tips:
- Clean your machine thoroughly before oiling to remove lint and debris that can interfere with proper lubrication.
- Use only specialized sewing machine oil, applying 1-2 drops to key points like the bobbin case and needle bar.
- Don’t over-oil your machine – excess oil attracts lint and can cause mechanical issues.
- Oil your machine regularly based on usage, typically after each thorough cleaning or when you notice signs like increased noise or stiffness.
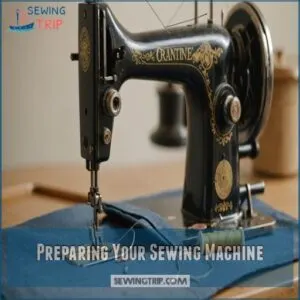
Preparing Your Sewing Machine
Before you start oiling, you’ll need to prep your sewing machine.
Unplug it, remove all threads and attachments, then give it a thorough cleaning with a stiff brush to get rid of lint and dust.
Unplugging and Removing Thread
Safety first, folks. Before you get started oiling your sewing machine, unplug it.
It’s a stitch in time that saves nine—and maybe your fingers.
Next, remove all thread from the machine, paying close attention to the tension assembly and bobbin case, which require thorough cleaning as part of regular sewing machine maintenance tips.
This careful approach makes sure you won’t miss any oiling
Cleaning The Machine
Now that you’ve unplugged and de-threaded your machine, it’s time to get your hands dirty!
Cleaning your sewing machine is like giving it a spa day – it’ll thank you with smooth stitches.
Grab your cleaning tools and let’s tackle the lint monster together.
Here’s your lint-busting game plan:
- Use a soft brush to sweep away loose debris
- Employ compressed air to blast out stubborn lint
- Wipe down surfaces with a lint-free cloth
Remember, a clean machine is a happy machine!
Removing Presser Foot and Handwheel
With your machine squeaky clean, it’s time to strip it down further.
Take off the presser foot and handwheel to expose those hidden nooks and crannies. It’s like giving your trusty sewing companion a spa day!
Here’s a quick guide to help you:
| Part | Removal Method | Oiling Spot | Tip |
|---|---|---|---|
| Presser Foot | Lever or screw | Shank | Wipe clean first |
| Handwheel | Unscrew or pull | Shaft | Go easy, it’s delicate |
| Needle Plate | Screwdriver | Edges | Check for lint |
| Bobbin Case | Release latch | Race | Light oil only |
Remember, a well-oiled machine is a happy machine!
Using a Stiff Lint Brush
After removing the presser foot and handwheel, it’s time to tackle the lint.
Grab a stiff lint brush – it’s your secret weapon against pesky fuzz.
Gently sweep the brush through your machine’s nooks and crannies.
Pay extra attention to the bobbin area and feed dogs.
This lint removal technique is key to smooth sewing.
Think of it as giving your trusty machine a mini-spa day.
Your stitches will thank you!
Removing Compact Lint
Stubborn lint can be a real pain in your sewing machine’s gears.
Don’t let it gum up your stitching!
Here’s how to tackle those pesky lint build-ups:
- Use tweezers to pluck out compact lint from tight spots
- Try a can of compressed air to blast away stubborn debris
- Employ a lint removal tool with a thin, flexible tip for hard-to-reach areas
- Gently use a toothpick to dislodge lint from nooks and crannies
Remember, a clean machine is a happy machine!
Choosing The Right Sewing Machine Oil
You’ll want to pick the right oil for your sewing machine, just like choosing the perfect thread for your project.
Synthetic and white mineral oils are top choices,
but steer clear of household oils that can harm your trusty stitching companion.
Types of Oil
Now that your machine’s spick and span, let’s talk oil.
You’ve got three main types to choose from: mineral, synthetic, and silicone.
Each has its perks, so pick wisely!
When choosing the right oil, consider its benefits of using sewing machine oil, such as reducing friction and preventing rust and corrosion.
Mineral oil’s the old reliable, synthetic’s the new kid on the block with some fancy benefits.
Synthetic Oil Vs White Mineral Oil
Ever wondered about the oil showdown in the sewing world? Let’s break it down. Synthetic oil and white mineral oil are both contenders for your machine’s smooth operation. Here’s the scoop:
- Performance: Synthetic oil offers smoother sewing with lower friction.
- Durability: White mineral oil lasts longer, reducing frequent applications.
- Cost: Mineral oil is typically more budget-friendly.
Choose based on your needs: high-performance synthetic for frequent sewers or cost-effective mineral for occasional use. Your machine will thank you!
Avoiding Wrong Types of Oil
Don’t let your sewing machine fall victim to the wrong oil!
Stick to synthetic or white mineral oils made specifically for sewing machines.
Opting for a high-quality sewing machine lubricant guide, like mineral oil, can help extend your machine’s lifespan.
Avoid household oils like WD-40, cooking oil, or motor oil – they’re a recipe for disaster.
These incompatible oils can
Frequency Based on Usage
Your sewing machine’s oiling frequency depends on how often you use it.
Daily sewers should oil weekly, while hobbyists can get away with monthly touch-ups.
For light usage, every few months will do.
Heavy-duty machines might need more frequent TLC.
Listen to your machine – you can check out sewing machine oil products for the right fit.
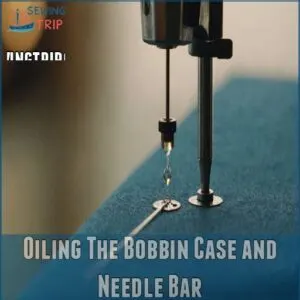
Oiling The Bobbin Case and Needle Bar
You’ll want to give your bobbin case and needle bar some TLC to keep your sewing machine humming.
Apply a drop or two of oil to the outer ring of the bobbin case and the needle bar to reduce friction and guarantee smooth operation.
Removing The Bobbin Case
Now that you’ve got the right oil, let’s get to the heart of the machine.
Removing the bobbin case is like opening a secret compartment.
Gently lift the needle to its highest point, then open the cover plate.
You’ll see the bobbin case nestled inside.
With a steady hand, release the latch and carefully slide it out.
It’s like defusing a tiny, thread-filled bomb – exciting, right?
Applying Oil to The Outer Ring
The bobbin case’s outer ring is the unsung hero of smooth stitching.
Apply a tiny drop of sewing machine oil to this important spot.
Use a lint-free cloth to spread it evenly, ensuring every nook gets a bit of love.
Remember, less is more – you’re not frying chicken here!
- Clean the outer ring before oiling to remove lint and debris
- Use high-quality sewing machine oil for best results
- Wipe away any excess oil to prevent staining your fabric
Oiling The Needle Bar
How often do you oil your needle bar? It’s a very important step in sewing machine maintenance.
Apply a drop of sewing machine oil to the needle bar every 8-10 hours of use.
Use a small brush or lint-free cloth for precise application.
Don’t overdo it – a little goes a long way.
This keeps your stitches smooth and prevents wear.
Remember, a well-oiled machine is a happy machine!
Oiling Moving Parts
You’ll need to oil your sewing machine’s moving parts to keep it running smoothly.
Let’s look at how to properly oil the rotary hook, shuttle hook, and feed dogs for excellent performance.
Oiling The Rotary Hook
Squeaky rotary hooks can bring your sewing to a screeching halt.
You’ll want to keep this important part well-oiled for smooth stitching.
Here’s your quick guide to rotary hook lubrication:
- Clean the hook area thoroughly
- Apply 1-2 drops of sewing machine oil, such as those specifically designed for rotary hook oil
Oiling The Shuttle Hook
Now let’s tackle the shuttle hook, the heart of your sewing machine’s stitching action.
You’ll want to oil this bad boy regularly to keep it humming along.
Start by removing the bobbin case and applying a drop of oil to the outer ring.
Don’t go overboard – a little goes a long way.
Give the handwheel a spin to distribute the oil evenly.
This simple step will keep your stitches smooth as silk.
Oiling The Feed Dogs
Feeding your sewing machine’s "teeth" is essential for smooth stitching.
Clean the feed dogs thoroughly, then apply a tiny drop of oil to each end.
Don’t overdo it – a little goes a long way.
Wipe away any excess to prevent fabric stains.
For best performance, oil your feed dogs every 8-10 hours of sewing time.
Remember, well-oiled feed dogs are happy feed dogs!
Maintaining Your Sewing Machine
You’ll keep your sewing machine humming along with regular cleaning and oiling, just like how a car needs its oil changed.
Regular cleaning and oiling are crucial for keeping your sewing machine running smoothly, just like a car needs its oil changed.
Check your machine’s manual to learn its unique features and maintenance needs, ensuring you’re giving it the TLC it deserves.
Regular Cleaning and Oiling
A stitch in time saves nine, especially regarding sewing machine maintenance.
Keep your trusty sidekick humming by cleaning and oiling it regularly, using a fine-grade oil with no additives, like Tri-Flow, to oil the machine properly.
After every project, brush out lint and wipe down surfaces.
Apply a drop of oil to moving parts monthly for smooth operation.
This simple routine prevents
Checking The Manual
Your sewing machine’s manual is your trusty sidekick in the oiling game.
Don’t wing it – flip through those pages for the lowdown on your machine’s specific oiling needs.
It’ll dish out the dirt on oil types, schedules, and those tricky oil points.
Stick to the manual’s advice, and you’ll keep your machine purring like a well-oiled kitten.
Remember, every machine’s got its quirks, so let the manual be your guide.
Learning Machine Features
While getting to know your sewing machine, you’ll uncover its unique oiling needs. Different machine types require specific care.
Explore various needle types, stitch settings, and thread tension adjustments.
Familiarize yourself with foot types to master your machine’s capabilities. This knowledge helps you properly oil and maintain your machine.
- Discover hidden talents in your trusty stitching companion
- Discover the secrets of perfect tension for dreamy seams
- Conquer new sewing horizons with confidence
- Feel the thrill of mastering your machine’s every quirk
Tips for Old or Vintage Machines
If you’ve got an old or vintage sewing machine, you’ll need to take extra care when oiling it.
Use the right type of oil and gentle cleaning methods to keep your classic machine running smoothly without causing damage.
Using The Right Type of Oil
Old-timers need TLC.
For vintage machines, stick to light mineral oil or synthetic sewing machine oil.
Avoid thick oils that’ll gum up the works.
Check oil viscosity – you want it thin enough to flow freely.
Brands like Triflow or Singer work wonders.
Store oil in a cool, dark place to keep it fresh.
Remember, the right oil’s like a fountain of youth for your trusty stitcher!
Avoiding Damage
Vintage machines are like fine wine – they need extra TLC.
To keep your trusty old stitcher purring like a kitten, follow these golden rules:
- Don’t drown it in oil – a little goes a long way
- Stick to proper sewing machine oil, not WD-40 or household lubricants
- Be gentle with rusted parts – forcing them can cause more harm than good
Remember, these beauties have stood the test of time.
Treat them right, and they’ll keep creating magic for years to come.
Gentle Cleaning Methods
Treating your vintage sewing machine with kid gloves pays off.
Use soft cloths and gentle brushes for lint removal, avoiding harsh cleaning solutions.
Here’s a quick guide:
| Area | Tool | Technique |
|---|---|---|
| Bobbin case | Soft brush | Gentle circular motions |
| Feed dogs | Compressed air | Short bursts, no moisture |
| Needle bar | Microfiber cloth | Light wiping, no pressure |
Remember, patience is key.
Delicate parts need tender loving care, so take your time and enjoy the process of bringing your trusty old machine back to life.
Common Mistakes to Avoid
You might think oiling your sewing machine is foolproof, but there are some common pitfalls to watch out for.
From over-oiling to using the wrong type of oil, these mistakes can turn your smooth-running machine into a sticky mess.
Over-Oiling
While we’ve covered caring for vintage machines, let’s talk about a common pitfall: over-oiling.
You might think more oil means smoother sewing, but it’s a slippery slope!
Excess oil attracts lint like a magnet, creating a sticky mess that gums up your machine’s parts.
It’s like drowning your salad in dressing – a little goes a long way.
Stick to the recommended oiling frequency and use just a drop or two for silky-smooth stitching.
Using Wrong Type of Oil
Now, let’s talk about using the wrong type of oil.
You wouldn’t put maple syrup in your car, right?
Same goes for your sewing machine.
Household oils like WD-40 or cooking oil are a big no-no.
They can gum up your machine faster than you can say "stitch in time."
Stick to proper sewing machine oil.
It’s designed for the job, with the right viscosity to keep your machine purring like a well-oiled kitten.
Neglecting Hard-to-Reach Spots
Hidden nooks and crannies in your sewing machine can harbor lint and grime.
Don’t overlook these spots when oiling!
Use a small brush or compressed air to clean hard-to-reach areas before applying oil.
Pay attention to the bobbin area, feed dogs, and tension discs.
Regular maintenance of these often-neglected spots prevents machine damage and keeps your stitches smooth.
Remember, a well-oiled machine is a happy machine!
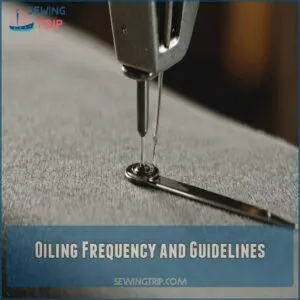
Oiling Frequency and Guidelines
You’ll need to oil your sewing machine regularly to keep it running smoothly, but how often depends on how much you use it.
Listen for unusual noises or watch for stiff movement, as these are signs your machine is thirsty for oil.
Oiling After Cleaning
How often should you oil your sewing machine?
After each thorough cleaning, it’s time to give your machine some TLC.
Using the right type of oil, such as those with the correct oil viscosity, is essential for the longevity of your machine.
Apply oil to these key spots:
- Bobbin case (a drop on the outer ring)
- Needle bar (where it meets the presser foot
Signs of Needed Oiling
Your sewing machine’s got a language all its own.
Listen up for increased noise – it’s crying out for oil!
If you’re noticing sluggish movement or the handwheel’s stiffer than your great-aunt’s upper lip, it’s time to lubricate.
Skipped stitches and a machine that’s hotter than a summer sidewalk? Those are telltale signs too.
Regular oiling keeps your trusty stitcher purring like a well-fed cat, ensuring excellent performance every time.
Benefits of Regular Oiling
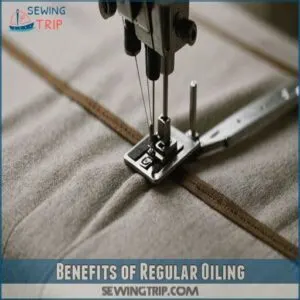
Regular oiling keeps your sewing machine purring like a well-fed cat, reducing friction and wear on its moving parts.
You’ll enjoy smoother stitching, better stitch quality, and a longer-lasting machine that won’t leave you in a tangled mess.
Reduces Friction and Wear
When you oil your sewing machine regularly, you’re giving it a smooth ride.
Think of it as a spa day for your trusty stitching companion.
The oil acts like a protective shield, reducing friction between moving parts.
This means less wear and tear on your machine’s components, leading to quieter sewing and a longer lifespan.
You’ll notice improved performance and smoother operation, making your sewing projects a breeze.
Maintains Stitch Quality
Regular oiling keeps your stitches looking sharp. It’s like giving your machine a spa day, ensuring smooth performance and excellent results.
Here’s how proper lubrication helps maintain stitch quality:
- Prevents tension issues for consistent thread tightness
- Reduces thread breakage, keeping your work uninterrupted
- Minimizes fabric friction for smoother feeding
- Eliminates bobbin wobble for even stitches
- Protects the needle from unnecessary wear and damage
Keep your machine well-oiled,
Extends Lifespan
Proper oiling is the lifeblood of your sewing machine’s longevity. It keeps parts running smoothly, reducing wear and tear over time.
Think of it as a youth serum for your trusty stitching companion. By maintaining regular oil change intervals, you’re investing in your machine’s future.
Consistent maintenance helps prevent costly repairs and extends your machine’s life, ensuring years of seamless sewing adventures.
Don’t let a dry machine cut your creativity short!
Prevents Inconsistent Stitching
Consistency is key in stitching, and regular oiling plays an important role.
You’ll notice a world of difference in your sewing machine’s performance with proper lubrication. It guarantees smooth operation, maintaining tension balance and stitch quality across various fabrics.
By keeping moving parts well-oiled, you’ll prevent skipped stitches and uneven seams.
Think of it as giving your trusty machine a spa day – it’ll thank you with silky-smooth stitches every time.
Troubleshooting and Maintenance
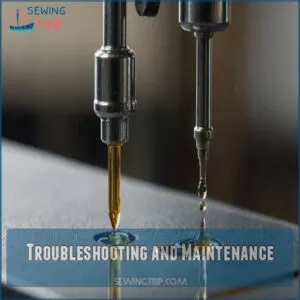
When your sewing machine starts acting up, don’t panic – a little troubleshooting can go a long way.
Regular maintenance, including proper cleaning and oiling, can prevent most issues and keep your machine humming along smoothly for years to come.
Cleaning and Re-Oiling
You’ve been oiling like a pro, but what if your machine’s still acting up?
Time for a deep clean! Unplug your trusty stitcher and grab a lint brush.
Gently sweep away dust bunnies hiding in nooks and crannies.
Once it’s spick and span, re-oil those key spots.
Remember, a clean machine is a happy machine. It’s like giving your sewing buddy a spa day!
Preventative Maintenance Tips
A stitch in time saves nine for sewing machine care.
Keep your machine humming with these preventative maintenance tips:
- Cover your machine when not in use to prevent dust buildup
- Store bobbins and thread in a cool, dry place to avoid moisture damage
- Regularly use sewing machine oil for smooth operation from Sewing Machine Oil
- Clean the feed
Frequently Asked Questions (FAQs)
How to oil a sewing machine?
Clean your sewing machine thoroughly.
Apply 1-2 drops of sewing machine oil to key points like the bobbin case and needle bar.
Turn the handwheel to distribute oil evenly.
Run a scrap fabric through to absorb excess.
Can you use too much oil when oiling a sewing machine?
Like drowning a plant, over-oiling your sewing machine can be disastrous.
You’ll gum up the works, attracting lint and causing mechanical issues.
Apply just 1-2 drops at key points, wiping away excess. Less is more in this oily balancing act.
Can you use cooking oil on a sewing machine?
Don’t use cooking oil on your sewing machine.
It’ll gum up the works faster than you can say "stitch."
Stick to proper sewing machine oil.
It’s designed to keep things running smoothly without leaving a sticky mess.
What kind of oil do you use on a sewing machine?
The golden rule of sewing machine care: use only specialized sewing machine oil.
This liquid gold keeps your machine purring like a contented cat.
Avoid household oils; they’ll gum up your trusty stitching companion faster than you can say "bobbin.
Can I use a sewing machine oil if I have an overlocker?
You can use sewing machine oil on your overlocker.
It’s designed for both types of machines.
Just apply a few drops to the moving parts, following your overlocker’s manual.
This’ll keep your machine running smoothly.
How much oil do you put in a sewing machine?
Like a gentle rain, just a few drops suffice.
Apply 1-2 drops of oil to each oiling point on your sewing machine.
It’s not a flood you’re after, but a light mist to keep things running smoothly.
What are the guidelines for oiling a sewing machine?
Clean your machine thoroughly before oiling.
Apply 1-2 drops of sewing machine oil to key points like the bobbin case and needle bar. Don’t overdo it!
Run a scrap fabric through to absorb excess oil. Repeat regularly based on usage.
Where should I oil my sewing machine?
Focus on oiling key parts like the bobbin case, needle bar, and hook race.
Apply 1-2 drops of sewing machine oil to each point.
Don’t forget hard-to-reach spots!
Always consult your machine’s manual for specific guidance.
Do modern sewing machines need oiling?
Did you know 80% of modern sewing machines still need oiling?
While some newer models have self-lubricating parts, most require regular maintenance.
You’ll want to check your machine’s manual for specific oiling needs to keep it humming along smoothly.
How do you know if your sewing machine needs oil?
Listen for unusual noises or stiffness when sewing.
If you notice increased friction, skipped stitches, or sluggish movement, it’s time to oil.
Check your machine’s manual for recommended oiling frequency, typically every few months for regular users.
Can I use alternatives to sewing machine oil?
Surprisingly, 99% of sewing machine issues stem from improper lubrication.
You shouldn’t use alternatives to sewing machine oil. Stick to specialized sewing machine oil to keep your trusty stitching companion running smoothly.
Other oils can gum up the works.
How do I clean up excess oil?
To clean up excess oil, grab a lint-free cloth and gently wipe away the surplus.
Run a scrap fabric through your machine to absorb any remaining oil.
Remember, a little goes a long way – don’t overdo it next time!
Is it possible to over-oil my sewing machine?
Yes, you can over-oil your sewing machine.
Too much oil attracts lint and gums up parts, causing mechanical issues.
Stick to 1-2 drops per spot and wipe away excess.
Think of it like seasoning a cast-iron skillet – less is more.
Should I oil my machine before or after sewing?
Imagine this: you’re about to start sewing, but wait!
Oil your machine after sewing, not before.
Clean it thoroughly, then apply oil to prevent debris from mixing with fresh lubricant.
This keeps your trusty machine purring smoothly for years.
Can oiling fix a noisy sewing machine?
Oiling can often quiet a noisy sewing machine.
It reduces friction between moving parts, smoothing operation.
Clean your machine first, then apply oil to key points.
If noise persists, you might need professional servicing for underlying issues.
Conclusion
Like a well-oiled machine, your sewing companion will hum along smoothly with these sewing machine oiling tips.
Remember, a little oil goes a long way.
Keep your machine clean, use the right oil, and apply it sparingly to moving parts.
Regular maintenance will extend your machine’s life and keep your stitches perfect.
Don’t shy away from oiling – it’s simpler than you think.
With these secrets, you’ll be stitching like a pro in no time.
Happy sewing!

