This site is supported by our readers. We may earn a commission, at no cost to you, if you purchase through links.
Start by unplugging everything and checking the cord for visible damage. If that looks good, open the pedal case and look for loose wires or corroded contacts.
A simple cleaning with rubbing alcohol often does the trick. For cord repairs, you’ll need basic electrical skills and wire nuts.
Most pedal problems are actually simpler fixes than they first appear, and knowing the right diagnostic steps can save you both time and money, by avoiding unnecessary trips to the repair shop for issues like loose connections or dirty contacts.
Table Of Contents
Key Takeaways
- You can fix most pedal issues yourself – Start by unplugging your machine and checking for frayed cords, then clean internal contacts with rubbing alcohol and look for loose connections inside the pedal housing.
- Three main problems cause most pedal failures – Watch for frayed cords, dirty contacts that need cleaning, and loose connections that you can tighten with basic tools and wire nuts.
- Regular maintenance prevents costly repairs – Clean your pedal every dozen projects, lubricate pivot points every 3-6 months, and store it in a dry location with the cord wrapped loosely.
- Know when to call professionals – If you see smoke, hear electrical sounds, or face complex circuit problems beyond basic cleaning and wire replacement, do not risk safety – get expert help.
Sewing Machine Pedal Issues
Your sewing machine pedal controls the speed and quality of every stitch you make.
When it starts acting up with hesitation, overheating, or unresponsive behavior, you’ll need to identify the root cause quickly to get back to your projects.
Common Causes of Malfunction
When your foot pedal starts acting up, several culprits usually lurk behind the scenes.
Dust accumulation clogs internal mechanisms, while overheating issues from prolonged use damage sensitive components. Wiring problems create intermittent connections, and component failure stops power flow entirely.
Moisture intrusion corrodes contacts, turning simple pedal troubleshooting into complex electrical foot pedal issues requiring immediate attention.
A common problem involves damaged or faulty cords, which can easily be replaced.
Symptoms of a Faulty Pedal
Several telltale signs reveal when your sewing machine’s foot pedal needs attention.
These sewing machine pedal problems don’t hide well.
Watch for these red flags:
- Unresponsive Pedal that ignores your commands completely
- Overheating Pedal that gets too hot to touch comfortably
- Erratic Stitching creating uneven, jumpy seam lines
- Burning Smell indicating internal electrical issues
- Unusual Noises like clicking, ticking, or grinding sounds
These pedal functionality issues signal it’s time for pedal troubleshooting before bigger problems develop.
Model-Specific Problems
Once you’ve spotted the warning signs, different sewing machine brands present unique challenges.
Your Bernina hesitation might need capacitor replacement, while Pfaff fragility often stems from broken internal parts requiring epoxy fixes.
Singer circuitry in modern models demands professional attention, but older adjustments let you tweak contact points yourself.
Generic failures happen when replacement parts don’t match original specs.
| Brand | Common Problem | Typical Solution |
|---|---|---|
| Bernina | Speed hesitation | Replace capacitor or circuit board |
| Pfaff | Internal breakage | Apply epoxy to fragile components |
| Singer | Circuit issues | Professional repair for modern models |
| Brother | Connection problems | Tighten internal screws |
| Janome | Speed inconsistency | Clean contact points thoroughly |
Pedal Repair Basics
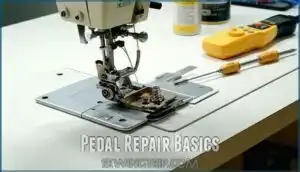
Mastering sewing machine pedal repair starts with understanding your pedal’s Simple Pedal Design. Most pedals contain just a few Essential Pedal Parts: a movable plate, metal switch, and connecting wires that control Power Flow Basics to your machine.
You’ll encounter two main types during your pedal repair guide journey. Mechanical vs Electronic pedals work differently – mechanical ones use a flip-flop lever system, while electronic versions rely on pressure-sensitive controls for speed regulation.
Your DIY repair toolkit needs basic items: screwdrivers, contact cleaner, and a multimeter. Basic Troubleshooting Steps begin with visual inspection for obvious damage like frayed cords or stuck mechanisms.
Pedal troubleshooting becomes manageable when you follow methodical investigation. Check connections first, then test electrical flow. For beginners, understanding foot pedal basics is vital for effective repairs. Most pedal repair issues stem from simple problems you can fix yourself with patience and the right approach.
Troubleshooting Techniques
When your sewing machine pedal acts up, you’ll need to follow a clear troubleshooting process to find the real problem.
Start by unplugging your machine and checking the pedal’s cord and connections before you examine the internal wiring.
Unplugging and Inspecting
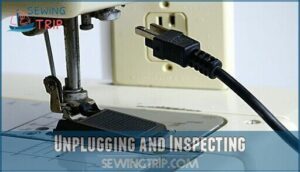
Safety First – unplugging your sewing machine pedal prevents electrical shocks during repairs.
Your Visual Assessment starts with examining the plug for damage, scorch marks, or melted plastic. Run your fingers along the entire cord length, checking for soft spots or cracks.
Look inside the pedal inspection housing for loose screws or obvious damage.
These Initial Checks during pedal troubleshooting help identify problems before you touch any electrical safety components.
Checking Cord Integrity
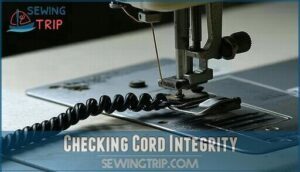
Your sewing machine pedal cord deserves a thorough once-over. Check every inch for fraying dangers and exposed wires that could cause problems.
Feel along the entire length, hunting for cracks or worn spots. Broken wire issues often hide beneath seemingly perfect exteriors. Continuity testing with a multimeter reveals hidden damage.
For those needing replacements, consider options for pedal cord replacement. Don’t ignore subtle signs – electrical connections depend on cord integrity for reliable performance.
Inspecting Wiring and Connections
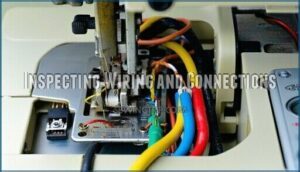
After checking your cord’s outer shell, you’ll need to examine the internal wiring more closely.
Use a multimeter for connection testing and wire continuity checks.
Look for shorted wire problems, damaged connector types, and loose electrical connections.
A broken wire often hides inside the pedal housing.
Cord inspection reveals frayed sewing machine pedal wiring that needs immediate attention.
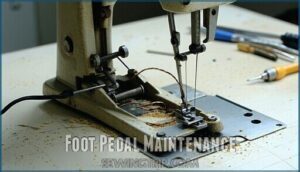
Foot Pedal Maintenance
Your sewing machine’s foot pedal needs regular care to keep working smoothly and prevent costly repairs down the road.
Simple maintenance tasks like cleaning dust buildup and checking connections will extend your pedal’s life and keep your stitching consistent.
Regular Cleaning Schedule
After every dozen sewing projects, your sewing machine pedal maintenance routine should include thorough pedal cleaning.
Dust removal becomes essential since lint buildup clogs internal mechanisms. Use safe cleaners like compressed air for internal cleaning without moisture damage.
This cleaning frequency prevents costly pedal repair issues. Focus on contact points where debris accumulates most, ensuring your sewing machine pedal responds smoothly during delicate stitching work.
Lubrication Best Practices
Three lubricant types work best for your sewing machine pedal: mineral oil, synthetic oil, and spindle oil.
Master these application methods for smooth operation:
- Clean pedal surfaces before applying any lubricant
- Use needle-point oiler for precise pedal lubrication techniques
- Apply 1-2 drops to pivot points and bearings only
Frequency of use matters—lubricate every 3-6 months.
Remember lubricant safety: always unplug first.
Proper pedal maintenance prevents costly repairs.
Proper Storage Methods
After keeping your pedal well-lubricated, smart pedal storage prevents future headaches.
Store your pedal in a dry location away from basement dampness and attic heat swings. Temperature control matters more than you’d think.
Wrap the cord protection loosely to avoid kinks.
A simple dust cover or cloth provides dust prevention while maintaining proper airflow around your investment.
Advanced Repair Methods
When basic repairs don’t fix your pedal problems you’ll need more advanced techniques to get your machine running again.
You can use a multimeter to find electrical issues, replace damaged wires inside the pedal and safely take apart the entire unit for thorough repairs, which involves using advanced techniques to resolve the pedal problems.
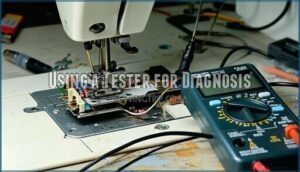
Using a Tester for Diagnosis
A multimeter turns guesswork into precision when diagnosing sewing machine pedal repair issues. This tester reveals exactly where problems hide within your pedal’s circuitry.
- Continuity checks identify broken connections in power cords and switches
- Resistance measurements test potentiometer function across the pedal’s range
- Voltage readings pinpoint electrical interruptions with Ohms precision
Component identification becomes straightforward with proper multimeter testing. A lack of a reading can indicate a potential foot pedal fault.
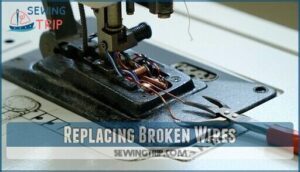
Replacing Broken Wires
Broken wires turn your pedal into dead weight. Start by identifying the correct wire gauge for your sewing machine pedal repair – using wrong sizes creates loose connections.
Master basic soldering techniques to join wire ends properly. Match connector types exactly when splicing new sections.
Focus on insulation repair by wrapping joints with electrical tape after soldering. For extensive damage, complete cord replacement beats patching multiple breaks.
Test all electrical connections before reassembling to confirm solid wire replacement work.
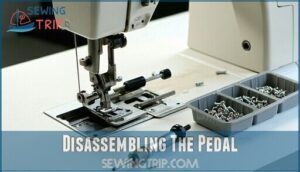
Disassembling The Pedal
Successful pedal disassembly starts with the right approach and sewing machine pedal repair knowledge. Unplug your machine first – safety first prevents electrical surprises during pedal disassembly.
Essential steps for opening sewing machine pedal:
- Select proper tools – precision screwdriver and magnetic parts tray
- Document component mapping with photos before opening methods begin
- Remove screws carefully to access mechanical parts inside
- Follow reassembly tips by reversing your documented steps
This systematic approach guarantees pedal components stay organized throughout repair. It ensures that by following these steps, you can successfully disassemble and then reassemble your sewing machine pedal, making the process more manageable and less prone to errors.
Brand-Specific Pedal Issues
Each sewing machine brand has its own pedal quirks that you’ll need to know about.
Bernina pedals often hesitate on uneven surfaces.
Pfaff models have fragile internal parts that break easily and Brother machines need specific troubleshooting steps.
Bernina Foot Pedal Problems
Bernina foot pedal problems often hit when you least expect them. Hesitation Causes typically trace back to uneven surfaces or dirty Internal Component contacts.
Your Speed Regulation might falter due to Capacitor Issues in older Type 238 models. Pedal Overheating signals prolonged low-speed use or a resting foot problem.
Clean contact points with electrical cleaner and check capacitor connections. Many models are available with <strong>free shipping options</strong> for qualifying orders.
Most Bernina foot pedal problems resolve with basic foot control repair techniques before requiring professional sewing machine pedal repair.
Pfaff Pedal Repair Solutions
The fragile internal components in certain Pfaff Pedal Models create unique challenges for sewing machine pedal repair.
When you encounter Internal Part Issues, a simple Glue Repair Technique using epoxy can temporarily restore function.
However, proper Pedal Disassembly requires careful handling to avoid further damage.
While DIY foot control repair saves money initially, Professional Repair Costs often prove worthwhile for complex Pfaff foot pedal repair situations requiring specialized expertise.
Brother Pedal Troubleshooting
Brother models love throwing curveballs with their speed control systems.
When your pedal overheating becomes an issue, check the fuse in the plug first.
Wiring diagrams help pinpoint connector problems that cause erratic speeds.
Don’t rush to buy generic pedals – they often fail quickly.
Sewing machine pedal problems with Brother machines usually stem from potentiometer wear.
Smart foot pedal troubleshooting beats expensive pedal repair every time.
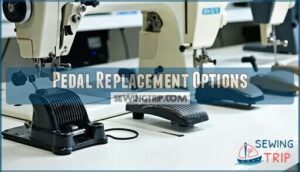
Pedal Replacement Options
When your pedal can’t be fixed, you’ll need to find a replacement that works with your specific sewing machine model.
You can choose from original manufacturer parts, generic alternatives from repair shops, or upgrade to ergonomic pedals that reduce foot strain during long sewing sessions, which can be a significant improvement for long sewing sessions.
Finding Compatible Parts
Finding the right replacement parts for your sewing machine pedal doesn’t have to feel like searching for a needle in a haystack. Your pedal model numbers hold the key to compatibility success.
You can find specific pedal parts online.
Start your hunt with these proven sources:
- OEM vs. Generic – Check manufacturer websites first for original parts
- Online Parts Sources – Browse specialized retailers offering part compatibility charts
- Sewing Machine Model Compatibility – Cross-reference your machine’s exact model for perfect pedal replacement matches
Smart sourcing saves time and headaches.
Installing Replacement Switches
With your compatible replacement switch in hand, you’re ready to tackle the installation.
First, verify electrical safety by unplugging your machine completely.
During pedal disassembly, photograph wire positions before disconnecting them. Switch testing confirms functionality before final assembly.
Remove old mounting screws, position the new switch precisely, and recreate wiring connections exactly. Soldering techniques may be required for permanent connections.
Secure everything tightly for reliable pedal repair.
Ergonomic Alternatives
Knee Controls and Start/Stop Buttons offer excellent ergonomic alternatives to traditional foot pedal operation.
Pedal-Free Machines eliminate continuous pressure on your feet, while adjustable Footrests improve Sewing Posture.
Wide sewing machine pedal designs distribute weight better than narrow versions.
These pedal ergonomics solutions reduce strain during long projects, making pedal repair less necessary over time.
Preventing Future Issues
You’ll save time and money by taking simple steps to protect your sewing machine pedal from damage.
Regular care prevents most common problems and keeps your pedal working smoothly for years.
Regular Inspection Schedule
Set up monthly sewing machine pedal inspections to catch problems early. Your pedal maintenance schedule keeps everything running smoothly and prevents costly breakdowns.
Track these pedal inspection essentials:
- Visual Checks – Look for cord damage and worn connections
- Connectivity Tests – Verify secure plug and socket contact
- Internal Cleaning – Remove dust buildup from moving parts
- Performance Monitoring – Test speed control and responsiveness
Avoiding Cord Damage
Your sewing machine pedal cord takes a beating, but smart habits prevent costly repairs.
Protect your investment with proper handling techniques that extend cord life.
Cord damage prevention starts with these simple steps:
- Use cord protectors at connection points to prevent wire fraying
- Practice proper coiling in loose loops, never tight spirals
- Install cord strain relief clips where cables bend most
- Watch for pet hazards like chewing cats and curious dogs
Handle gently, store smart.
Storing The Pedal Safely
Beyond cord care lies proper storage – your pedal’s best defense against premature failure. Choose a dry location away from sunlight and moisture for ideal pedal protection. Safe placement means avoiding pressure from heavy items that could crack the housing.
A simple solution to prevent sliding involves using a non-slip pedal mat.
| Storage Do’s | Storage Don’ts |
|---|---|
| Use soft cloth covers | Stack heavy items on top |
| Store in cool, dry areas | Leave in damp basements |
| Coil cord loosely | Bend cord at sharp angles |
| Keep away from pets | Store near heat sources |
Smart pedal storage methods and cord management prevent most sewing machine pedal problems before they start.
Professional Repair Services
Sometimes your sewing machine pedal needs more help than you can provide at home.
When you see smoke coming from the pedal or hear strange electrical sounds, it’s time to contact a qualified repair technician who’s the right tools and experience to fix complex problems safely.
Recognizing The Need for Expert Help
When to Call professionals for sewing machine pedal repair? If you’re facing internal damage, complex diagnostics, or electrical safety concerns, don’t risk it.
Professional assessment beats guesswork when circuits fail or mysterious symptoms persist.
Cost considerations matter, but professional repair prevents further damage.
Your pedal repair attempts shouldn’t turn dangerous—experts handle what you can’t safely tackle alone.
Finding a Qualified Technician
Once you’ve recognized the need for expert help, finding the right qualified serviceman becomes your next mission.
A skilled sewing machine technician can diagnose complex electrical issues that basic troubleshooting can’t solve.
Here’s how to locate a reliable professional repair specialist:
- Check Technician Credentials and certifications from sewing machine manufacturers
- Read Online Reviews from previous customers on Google and Yelp
- Ask Local Specialists at fabric stores for trusted sewing machine repairman recommendations
- Verify Repair Guarantees and warranty coverage before committing
- Compare Service Costs from multiple shops for fair pricing
Pedal professional servicing requires specific expertise in electrical systems.
Understanding Repair Costs
When budgeting for sewing machine pedal repair, expect repair costs between $50-$150 depending on complexity.
Cost Factors include Labor Rates ($28-$80 hourly) and Part Prices ($6-$30).
DIY vs. Pro decisions impact your wallet substantially.
Pedal professional servicing offers Warranty Impact protection.
Compare pedal repair pricing against replacement costs before deciding.
| Repair Type | Cost Range | Time Required |
|---|---|---|
| Basic cleaning/adjustment | $20-$50 | 30-60 minutes |
| Wire replacement | $50-$100 | 1-2 hours |
| Complete pedal rebuild | $100-$150 | 2-3 hours |
Pedal Repair Safety
Before you start any pedal repair work, you must unplug your sewing machine from the wall to prevent electrical shock.
Working on a live pedal can cause serious injury, so always disconnect power and wait a few minutes before opening the unit to ensure your safety and prevent serious injury.
Electrical Safety Precautions
Smart sewing machine pedal repair starts with electrical safety fundamentals. Unplugging First prevents dangerous shocks during electrical repairs. Your workspace needs proper Grounding Practices to handle electrical hazards safely.
Electrical safety tips protect you from Short Circuit dangers and Insulation Damage:
- Test outlets with a multimeter before connecting equipment
- Use insulated tools when checking internal circuitry
- Wear rubber-soled shoes during electrical work
- Always inspect power cords for fraying or exposed wires
Voltage Testing confirms circuits are dead before touching components. These precautions keep repair work safe.
Avoiding Injury During Repair
Beyond electrical safety measures, physical safety matters just as much when you’re elbow-deep in pedal repairs. Electrical Shock Hazards aren’t your only concern – cuts, pinches, and burns can happen fast.
Workspace Preparation sets you up for success:
Safe Disassembly and Proper Tool Usage prevent accidents. Sharp edges hide inside pedals, so move slowly and wear Protective Gear.
Proper Disposal of Old Parts
After fixing your pedal, don’t just toss those old parts in the trash. Your pedal disposal choices affect environmental impact substantially.
Follow local regulations for pedal ewaste recycling:
- Contact hazardous waste facilities for electrical components
- Separate plastic housings from metal contacts
- Find certified pedal recycling centers nearby
- Practice safe handling of capacitors and circuit boards
Recycling components protects your community while supporting sustainable repair practices. Proper disposal of sharp items like sewing needles, and by extension, pedal components, is vital to avoid risks of improper disposal.
Frequently Asked Questions (FAQs)
How to fix a sewing machine foot pedal?
Nearly 80% of sewing machine problems stem from foot pedal issues.
First, unplug your machine for safety.
Check the cord for damage, clean internal contacts with a brush, and test connections with a multimeter before replacing faulty components.
Can a sewing machine pedal be repaired?
Yes, you can repair most sewing machine pedals yourself.
Simple issues like loose wires, dirty contacts, or stuck switches are fixable.
However, complex electronic problems need professional help to avoid safety risks.
Can you use a sewing machine without a foot pedal?
You can operate many modern sewing machines without a foot pedal by using the start/stop button feature.
This hands-free option lets you control stitching speed through machine settings, making sewing more comfortable for extended projects, with a focus on comfortable sewing experience.
How do you test a foot pedal on a sewing machine?
You’ll want to unplug your machine first, then check the cord for damage.
Plug it back in and gently press the pedal while watching if your machine responds smoothly and consistently.
How do you store a sewing machine foot pedal?
Like tucking a treasured book away, store your foot pedal in a dry location away from dust and moisture.
Keep the cord wrapped loosely to prevent damage, and place it near your machine for easy access.
What should I do if my sewing machine pedal is running too fast?
Check for dirt buildup inside the pedal first.
If cleaning doesn’t help, your capacitor or circuit board might need replacement.
Try moving to level ground, as uneven surfaces can cause speed control issues.
Can a sewing machine foot pedal be repaired?
Your foot pedal isn’t dead forever!
Most sewing machine pedals can definitely be repaired.
You’ll tackle cleaning, wire replacement, or capacitor fixes.
Simple issues need basic tools, but complex problems require professional help.
Can I use my sewing machine without a foot pedal?
Yes, you can sew without a pedal.
Many modern machines offer start/stop buttons, knee bars, or built-in speed controls.
These alternatives let you control stitching hands-free, making sewing more comfortable and accessible.
How to fix presser foot on sewing machine?
When your presser foot’s acting up, don’t panic.
First, lift the presser foot lever and check if it’s properly seated.
Tighten the screw holding it in place, or replace the foot if it’s damaged beyond repair.
How to open a sewing machine foot pedal?
Unplug your machine first for safety.
Look for screws on the pedal’s bottom or sides. Remove them carefully with a screwdriver.
Lift the top cover gently to access internal components without damaging delicate wires.
Conclusion
Mastering sewing machine pedal repair transforms you from helpless victim to confident problem-solver.
You’ve learned ten essential fixes that tackle everything from frayed cords to sticky switches.
Most pedal issues require only basic tools and patience.
Regular maintenance prevents costly breakdowns and keeps your machine running smoothly.
When complex problems arise, you now know when to call professionals.
Don’t let a faulty pedal stop your creative projects.
With these skills, you’ll keep sewing without interruption.
- https://en.wikipedia.org/wiki/Sewing_machine
- https://www.google.com/search?q=sewing+machine+foot+pedal+circuit+diagram&sxsrf=ACYBGNQXySb77MRsrvNhAPf6ysbmQ0236w:1572434689276&source=lnms&tbm=isch&sa=X&ved=0ahUKEwj-ydjY78PlAhV6H7kGHQAbAZIQ_AUIEigB&biw=1539&bih=746
- https://reddit.com/r/guitarpedals/comments/11abtns/can_anyone_recommend_a_suitable_way_to_lubricate
- https://justanswer.com/small-appliance/j46r8-everything-machine-works-except-foot-pedal.html
- https://youtube.com/watch?pp=0gcJCdgAo7VqN5tD&v=9kOub6qm08U

