This site is supported by our readers. We may earn a commission, at no cost to you, if you purchase through links.
Knit fabrics have a reputation for being the rebellious teenagers of the sewing world—stretchy, unpredictable, and prone to making grown adults want to throw their machines out the window. That reputation isn’t entirely undeserved. Unlike woven fabrics that behave politely under a presser foot, knits move, curl, and stretch in ways that expose every flaw in your technique.
But here’s what most sewists discover once they push past that first frustrating project: sewing knit fabrics follows a clear set of rules, and once you learn them, jersey tees and fitted leggings suddenly feel more achievable than a basic cotton skirt.
Table Of Contents
- Key Takeaways
- Choosing The Right Knit Fabrics
- Essential Tools for Sewing Knit Fabrics
- Preparing Knit Fabrics for Sewing
- Cutting Knit Fabrics Accurately
- Setting Up Your Sewing Machine for Knits
- Sewing Seams on Knit Fabrics
- Handling and Supporting Knit Fabrics
- Finishing Edges and Hems on Knits
- Troubleshooting Common Knit Sewing Issues
- Top 7 Products for Sewing Knit Fabrics
- Frequently Asked Questions (FAQs)
- Conclusion
Key Takeaways
- Success with knit fabrics hinges on three non-negotiables: ballpoint or jersey needles (sizes 70-90) to prevent snags, zigzag or stretch stitches to preserve elasticity, and prewashing to eliminate the 3-5% shrinkage that cotton knits will throw at you after your garment is finished.
- Your sewing machine setup matters more than the fabric itself—dial down presser foot pressure for lightweight knits, lower thread tension slightly to prevent puckering, and invest in a walking foot to keep layers feeding evenly without stretching or shifting mid-seam.
- Edge control starts before you cut: stabilize curling edges with light spray starch, use a rotary cutter with mat grid alignment for precision, and never pull fabric through the machine—let the feed dogs do the work to avoid wavy seams and distortion.
- The twin needle delivers that professional hem finish on knits by creating parallel top stitches with a hidden stretch stitch underneath, while a tailor’s clapper and steam pressing set crisp, flat seams without scorching your fabric.
Choosing The Right Knit Fabrics
Picking the right knit fabric is honestly half the battle before you even thread your machine. Not all knits behave the same way, and the wrong choice can turn a fun project into a frustrating mess.
Understanding stretch percentages and recovery rates can save you a lot of headaches — check out this guide on sewing your own clothes from fabric selection to first stitch before committing to a knit.
Here’s what you need to know to choose wisely.
Types of Knit Fabrics for Sewing Machines
Not all knit fabrics are created equal — and that difference matters when you’re at your machine.
Jersey fabric is your smoothest entry point, with its stretchy, single-knit texture perfect for tees. Interlock lies flat on both sides, while rib knit offers serious horizontal stretch.
French terry and ponte roma round out your options, each bringing unique fabric blends and sewing challenges to the table.
You can get a deeper understanding of the different types of knit fabrics to make more informed sewing choices.
How to Determine Fabric Stretch Percentage
Once you know your fabric types, measuring knit elasticity takes about 30 seconds. Grab a 10 cm swatch, hold one edge at zero, and gently pull until it stops. That’s your stretch measurement.
Use this stretch calculation: (stretched width minus original width) ÷ original width × 100. Fabric testing this way tells you exactly what your stretchy fabric can handle before sewing with knit fabrics.
For more details on proper measurement, refer to these helpful fabric stretch measuring techniques.
Selecting Fabric Weight for Projects
Weight selection matters just as much as stretch. Lightweight knit fabrics under 150 GSM give you that flowy fabric drape perfect for tees and summer tops.
Medium weights — 150 to 270 GSM balance stretch factors with durability, making them ideal for everyday wear.
Going heavier? Save those for structured outerwear. Match your fabric weight to your project, and your fabric choice practically makes itself.
Essential Tools for Sewing Knit Fabrics
Before you sew a single stitch, having the right tools in your corner makes all the difference with knit fabrics. The good news is you don’t need a whole craft store — just a few key pieces that actually work with the stretchy nature of knits.
Here’s what belongs in your setup.
Must-Have Sewing Machine Features
Your sewing machine is the foundation of every knit project, so choosing the right features matters enormously. Look for varied Stitch Options — straight, zigzag, and stretch stitches are non-negotiable. Reliable Feed Control and a built-in Walking Foot keep layers moving together smoothly.
Dial in your Tension Settings carefully, invest in a sturdy metal frame, and use variable Speed Controls for total command.
Choosing The Right Needles for Knits
The needle you choose makes or breaks your knit project. Needle Type Basics come down to this: ballpoint needles glide between loops instead of piercing them — no snags, no runs.
- Ballpoint Needles: Perfect for jerseys and everyday knits
- Stretch Needle: Built for elastic fabrics and spandex blends
- Size and Thread: Match needle size 75–90 to fabric weight
- Brand Quality: Schmetz needles offer reliable, consistent Needle Condition
Helpful Cutting and Marking Tools
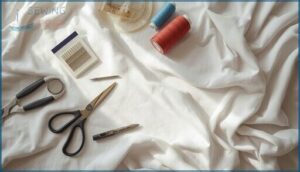
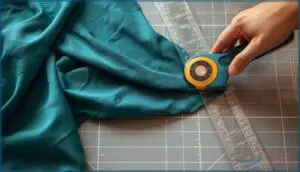
Sharp tools make all the difference when you’re working with slippery, stretchy knit fabrics. A rotary cutter paired with a cutting mat gives you clean, accurate cuts without dragging or distorting.
Add tracing wheels and fabric markers to your sewing notions kit for precise pattern transfers. Smart fabric manipulation starts before you ever thread the machine.
Preparing Knit Fabrics for Sewing
Before you even thread your machine, what you do with your fabric beforehand makes or breaks the entire project. Knits need a little prep love — skip this stage and you’ll be fighting skewed seams and unexpected shrinkage the whole way through.
Here’s exactly what to do before you cut a single piece.
Prewashing and Shrinkage Prevention
Skipping the prewash is like building on sand — your finished garment will shift after the first wash. Cotton knits shrink 3–5%, so prewash methods matter.
Skipping the prewash is like building on sand — cotton knits shrink, and your finished garment will pay the price
Before cutting anything, run your knit fabrics through a cold-to-warm cycle (30–40°C) with mild detergent for smart color preservation and fiber preparation. This simple fabric care step locks in shrinkage control before you ever thread your machine.
Ironing and Smoothing Wrinkles
Wrinkled knit fabrics are a setup for crooked seams — so don’t skip this step.
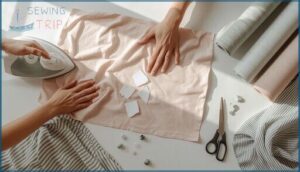
For effective wrinkle removal, use steam ironing with a pressing cloth between the iron and your fabric. Heat settings matter: low-to-medium heat keeps knit fabrics safe. Hold the iron just above the surface, letting steam do the fabric relaxation work. Never drag — just press and lift.
Aligning and Straightening Knit Grainlines
Getting your grainline right is the foundation of a well-fitting garment — skip it and everything shifts sideways. Knit fabrics love to drift, so grainline management and fabric stabilization aren’t optional extras.
- Align the grain arrow parallel to the selvage edge
- Steam or press curling edges before pinning for edge control
- Use knit blocking to lock in straight grain after cutting
- Recheck grain alignment at multiple points with a clear ruler
- Lightly glide — never pull — during pattern placement to prevent grain shift
Cutting Knit Fabrics Accurately
Cutting knit fabric is where a lot of beginners hit their first real snag — and honestly, it’s not your fault. The slippery, stretchy nature of knits means your usual cutting habits won’t cut it here (pun intended).
Here’s what you need to know to get clean, accurate cuts every time.
Using Rotary Cutters and Mats
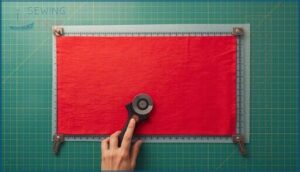
A rotary cutter and self-healing cutting mat are your best friends when tackling knit fabrics. Match your blade sizes to the job — 45mm works beautifully for most knits. Use mat grid alignment to keep cuts straight and true.
Practice cutting safety by retracting your blade immediately after each pass. Regular mat care extends blade life considerably.
Preventing Fabric Stretch While Cutting
Sharp cuts mean nothing if your knit fabrics shift mid-slice. Fabric stabilization is where cutting accuracy lives or dies. Lay pieces flat on your cutting mat, keeping grain alignment true — no tugging, no coaxing.
- Place tissue paper under lightweight knits for edge control
- Avoid stretching fabric grain while tracing
- Use pattern weights for tension management
- Cut steady along your rotary cutter path
Pattern Placement Tips for Knits
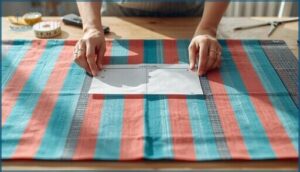
Once your fabric lies flat and stable, placement becomes your next puzzle. Knit Fabric Orientation shapes everything — align pattern pieces along the fabric grain so stretch runs where your body needs it. Use this quick reference for Symmetry Matching and Stripe Placement:
| Placement Goal | Tip |
|---|---|
| Grainline Management | Match vertical ribs to pattern grainline |
| Stripe Placement | Align stripes across side seams |
| Symmetry Matching | Mirror sleeve and collar pieces |
| Pattern Alignment | Cut single layers for complex motifs |
Setting Up Your Sewing Machine for Knits
Getting your machine ready for knits is where a lot of people quietly panic — and honestly, that’s fair. The good news is a few targeted adjustments make all the difference between seams that pucker and ones that stretch beautifully.
Here’s what you need to dial in before you sew a single stitch.
Best Stitch Types for Stretch Fabrics
Your stitch choice makes or breaks a knit seam. A narrow zigzag stitch (1.5–2.5 mm) is your go-to for most knit seam finish work — it flexes without popping. The straight stretch stitch reinforces seams beautifully, while a reinforced zigzag stitch manages thicker fabrics.
Pair each with a stretch needle to prevent skipped stitches and maintain fabric tension throughout every seam.
Adjusting Presser Foot Pressure
Once your stitch is set, don’t overlook presser foot pressure — it quietly controls everything. Your sewing machine’s pressure controls dial adjusts the foot force pushing down on your knit fabric. Delicate knits need less pressure; bulky knits need more grip.
Always test on scraps first. Getting this one sewing machine setting right is honestly a major improvement for cleaner seams.
Selecting Thread and Tension Settings
Thread and tension work hand in hand — get one wrong, and your seams will tell you immediately. Start at a mid-range upper tension, then test on a scrap. Nail your bobbin balance before moving forward.
- Thread compatibility matters: polyester thread or stretch thread outperforms all-purpose thread on knits
- Tension testing reveals imbalance fast — balanced stitches show both threads meeting inside the fabric
- Knit adjust settings vary with fabric weight, so always retest after switching materials
Sewing Seams on Knit Fabrics
Sewing seams on knit fabric is where most beginners hit their first real wall — and honestly, it makes sense. Knits move, stretch, and fight back in ways woven fabric never does.
Here’s what you need to know to sew seams that actually hold.
Using Zigzag and Stretch Stitches
Your sewing machine settings can make or break a knit seam — literally. Skip the straight stitch here; it’ll snap the moment the fabric moves.
Instead, lean on the zigzag stitch with medium zigzag settings for seam stability, or use the built-in stretch stitch (that little lightning bolt). Both allow fabric tension to flex naturally, keeping your knit fabric sewing techniques strong and snag-free.
Preventing Wavy and Stretched Seams
Waviness is the enemy of a clean knit seam — but it’s totally preventable.
Start with fabric relaxation: let your knit rest flat before sewing. Then dial in tension adjustment on your sewing machine, lowering it slightly for stretch fabrics.
Pair a zigzag stitch or straight stretch stitch with proper seam stabilization and edge control, and those wavy, stretched seams simply won’t stand a chance.
Reinforcing High-Stress Areas
High-stress areas — think armholes, shoulder seams, and crotch seams — are where garment construction either holds or falls apart.
Smart seam reinforcement saves your project:
- Apply fabric stabilizers or lightweight interfacing techniques along stress lines
- Use a reinforced zigzag stitch or stretch stitch for elastic banding zones
- Manage stress point management with narrow tape at seams
- Test by gently pulling before finishing
Handling and Supporting Knit Fabrics
Knit fabric has a mind of its own — and if you don’t support it properly, it’ll stretch, shift, and fight you the whole way through.
The good news is that a few smart handling habits make a world of difference between a clean seam and a wavy mess.
Here’s what you need to know to keep your knit fabric under control from start to finish.
Using a Walking Foot for Even Feeding
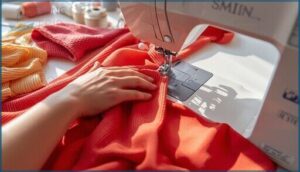
Think of a walking foot as giving your sewing machine a second pair of hands. Its built-in feed dogs grip the top layer of knit fabrics simultaneously with the bottom, delivering smooth feeding and even stitching throughout. No more stretched-out seams!
| Walking Foot Tips | Why It Matters |
|---|---|
| Enable feed dog control | Prevents top layer creep |
| Use with zigzag stitch | Maintains fabric grip on stretch |
| Sew at steady pace | Ensures smooth feeding |
| Pair with ballpoint needle | Protects knit loops |
| Support fabric weight | Reduces distortion |
Pinning and Stabilizing Edges
Pinning knit fabrics is your secret weapon for edge control and fabric stabilization — without it, those slippery loops will shift the moment they hit the presser foot.
Here are the essential techniques to master:
- Use ballpoint pins perpendicular to the edge every 1–2 inches for solid pinning techniques
- Position pins within the seam allowance to avoid needle damage
- Apply lightweight stay tape for seam reinforcement along necklines
- Baste curling edges first for reliable curl prevention
- Remove each pin just before the needle reaches it
Avoiding Fabric Distortion While Sewing
Once your edges are stabilized, fabric tension becomes your next concern. Sewing too fast or pulling knit fabrics through your sewing machine breaks seam integrity fast. Let the walking foot and feed dogs do the work.
Maintain grain alignment, use a zigzag stitch or stretch stitch, and pause occasionally to check edge stability — because undoing wavy seams is nobody’s idea of fun.
Finishing Edges and Hems on Knits
Getting the edges and hems right can make or break a knit project. The good news is you’ve got a few solid options that actually work with stretch, not against it. Here’s what to know about each one.
Raw Edge Options for Knits
Raw edge finishing on knit fabrics is honestly more flexible than you’d expect. Since knits don’t fray like woven fabrics, you have real options.
A zigzag stitch or stretch stitch seals edges beautifully for knit stabilization. For a polished look, try raw edge binding with self-fabric strips.
Fray prevention products work surprisingly well too, especially on stable knits.
Twin Needle Hemming Techniques
Want that clean, store-bought hem on knit fabrics? A twin needle is your secret weapon.
Twin Needle Basics start with understanding how two parallel top stitches form while the bobbin creates a hidden stretch stitch underneath — pure genius.
For hemming techniques on your sewing machine, sew right-side up, lower your tension slightly, and explore hemming variations like pintucks or contrasting thread for personality.
Applying Stretch Hem Tape
If the twin needle isn’t your style, stretch hem tape makes hem finishing surprisingly satisfying. This tape adhesion method uses heat-activated fabric bonding — just align the tape on your prewashed knit fabrics, press, and let it cool.
Always do adhesive testing on scraps first. The tape stretches with your hem, no zigzag stitch or stretch stitch needed.
Troubleshooting Common Knit Sewing Issues
Even the most careful sewists run into hiccups when working with knit fabrics — and that’s completely normal. The good news is that most problems have a straightforward fix once you know what to look for.
Here are the most common issues you’ll face and exactly how to tackle them.
Fixing Thread Breakage and Skipped Stitches
Thread breakage and skipped stitches are the absolute mood-killers mid-project. For sewing with knit fabrics, your first fix is checking needle alignment — a fully inserted ballpoint needle prevents those maddening skips.
Dial in your thread tension so stitch balance stays consistent, choose polyester thread for breakage prevention, and stabilize slippery fabric before feeding it through.
Clean lint regularly — sewing machine maintenance matters more than you’d think!
Correcting Wavy Seams
Wavy seams are basically knit fabric’s way of throwing a tantrum — but seam correction is simpler than you’d think. Switch to a zigzag stitch or stretch stitch for better stretch control, then lower your thread tension slightly.
Steam-pressing techniques work wonders for relaxing fibers. Fabric stabilization with tissue paper under the seam prevents future waviness, keeping your sewing knit fabrics journey smooth and frustration-free.
Dealing With Curling Fabric Edges
Curling edges are knit fabric’s sneaky little rebellion — but you can win this battle. Edge Stabilization starts before you even cut: apply light spray starch, then press flat.
For Curl Prevention during Knit Fabric Sewing, try these steps:
- Prewash for Fabric Relaxation and shrinkage control
- Use a Zigzag Stitch or Stretch Stitch for Seam Stability
- Prioritize Cutting Accuracy with a sharp rotary blade
- Stay-stitch within 1 cm when Sewing Knit Fabrics
Top 7 Products for Sewing Knit Fabrics
Having the right tools in your corner makes sewing knit fabrics so much less of a battle. From needles to sewing machines, the right gear genuinely changes what’s possible.
Here are seven products worth adding to your sewing space.
1. Schmetz Stretch Sewing Machine Needles
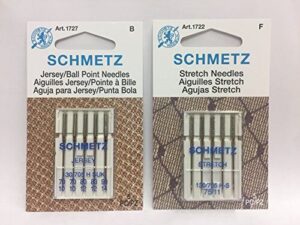
If knit fabrics had a nemesis, it would be the wrong needle. Schmetz Stretch Sewing Machine Needles (size 75/11) solve this instantly. Their medium ball point slides between knit fibers instead of piercing them, so you won’t get runs, snags, or those maddening skipped stitches.
The deeper-set eye and deep scarf work together to keep thread tracking smoothly on Lycra and spandex blends. Compatible with most domestic machines — Brother, Singer, Janome — these are genuinely non-negotiable for any serious knit project.
| Best For | Sewers working with knits, jersey, and stretchy fabrics like swimwear or spandex who want clean stitches without damaging their material. |
|---|---|
| Primary Use | Sewing knit fabrics |
| Material | Metal |
| Compatibility | Most domestic machines |
| Skill Level | All levels |
| Brand | CESDes |
| Weight | Light |
| Additional Features |
|
- The medium ball point slides between fibers instead of piercing them, so no snags, runs, or broken threads.
- Works with most home machines like Brother, Singer, and Janome — no guesswork on compatibility.
- Designed to prevent skipped stitches, which is one of the most frustrating problems when sewing stretch fabric.
- Only useful for knits, stretch, and jersey — if you mostly sew woven fabrics, these won’t be your go-to needle.
- Not guaranteed to work with every sewing machine out there, so it’s worth testing before committing to a big project.
- No warranty or return policy is mentioned, so you’re buying on trust.
2. Singer Even Feed Walking Foot
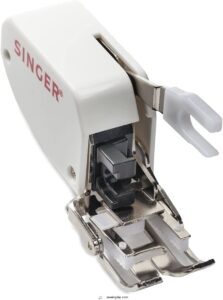
Fabric shifting mid-seam is one of the most frustrating knit sewing problems — and the Singer Even Feed Walking Foot (Model 2500271) is built to stop it cold. Its independent upper feed dogs move in sync with your machine’s feed dogs, pulling both fabric layers at the same rate. No bunching, no stretching, no drift.
It’s especially exceptional for layered knit projects, jersey seams, and even plaid matching. Compatible with Singer low-shank machines, it installs just like a standard presser foot.
| Best For | Quilters, knit sewers, and anyone tired of fabric shifting, bunching, or stretching mid-seam — especially when working with layers, plaid, or tricky materials like jersey, leather, or velvet. |
|---|---|
| Primary Use | Even feeding fabrics |
| Material | Metal/Plastic |
| Compatibility | Low-shank machines |
| Skill Level | Beginner to advanced |
| Brand | SINGER |
| Weight | 2.24 oz |
| Additional Features |
|
- Its own set of upper feed dogs sync with your machine’s, so both fabric layers move at the same pace — no more drift or bunching
- Handles a wide range of tricky fabrics: knits, leather, vinyl, napped fabric, and multiple quilting layers
- Easy to install on low-shank Singer machines, just like a regular presser foot
- Not a universal fit — check your machine’s compatibility before buying since it won’t work with all models
- The ridged foot pad can occasionally catch on delicate or thin fabric edges
- Some users have reported skipped stitches or fabric getting caught in the feed dogs if it’s not installed and adjusted properly
3. Schmetz Jersey Sewing Machine Needles
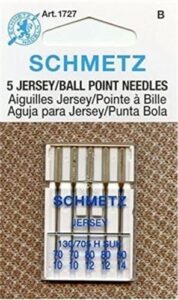
The right needle makes all the difference — and the Schmetz Jersey Ball Point Needles deliver exactly that. Their medium ball point tip glides between knit loops instead of piercing them, which means no snags, no runs, no skipped stitches.
Each pack includes five needles in sizes like 70/10, 80/12, and 90/14, so you’re covered for lightweight to heavier knit projects. They work with all major home machines, making them a genuinely adaptable staple for your sewing kit.
| Best For | Sewists who regularly work with jersey, knit, or other stretch fabrics and want to avoid skipped stitches and fabric damage. |
|---|---|
| Primary Use | Sewing knit fabrics |
| Material | Metal |
| Compatibility | All home machines |
| Skill Level | All levels |
| Brand | SCHMETZ |
| Weight | Light |
| Additional Features |
|
- The ball point tip slides between fabric loops instead of piercing them, so your knits stay snag-free and intact.
- Comes in multiple sizes (70/10 to 90/14), covering everything from lightweight gauze to heavier sweatshirt fabric.
- Works with all major home sewing machine brands, so no compatibility headaches.
- Heavy use can cause the needles to break or wear out faster than expected.
- Not suited for woven or non-stretch fabrics where a sharper point would do a better job.
- Only compatible with domestic machines — won’t work if you’re running an industrial setup.
4. Even Feed Walking Sewing Foot with Quilt Guide
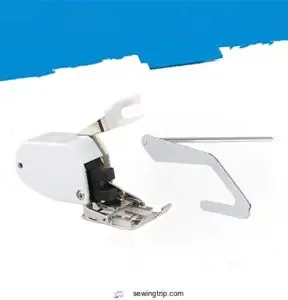
Once you’ve got the right needle sorted, controlling fabric movement under your machine is the next big win. The Gsiartvill Even Feed Walking Foot has its own built-in feed dogs that sync with your machine’s feed dogs, moving every layer together — no more stretching, puckering, or drifting seams.
The included quilt guide helps you sew perfectly parallel rows, which is a major advantage for matching prints or plaids. It fits most low-shank machines, including Brother, Singer, and Janome.
| Best For | Quilters and sewers working with multiple fabric layers, matching prints or plaids, or any project where keeping everything aligned really matters. |
|---|---|
| Primary Use | Sewing stretch fabrics |
| Material | Metal |
| Compatibility | Standard machines |
| Skill Level | All levels |
| Brand | Schmetz |
| Weight | 0.2 oz |
| Additional Features |
|
- Built-in feed dogs sync with your machine to move all layers evenly — no stretching or drifting
- Comes with a quilt guide so you can sew parallel rows without measuring every single time
- Fits most low-shank machines like Brother, Singer, and Janome, so it’s pretty versatile
- Can struggle with very thick or uneven fabric stacks, so it has its limits
- You may need to slow your sewing speed down, which adds time to bigger projects
- A few users have run into durability issues and found customer support hard to reach
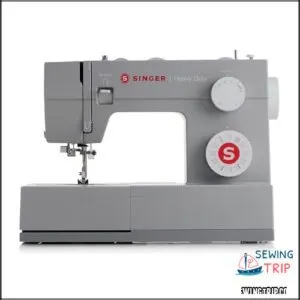
5. Singer Heavy Duty Sewing Machine
Of course, even the best walking foot needs a machine that can keep up. The Singer Heavy Duty delivers exactly that — a full metal frame, a motor pushing up to 1,100 stitches per minute, and adjustable presser foot pressure that genuinely matters when you’re feeding stretchy jersey or ribbed knit under the needle.
It’s beginner-friendly enough to learn on, yet sturdy enough to handle thick double-knit layers without stalling. That’s a combination worth having.
| Best For | Beginners and experienced sewers who work with everything from sheer fabrics to heavy-duty denim and want a reliable, no-fuss machine that can handle it all. |
|---|---|
| Primary Use | Even feeding fabrics |
| Material | Metal/Plastic |
| Compatibility | Low-shank machines |
| Skill Level | All levels |
| Brand | Gsiartvill |
| Weight | 1.94 oz |
| Additional Features |
|
- Full metal frame keeps the machine solid and stable, even when you’re pushing through thick layers of denim or canvas
- Adjustable presser foot pressure makes it easy to switch between delicate fabrics and heavier materials without fighting the machine
- 110 stitch applications give you plenty of room to get creative, whether you’re sewing garments, bags, or home decor
- The metal construction makes it heavier than most, so it’s not the easiest to move around or store
- The upright spool pin can cause thread to wrap and jam, which gets frustrating mid-project
- Not the best fit for advanced sewers who want digital controls or more complex features
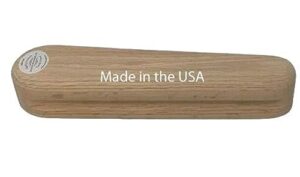
6. Jacksons Woodworks Tailors Clapper
Now, once your seams are stitched, pressing them flat is where the real magic happens — and that’s where Jacksons Woodworks Tailors Clapper earns its spot in your toolkit.
Made from unfinished oak wood, it absorbs steam beautifully instead of bouncing it back. Press your iron down, apply the clapper immediately, and hold. The weight — around 12 oz — does the work for you, setting crisp, flat seams without scorching your fabric.
Seriously, your knit projects will look professionally finished.
| Best For | Sewists, quilters, and garment makers who want sharp, professional-looking seams without the risk of scorching their fabric. |
|---|---|
| Primary Use | General sewing |
| Material | Metal/Plastic |
| Compatibility | Standard machines |
| Skill Level | Beginner to advanced |
| Brand | SINGER |
| Weight | 17.6 lbs |
| Additional Features |
|
- The unfinished oak absorbs steam really well, which means seams set faster and stay flat longer.
- At 12 oz, it’s got just enough weight to do the pressing for you — no extra muscle needed.
- The routed grooves on both sides give you a solid grip, so it’s comfortable to hold and easy to control.
- It’s on the pricier side for what is essentially a block of wood, so budget-conscious shoppers might hesitate.
- Color varies piece to piece, so what you see in the product photo may not be exactly what shows up at your door.
- Weight can vary slightly too, depending on the density of the wood — not a dealbreaker, but worth knowing.
7. Omnigrid Non Slip Quilting Ruler
Flat seams are only half the battle — you also need clean, accurate cuts. That’s where the Omnigrid Non-Slip Quilting Ruler (6″ x 24″) quietly becomes your secret weapon.
Its patented non-slip backing grips fabric instead of letting it wander mid-cut, and those neon grid lines? Incredibly visible against both light and dark fabrics. The 1/8-inch graduation markings give you precision that regular rulers can’t touch. For trimming knit bands or straightening edges, this ruler keeps everything honest.
| Best For | Quilters, sewists, and crafters who need precise, clean cuts on everything from jelly roll strips to full yardage. |
|---|---|
| Primary Use | Pressing seams |
| Material | Oak wood |
| Compatibility | Universal |
| Skill Level | All levels |
| Brand | Handmade |
| Weight | 12 oz |
| Additional Features |
|
- The neon grid lines show up clearly on both light and dark fabrics, so you’re not squinting to find your marks.
- 1/8-inch graduations give you a level of accuracy that most basic rulers just don’t offer.
- The non-slip backing keeps the ruler from sliding around mid-cut, which makes a real difference when you’re working fast.
- A few buyers have reported receiving their ruler already damaged, which points to some inconsistency in packaging or quality control.
- The non-slip grip works well most of the time, but it’s not foolproof on every fabric surface.
- All measurements are in inches only, so if you work in metric, this one isn’t for you.
Frequently Asked Questions (FAQs)
Can you sew knitting with a sewing machine?
Yes, you can absolutely conquer knit fabrics with your trusty sewing machine! With the right needle, stretch stitches, and a little patience, you’ll transform those stretchy loops into beautiful, professional garments.
What is the best sewing machine stitch for knits?
The lightning bolt stretch stitch gives you the best balance of flexibility and durability. It stretches with your fabric without creating visible ridges, making it perfect for everyday knit garments.
What stitch to use when sewing knit fabric?
A zigzag stitch is your go-to workhorse for knit fabrics! It allows stretch while preventing gaping seams.
For lightweight knits, try a narrow zigzag or dedicated stretch stitch to preserve elasticity beautifully.
What kind of sewing machine needle for knit fabric?
Ballpoint or jersey needles work best because their rounded tips glide between fabric loops instead of piercing them.
This prevents runs, holes, and skipped stitches while maintaining your knit’s stretch and integrity!
How to prevent knit fabric from curling?
Stop edge curl right in its tracks by choosing knits with spandex content, cutting precisely with a rotary tool, and finishing with a twin needle or gentle steam blocking to set flat edges.
Can I use a serger for knit fabrics?
A serger excels at sewing knits. The four-thread overlock stitch finishes seams while preserving stretch, and differential feed prevents waviness on lightweight knits—making it your secret weapon for professional results.
Best stitch for swimwear and activewear?
For swimwear and activewear, you’ll want the four-thread overlock stitch—it creates strong, stretchy seams that move with the fabric.
Triple straight stretch stitch works beautifully for reinforced side seams too!
How to fix wavy seams after sewing?
Steam the wavy seam from the inside using a pressing cloth, then re-stitch at a slower speed on scrap fabric.
If waviness persists, reduce top tension slightly and use a walking foot for even feeding.
Tips for sewing ribbed knit fabrics?
Ribbed knits love to mock your straight seams! Use a ball point needle sized 70/10 to 90/14, set your stitch length to 5-0 mm, and let those ribs run parallel to your seam line.
Can knit fabrics be sewn without a serger?
Your standard machine manages knits beautifully with the right setup. A ballpoint needle and narrow zigzag stitch create flexible seams that move with your fabric—no serger required for successful projects.
Conclusion
Think of your sewing machine as a dance partner—once you’ve learned the steps, knit fabrics stop fighting you and start moving with you. The stretch that once frustrated you becomes your creative advantage, letting you build garments that move, breathe, and actually fit.
You’ve got the needles, stitches, and techniques. Now every jersey tee and yoga pant is just another chance to prove that sewing knit fabrics on a sewing machine isn’t mysterious—it’s just misunderstood.

