This site is supported by our readers. We may earn a commission, at no cost to you, if you purchase through links.
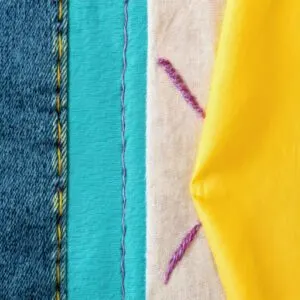
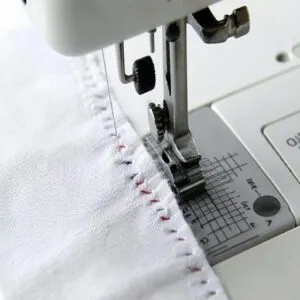
A straight stitch is your go-to for seams, topstitching, and darts—it’s like the workhorse of sewing.
Zigzag stitches? Perfect for stretchy fabrics and taming raw edges.
Need reinforcement? Use the backstitch to lock your seams in place at the start and end.
Hemming stitches keep those pesky frays hidden, and running stitches are great for quick fixes.
Just practice on scrap fabric to get the hang of it—no one’s born knowing how to sew a perfect line.
Ready to add flair with fancier stitches? Keep reading to learn more about fancier stitches!
Table Of Contents
Key Takeaways
- You can master straight and zigzag stitches quickly since they cover most basic sewing needs, from seams to fabric edges.
- Use decorative stitches like satin, shell tuck, or honeycomb to add flair and transform plain fabrics into eye-catching designs.
- Adjust stitch length and width based on your project to enhance fabric compatibility and avoid issues like puckering or breakage.
- Leverage your sewing machine’s automatic features, like buttonholes and locking stitches, to save time and improve stitch precision.
Basic Sewing Stitches
Mastering basic sewing stitches is like learning the alphabet of sewing – it’s where everything begins.
From the trusty straight stitch to the zigzag that keeps edges neat, these simple techniques open up endless creative possibilities.
Straight Stitch Uses
The straight stitch is the ultimate go-to in sewing.
You’ll use it for almost everything, like:
- Joining fabric—think seams or patchwork.
- Topstitching tips—clean edges every time.
- Dart construction—shaping garments with ease.
- Tuck making—perfect pleats or folds.
- Basting techniques—temporary stitching that’s a cinch.
For more detailed information, explore this thorough straight stitch guide.
This stitch is basic but oh-so-essential!
Zigzag Stitch Applications
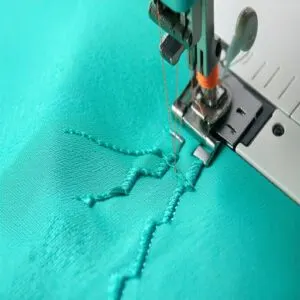
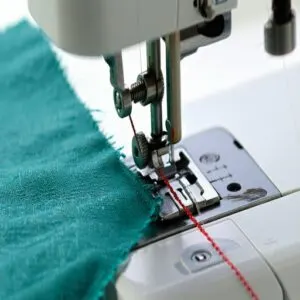
When tackling stretchy fabrics or keeping raw edges neat, the zigzag stitch is your go-to.
It’s flexible, handles stretch seams like a pro, and perfect for sewing knits.
Need quick fabric finishing? Run the zigzag along those raw edges with ease.
Honestly, no sewing machine stitches guide is complete without mastering this versatile stitch in your stitch guide!
Backstitch Techniques
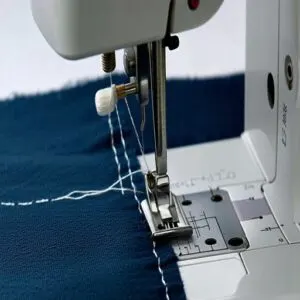
Backstitch basics are your secret weapon for strong, secure seams, it’s like hitting rewind with your needle, reinforcing every thread, which leads to stitch mastery.
Follow this simple process to achieve strong, secure seams:
- Start with a straight stitch.
- Reverse stitching for 2-3 stitches.
- Continue forward, sewing your seam.
- Backstitch at the end for reinforcement.
- Snip threads neatly for clean work.
This method ensures that your seams are not only secure but also neat, making the overall sewing experience more efficient and the outcome more professional, ultimately leading to seam reinforcement that lasts.
Running Stitch Methods
If you’ve mastered the backstitch, the running stitch is like its easier-going cousin.
Perfect for hand sewing and quick fabric joining, it’s just a matter of weaving your needle up and down evenly.
Focus on stitch consistency and light thread tension for cleaner results.
Whether you’re repairing a tear or testing basic stitches, this simple technique gets the job done!
Hemming Stitch Tips
Hemming doesn’t have to feel like threading a needle in the dark.
Start with good fabric preparation—press those edges first! Try folded hems for cleaner results.
Use hemming tools like clips to keep things neat. Sewing shortcuts, like a blind hem stitch, hide the thread but keep the hold.
Hemstitches or edge stitches add flair while doing the heavy lifting!
Specialized Stitches
Specialized stitches bring creativity and functionality to your projects, letting you tackle everything from buttonholes to decorative edging with ease.
Whether you’re reinforcing seams or adding flair, these stitches make your sewing as unique as you are, with functionality that enhances your work.
Buttonhole Stitch Variations
After straight stitches come buttonholes—practical and stylish.
From keyhole buttonholes for thicker buttons to round end buttonholes for lightweight fabric, there’s a fit for every project.
The buttonhole stitch creates knots for added sturdiness, unlike the similar-looking blanket stitch, as explained on this buttonhole stitch webpage.
Use automatic or sensor buttonhole settings to finesse sizes and adjust stitch density.
Match thread colors to your fabric and test first—it saves tears, trust me.
Keep those sewing speeds steady!
Satin Stitch Decorations
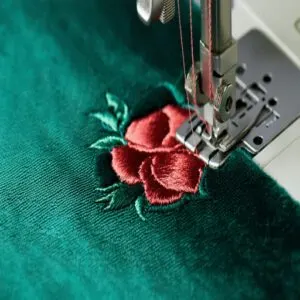
Satin stitches are the secret sauce for dazzling fabric embellishments.
They’re perfect for creating sleek, decorative edging or elevating stitch patterns into textile art.
Try these ideas:
- Add bold embroidery stitches to monograms.
- Outline designs with tight satin stitch details.
- Use satin stitch guides for even spacing.
- Layer decorative stitches for depth.
- Transform plain fabric into wow-worthy creations.
Edge Stitch Finishes
Edge stitches bring polished perfection to your seams.
For clean raw edges, consider an Overlock Finish or use Bias Tape to enclose the Seam Allowance.
Want a subtle look? A Blind Hem Stitch works wonders.
Hemstitches and overcasting stitches add durability, while stitching along a Folded Edge gives a sleek touch.
Edge stitching truly upgrades those Seam Finishes!
Fancy Stitch Techniques
Fancy stitches add flair to your sewing projects, turning basics into textile art.
Want to enhance your work? Try these:
- Applique Stitch for bold designs; it’s perfect for sewing embellishments.
- Shell Tuck Stitch creates decorative edging with a 3D twist.
- Cross Stitch Patterns bring life to fancy embroidery.
These decorative stitches make any piece unforgettable!
Utility Stitch Functions
While fancy stitches beautify projects, utility stitches are your workhorse.
They handle seam reinforcement, fabric mending, and edge finishing like pros.
With proper stitch density and thread tension, your sewing machine stitches will last longer than your old favorite jeans.
Explore stitch types using your sewing machine feet, and don’t overlook the magic of stitch selection for versatile repairs!
Sewing Machine Capabilities
Your sewing machine can do way more than just straight stitches—it’s like having a toolbox full of tricks right at your fingertips.
From adjusting stitch lengths to creating perfect buttonholes automatically, it’s designed to make sewing easier and way more fun.
Machine Stitch Types
In the context of machine stitches, knowing your stitch types is like having the perfect tool for every job.
From straight to zigzag, these sewing machine stitches offer endless options.
Adjust machine settings for stitch density and thread tension to match your fabric compatibility.
A quick stitch tutorial can boost your stitch quality and stitch selection confidence.
Stitch Length Adjustments
Getting stitch length right is like finding the sweet spot in cooking—it changes everything.
Adjust it depending on fabric thickness, stitch density, and seam allowance.
Here’s how:
- Basting? Use longer stitches—they’re faster and easier to remove.
- Sheer fabrics? Go shorter to avoid puckering.
- Leather? Longer prevents unnecessary holes.
Test on scrap fabric first!
Stitch Width Variations
Adjusting stitch width gives you ultimate control over sewing machine stitches.
Whether you’re zigzagging knits or creating decorative finishes, it adapts to fabric thickness and project needs.
Wider stitches prevent puckering, while narrow ones are perfect for precision.
| Width Setting | Best For | Tip |
|---|---|---|
| Narrow (1-2mm) | Lightweight fabrics | Use gentle tension |
| Medium (3-4mm) | Everyday sewing | Balance speed/tension |
| Wide (5-7mm) | Decorative stitches | Adjust thread type |
| Adjustable | Mixed fabrics | Test stitch length |
Automatic Buttonhole Functions
Ever struggled with perfect buttonholes?
Automatic modes on modern machines handle everything, from stitch precision to fabric compatibility.
Just select your buttonhole settings—square, keyhole buttonhole, rounded keyhole buttonhole, or even a stretch buttonhole—and let the machine do the work.
For further guidance, explore this helpful buttonhole sewing tutorial.
With these automatic buttonhole features, sewing efficiency soars, and frustration dips.
It’s like having a stitch-savvy buddy at your fingertips!
Locking Stitch Features
Locking stitches are your secret weapon to secure loops and keep projects looking polished.
They create invisible knots that hold everything in place, even under stress.
Many machines feature a lockamatic stitch, automating the process.
Adjust stitch length, width, and tension settings to match your fabric.
Master these locking methods, and you’ll conquer thread control effortlessly every time!
Stitch Styles and Stretch
In the context of stitching stretchy fabrics or adding creative flair, choosing the right stitch style is key.
From elastic stitches to decorative patterns like honeycomb or shell tuck, you’ll find stitches that are both practical and fun to master.
Elastic Stitch Uses
Elastic stitches are your best friend when working with stretch fabric.
Whether stitching stretchy hems on activewear or securing elastic seams, these stitches move with the fabric instead of popping threads.
Use a stretch stitch or triple stretch stitch for sewing knits like jersey.
For added convenience, explore elastic stitch sewing products available online.
For garment fit perfection, your sewing machine stitches keep everything sleek and durable.
Stretch Blind Hem Stitch
Tired of stiff seams on stretchy fabric? A stretch blind hem stitch gives you an invisible finish that flexes with the material.
Here’s how:
- Fold and press the hem.
- Use a blind hem foot to guide the fold.
- Adjust stitch for minimal fabric "bites."
- Match thread to fabric color.
- Test on scraps for perfection!
This process ensures a professional-looking hem with a blind hem foot, which is essential for achieving a flexible and invisible finish.
Shell Tuck Stitch Applications
The shell tuck stitch brings charm to any project with its decorative edging and slight fabric gathering.
Adjust your sewing machine’s stitch length and width to create delicate, scalloped finishes perfect for hems or embellishments, and for smooth results, tweak the stitch tension carefully.
Understanding the sewing machine stitches is essential for mastering various techniques, it’s like giving your fabric a flirty little wave—simple, yet an eye-catching textile embellishment that adds a unique touch to your work.
Honeycomb Stitch Patterns
Why not add some flair with the honeycomb stitch? This textured, decorative stitch can transform plain fabric into eye-catching patterns.
It’s perfect for embroidery styles, quilting, or accenting garments.
Use your sewing machine’s stitch guides to nail the technique and bring your designs to life.
- Creates unique fabric patterns and textures
- Perfect for decorative stitches on garments
- Elevates simple fabrics with honeycomb designs
Ladder Stitch Techniques
If the honeycomb stitch makes fabric pop, the ladder stitch sneaks in with invisible weaving magic.
Think of it as the stealthy ninja of sewing stitches—perfect for repairs or hidden seams.
You’ll master thread control by weaving through fabric folds, creating hidden strength and stitch reinforcement.
Whether by hand or with sewing machine stitch guides, practice fosters precision.
Mastering Sewing Techniques
You’ve got the sewing machine, now it’s time to tap into its full potential by learning key techniques.
From stitching straight lines to troubleshooting common hiccups, mastering these skills will make every project smoother (and way less stressful).
Learning Machine Stitching
Start by getting cozy with your sewing machine—read the manual like it’s your secret weapon.
Experiment with stitch lengths and widths to see their impact, and play around with fabric scraps to test thread and fabric combos.
Troubleshoot stitch tension if it looks messy.
These Machine Stitching Tips help you nail the basics and master different stitches effortlessly.
Mastering Different Stitches
Mastering stitches isn’t about luck – it’s about understanding the basics.
Pay attention to stitch tension, fabric selection, and thread choice.
Adjust your sewing speed to balance control and precision.
For both hand and machine sewing, explore different sewing techniques to expand your skillset.
Practice basic stitches like straight and zigzag on scrap fabric to perfect stitch quality.
Experiment with different machine stitches to discover their unique purposes – the results can be amazing!
Project Time and Guides
Got your sewing machine and fabric ready but not sure how long projects take?
Enter: Sewing Timers and Project Planners. Map out your goals with stitch tutorials and fabric calculators to keep things smooth.
Break tasks into manageable chunks using sewing schedules or guides from your machine’s manual. Planning saves time and keeps frustration at bay!
Free Printable Stitch Guides
Need a cheat sheet to conquer sewing machine stitch guides? Free printable stitch guides are lifesavers!
Customize your reference with:
- Stitch charts matching sewing patterns and thread types.
- Fabric guides for choosing the right stitch length and width.
- Visual illustrations for tricky sewing stitches.
- Quick sewing tips for busy projects.
- Beginner-friendly layouts straight from your sewing machine manual.
Sewing Machine Troubleshooting
When your sewing acts up, grab the sewing machine manual—it’s your best sidekick.
For thread breakage or bobbin troubles, re-thread carefully and check the tension settings.
Dealing with needle problems? Switch to a fresh one! Machine error codes might highlight tension issues, so inspect sewing machine parts and accessories.
For additional support, explore these sewing machine troubleshooting products. Regularly clean your machine to keep those fancy sewing machine features running smoothly.
Frequently Asked Questions (FAQs)
How do I choose the right thread?
Pick your thread like you’d pick shoes—match it to the job.
Cotton is for natural fabrics, polyester for stretchy ones, and heavy-duty for thick materials.
Test durability, and avoid cheap threads that break easily!
What fabrics work best with decorative stitches?
Decorative stitches are like icing on the cake—pair them with smooth fabrics like cotton, silk, or linen for best results.
Avoid thick or stretchy materials, as they can distort stitches and mess up your vibe!
How do I fix uneven stitch tension?
When your stitches look wonky, check if your thread’s snug in the tension discs.
Re-thread both top and bobbin threads, adjust tension settings, and try stitching on scrap fabric until those pesky loops behave.
Which needle size suits lightweight materials?
Think of needles like dance partners—lightweight fabrics need a delicate touch.
Use sizes 9-11 (65-75), they glide smoothly through silks, chiffons, and voile without snagging, helping you stitch like a pro with zero frustration, as they are ideal for a delicate touch.
How can I prevent fabric puckering?
Loosen your tension, use a fresh needle, and stabilize slippery fabrics with an interfacing or tissue paper.
Match your stitch length to the fabric weight—shorter for delicate, longer for thicker.
Slow down; patience pays off!
Conclusion
Did you know the average sewing machine has over 50 stitch options?
With this guide, you’ll master the basics like straight and zigzag stitches, while also exploring specialized styles like buttonholes and hems.
Sewing machine stitch guides simplify it all so you can add personality to your creations with ease.
Whether you’re hemming jeans or crafting custom designs, practice is key. Grab some scrap fabric, experiment with techniques, and let your creativity shine one stitch at a time!

