This site is supported by our readers. We may earn a commission, at no cost to you, if you purchase through links.

Adjust your stitch length to medium and loosen thread tension slightly. Layer your quilt sandwich carefully with backing, batting, and top.
Safety pin every four inches or use spray basting for stability. Practice straight-line quilting first, then graduate to free-motion designs.
Match your needle size to your thread weight and batting thickness. Don’t rush the process – your machine needs time to handle thick layers.
The secret lies in understanding how each adjustment affects your final result. The process requires patience and attention to detail, ensuring that your machine is properly set up for the task at hand, with the correct needle size and thread tension.
Table Of Contents
Key Takeaways
- Master your machine setup first – You’ll need a walking foot for even feeding, dropped feed dogs for free-motion work, and properly adjusted stitch length and tension to prevent frustrating thread tangles and skipped stitches.
- Create a stable quilt sandwich – You must layer your backing, batting, and quilt top carefully, then secure them with safety pins every four inches or use spray basting to prevent fabric shifting during quilting.
- Match your needle and thread correctly – You cannot achieve professional results without pairing the right needle size (70/10 for thin fabrics, 90/14 for thick layers) with an appropriate thread weight for your specific project.
- Start simple and practice patience – You should begin with straight-line quilting using templates before attempting complex free-motion designs, and always test your settings on fabric scraps to avoid ruining your masterpiece.
Quilting Machine Setup
Setting up your sewing machine properly can make the difference between a smooth quilting session and a frustrating tangle of threads that’ll have you questioning your life choices.
Your machine setup separates quilting zen from thread chaos nightmares.
You’ll need to adjust three key elements: choose the right walking foot for even stitching, drop those feed dogs for free-motion control, and fine-tune your stitch length** and tension settings.
Choosing The Right Walking Foot
Selecting the perfect walking foot transforms your quilting game from frustrating to fantastic.
This specialized attachment guarantees even stitching across multiple fabric layers, preventing the dreaded fabric shift that ruins your hard work.
- Foot types: Choose low-shank variants for most home machines
- Fabric feed: Dual feed systems move all layers together smoothly
- Pressure adjustment: Walking foot quilting maintains consistent tension
- Specialty feet: Quilting machine feet handle thick batting effortlessly
- Even layers: Quilting even layers becomes achievable with proper equipment
For all your needs, consider walking foot options.
Dropping Feed Dogs for Free-Motion Quilting
Free-motion quilting transforms your quilting sewing machine into an artist’s brush.
Dropping feed dogs gives you complete hand control over fabric movement, allowing quilting freedom that structured stitching can’t match.
Regular maintenance, like feed dog cleaning, guarantees consistent fabric grip.
Switch to a darning foot and test both feed dogs up with zero stitch length or fully dropped.
Some machines prefer one method for better stitch regulation during freemotion quilting adventures.
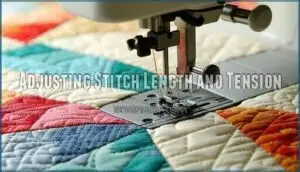
Adjusting Stitch Length and Tension
Once your feed dogs are dropped, you’ll need to fine-tune your machine settings for perfect results.
Set your stitch length between 2.5-3.0 for ideal stitch length that won’t create puckering.
Test thread tension balance on scrap fabric first – fabric thickness impact varies, so tension troubleshooting becomes your best friend.
These quilting tension adjustments make all the difference.
Quilt Preparation Methods
Before you start quilting, you’ll need to create a stable quilt sandwich by layering your backing fabric, batting, and quilt top together.
Proper preparation saves you hours of frustration later because wrinkled layers and shifting fabric can turn your beautiful design into a bumpy mess that even your grandmother wouldn’t hang on the fridge.
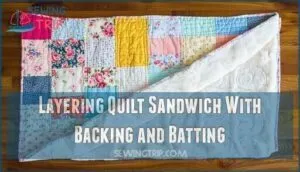
Layering Quilt Sandwich With Backing and Batting
When creating your quilt sandwich, start with the backing fabric placed face-down on a flat surface.
Layer your chosen batting fiber type on top, then add the quilt top face-up.
This layering order prevents wrinkles and guarantees proper alignment.
The backing should extend two inches beyond your quilt top on all sides for easier handling during the quilting process.
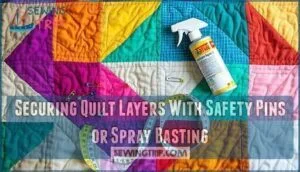
Securing Quilt Layers With Safety Pins or Spray Basting
Once you’ve layered your quilt sandwich, securing those layers becomes your next mission.
Safety pins work like tiny anchors—space them every four inches in a grid pattern to prevent fabric bunching.
Basting spray offers quicker alternatives, though combining both methods boosts basting reliability.
For beginners, consider purchasing extra quilt wadding to account for mistakes.
Start pinning from the center outward for best wrinkle prevention, especially with fusible batting underneath, using methods like safety pins.
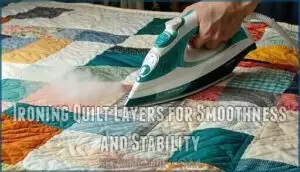
Ironing Quilt Layers for Smoothness and Stability
Your iron becomes a quilting superhero when set to the right temperature for your fabric types.
Press seam layers flat using gentle, steady strokes without dragging.
Light starch usage helps maintain crisp edges and proper fabric alignment.
Quality ironing tools make all the difference in achieving smooth quilting layers.
Master these quilting pressing techniques for professional results.
Quilting Techniques and Designs
You’ve prepared your quilt sandwich and now it’s time to bring your vision to life with the right stitching techniques.
Whether you choose free-motion quilting for creative flowing designs or stick with straight lines and templates for precise patterns, mastering these fundamental approaches will transform your quilting from wobbly beginner work to smooth professional results.
Mastering these techniques, including the use of templates for precise patterns, is crucial for achieving high-quality quilting.
Free-Motion Quilting for Complex Designs
Once your quilt sandwich is prepped and secured, you’re ready to tackle free motion quilting‘s exciting creative possibilities.
This machine quilting technique gives you complete stitch control and fabric movement freedom, letting your quilting machine become a canvas for thread painting and creative expression.
Here’s what makes freemotion designs shine:
- Design Complexity – Create intricate patterns without rotating your quilt
- Artistic Freedom – Your domestic machine quilting becomes as unique as your signature
- Speed Advantage – Complex all-over designs work faster than traditional methods
Using Templates for Structured Quilting Patterns
Templates bring order to chaos when your quilting machine craves structure.
These quilting templates act like training wheels, guiding your stitches through complex designs with confidence.
Choose durable Template Materials that won’t shift mid-stitch.
Start with simple patterns to tackle Accuracy Concerns, then graduate to Custom Templates for unique flair.
Fabric cutting accuracy is key, so be sure to address template verification before starting your project.
Proper Template Storage keeps your collection organized and ready for action.
Creating Continuous Lines With Straight Stitching
Straight line quilting transforms your project into a masterpiece when you master continuous line designs.
Your walking foot becomes your best friend here, keeping those quilting stitches perfectly even.
Here’s your roadmap to success:
- Start from the center – work outward to prevent puckering nightmares
- Keep consistent stitch length – set it to 3.0 for most machines
- Use pivoting techniques – lift foot, rotate fabric, continue seamlessly
Thread and Needle Selection
You can’t build a house with the wrong tools, and you can’t quilt well with the wrong thread and needle combo.
Getting this pairing right saves you from skipped stitches, broken threads, and that "why won’t this work" feeling that makes you want to throw your project across the room, which can be frustrating and lead to a "why won’t this work" feeling.
Matching Needle Size to Quilting Project Needs
Your quilting needle choice directly impacts stitch quality and fabric integrity.
Fabric thickness determines needle size – thin cottons need 70/10 needles while thick batting density requires 90/14 or larger.
Project complexity matters too, with delicate piecing using sharp 80/12 needles, but multiple layers demand stronger quilting needles.
Selecting the right needle can be simplified with a quilting needles guide, and it’s essential to match needle types to your specific quilting machine techniques for professional results.
Choosing The Right Thread Weight and Type
Picking the perfect thread can make or break your quilting masterpiece.
Medium-weight threads (40wt-50wt) work best for most projects, while fine threads (60wt-100wt) suit delicate work.
Match thread fiber to your fabric—cotton with cotton, synthetic with synthetic.
High-quality thread prevents breakage and guarantees smooth stitching.
Store specialty threads properly to maintain their decorative appeal and performance.
Adjusting Machine Settings for Balanced Thread Tension
Once you’ve got your thread weight and needle sorted, your machine settings need fine-tuning for perfect stitches. Think of thread tension balance like Goldilocks – not too tight, not too loose, but just right.
Here’s your tension troubleshooting guide:
- Test on fabric scraps before quilting your masterpiece
- Check bobbin tension adjustment if stitches look loopy underneath
- Adjust top tension gradually in small increments
- Consider fabric type impact on tension requirements
- Document successful quilting machine settings for future projects
Incorrect thread placement often leads to most tension problems.
Troubleshooting Quilting Issues
When your quilting goes wrong, you don’t need to panic or start over from scratch.
Quilting mishaps aren’t disasters—they’re just detours on your path to mastery.
You can fix most common problems like skipped stitches and uneven seams by checking your needle, adjusting tension settings, and making sure your walking foot works properly.
Resolving Skipped Stitches and Uneven Seams
When your needle skips or seams look wonky, don’t panic.
Check your needle first – a dull blade causes most problems. Replace it every project for best results. Thread compatibility matters too, so match weight to your fabric.
| Problem | Quick Fix |
|---|---|
| Skipped stitches | Replace dull needle, rethread machine |
| Uneven seams | Check foot pressure, reduce speed |
| Thread breaks | Lower machine tension, use quality thread |
| Puckering fabric | Adjust fabric density settings, maintain machine |
Adjusting Sewing Machine Tension for Balanced Stitches
Perfect thread tension often feels like chasing a unicorn, but it’s achievable with smart tension troubleshooting.
Start by testing different thread weights on fabric scraps to see how stitch formation changes. Make small sewing machine tension adjustments, then create test swatches to evaluate results.
Remember that fabric type affects quilting thread tension, so adjust accordingly for balanced stitches.
Regular cleaning helps avoid tension device malfunctions to ensure smooth operation and prevent issues with thread tension.
Practicing Patience and Persistence in Quilting Techniques
Mastery in quilting comes through embracing the learning curve.
Every quilter faces frustration, but consistent practice builds confidence. Don’t let imperfect stitches discourage you—they’re part of growing your quilting skills.
Here’s how to develop quilting patience:
- Start with simple projects to build your foundation in sewing machine techniques
- Celebrate small wins like completing your first free-motion design
- Accept mistakes as stepping stones to overcoming frustration and achieving quilting mastery
Frequently Asked Questions (FAQs)
What are the 3 different techniques used in quilting?
Most quilters use three primary techniques regularly. You’ll master straight-line quilting with a walking foot, free-motion quilting for creative designs, and quilting-in-the-ditch following seam lines for invisible stitching.
What is the golden rule in quilting?
Start from the center and work outward.
This prevents puckers and keeps your quilt layers aligned perfectly.
You’ll avoid bunching, wrinkles, and frustrated moments that’ll make you want to toss your project aside, by following this approach to prevent puckers.
What is the best sewing machine setting for quilting?
Set your machine to needle-down function, drop feed dogs to zero, and use a 90/14 needle with 40-50 weight cotton thread. Adjust tension to medium and practice on scraps first.
What stitch to use for quilting by machine?
Choose straight stitches for machine quilting, adjusting your stitch length to 0 for even results.
You’ll want consistent tension and a steady pace to prevent skipped stitches or puckering in your quilt layers.
How do you quilt around appliqué details?
Outline your appliqué shapes with free-motion quilting using a darning foot.
Drop the feed dogs for complete control.
Stitch slowly around curves and points, following the appliqué’s contours to enhance the design’s dimensional beauty.
Whats the best way to quilt borders?
Like framing a masterpiece, borders deserve special attention.
You’ll want to stitch straight lines parallel to edges using your walking foot.
Keep spacing consistent and work from center outward to prevent puckering and maintain perfect tension.
This approach will help you achieve professional-looking results with straight lines.
How do you handle thick seam intersections?
Navigate thick seam intersections by using a larger needle like 90/14, reducing your stitch length, and going slowly.
You’ll want to lift your presser foot slightly when crossing over bulky areas to prevent needle breakage.
Can you quilt with metallic threads?
Yes, you can quilt with metallic threads, but they’re trickier than cotton.
Use a larger needle like 90/14, slow your stitching speed, and reduce tension.
Practice on scraps first—metallic thread breaks easily.
How do you finish quilting thread tails?
Picture dangling threads like loose shoelaces begging for attention.
You’ll pull both thread tails to the back, tie a simple knot, then thread through a needle and bury the tails inside the quilt’s batting layers.
Conclusion
Practice makes perfect, and mastering sewing machine techniques for quilting takes time.
You’ve learned essential setup steps, from choosing walking feet to adjusting tension settings.
Remember that patience pays off when working with thick quilt layers, and start with simple straight-line patterns before attempting complex free-motion designs.
Your machine will reward careful preparation with beautiful, professional results, and keep practicing these sewing machine techniques for quilting, and soon you’ll create stunning quilts that showcase your growing expertise and dedication.
- https://www.diaryofaquilter.com/quilting-with-stencils-on-your-domestic-machine/
- https://cottonandjoy.com/blogs/blog/quilting-tips-working-with-templates?srsltid=AfmBOoqN0Cx4vj00IAmd4kz7CCMtj2-CrqnCos3M-JbiSIR8ClMDHB7j
- https://www.facebook.com/FonsandPorter/videos/quilt-it-template-work-with-kimmy-brunner/409659579763647/
- https://www.youtube.com/watch?v=umxiAemK-pA
- https://thecraftyquilter.com/2016/09/use-stencils-quilting/


